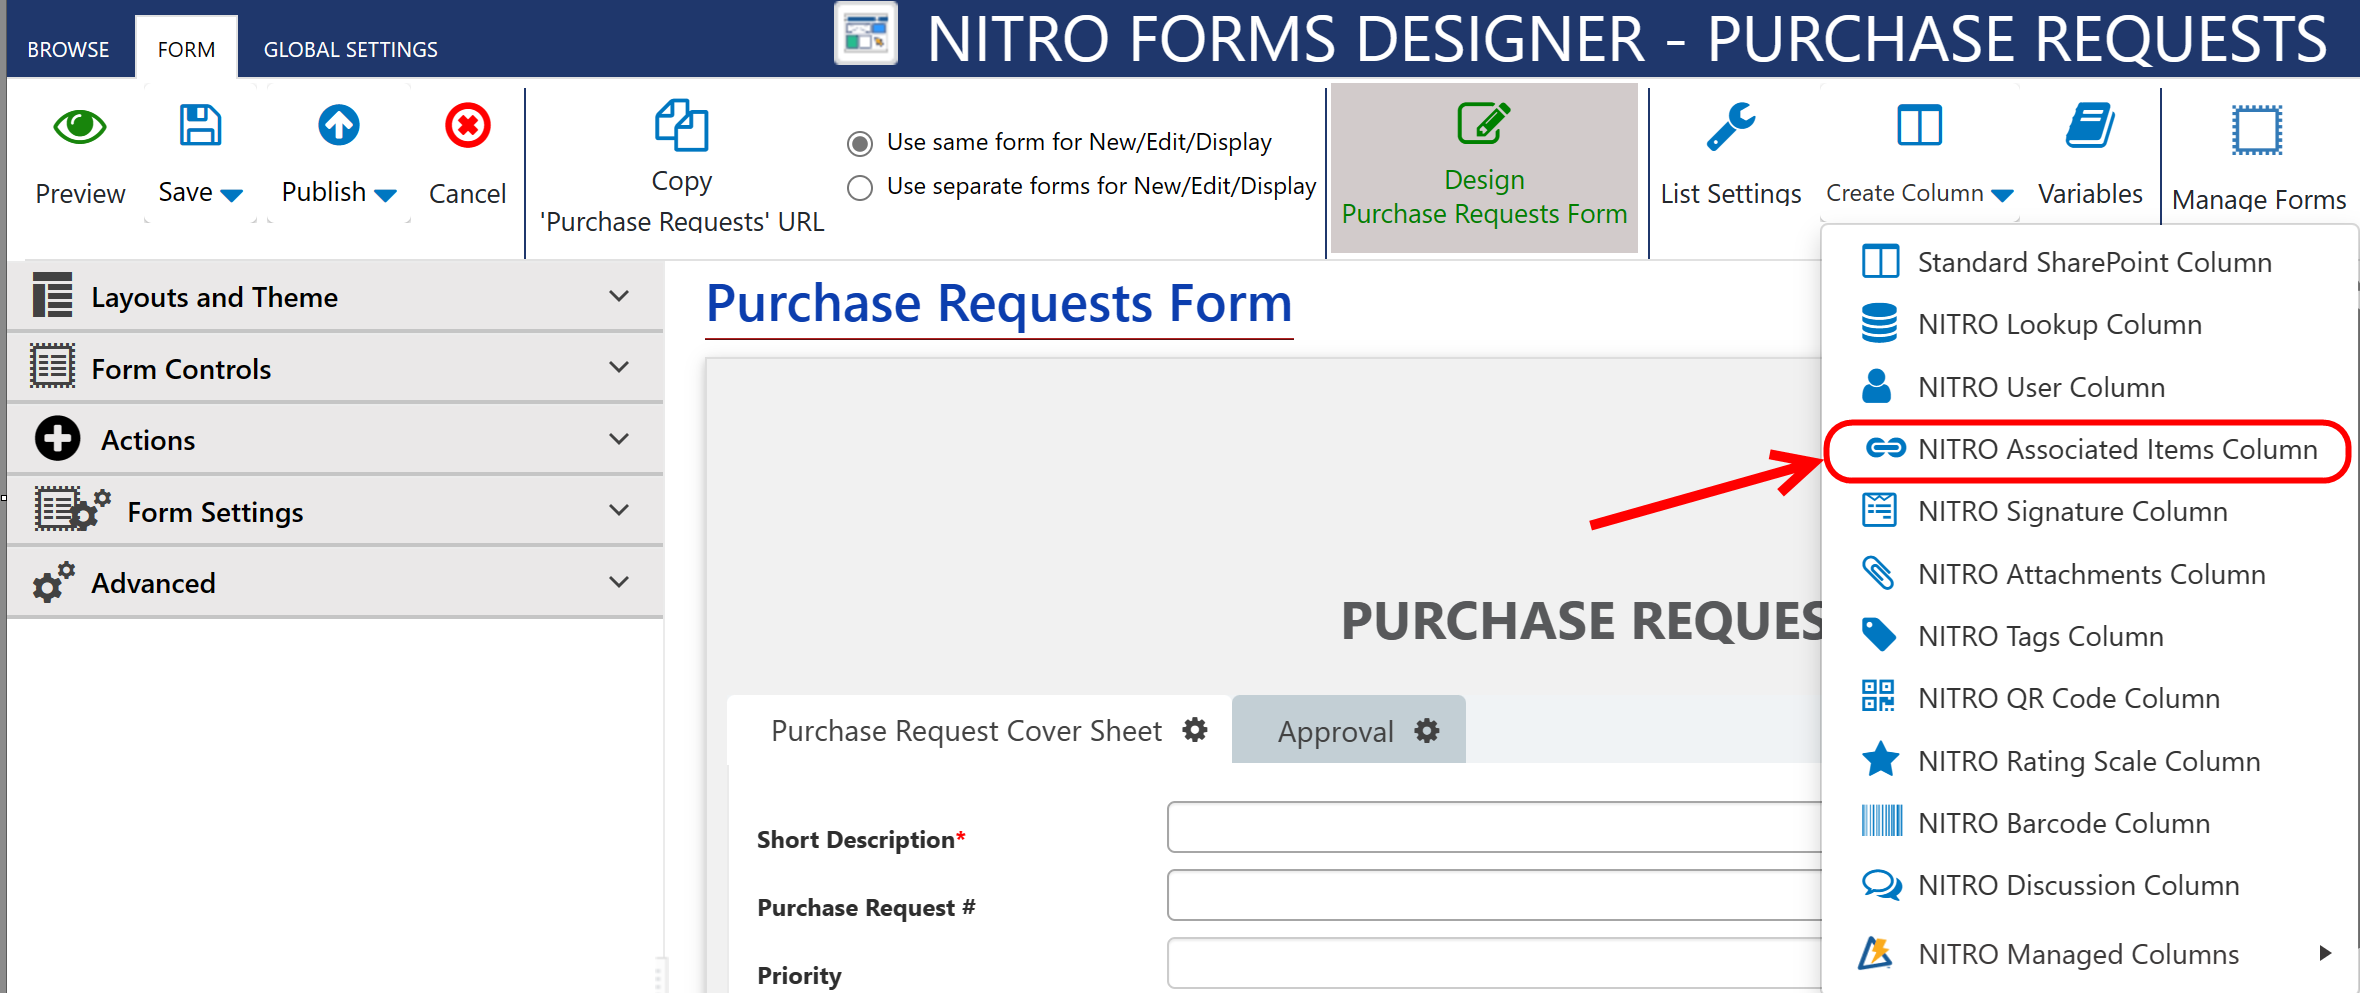
To create a new NITRO Associated Items column, go to the Create Column button in the NITRO Form ribbon, and select NITRO Associated Items Column from the dropdown:
This will bring up the settings screen for configuring an Associated Items column. There are seven tabs across the top:
General Settings
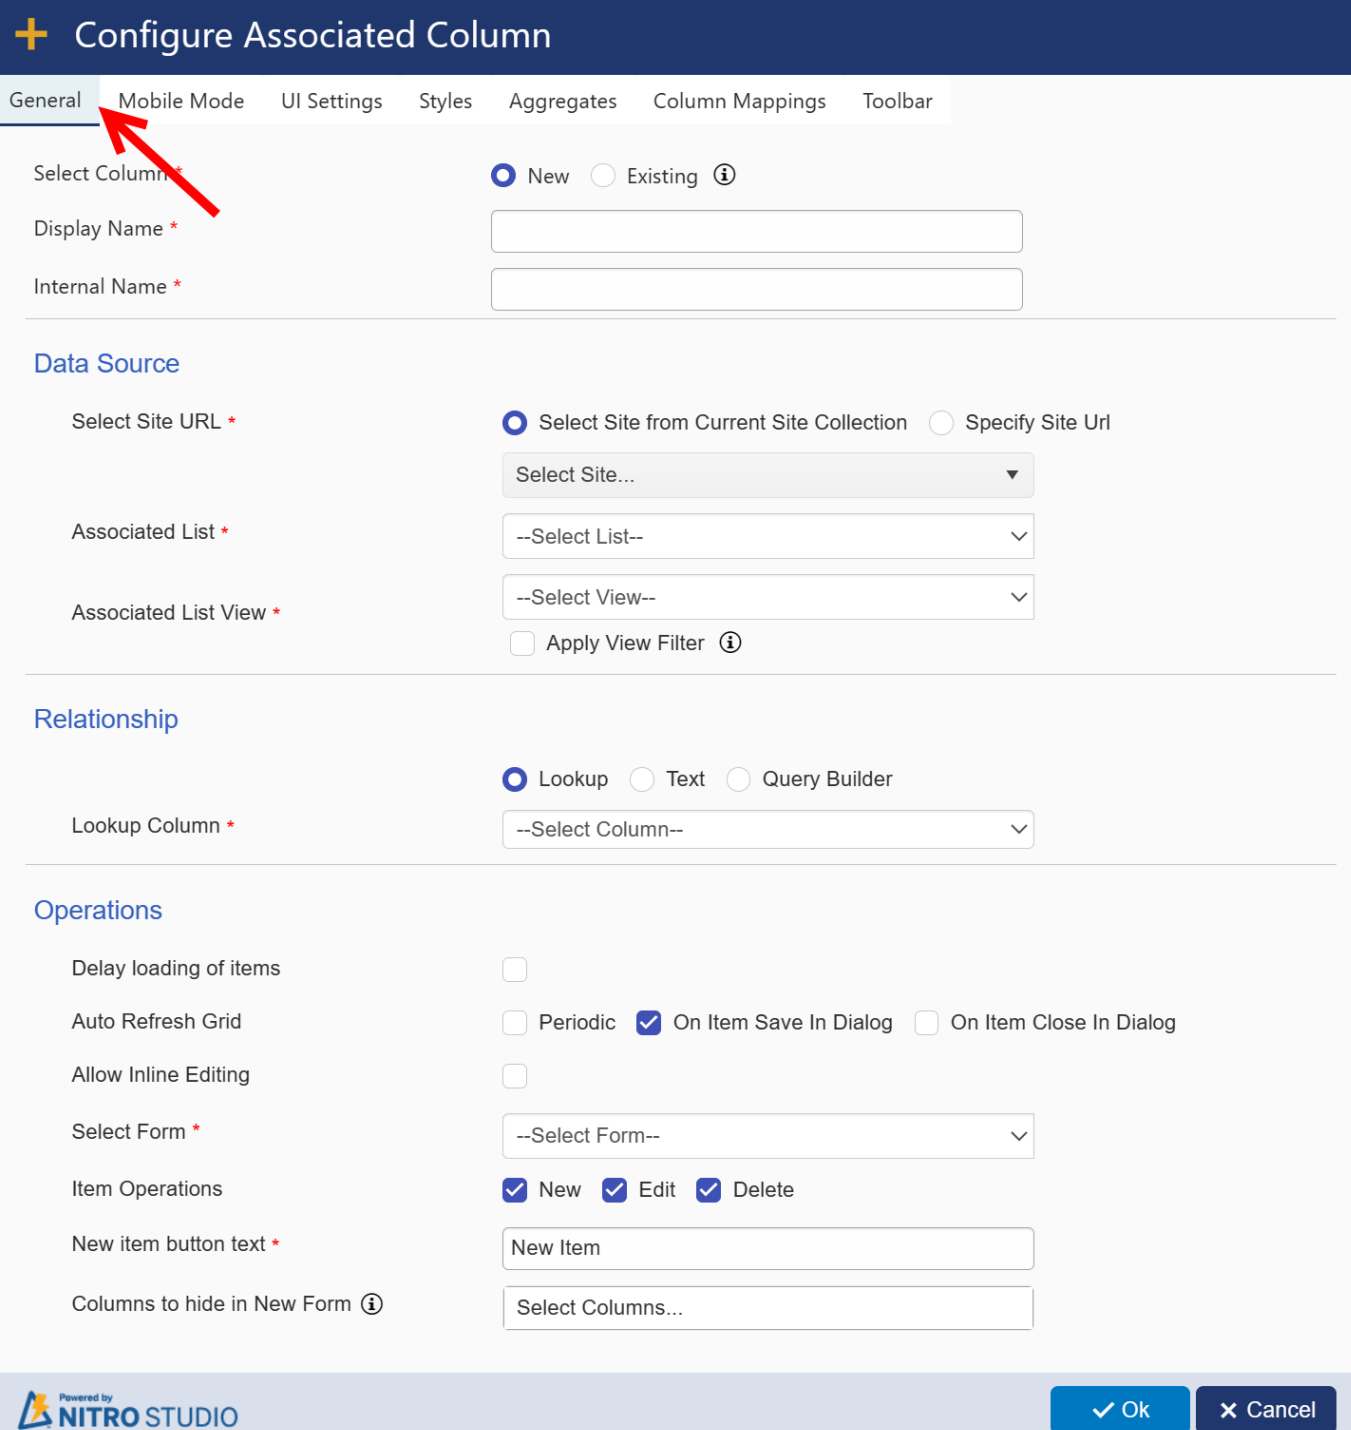
Choose whether you want to create a new Associated Items column or use an Existing column. If you are converting an Existing column, the options at the top change slightly:
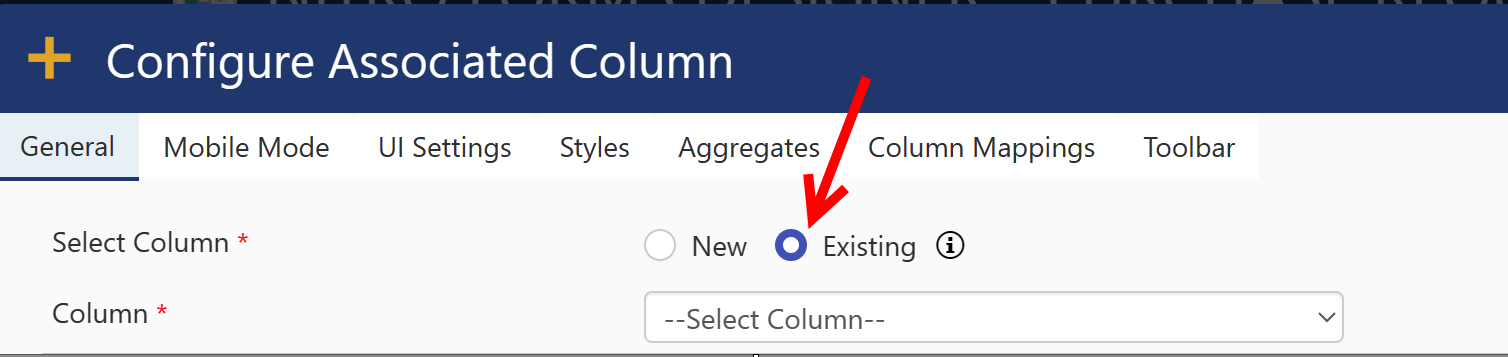
The Column dropdown now gives you an option to select a current standard SharePoint lookup column for converting to an Associated Item Column
For a New column, enter the Display Name and Internal Name of the column. Crow Canyon recommends using an Internal Name with no spaces.
Note:
•Auto populating internal name from display name if internal name is empty when tabbing out from title of setting in new column creation.
Data Source section
a. Choose the site that holds the list you want to look up to.
b.Choose the list you want the column to look to. This assumes you already have lists made.
| c.Choose the view on that list, which can be any view you have previously set up. |
| Apply View Filter: Filter the associated items as per the view conditions. |
Relationship section
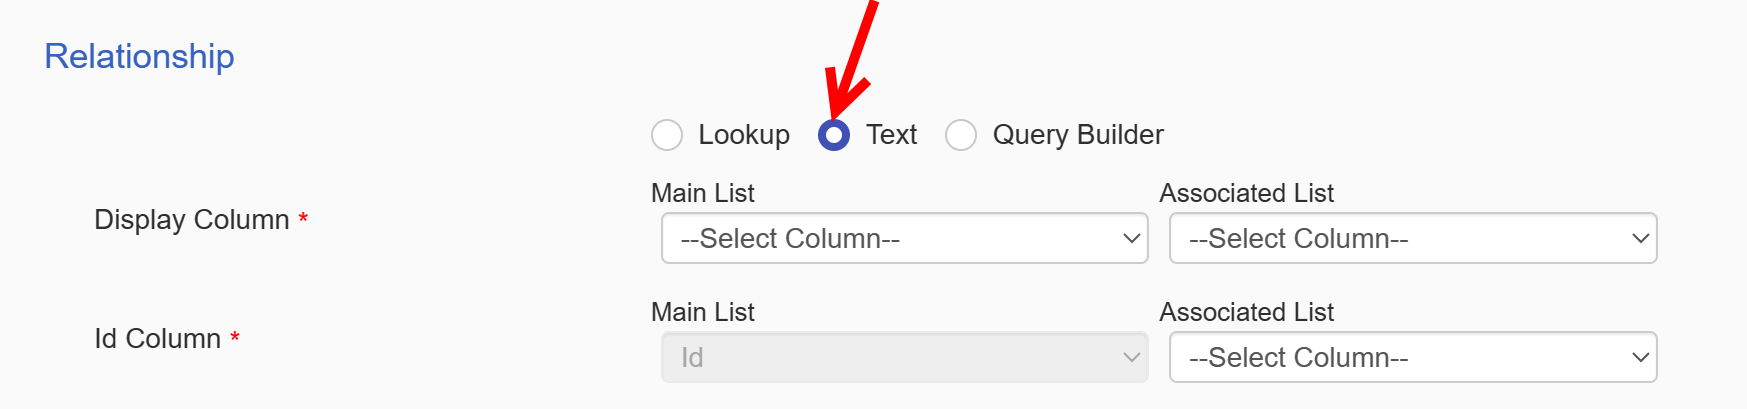
Choose how you want to link the items in the child list to the item in the parent list. There are three options:
a.Lookup Column (shown above): For this option, the column must already be associated with a list and designated as a Lookup column.
b.Text: here, you can associate child list items to main list through text columns as shown below.
c.Query Builder
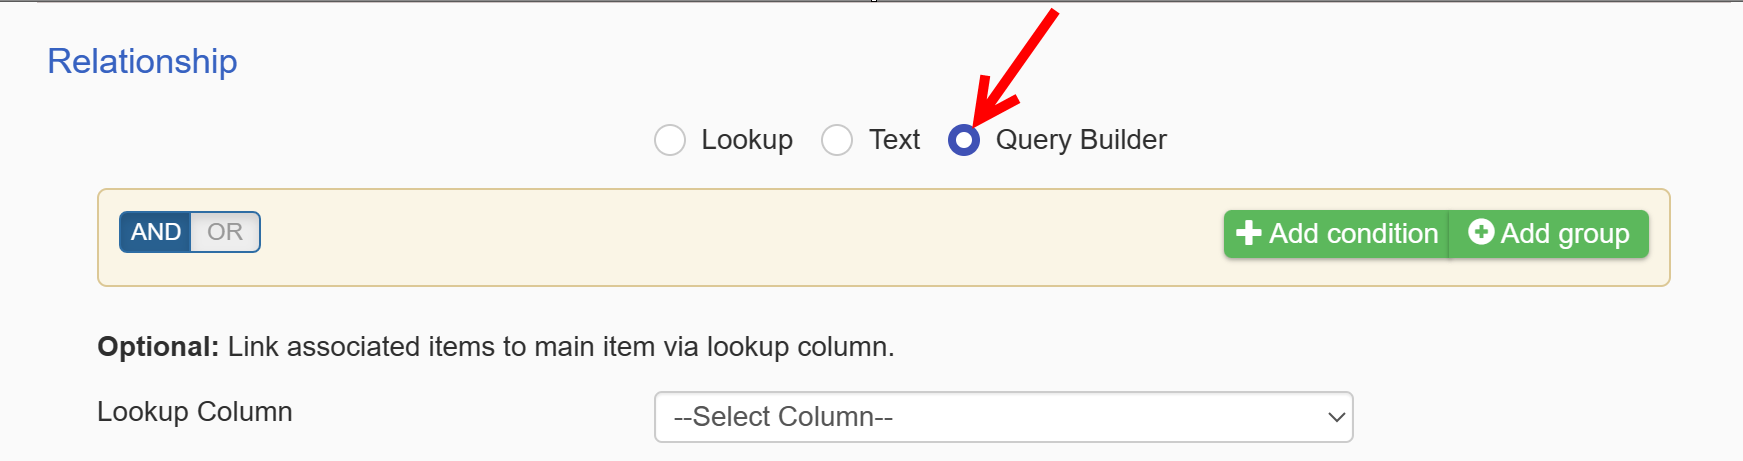
Here, configure query based on which you want to link associated items to main item via selected lookup column value in child list.
Operations section
Delay loading of items will put a small delay in place before loading the associated items. In cases where there is a large number of associated items, this allow the form to load faster.
Auto Refresh Grid: It supports three options:
Periodic: auto refresh associated item periodically after speciafied auto refresh interval.

On Item Save In Dialog: allow automatic refresh of associated item when item is saved in dialog.
On Item Close In Dialog: allow automatic refresh of associated item when item is closed in dialog.
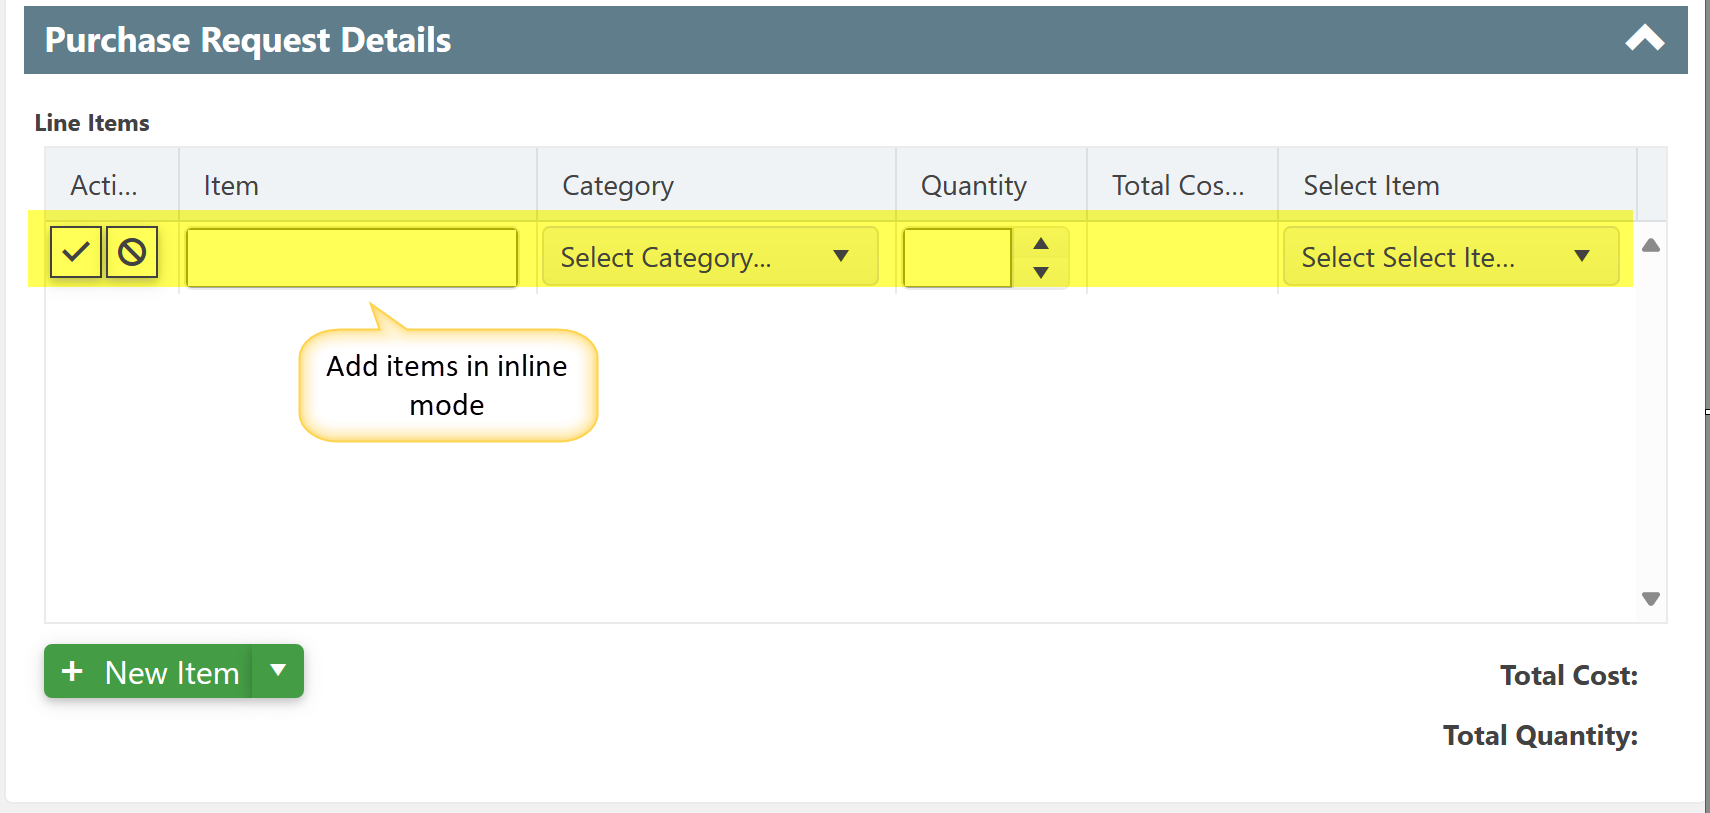
Allow Inline Editing – Toggle this option to allow the end user to Add, Delete, and Edit associated tasks inline.

Output:
Select Form – Select the form that will “pop-up” when your end user adds an associated item. You will have to create this form first as well for you to select it or you can use the Default form. NITRO will automatically create a NITRO Form for the associated list if one does not already exist.
Item Operations
New – Toggle this option to allow the end user to add a new entry to the form
Edit – Toggle this option to allow the end user to make edits to the associated task on the form
Delete – Toggle this option to allow the end user to delete associated tasks on the form
New item button text -- this where you can change the caption of the "New Item" button. For further customization of this button, see the Styles section.
Columns to hide in New Form – Here you can select which columns you would like to hide in the associate item form.
Mobile Mode:
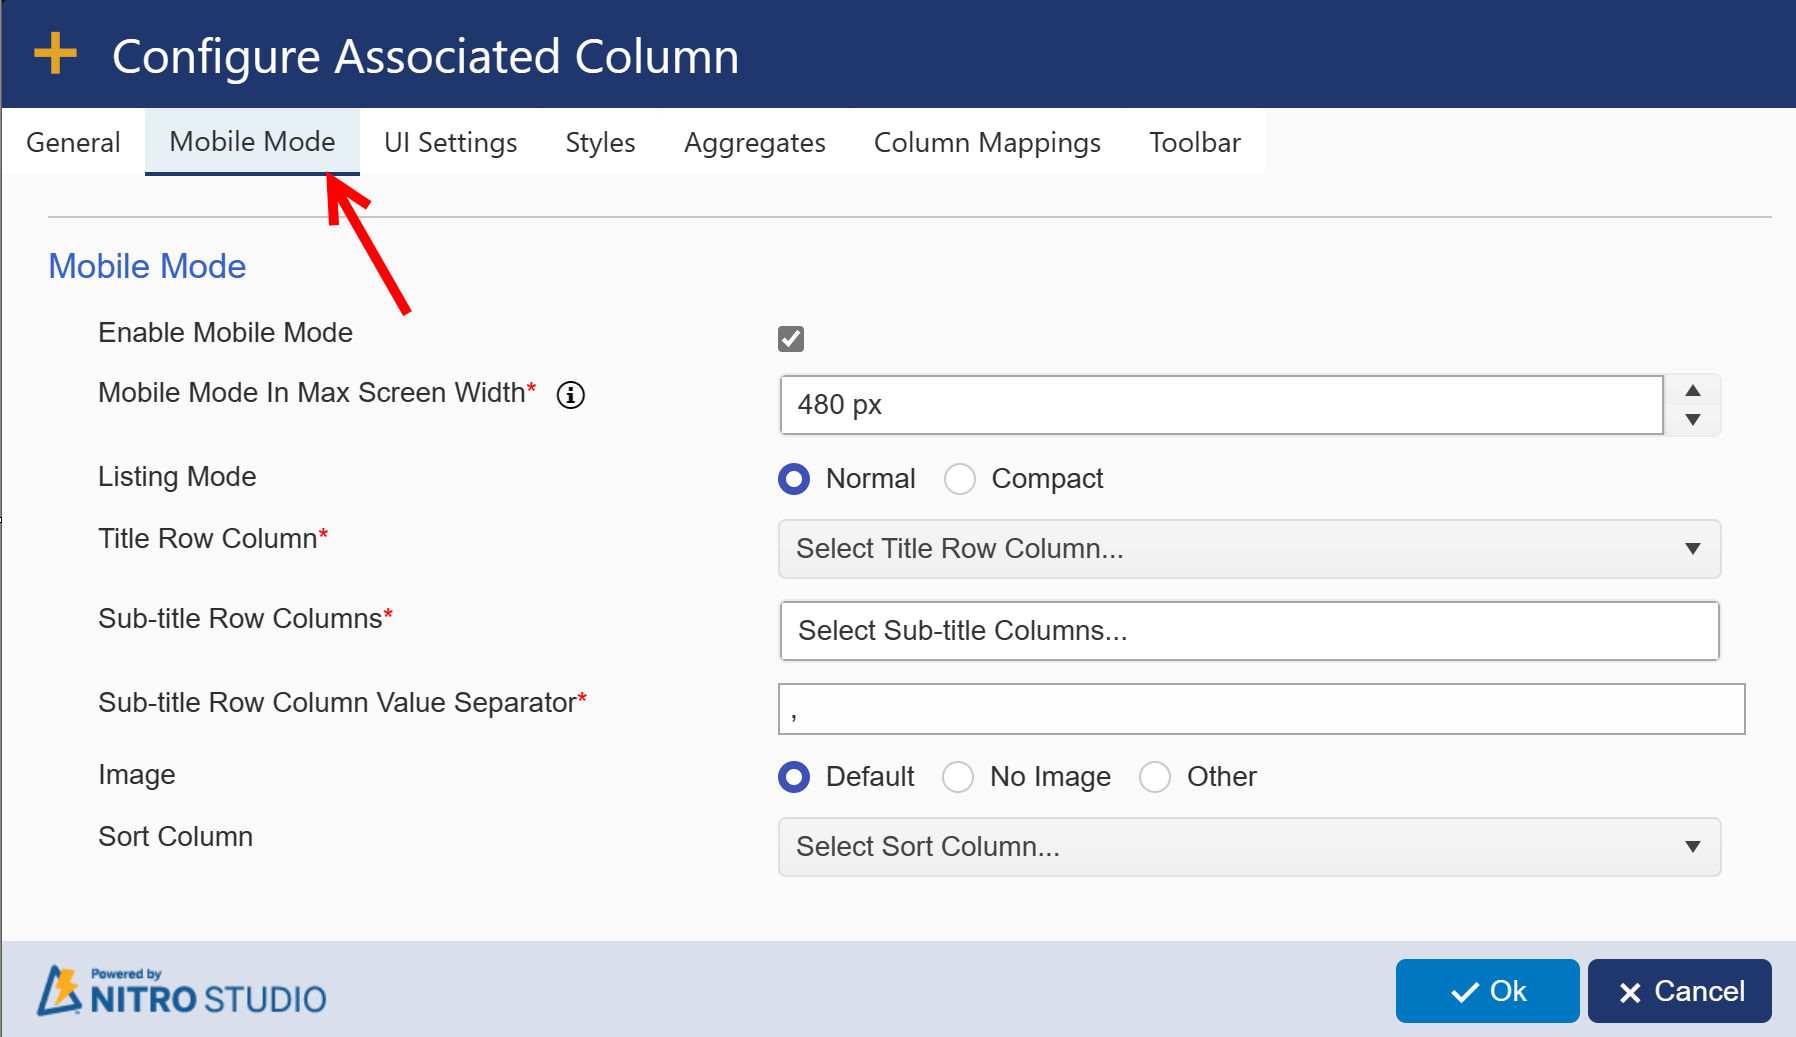 |
| Click here for column details of mobile mode |
UI Settings
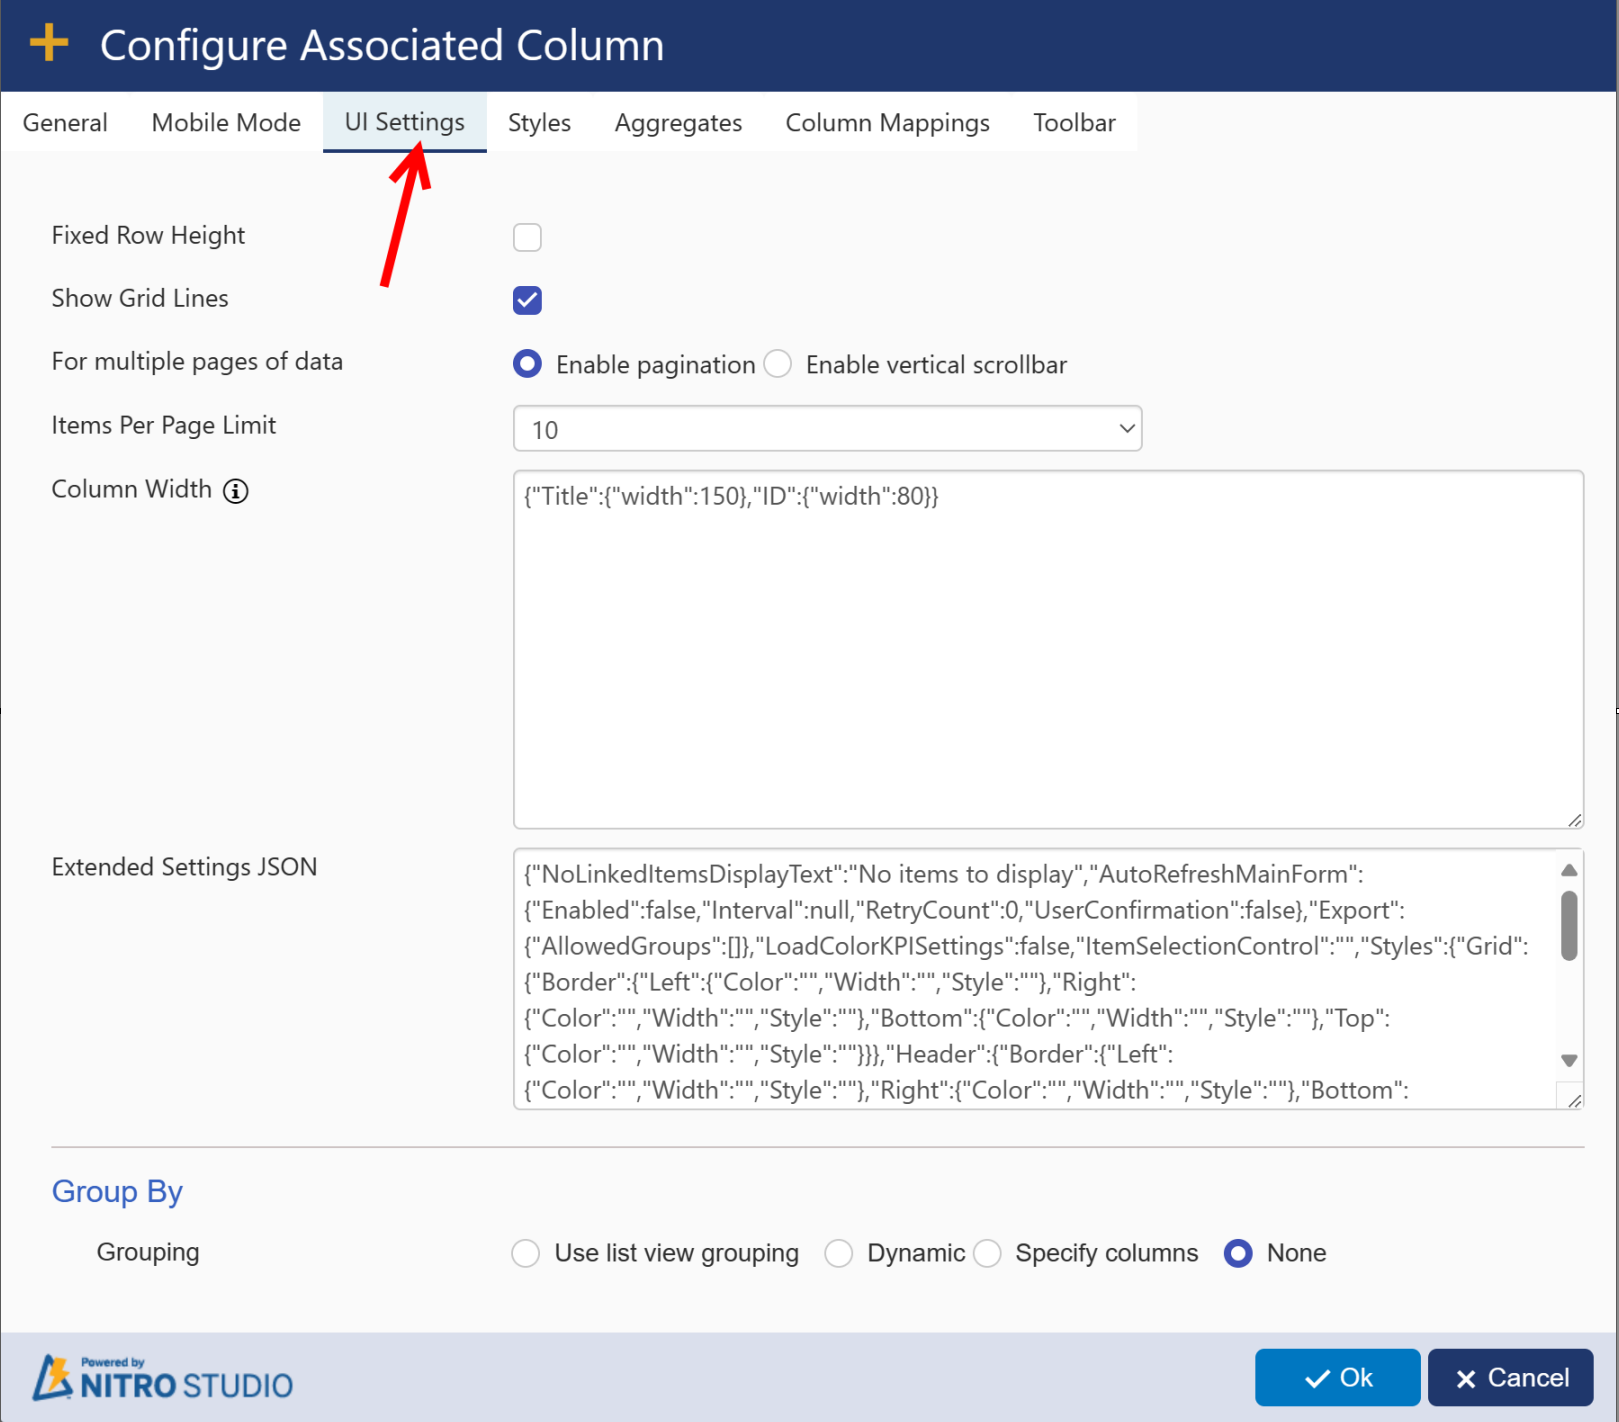
Fixed Row Height - Sets the row height in the Associated Items grid on the form to a fixed height, in case there are any Multiple Lines of Text columns that would otherwise extend the height of the grid.
Show Grid Lines - select this option to show grid lines in associated item.
Example with grid line:
Example without grid lines:
For multiple pages of data - You can choose "Enable pagination" which will show multiple pages when you have more items in an Associated Items grid than are specified in the "Items Per Page Limit" field (10, in this example). Otherwise, with "Enable vertical scrollbar" you'll get a scrollbar in the form for more than 10 items.
Items Per Page Limit - Determines the number of items in the Associated Items grid before pagination or the scollbar is shown.
Column Width - Allows you to set a fixed width for columns in the Associated Items grid, in pixels.
Extended Settings JSON - for extended settings refer Extended Settings JSON section Of Configuring List Search
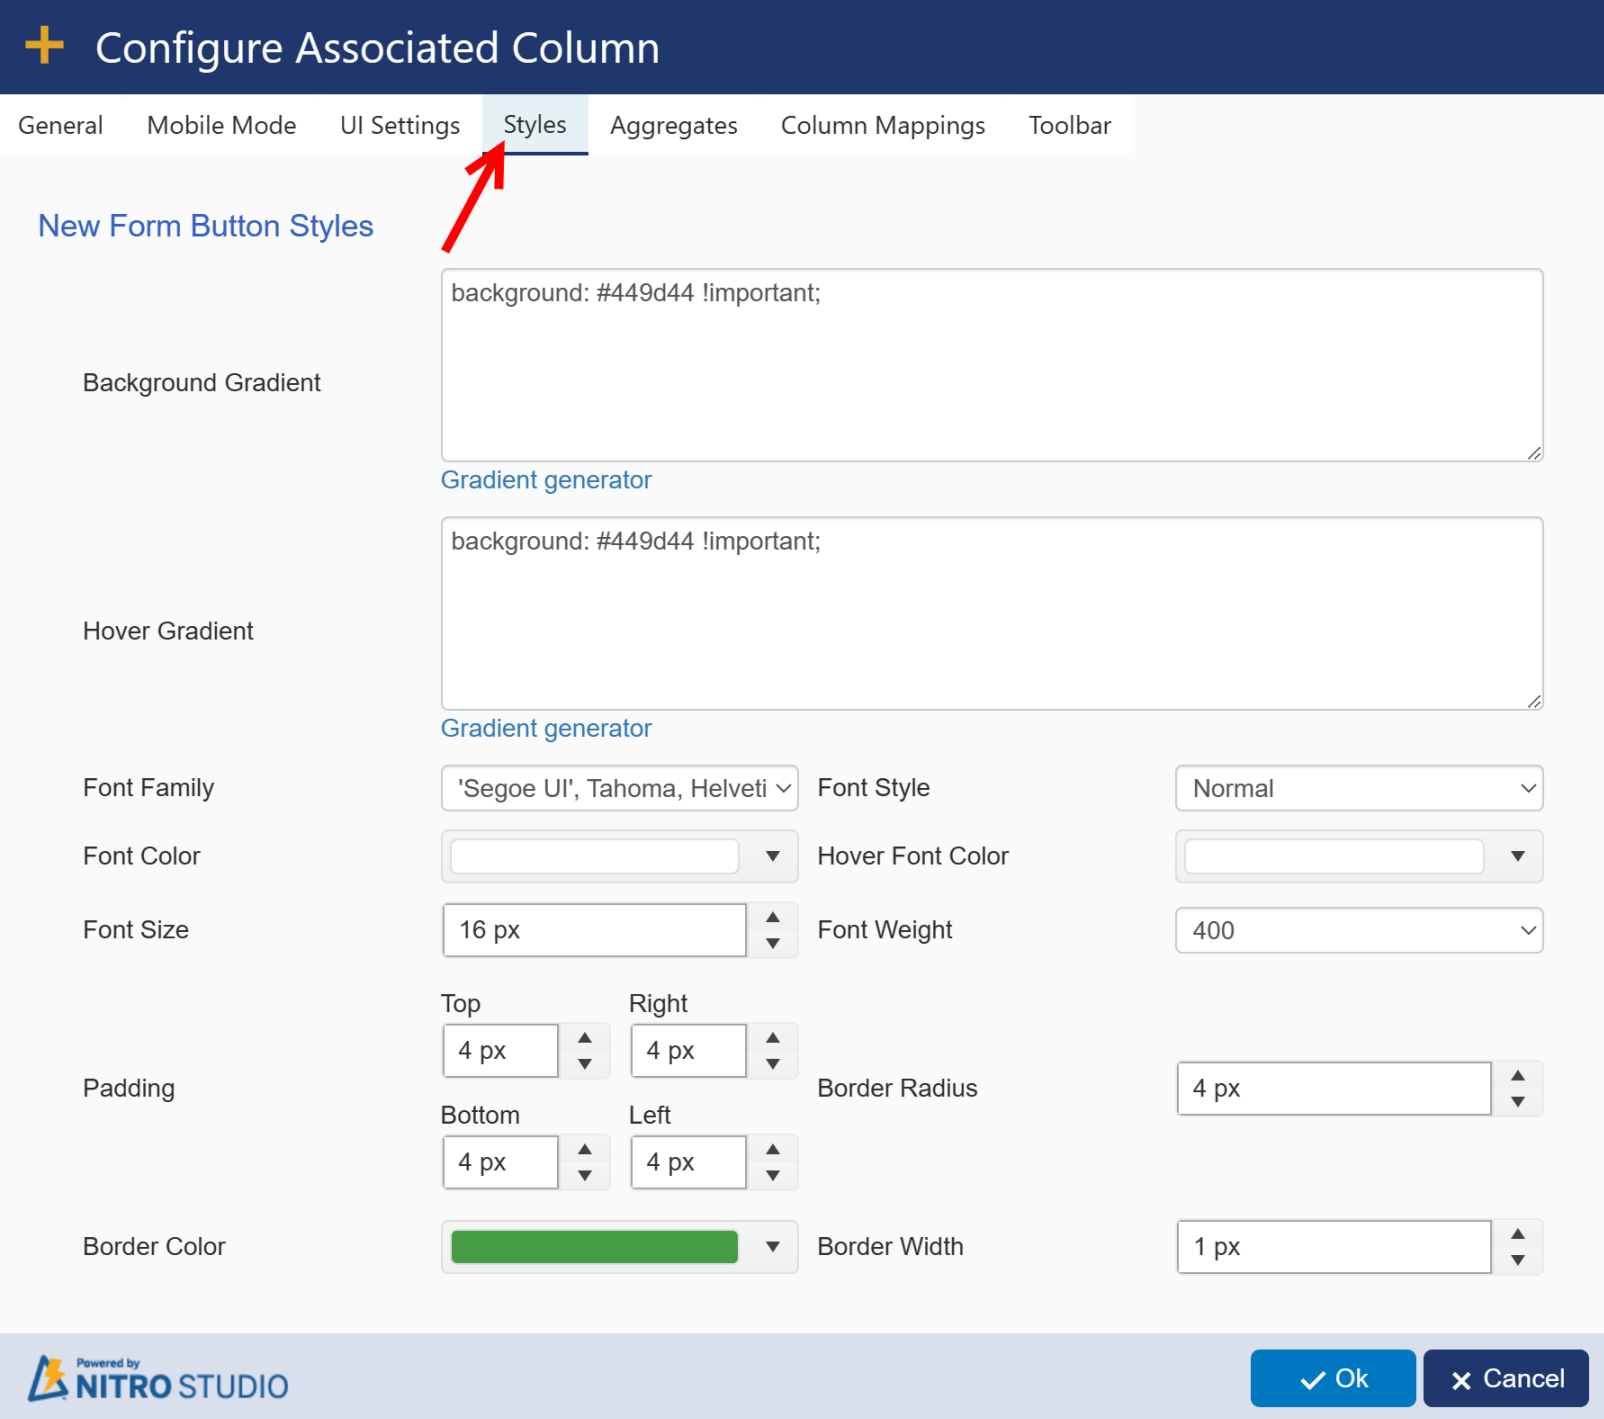
Styles
This tab allows you to modify the "New Item" button. You can change the color, font, radius, and more with the settings on this tab.
Aggregates
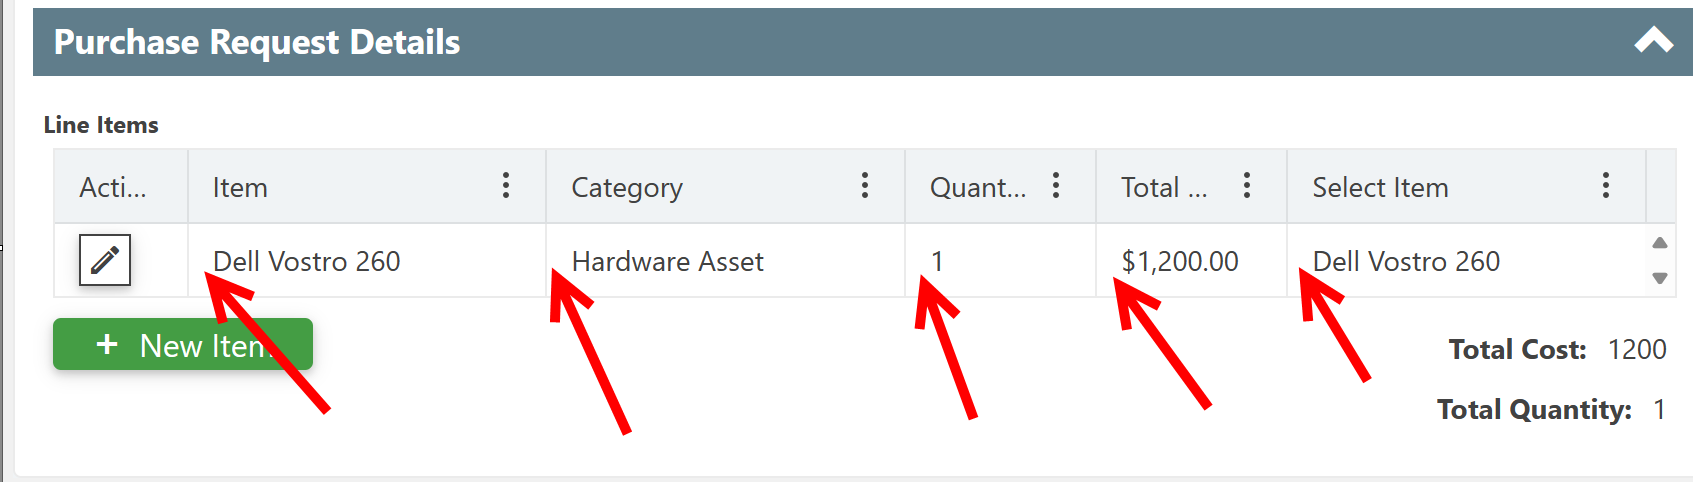
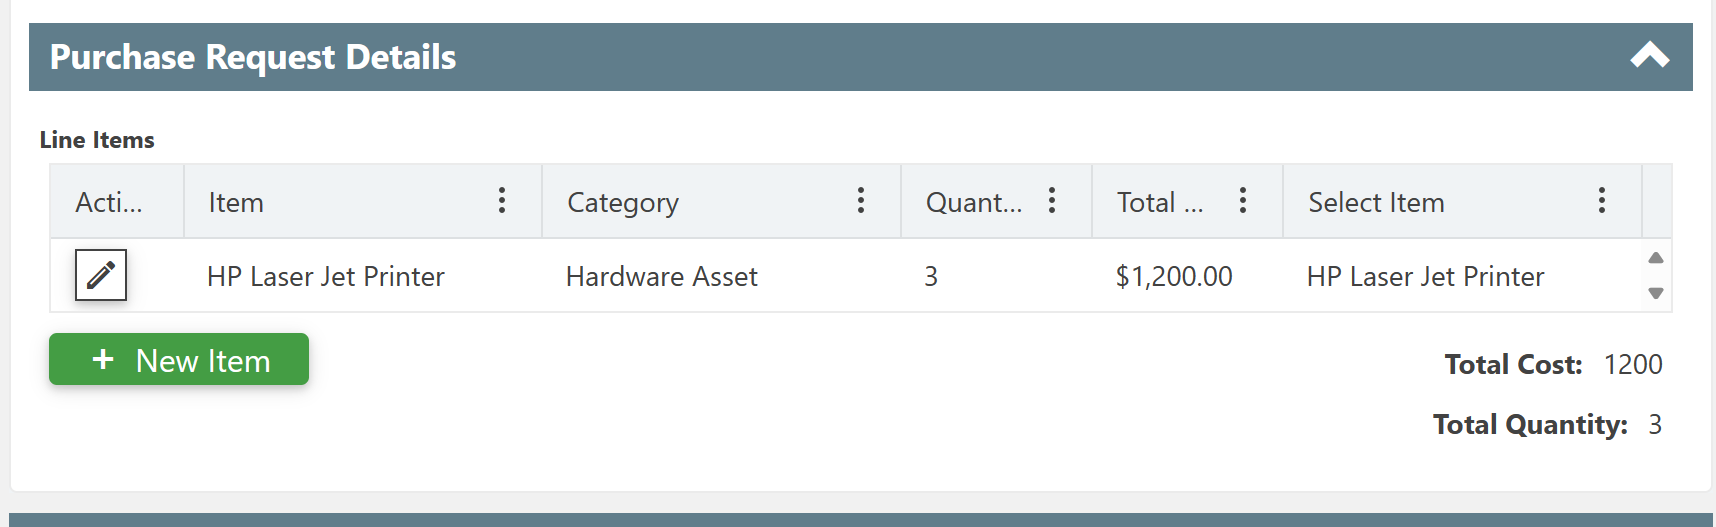
Allows you to sum up a number field in the Associated Items grid, such as currency or hours. Click on New Aggregate to create a new summary of items in the grid.
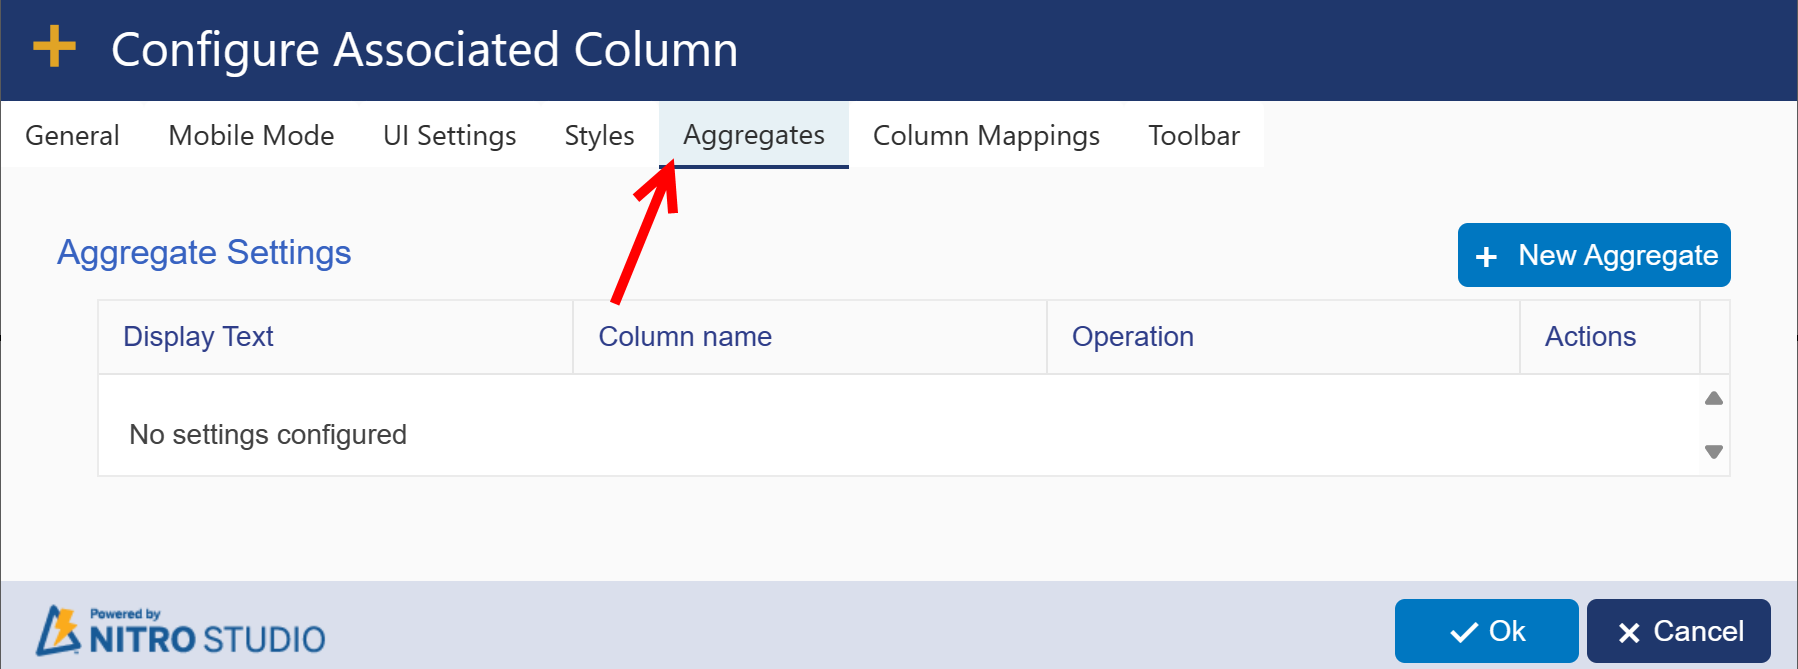
New Aggregate:
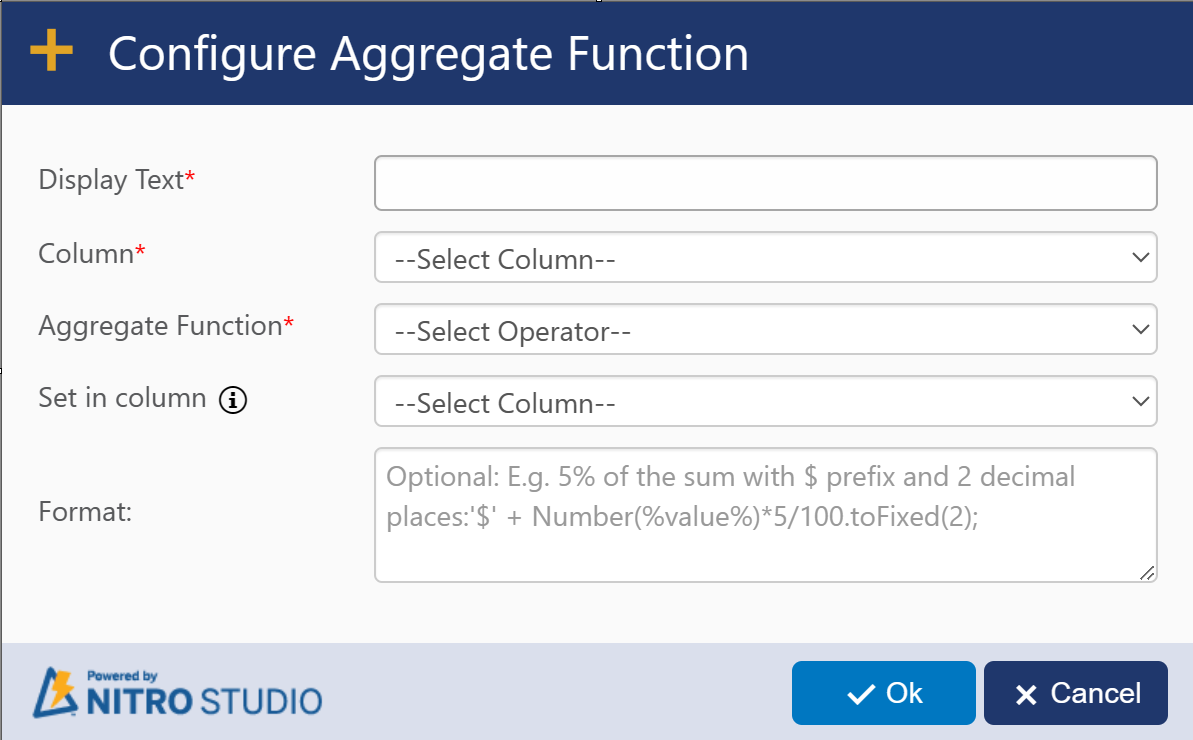
Display Text - This is what shows up on the form ahead of the value, e.g. "Total Cost"
Column - This is the column that gets calculated
Aggregate Function - This is the function for calculating the aggregate. Options are Count, Sum, Avg (Average), Min, Max, and Advanced. Advanced allows you to use JavaScript to calculate the aggregate.
Format - Allows for formatting the aggregate with e.g. a dollar sign ($).
Column Mappings
You can map columns from the parent item to any new items created in the Associated Items grid by clicking on New Column Mapping:
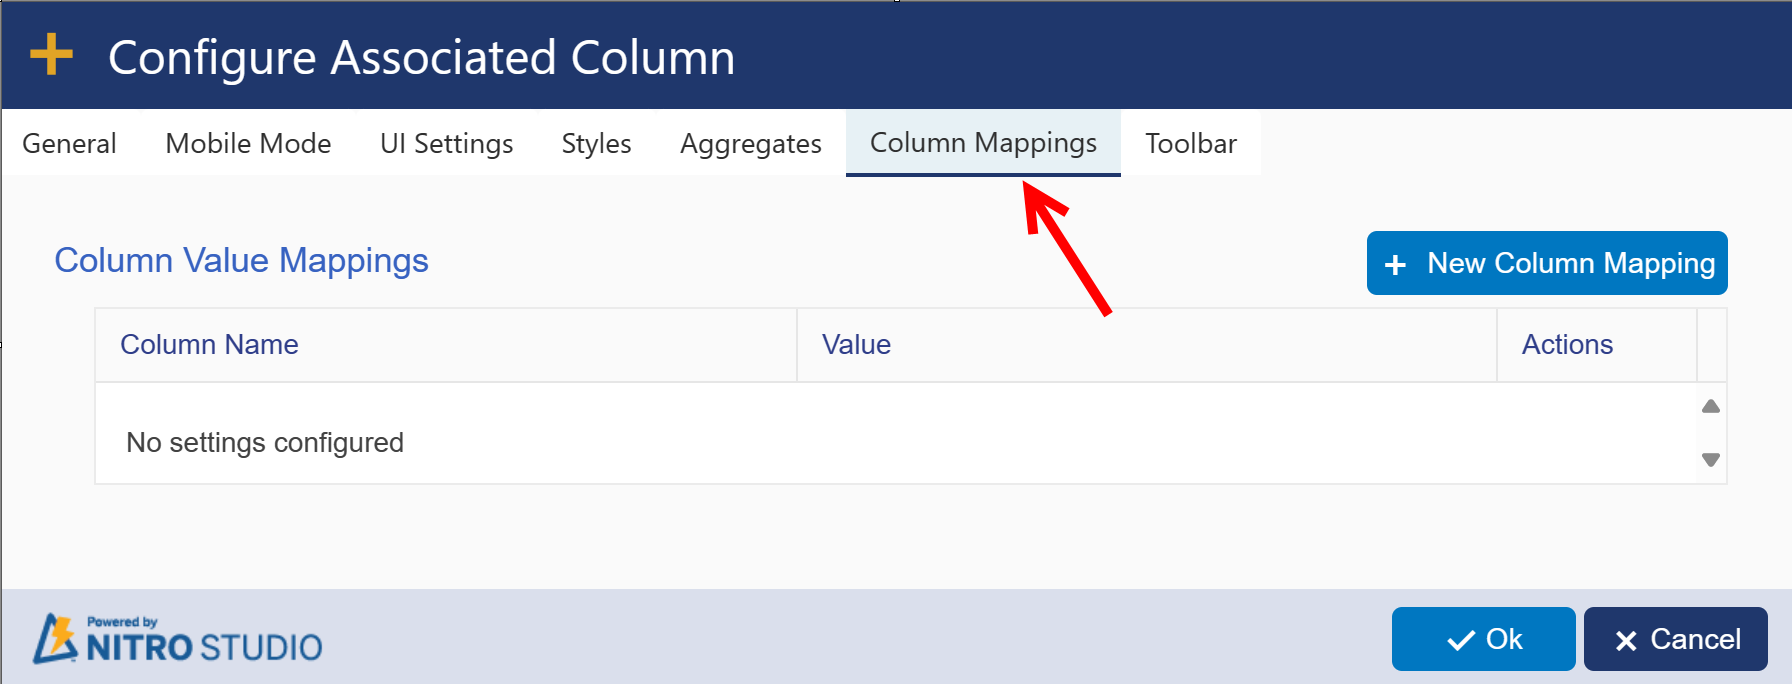
New Column Mapping:
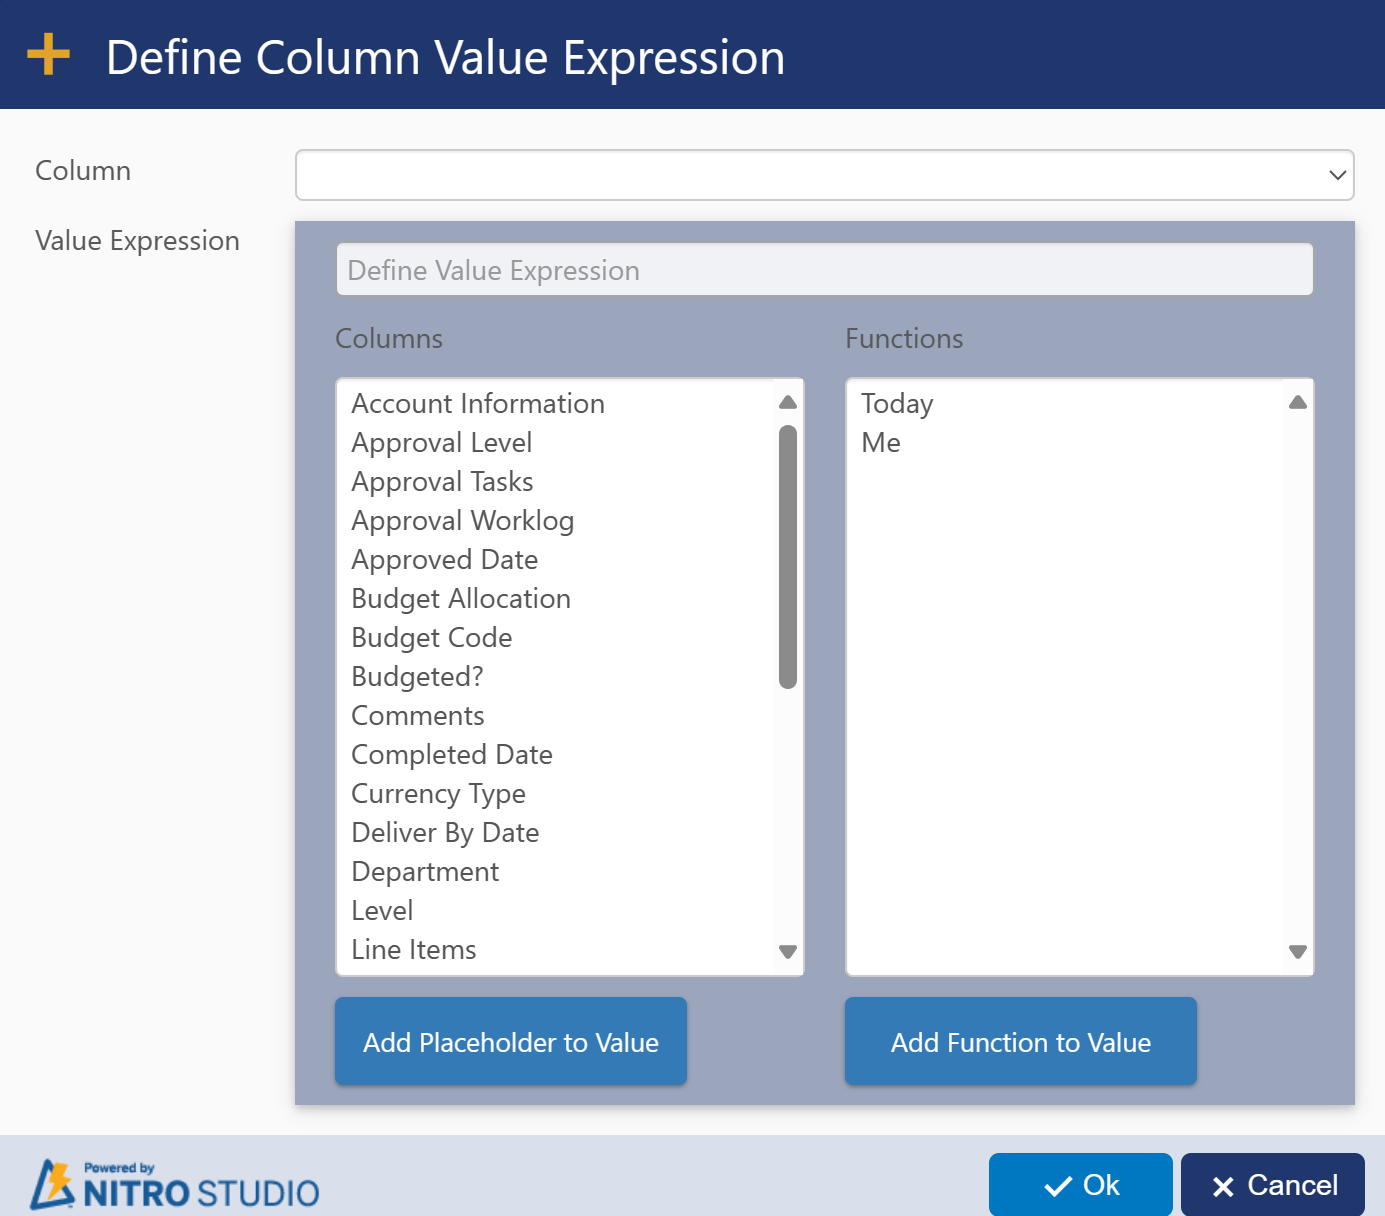
Column - The column on the Associated Items grid that you want to populate with data from the parent item.
Value Expression - The column from the parent item that you want to map to the column on the Associated Item. You can use any of the column values from the parent item or you can use the Today and Me functions.
Toolbar
You can add a tool bar to the Associated Item grid. When enabled, three buttons can show up: Export to Excel, Print, and Email.
Export to Excel - This will allow the user to download the grid items as an Excel file
Print - Brings up the NITRO Print interface with any print templates configured for the Associated list. See Print Manager for more information.
Email - Brings up the NITRO Email interface with any email templates configured for the Associated list. See Email Manager for more information.
Comments - This will allow the user to comments
New - This will allow the user to create new item
You can choose to hide any of these from the tool bar. To hide all , simply uncheck "Enable Tool bar."
Once you have made the additions and edits you want, be sure to publish the form.

Refer below articles for more details on associated item
Count The Number Of Items Separately For Each Status In NITRO Associated Items Column In NITRO Form
Capture Total Of Associated Item Currency Column Dynamically In Parent Item
NITRO Forms: Upload Large Documents From Associated Items Column