Advanced Settings in the Manage Forms screen provides the following options:
- Export/Import NITRO Forms Settings
- Background Item Update
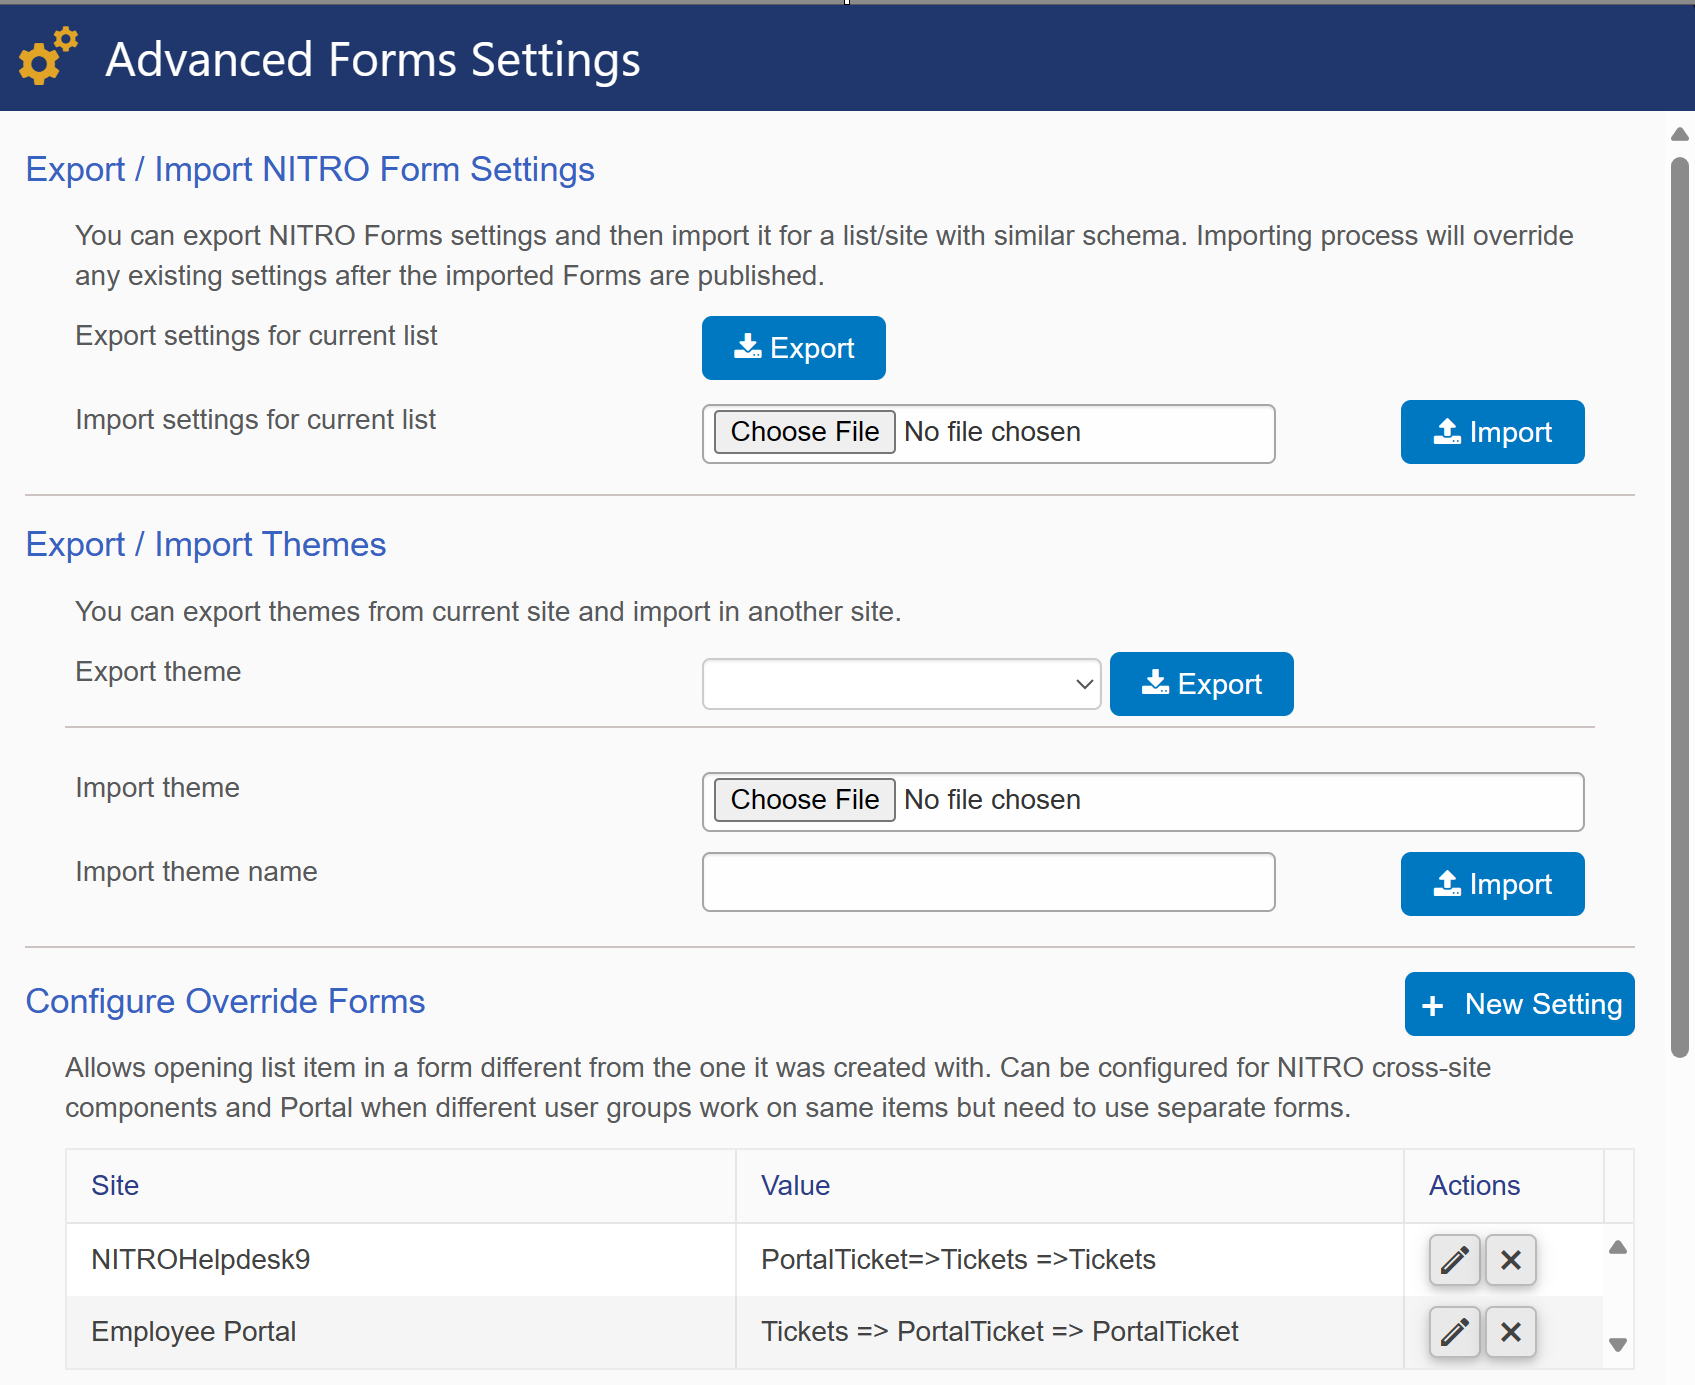
Export/Import NITRO Forms Settings
In many cases, you may want to develop your form on a development list or site first before publishing to production. The Export/Import feature allows you to first create a form on a "test" or "dev" list and then copy it over to the "prod" list. This requires that the list schema is consistent between the "dev" list and the "prod" list. While you can manually configure both the "dev" and "prod" lists, you may want to use a list template to recreate the "dev" list in "prod." To learn more about how to use list templates in SharePoint, see this Microsoft article: https://support.office.com/en-us/article/manage-list-templates-c3884ad1-bc49-44b8-b3d6-3bc6a01eb393
The Form Settings will be saved as an XML file and can be saved locally or in a cloud location from your computer. When importing the file, select "Choose File", select the XML file you wish to upload, and then click "Import".
Export/Import Themes
The NITRO Forms Designer allows you to create Themes for your forms. These themes (UI and other settings) can be exported out and imported in across lists and sites. This is a powerful way to keep the design of your forms consistent across multiple sites and lists. To create new themes, click 'Create Theme' button available in NITRO form ribbon as shown below.

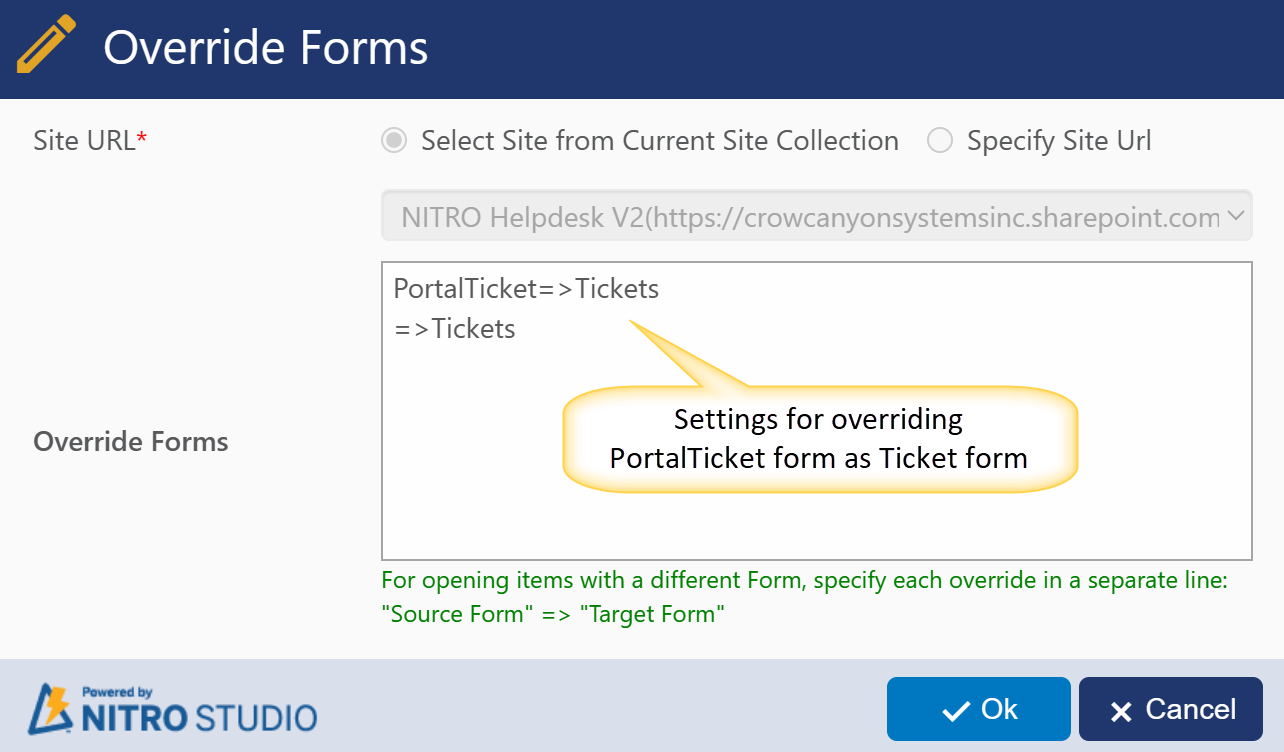
Configure Override Forms
In some cases, you may want to open a SharePoint item with a different form than the one it was created with. The most common case is if you are using the Modern UI Portal experience. For example, users interacting with the portal will want to always see the portal version of the form, whereas backend users will want to see the backend version of the form. If you create an item with the backend version, and want to show it to a portal user, you'll need to override the form in the portal to show the portal version of the form. Vice versa in the backend; if the portal user creates the item, the backend user will want to see the backend version of the form.
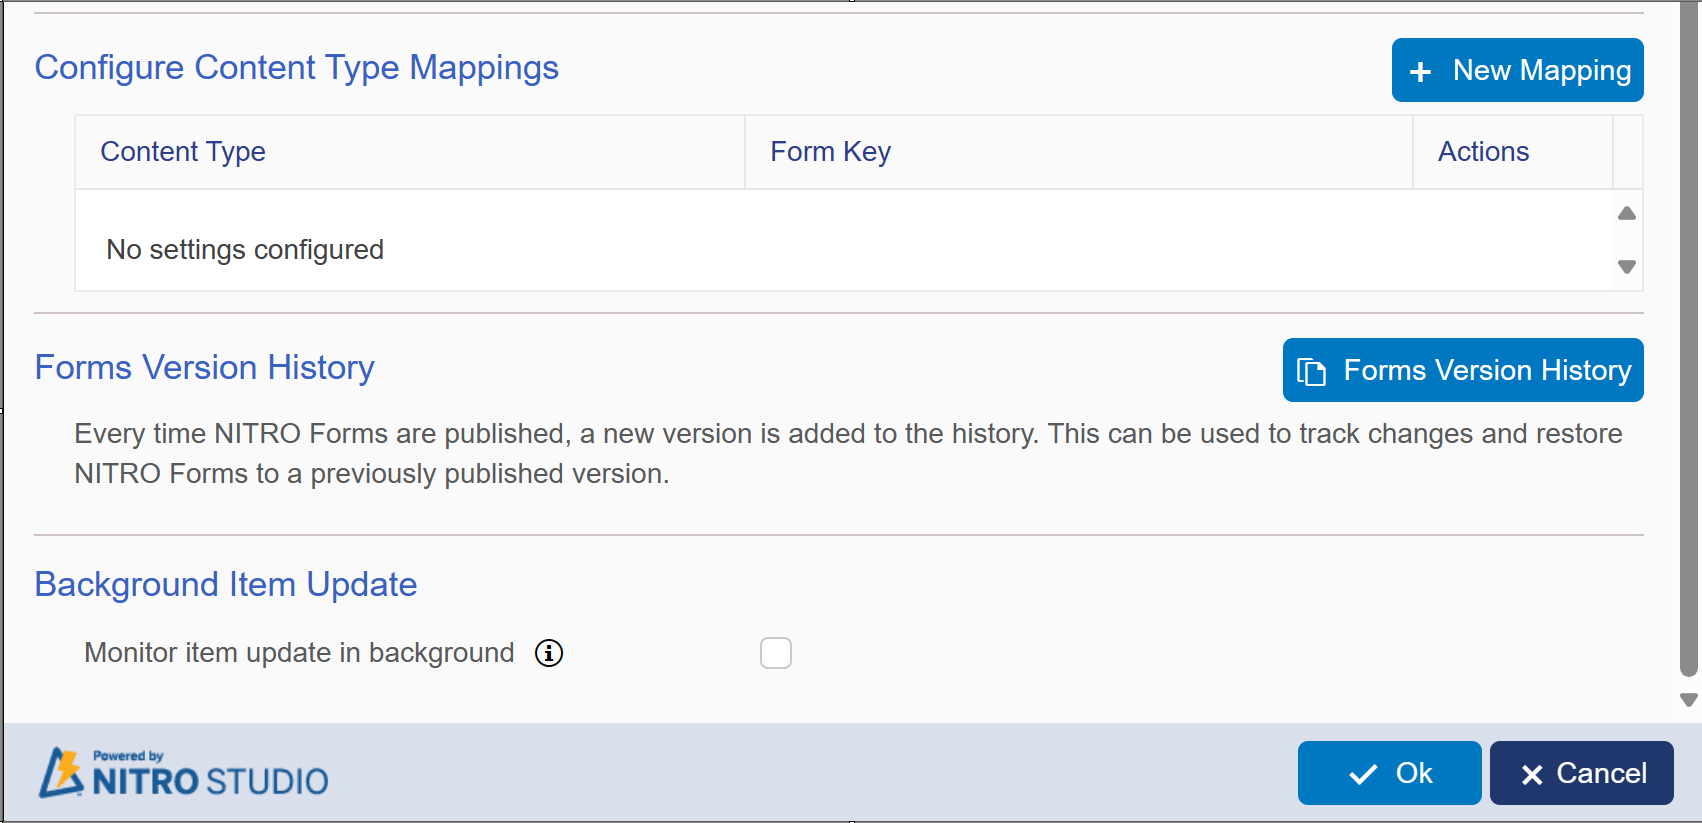
Content Type Mappings
A SharePoint list can show list items using different Content Types, which really means different forms (to use Content Types on a List, go to List Settings/Advanced Settings and set "Allow Management of Content Types?" to "Yes"). These different Content Types will be available on the "New" menu in the List (Items Ribbon, New Item in Classic UI or under "New" in the Modern UI). If there is only one Content Type, then the New option always uses that one. (A list will always have at least one Content Type by default. )
Our Content Type Mapping allows you to create different NITRO Forms and have them able to be selected and used in the List interface. Once you map a NITRO Form to a Content Type, the NITRO Form will open when that Content Type is chosen from the New menu. Also, once an item is created with a certain Content Type, it will use the mapped NITRO Form when it is opened in Edit or Display mode. This feature allows different NITRO Forms to show up in the List UI.
Note that once you enable NITRO forms on a list, all forms of whatever Content Type will show up as NITRO Forms; if there is no explicit mapping of a Content Types to a NITRO Form, it will use the default NITRO form for that list when that Content Type is chosen.
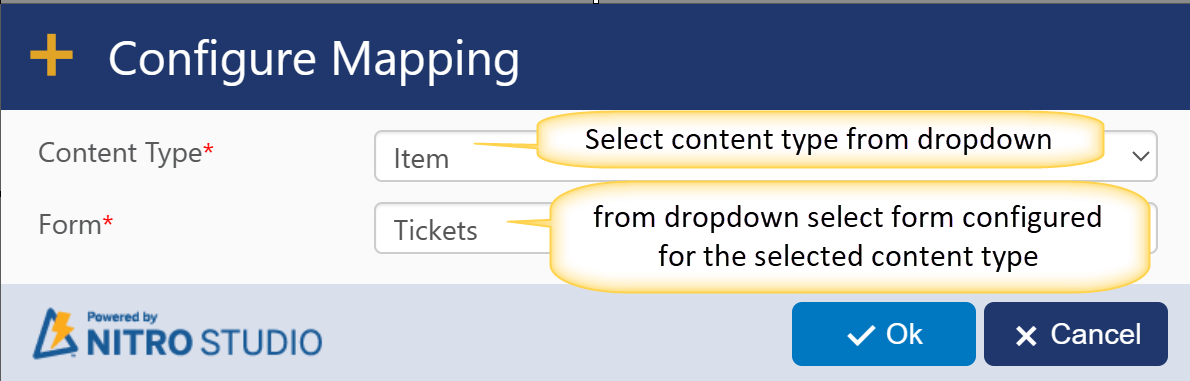
Click 'New Mapping' button to configure form mapping with content type. following form will open
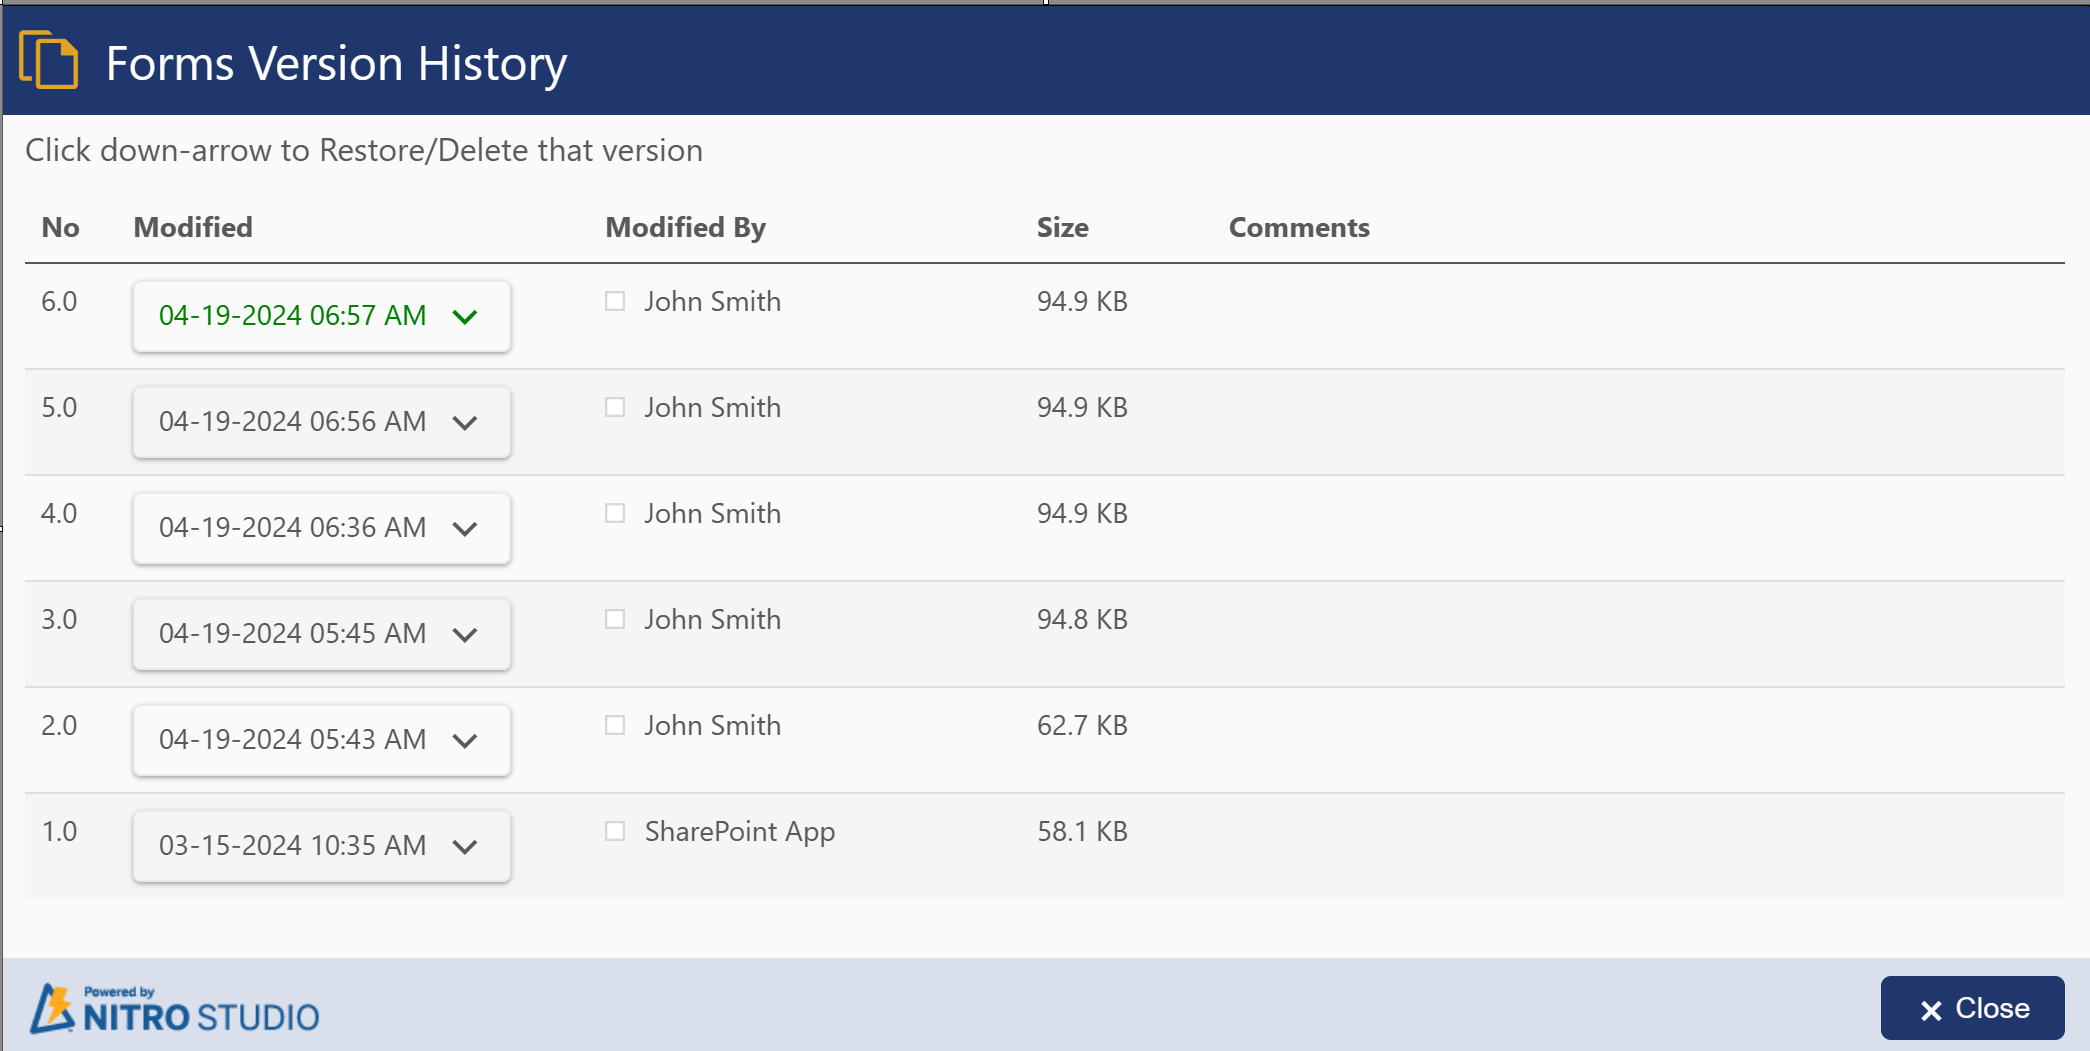
Forms Version History
This section allows you to restore a previously published version of the form. When you click on the button, you'll see the list of all previously published versions, who published it, when it was published, and any comments that were added:
Background Item Update
While user is viewing/updating an item in NITRO form, it can be updated by another user or process ( like a workflow). To tack these changes, enable Background Item Update feature. it will make visible below columns.

Allow Overwriting background update changes: In case of an update to item by another user or process in background, allow current user to overwrite with their changes to the NITRO form.
Background update monitor interval: NITRO form will check for background update to item as per this time interval