Sending Email from an item in a SharePoint list
Sending mails from SharePoint lists is available in two scenarios:
1. Send Mail directly from List views
Select an item to send outgoing email and click on “CrowCanyon Email” button in the Items ribbon.
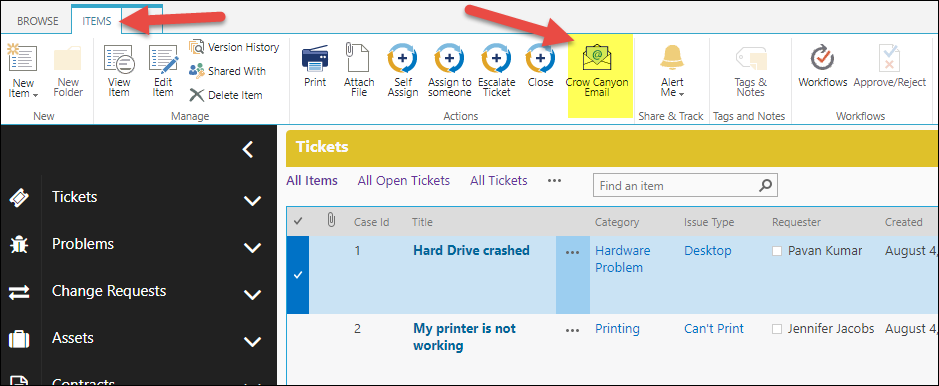
Note: Multiple item selection is not supported with ‘Crow Canyon Email'
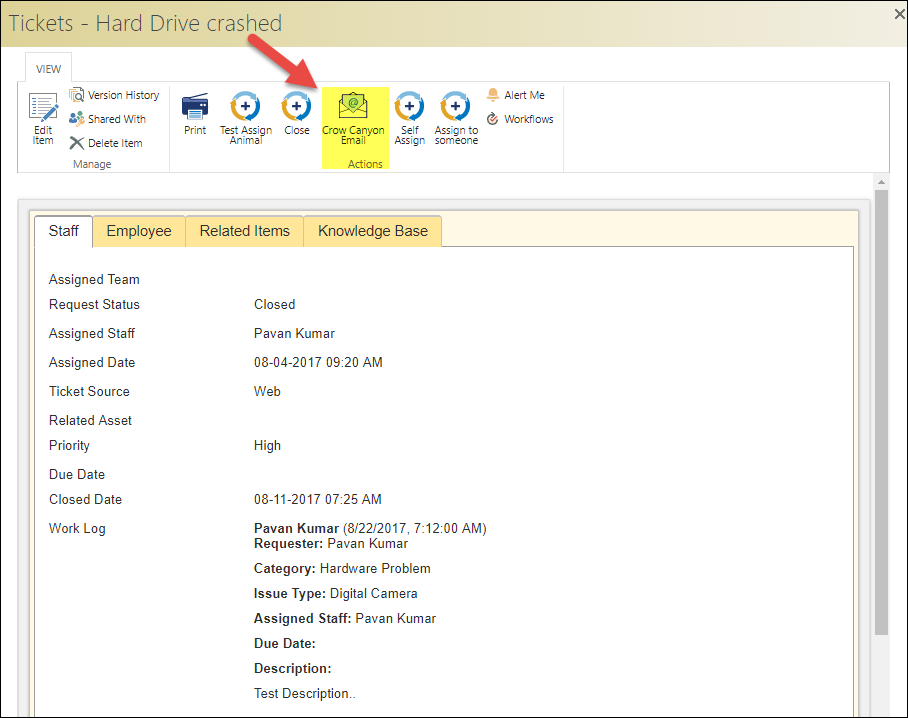
2. Send Mail from Item Display form
Open a list Item in display form and click on “CrowCanyon Email” action in the ribbon to send email
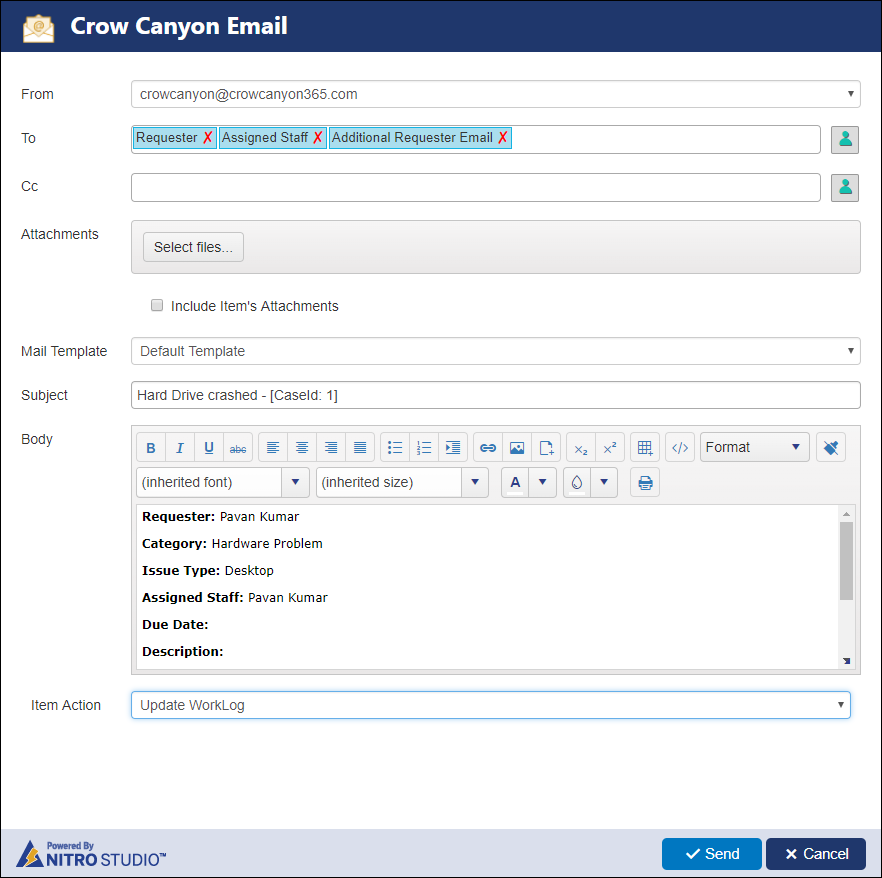
Sending an Email
ANY OF THE BELOW FIELDS CAN BE CHANGED PRIOR TO SENDING THE EMAIL: (See Configuring Email Settings for setting defaults.)
From: Drop list of all the From addresses configured in the email settings; displays the first email address as default.
To & CC: Displays the To & CC addresses configured in the email settings.
Attachments: Allows adding attachments to the outgoing email
Include Items's Attachments: Puts the attachments on the current item into the outgoing email
Mail Template: Drop list of all mail templates configured in the email settings; displays the default mail template.
Subject: Auto-populated based on mail template
Body: Auto-populated based on mail template
Item Action: Drop list of all item actions configured in the email settings; displays the default item action. Only one action (or None) can be chosen per email.
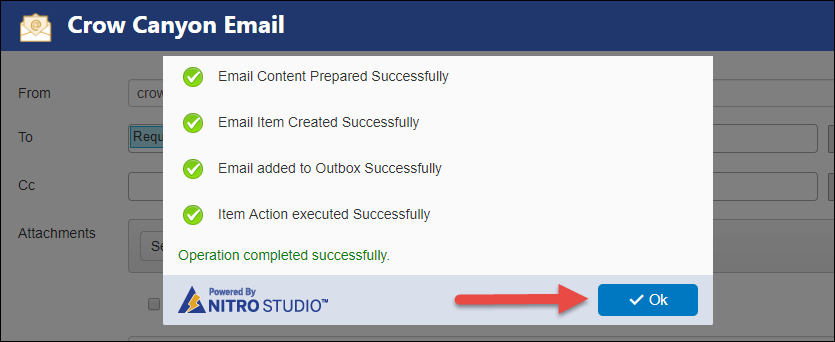
After sending, a success log is displayed as shown below.
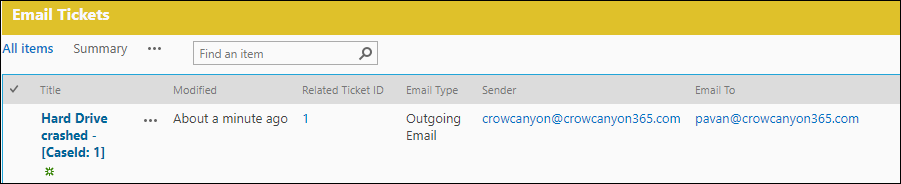
On sending an email from the list, an item gets created in Email History List with all the relevant information (see Configuring Email History List for more details).
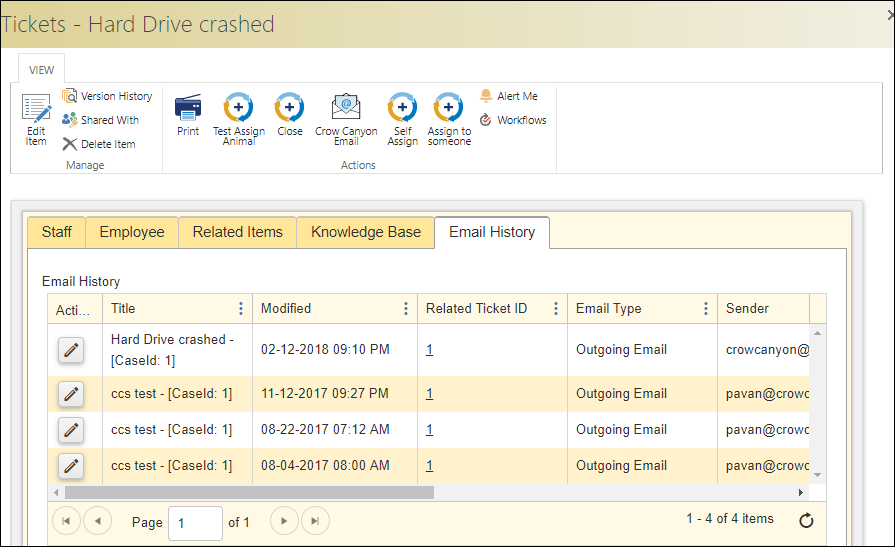
The item can be set up to show its Email History:
Browser Security Settings:
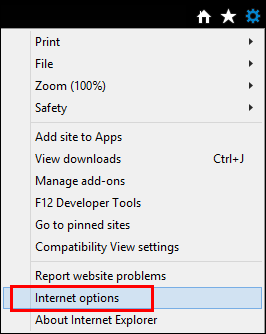
1.Sometimes Email Manager may not work as expected in Internet Explorer. So, please perform these steps to avoid issues in IE browser.
2.Open your site in Internet Explorer and open ‘Emai Managerl’ app
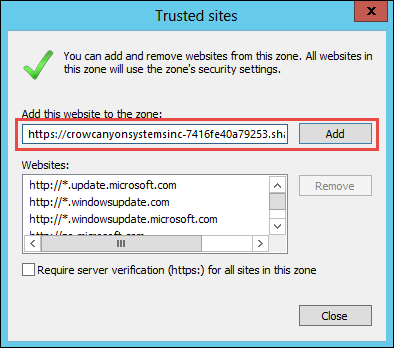
3.Click on ‘Tools’ icon from top right corner of the browser, click ‘Internet Options’, and then click the Security tab and select ‘Trusted sites’ option and click on Sites
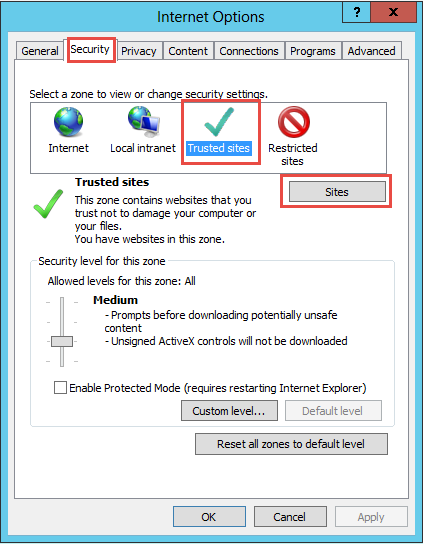
4.On the dialog, address of the current site should be pre-filled. Please click ‘Add’ button to add it to trusted sites
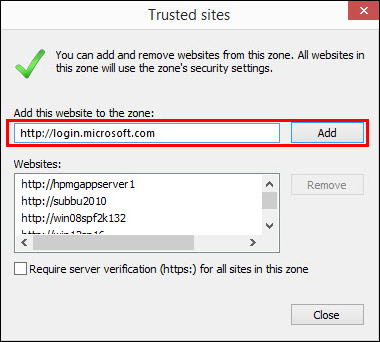
5.Also, add ‘http://login.microsoft.com’ to the trusted sites
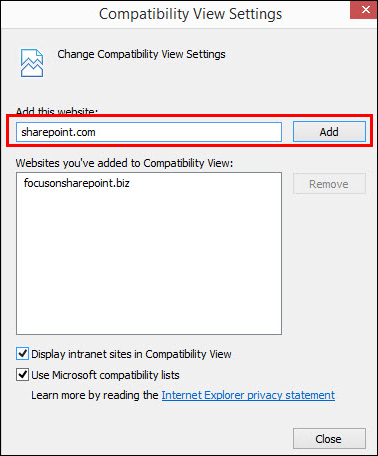
6.Next, click on Tools, click Compatibility View Settings and add site ‘*.sharepoint.com’
7.Close the browser and open it again and navigate to site.