Send Mail
This action allows you to send notifications, alerts, and other emails using mail templates created within the NITRO Workflows app. These mail templates are used in this Send Mail action only and are not used elsewhere in NITRO Studio..
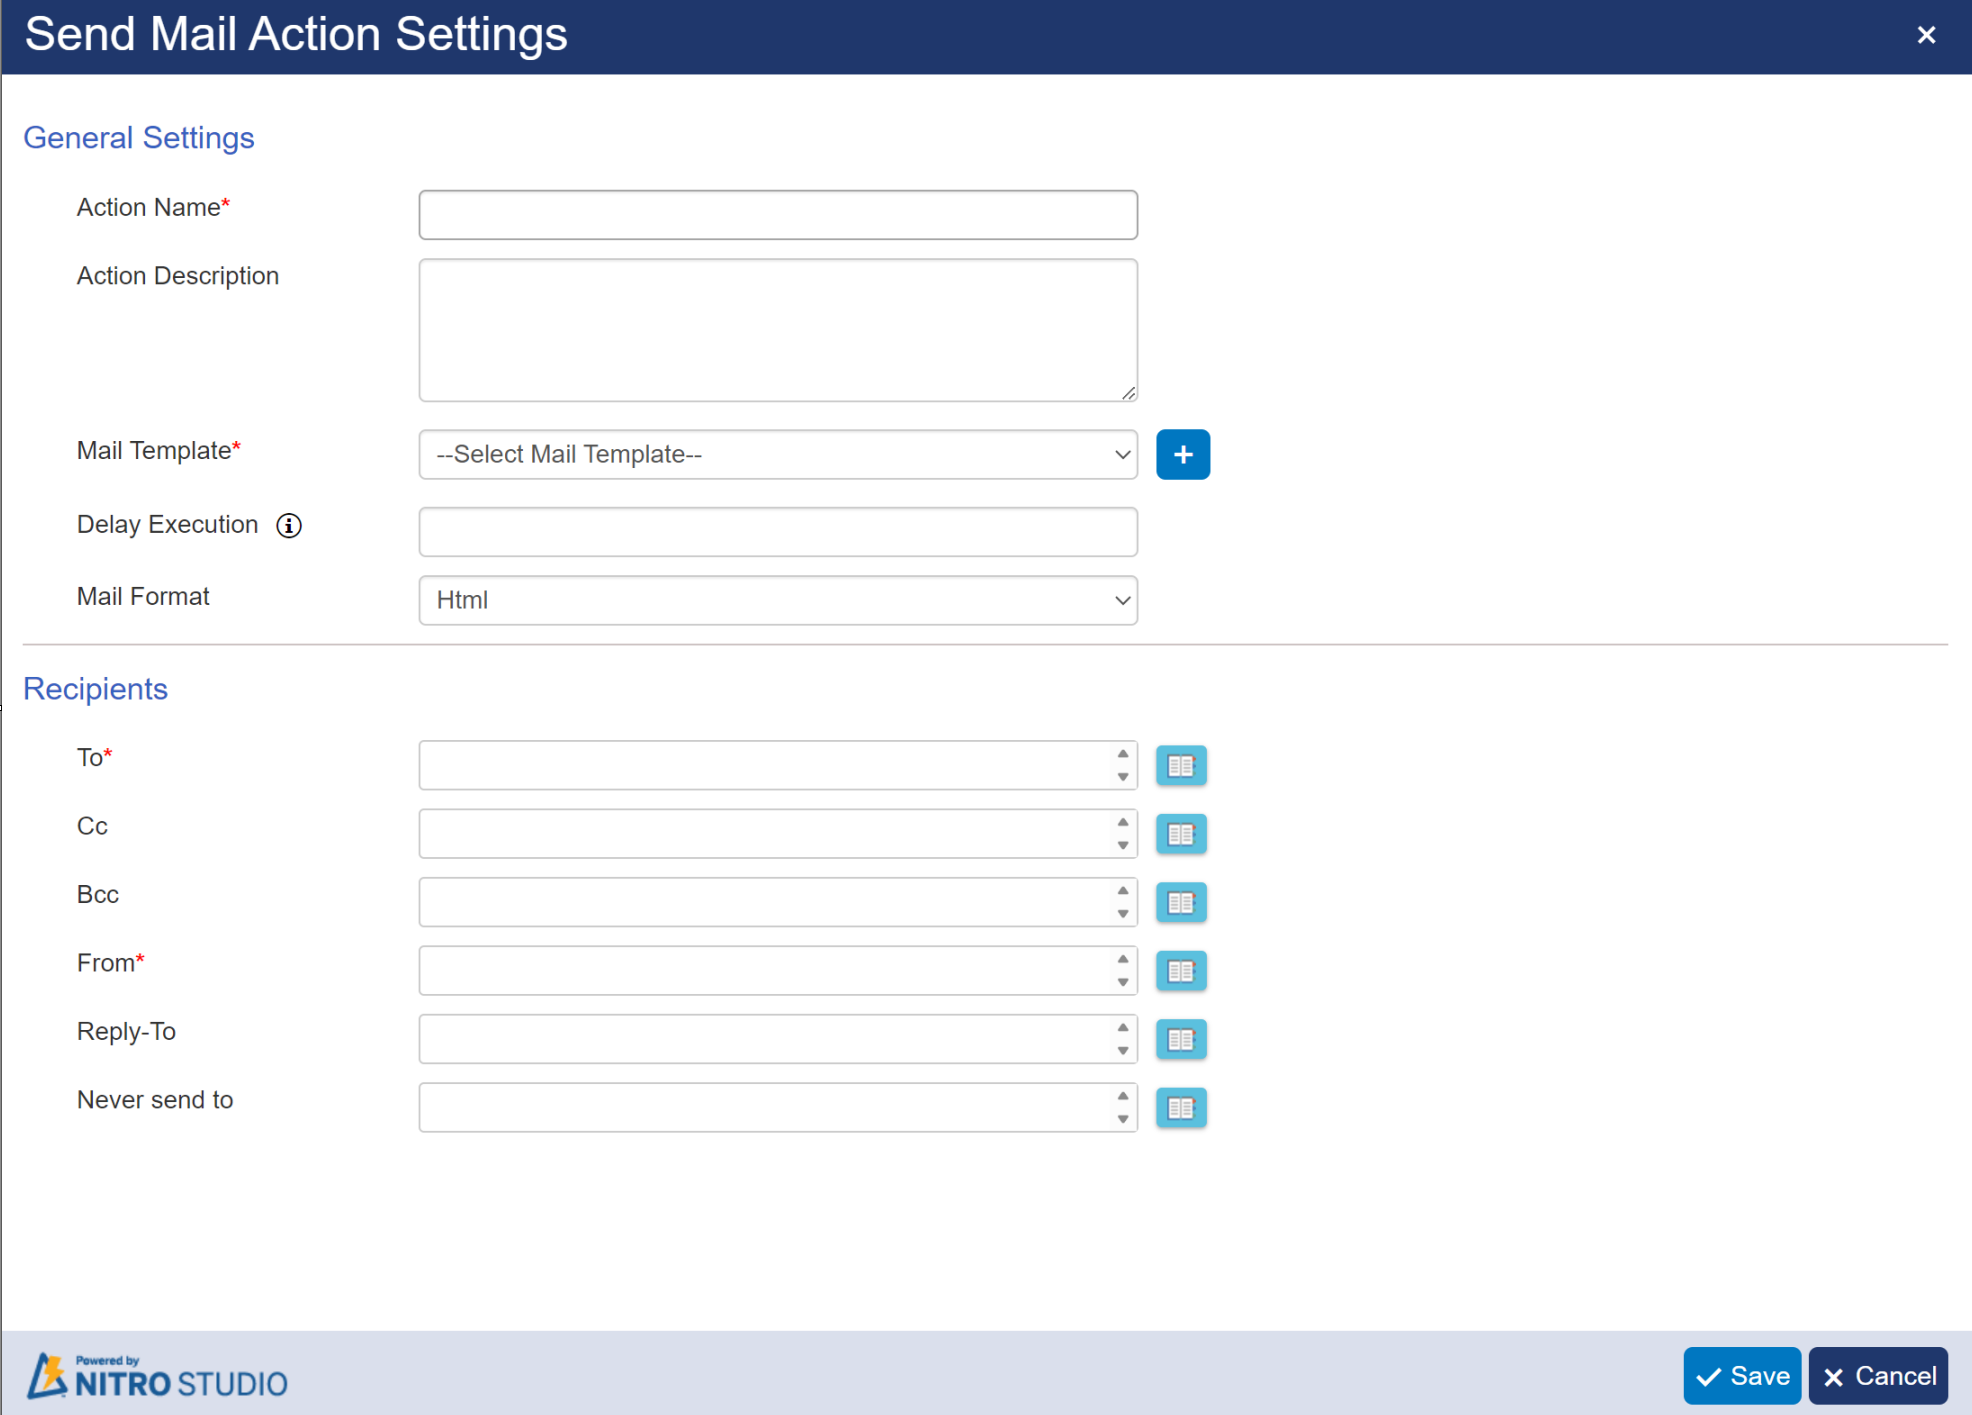
Send Mail Action in Designer workflow:
Send Mail Action in Legacy workflow:
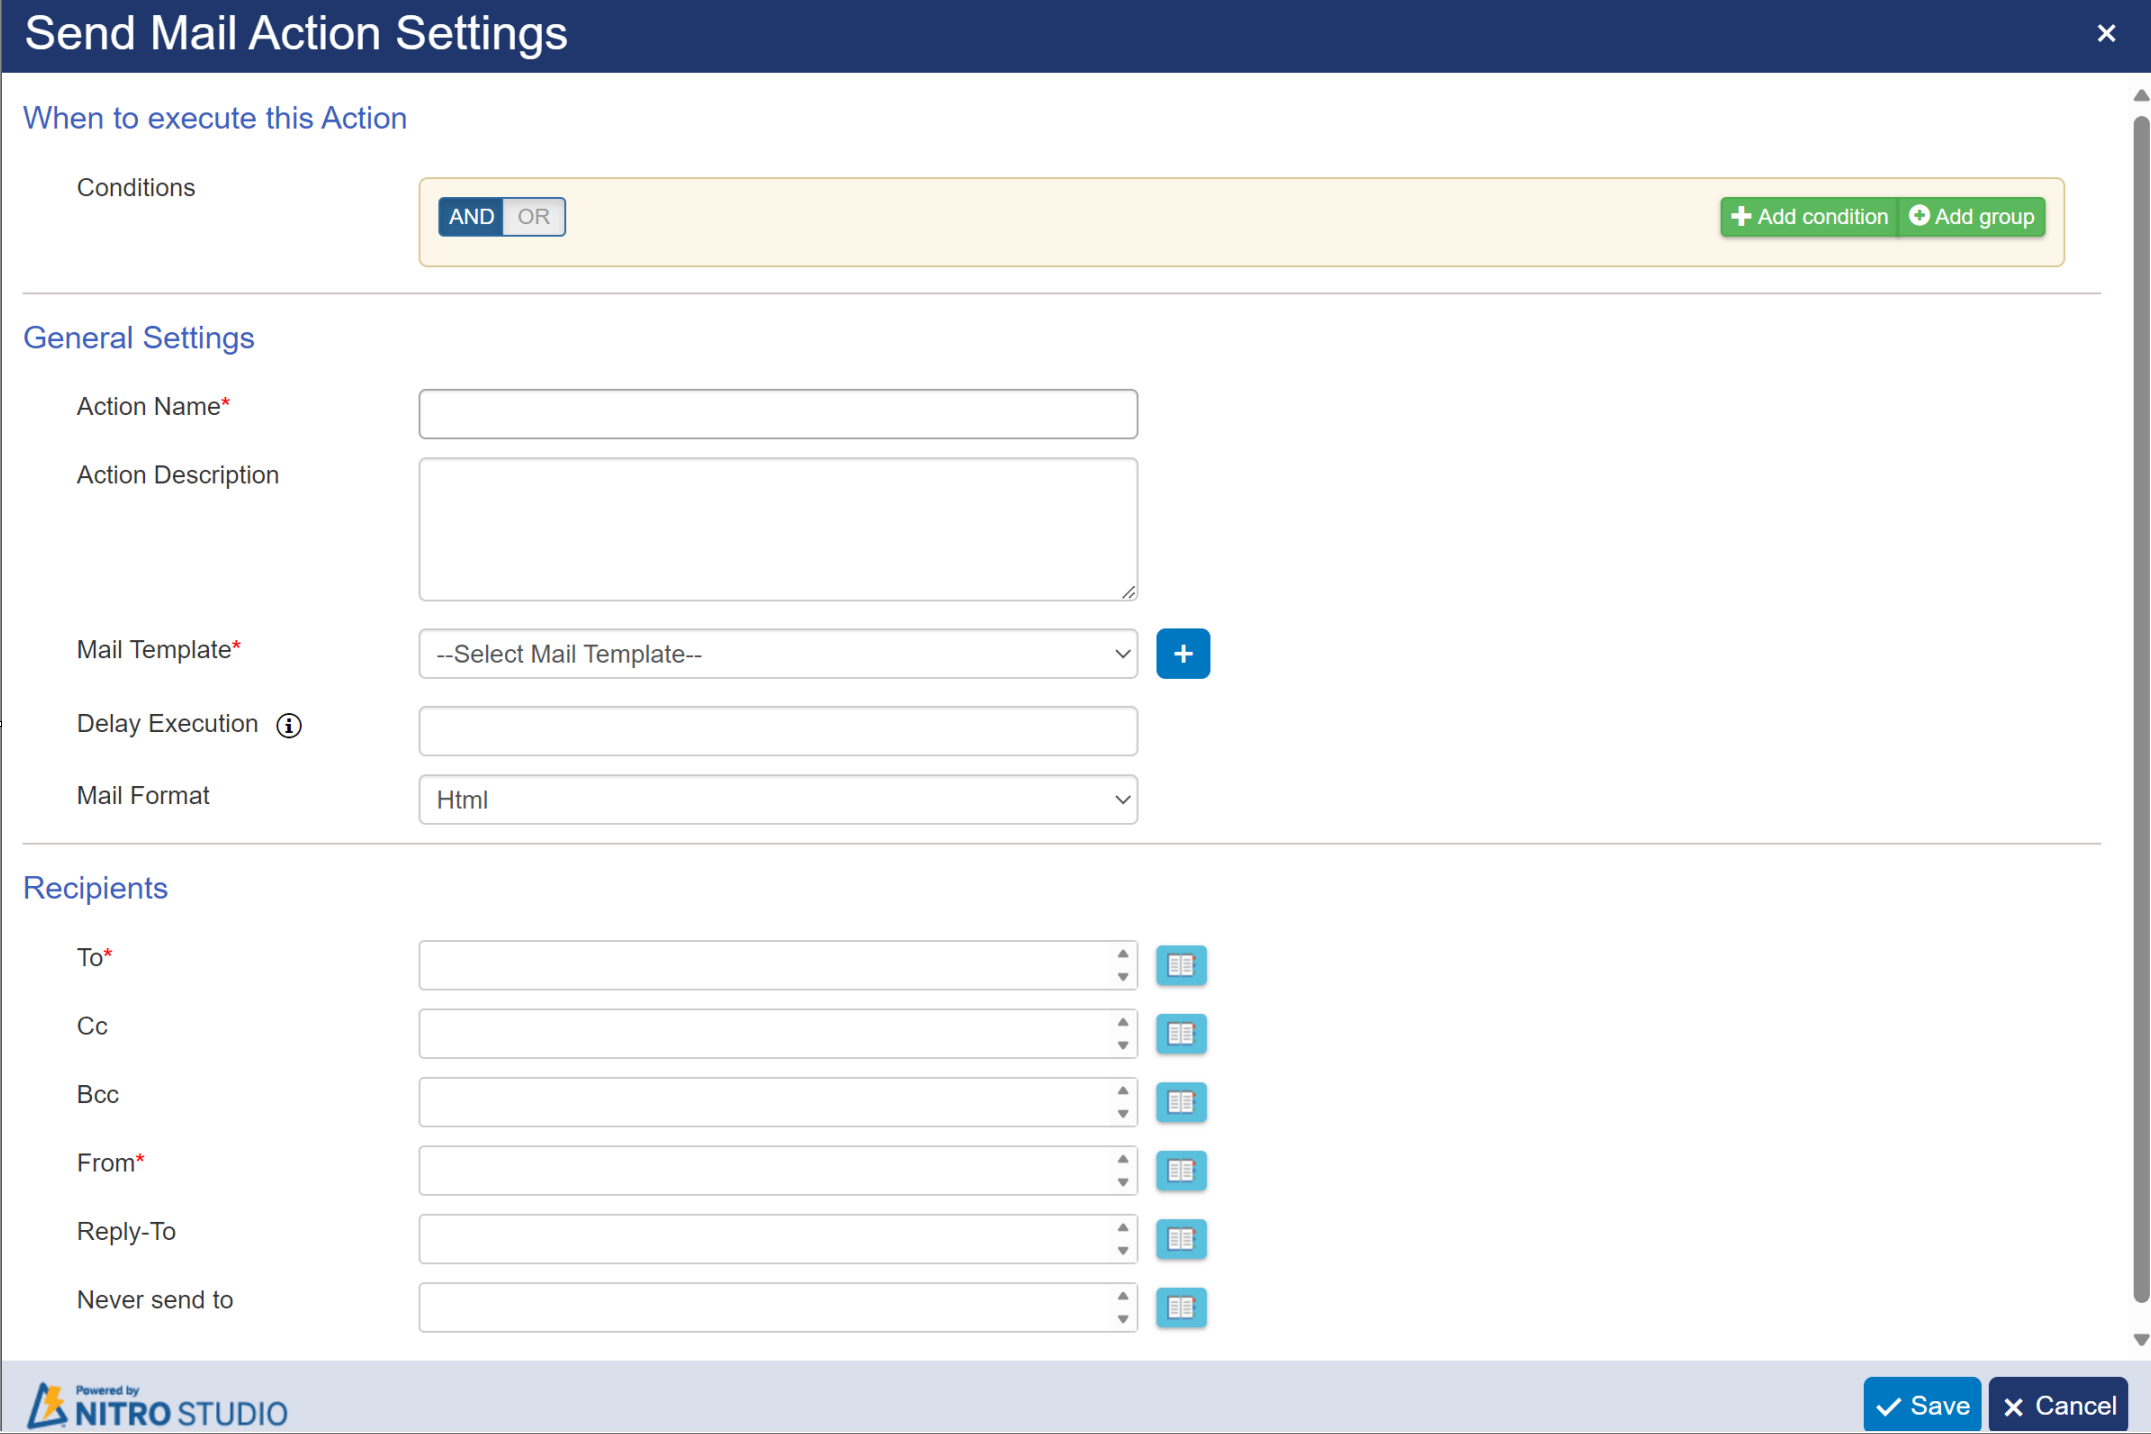
General Settings
Action Name: enter a name for this Send Mail action
Action Description: enter description for this Send Mail action
Mail Template: see section 'Mail Template' explained below
| Delay Execution: to delay the sending of the email, enter a number from 1 to 30 to indicate the number of seconds to delay sending. |
| Mail Format: supports three mail format. default format is Html. |
•Html: This is the default format.HTML allows you to create messages by using different fonts, colors, and formatting options. You can also embed pictures directly within the message.
•Plain Text: Plain text format doesn’t support bold or italic text, colored fonts, or other formatting. Pictures cannot be displayed within the message body, but you can include them as attachments.
•Plain Text - Strip Html: Strip HTML removes all HTML tags and gives plain text.
 |
Recipients
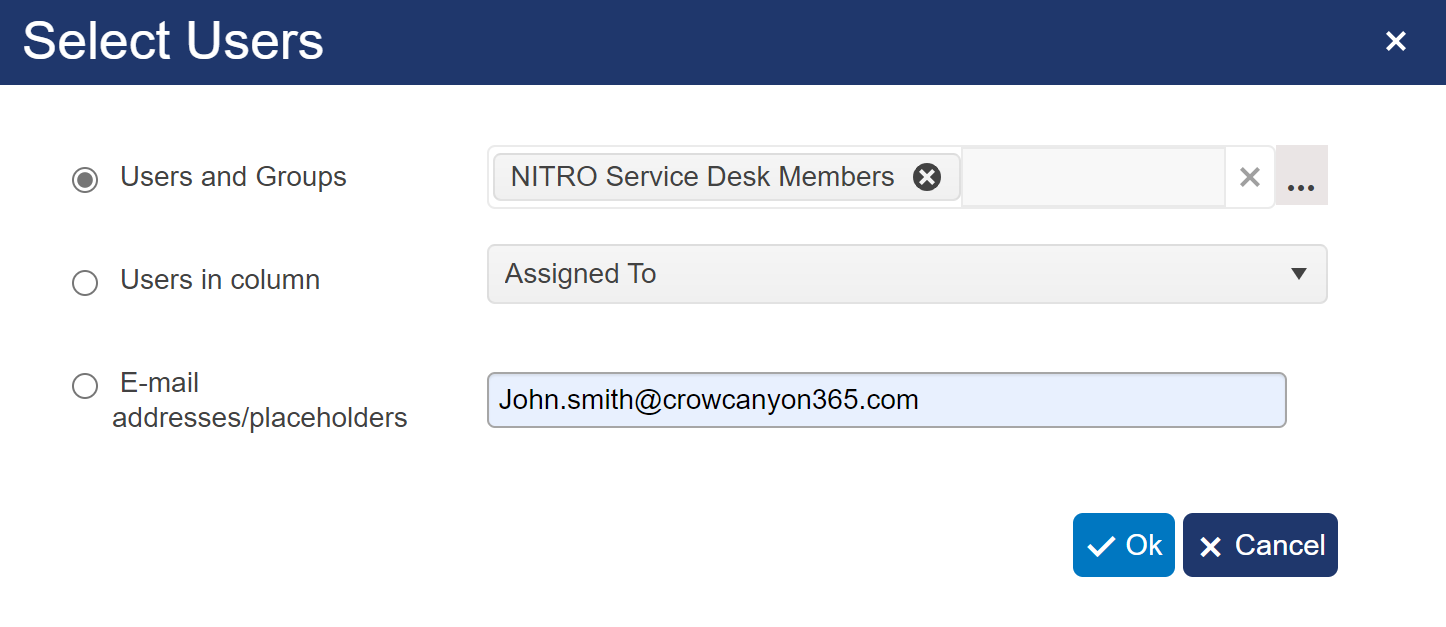
To select recipients, click the buttons after the text boxes. Select the recipients from the Select Users box that comes up.
"To", "Cc", and "Bcc" - can hold multiple names.
"From" - can hold only one user or email address.
"Reply-To" - can hold only one user or email address
"Never send to" -- use to indicate users or email addresses to never send this email to.
Note: in NITRO Workflows, we cannot support [Me] placeholder as workflows do not run in user context
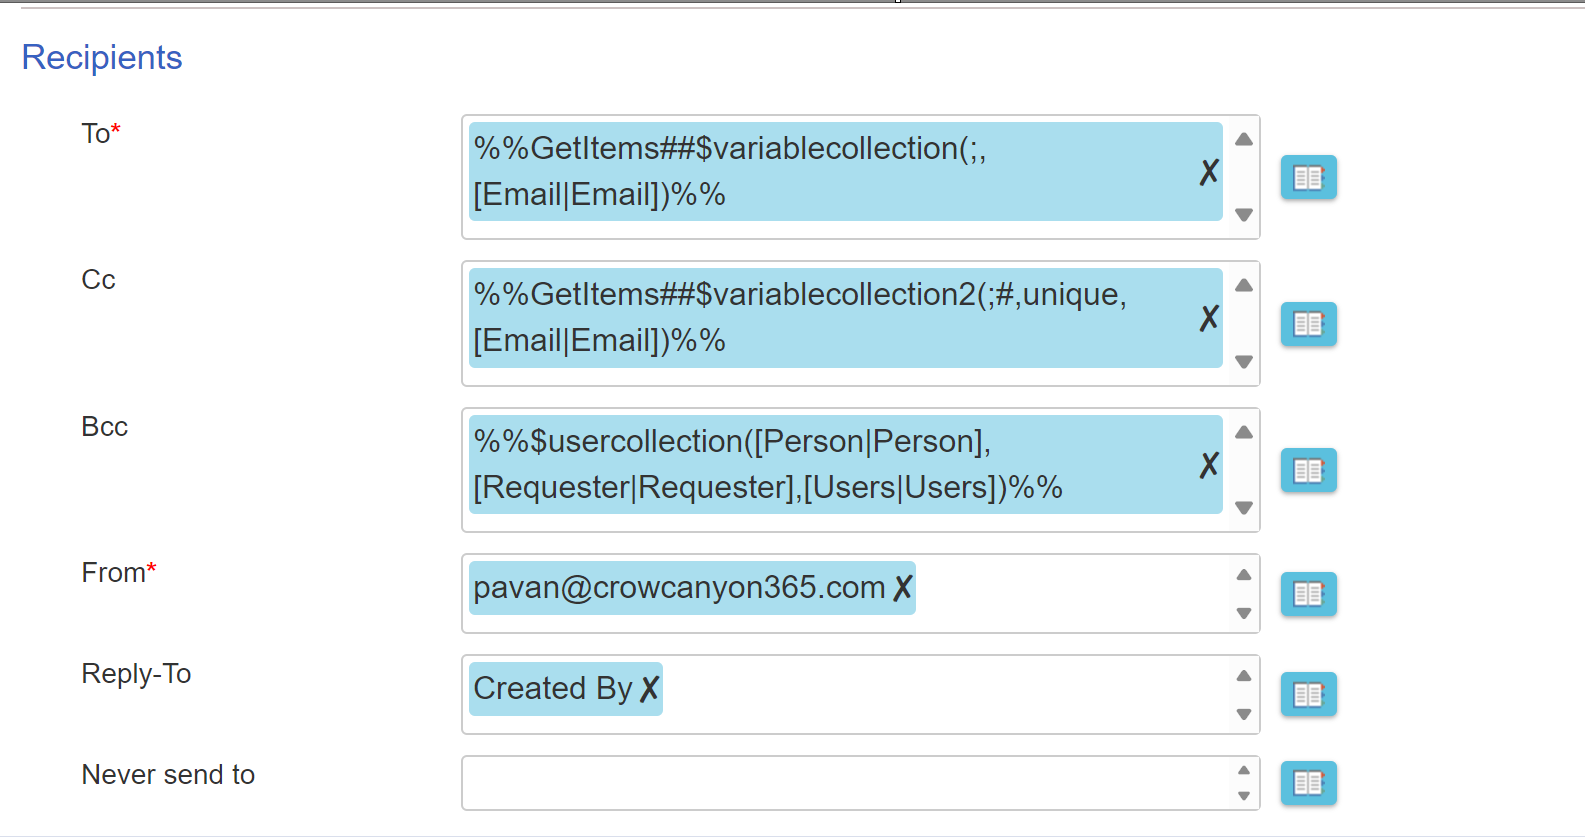
Note: Support %% syntax in send mail recipients to support functions.
Sample Example:
Mail Templates
Use the "Mail Template" dropdown list to select a mail template. If no mail templates have been configured in the NITRO Workflow app, click the Create button to create a mail template. The Edit and Delete buttons can be used to edit or delete an existing NITRO Workflow mail template.
 Create a Mail Template -- Note that the mail templates created here apply only to the NITRO Workflows app and are not used elsewhere in NITRO Studio.
 Edit a Mail Template -- a template must be selected in the drop list in order to edit it.
 Delete a Mail Template -- a template must be selected in the drop list in order to delete it.

Name: provide the name of the Template.
Priority: Select the importance(Priority) of mail from the dropdown.
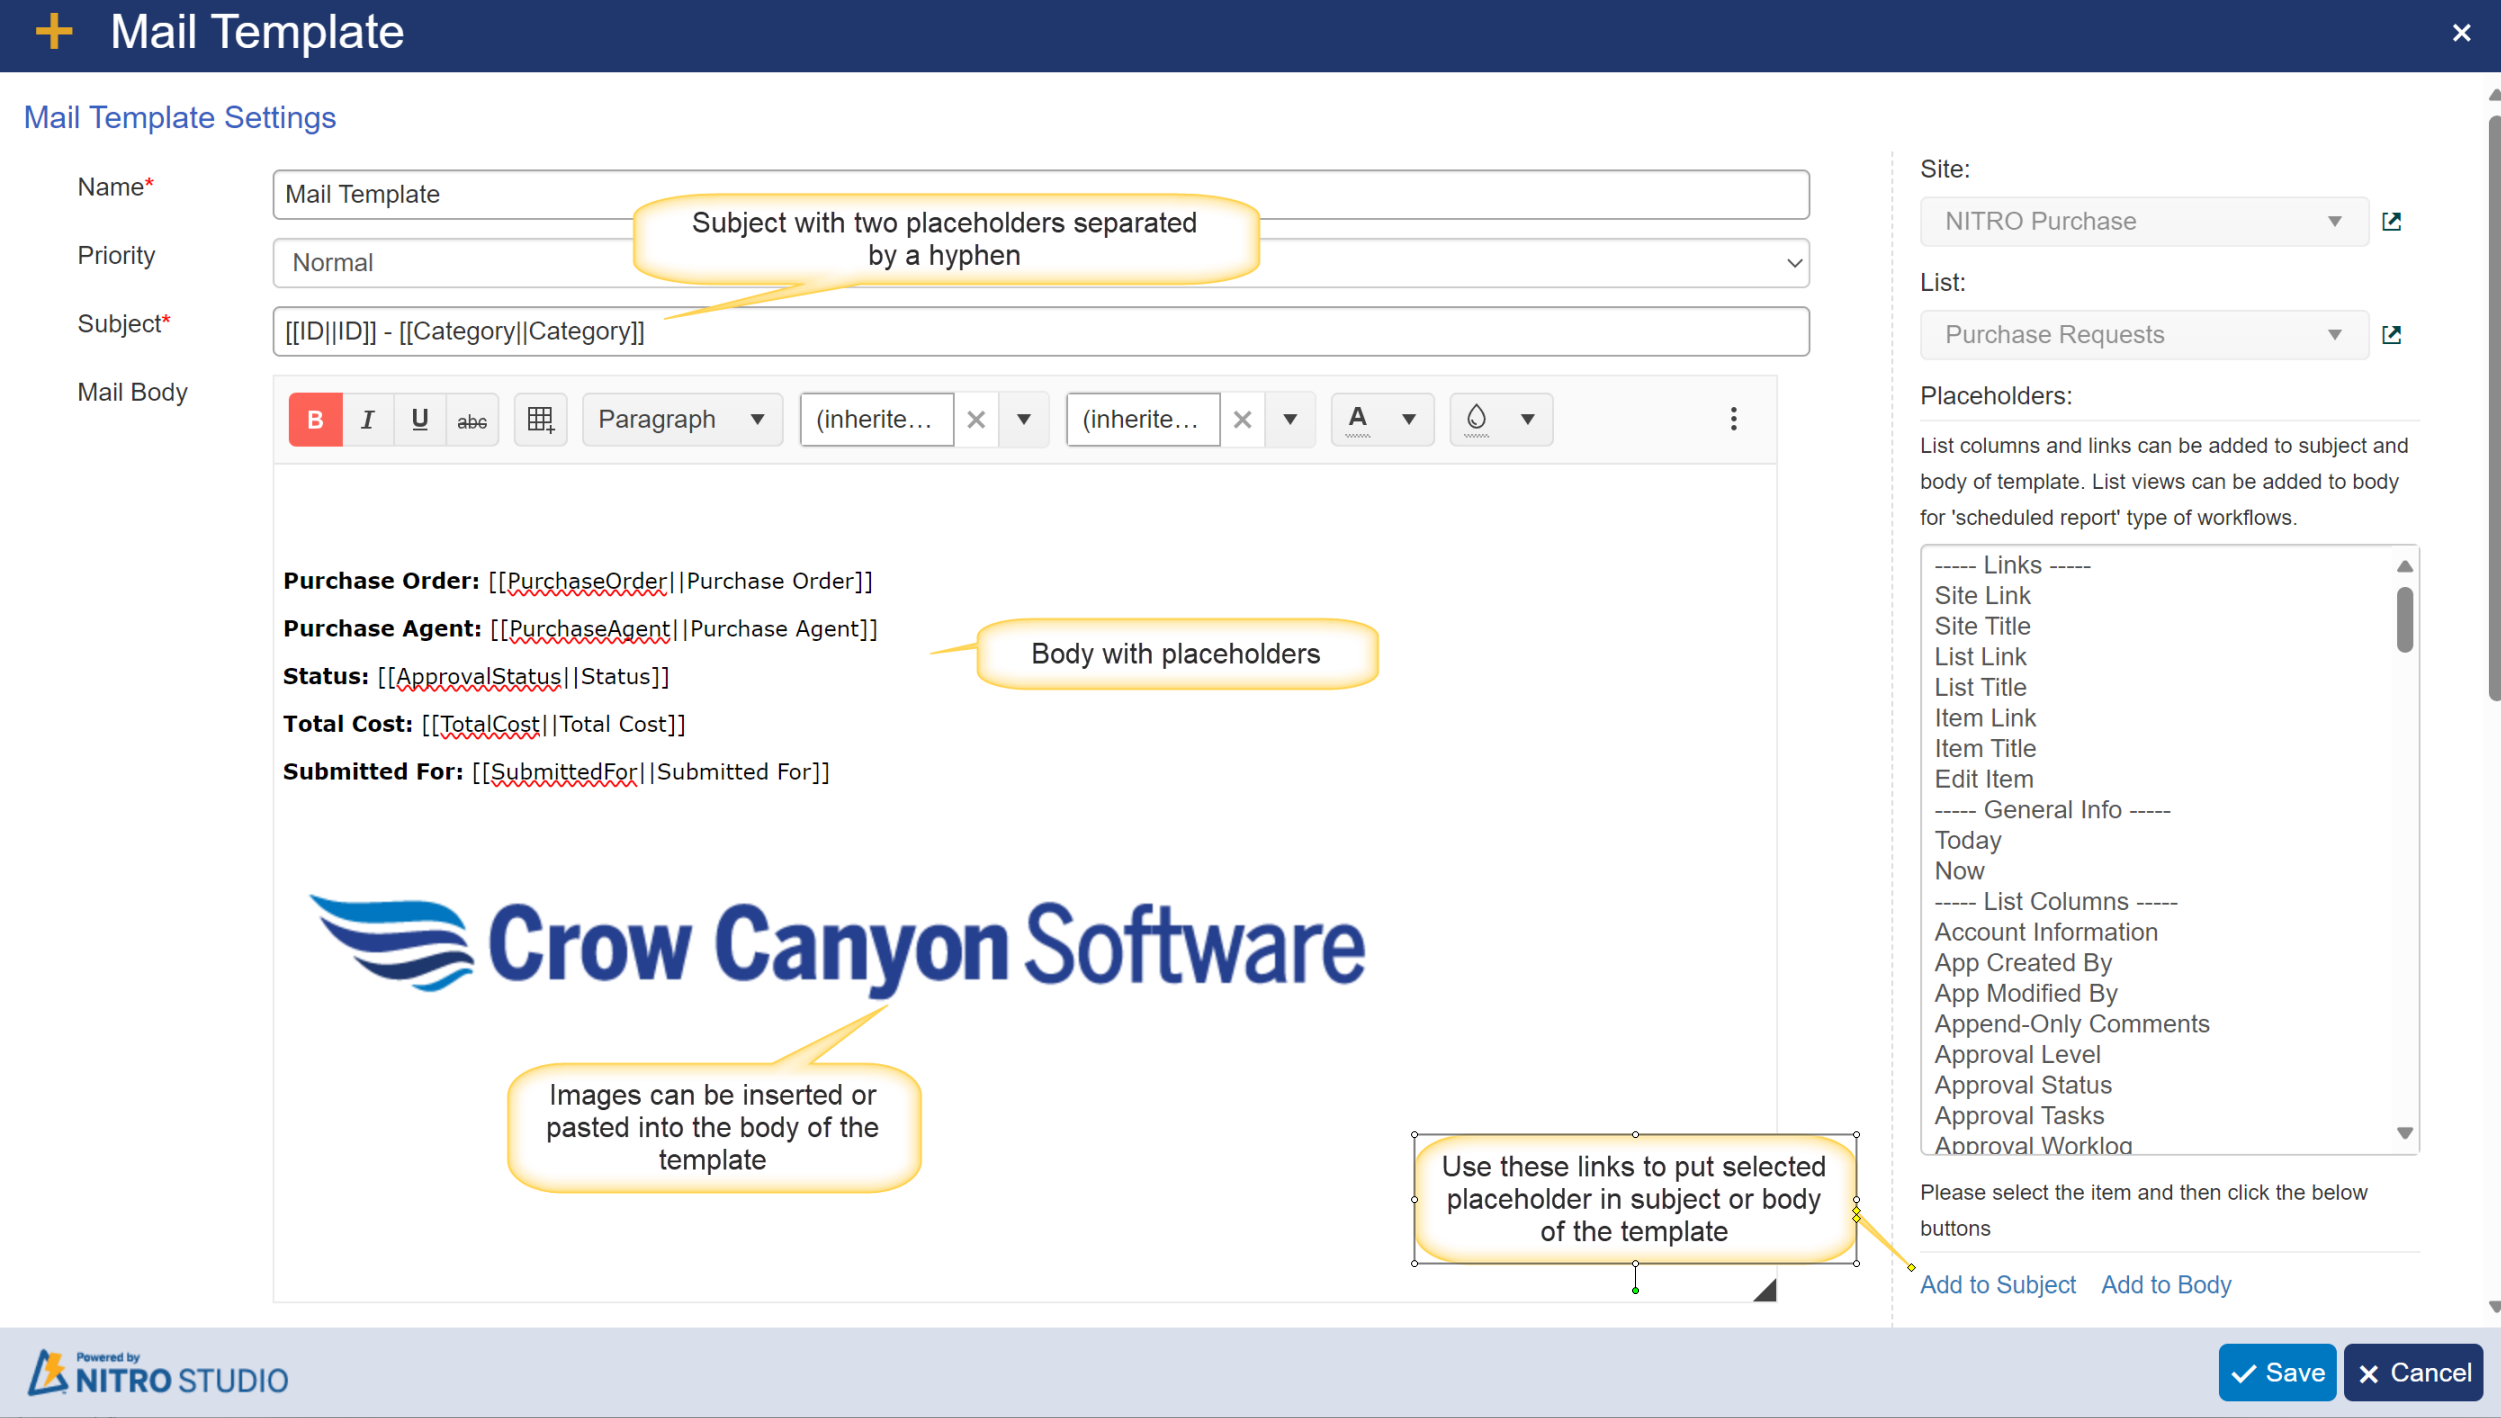
Subject: provide the subject of the email. This can have Placeholders in it.
Mail Body: specify the body(main Text) of the email, which can include rich-text formatting. In mail body sender canspecify the main purpose of email.This can have Placeholders in it.
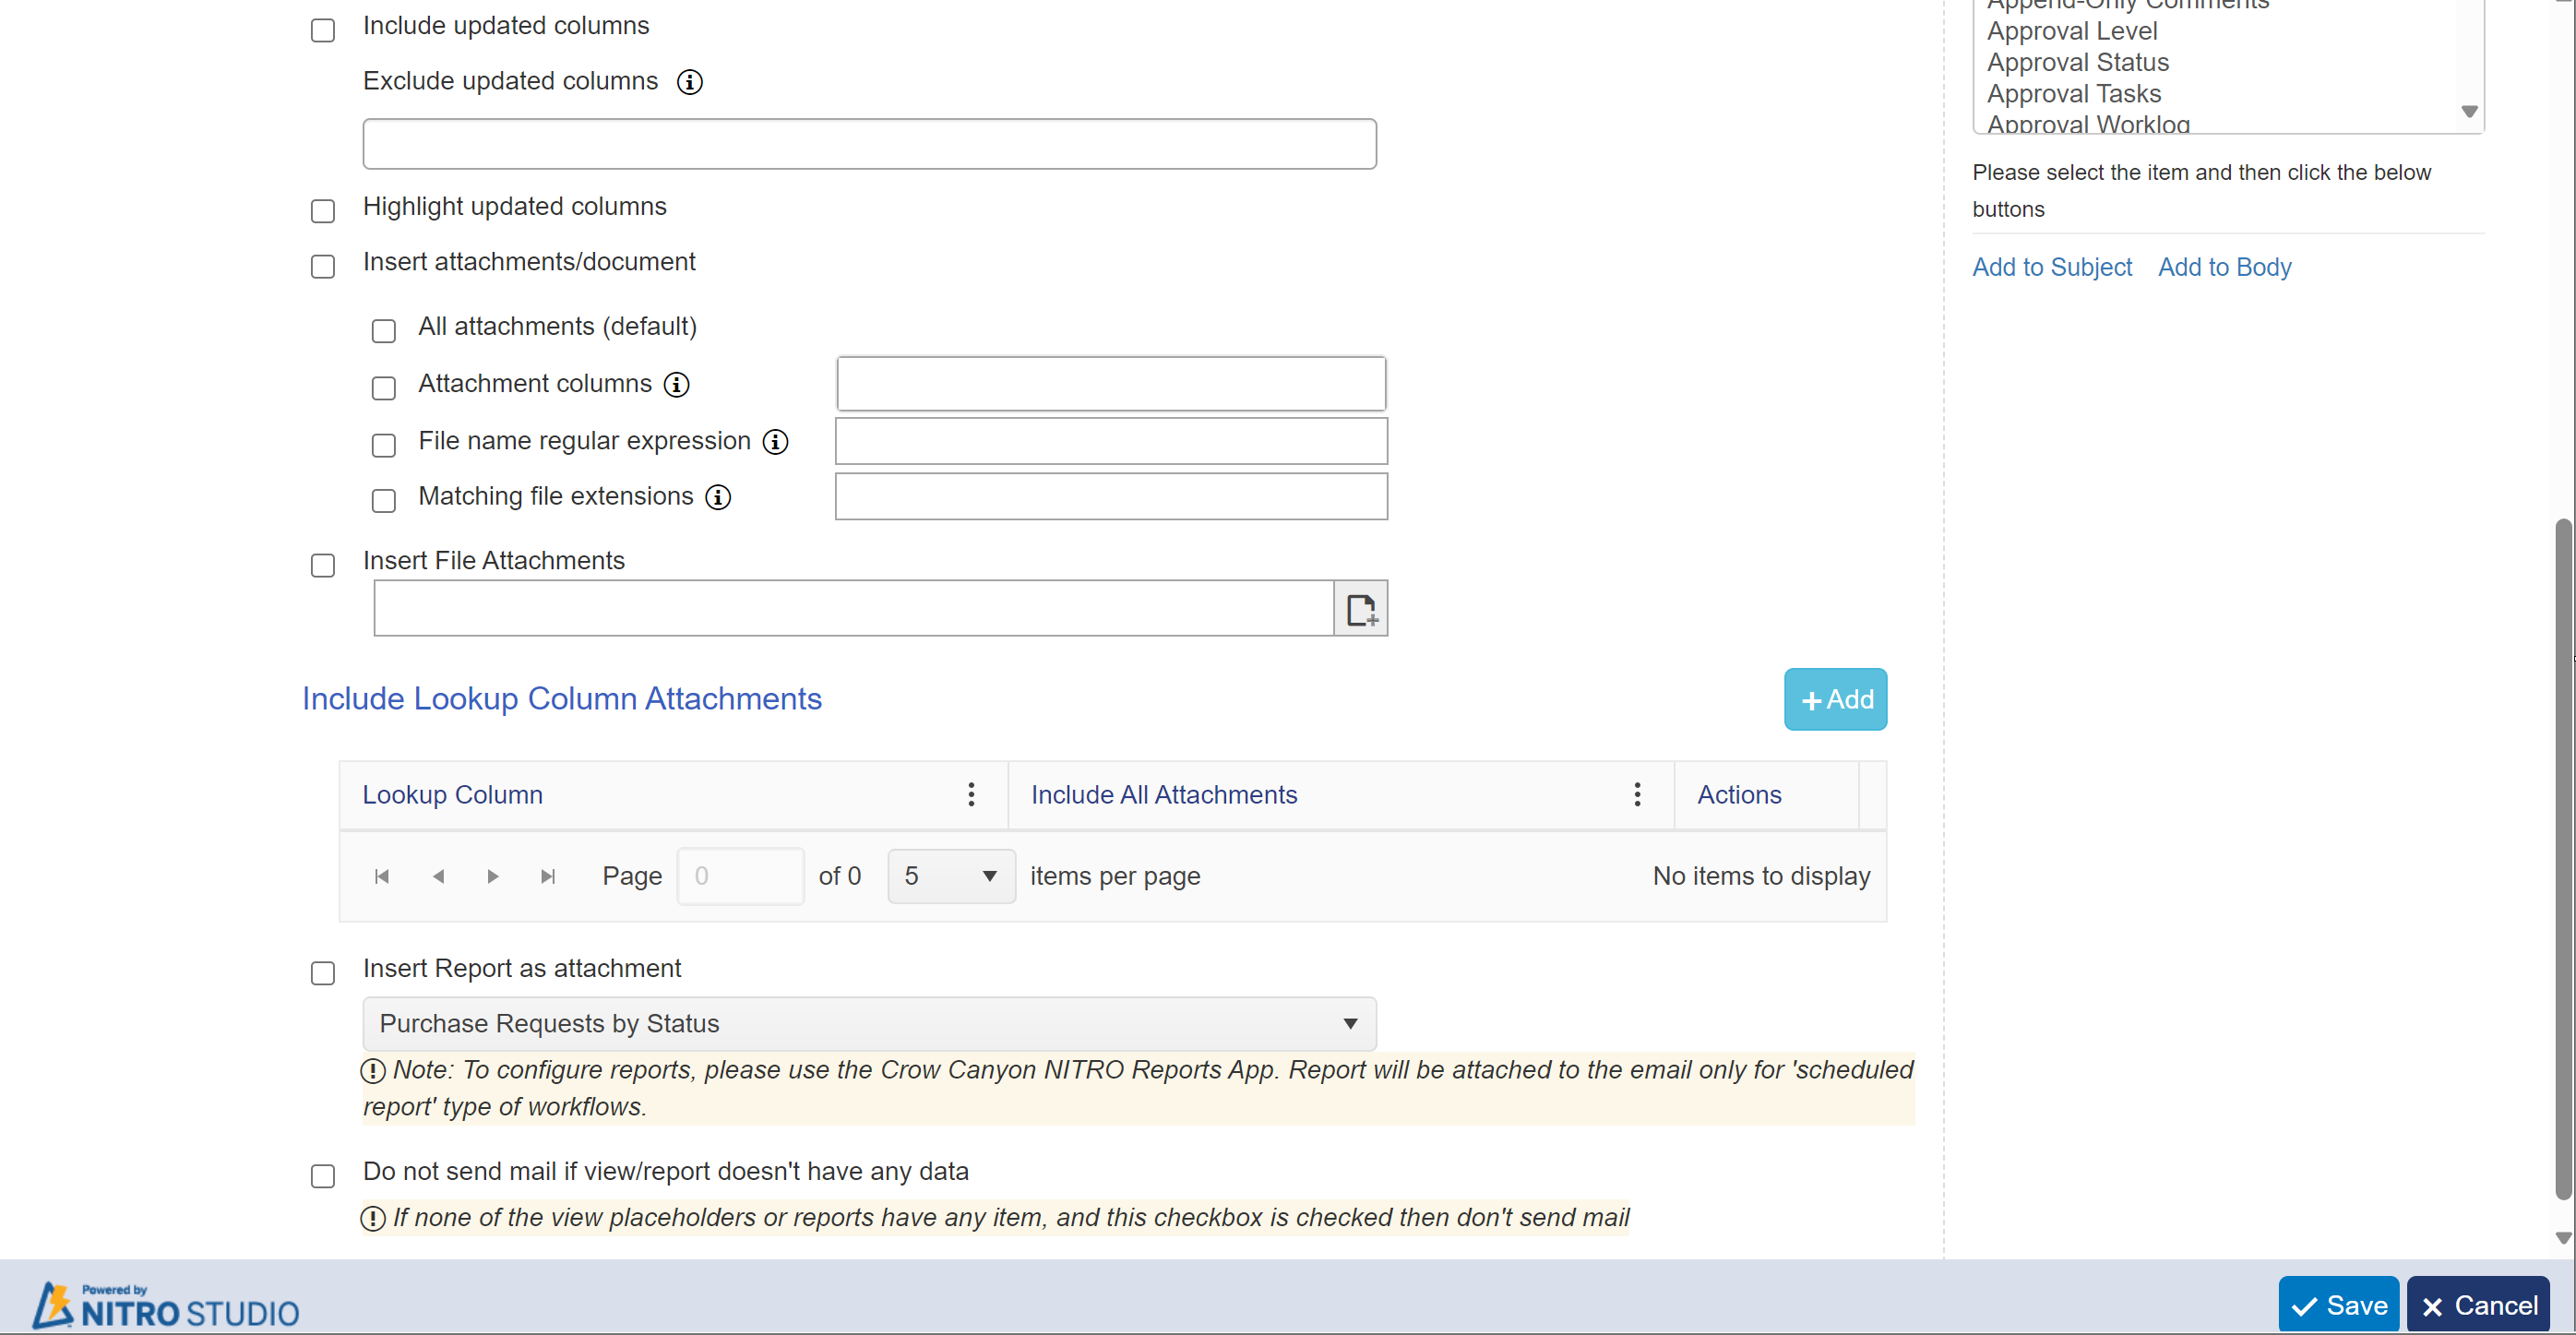
Include updated columns: any columns that have been updated will be included in the email.
Exclude update columns: do not include the updated columns designated in the box.
The format to identify the excluded columns is: [[Column internal name || Column display name]]
for multiple columns: [[Column1 internal name||Column1 display name]] [[Column2 internal name||Column2 display name]] ... (etc.)
Highlight updated columns: any updated columns that are included in the email will be highlighted.
Insert attachments/documents: Enabling this setting will allow you to insert columns, attachments and documents and will enable the “All attachments” default setting
• All Attachments: It will include all attachments in the mail.
• Attachment columns: Select one or more text type columns, or select NITRO Attachments.
• File name regular expression: Filter attachments/documents using regular expressions.
| Example: To match all pdf files with word Agreement in their name specify: .*Agreement.*.pdf |
• Matching file extensions: Filter attachments/documents by matching file extensions.
| Example: pdf;docx |
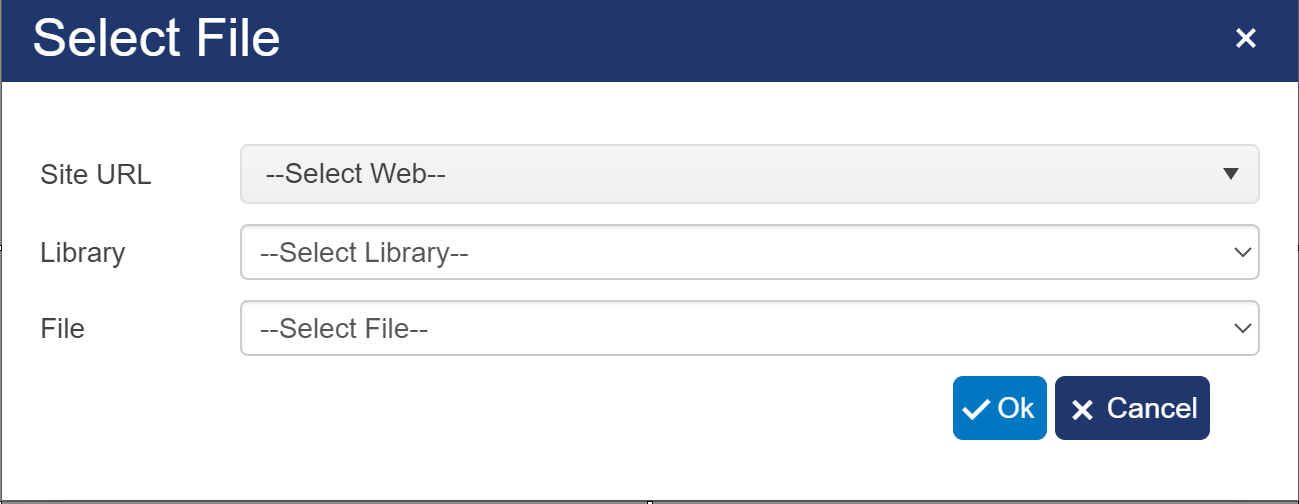
Insert File Attachments: Select this option to Insert SharePoint file(s) from library by clicking '+' button
•Site URL: Select site URL from dropdown
•Library: dropdown will show all library of selected site in above step. Select library from which you want to attach file.
•File: Select file name (from the selected library in above step) that you want to attach in the email.
Insert Lookup Column Attachments: To insert attachments from lookup column, click 'Add' button. A window will pop up
Select lookup column from dropdown. 'All attachments' is by default selected. this will include all attachments of selected lookup column in email.
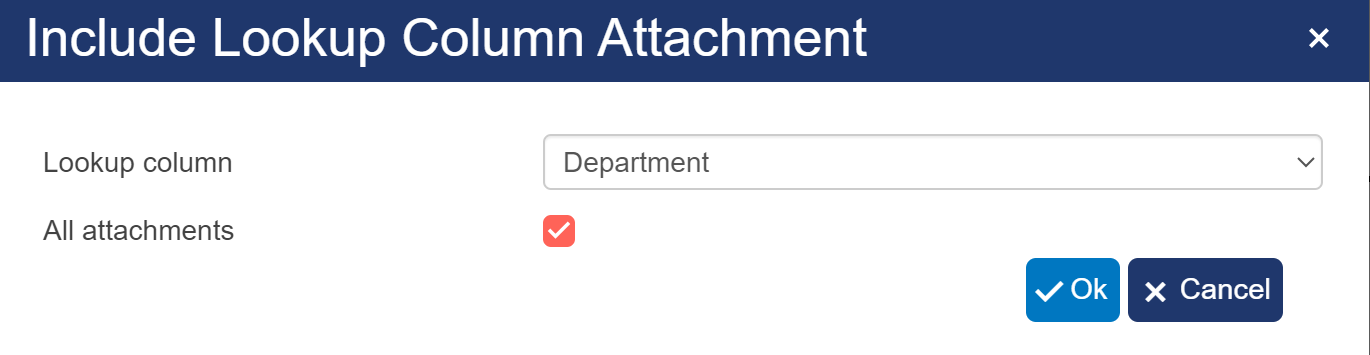
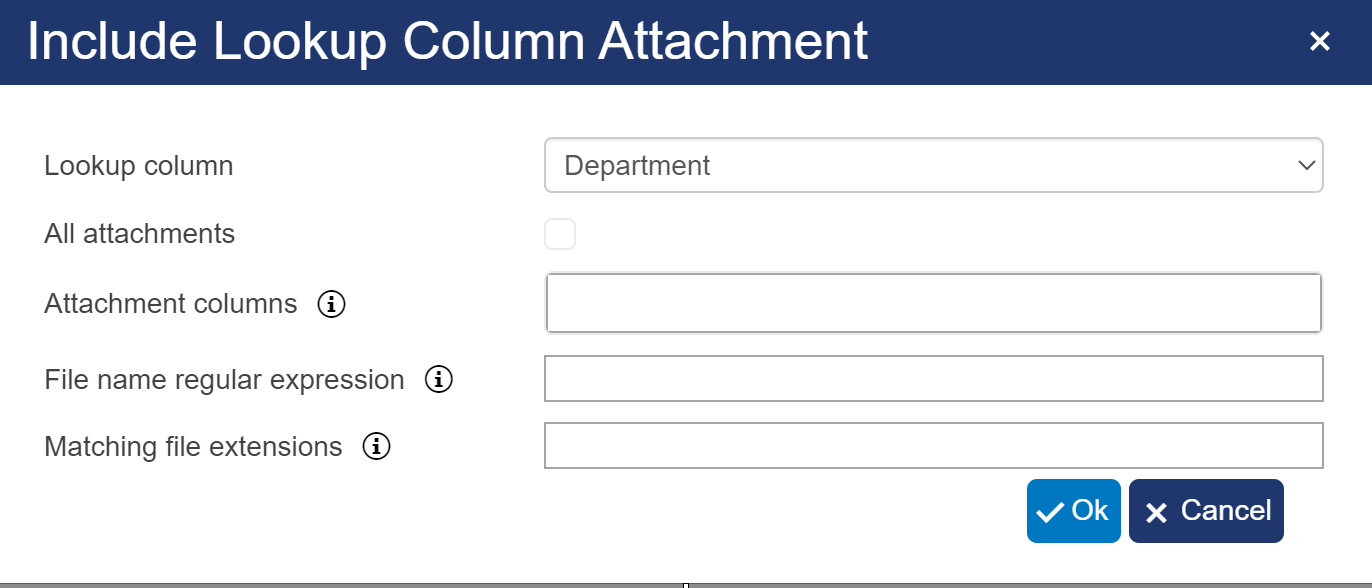
If you don't want to include all attachments of lookup column then deselect 'All attachments'. following columns will be visible after deselecting 'All attachments'
• Attachment columns: Select one or more text type columns, or select NITRO Attachments.
• File name regular expression: Filter attachments/documents using regular expressions.
| Example: To match all pdf files with word Agreement in their name specify: .*Agreement.*.pdf |
• Matching file extensions: Filter attachments/documents by matching file extensions.
| Example: pdf;docx |
Insert Report as Attachments: Select this option to insert report as attachment in email. From dropdown user can select report to attach with email.
To configure reports, please use the Crow Canyon NITRO Reports App. Report will be attached to the email only for 'scheduled report' type of workflows.

Do not send mail if view/report doesn't have any data: Select this option to don't send mail if none of the view placeholders or reports have any item.

PLACEHOLDERS
List columns and links can be added to subject and body of template. List views can be added to body for 'secheduled report' type of workflows.
Select the list columns and links from 'Placeholders' option available on the right side of mail template and click "Add to Subject" or "Add to Body" buttons below the 'Placeholders' to put the selected list columns(placeholders) in the corresponding place.
The placeholders include Site and Item information as well as all the fields in the list where this mail template is being created.
"Site Link", "List Link", "item Link", and "Edit Item Link" will put a clickable URL in the email. "Site Title", "List Title", and "Item Title" will put the name as text, not as a clickable link.
Here is an example Template with placeholders in it:
To insert query list item link in mail template, please refer this article Query list item link in mail template