When the NITRO Workflows app opens you will see this screen which shows any existing workflows and allows you to create new workflows.To edit a workflow click the pencil icon on the line of the workflow you want to edit. To create a new workflow follow the instructions below.
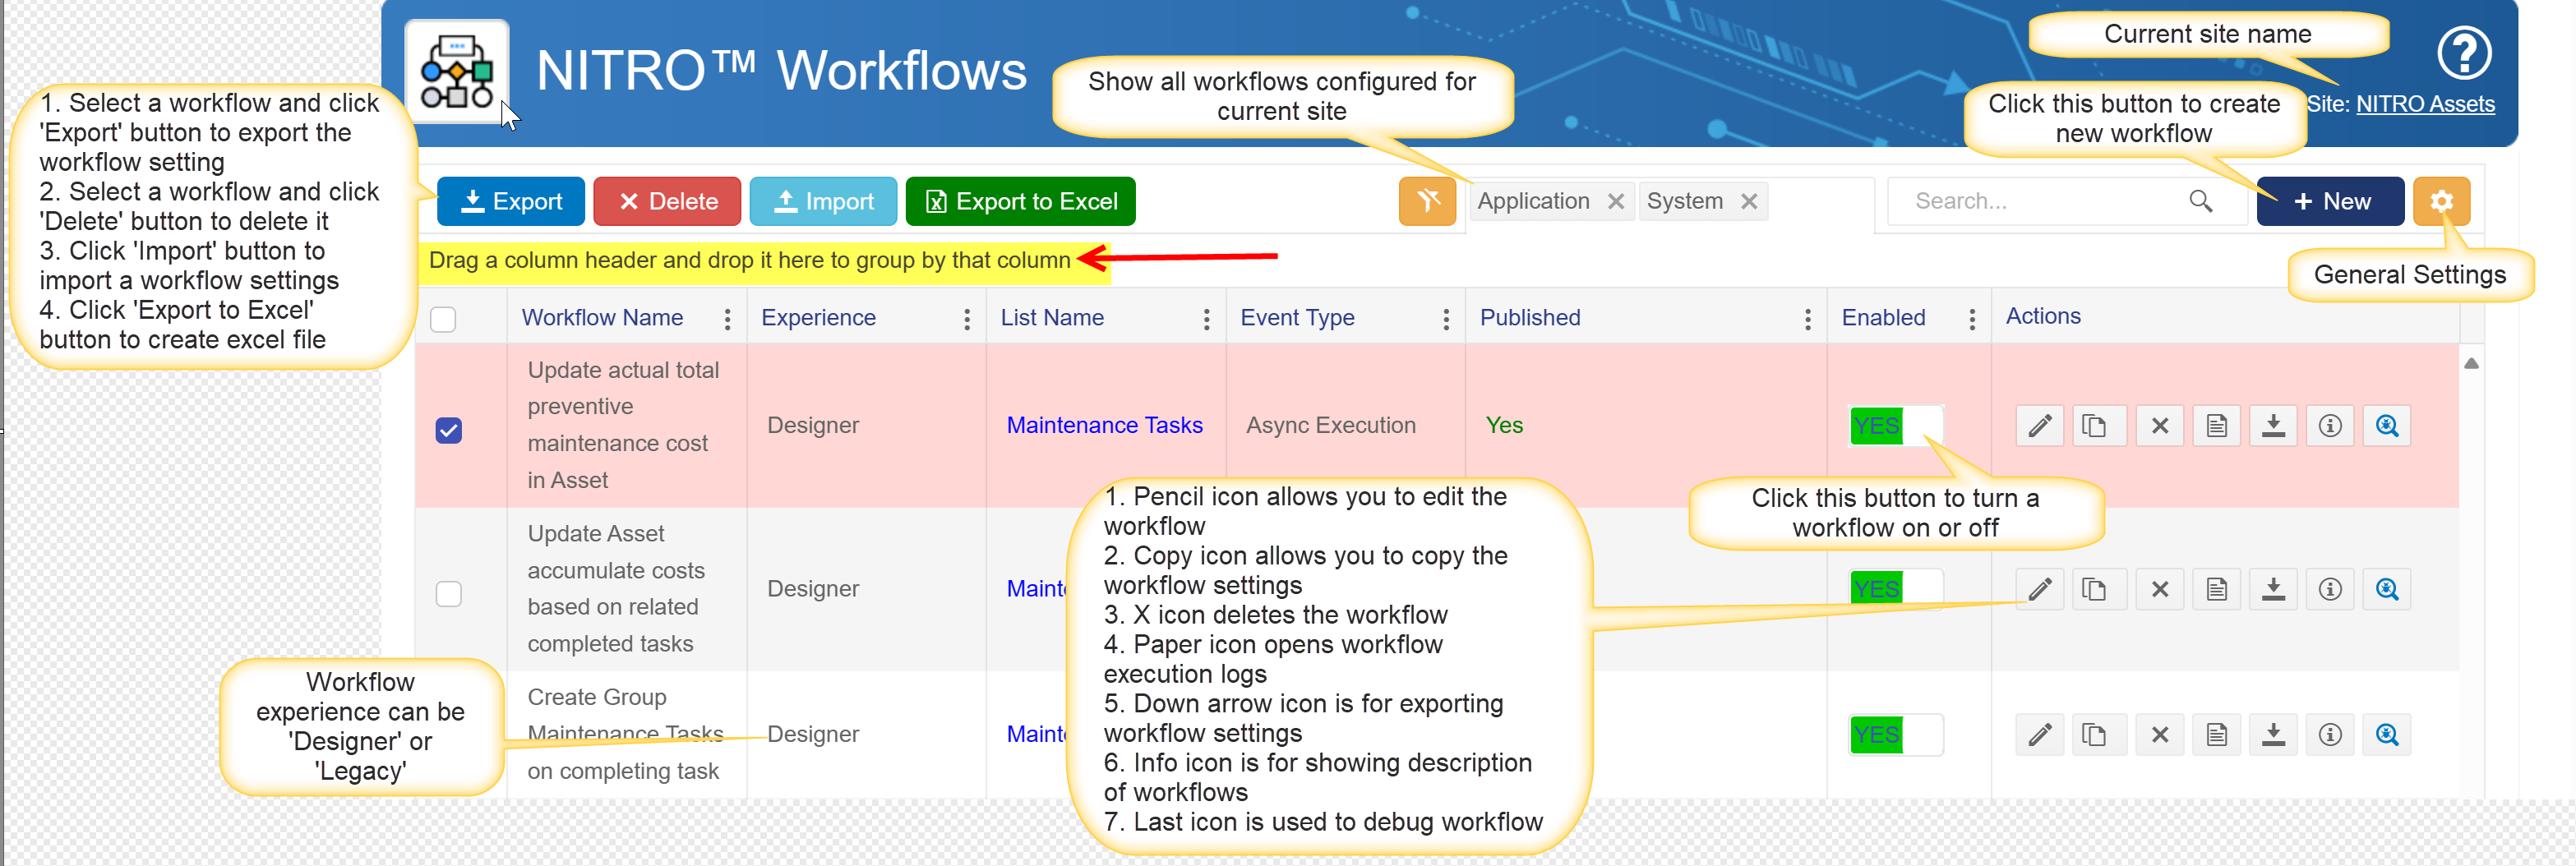
Create a New Workflow
To create a new workflow click 'New' button. following window will pop up
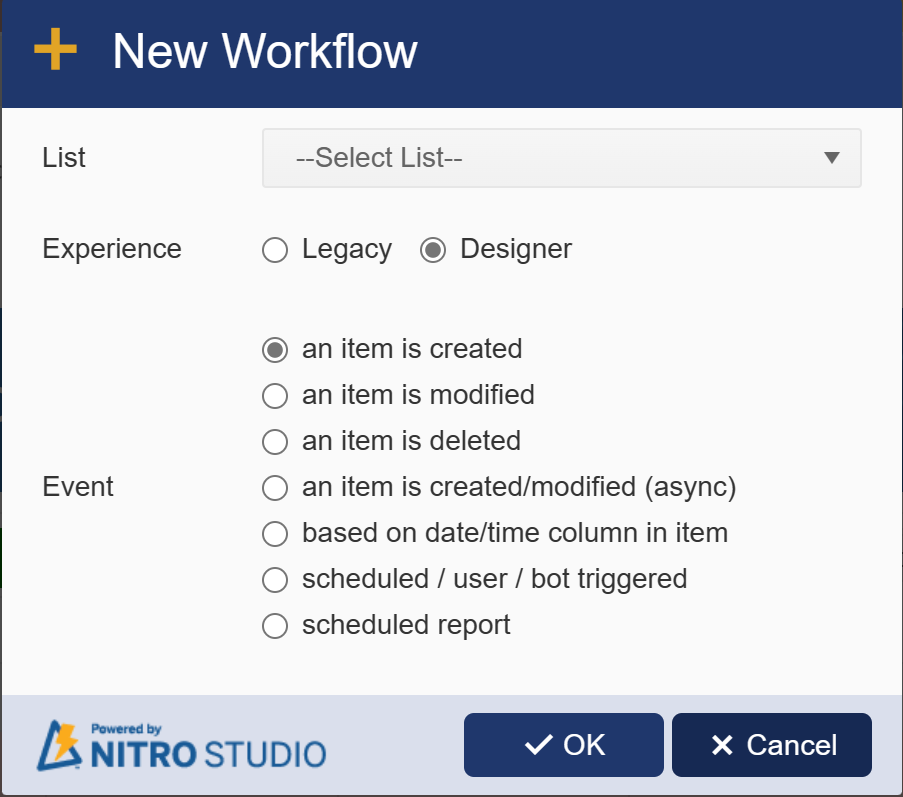
List: Select list name from dropdown for which you want to configure the workflow.
Experience: User can create 'Legacy' (Old experience) or 'Designer' workflow (New Experience)
Event: Select the type of event that triggers your workflow. Workflows can be triggered based upon data conditions such as list item creation, item update, and item deletion, or they can be be triggered by time (e.g. run at a certain time of day or time interval.)
Designer Workflow:
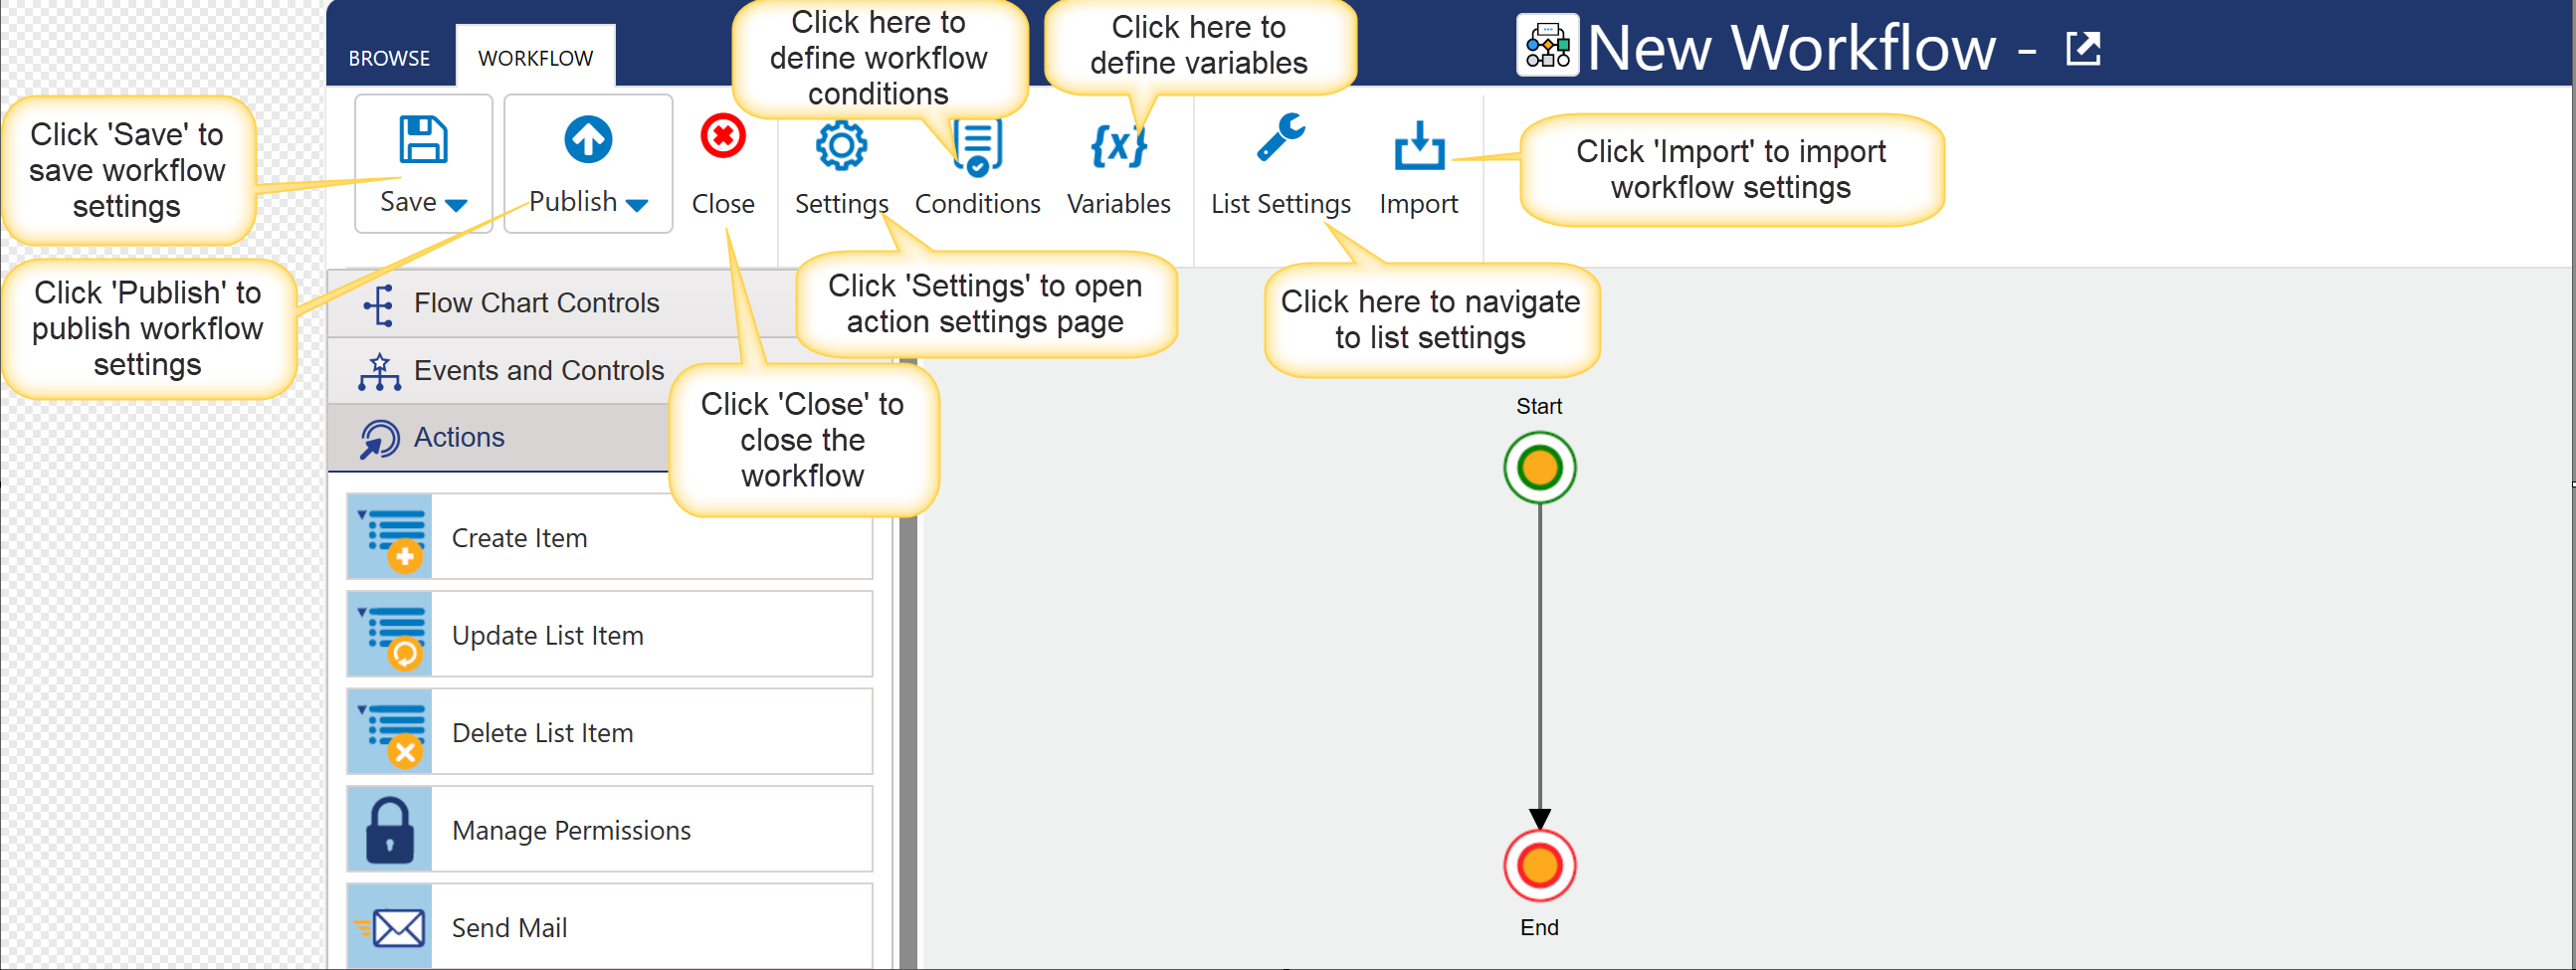
| Save: Click 'Save' button to save workflow settings |
| Publish: Click 'Publish' button to publish workflow settings |
| Close: Click 'Close' button to close the workflow |
| Settings: Click 'Settings' to open action settings page as shown below: |
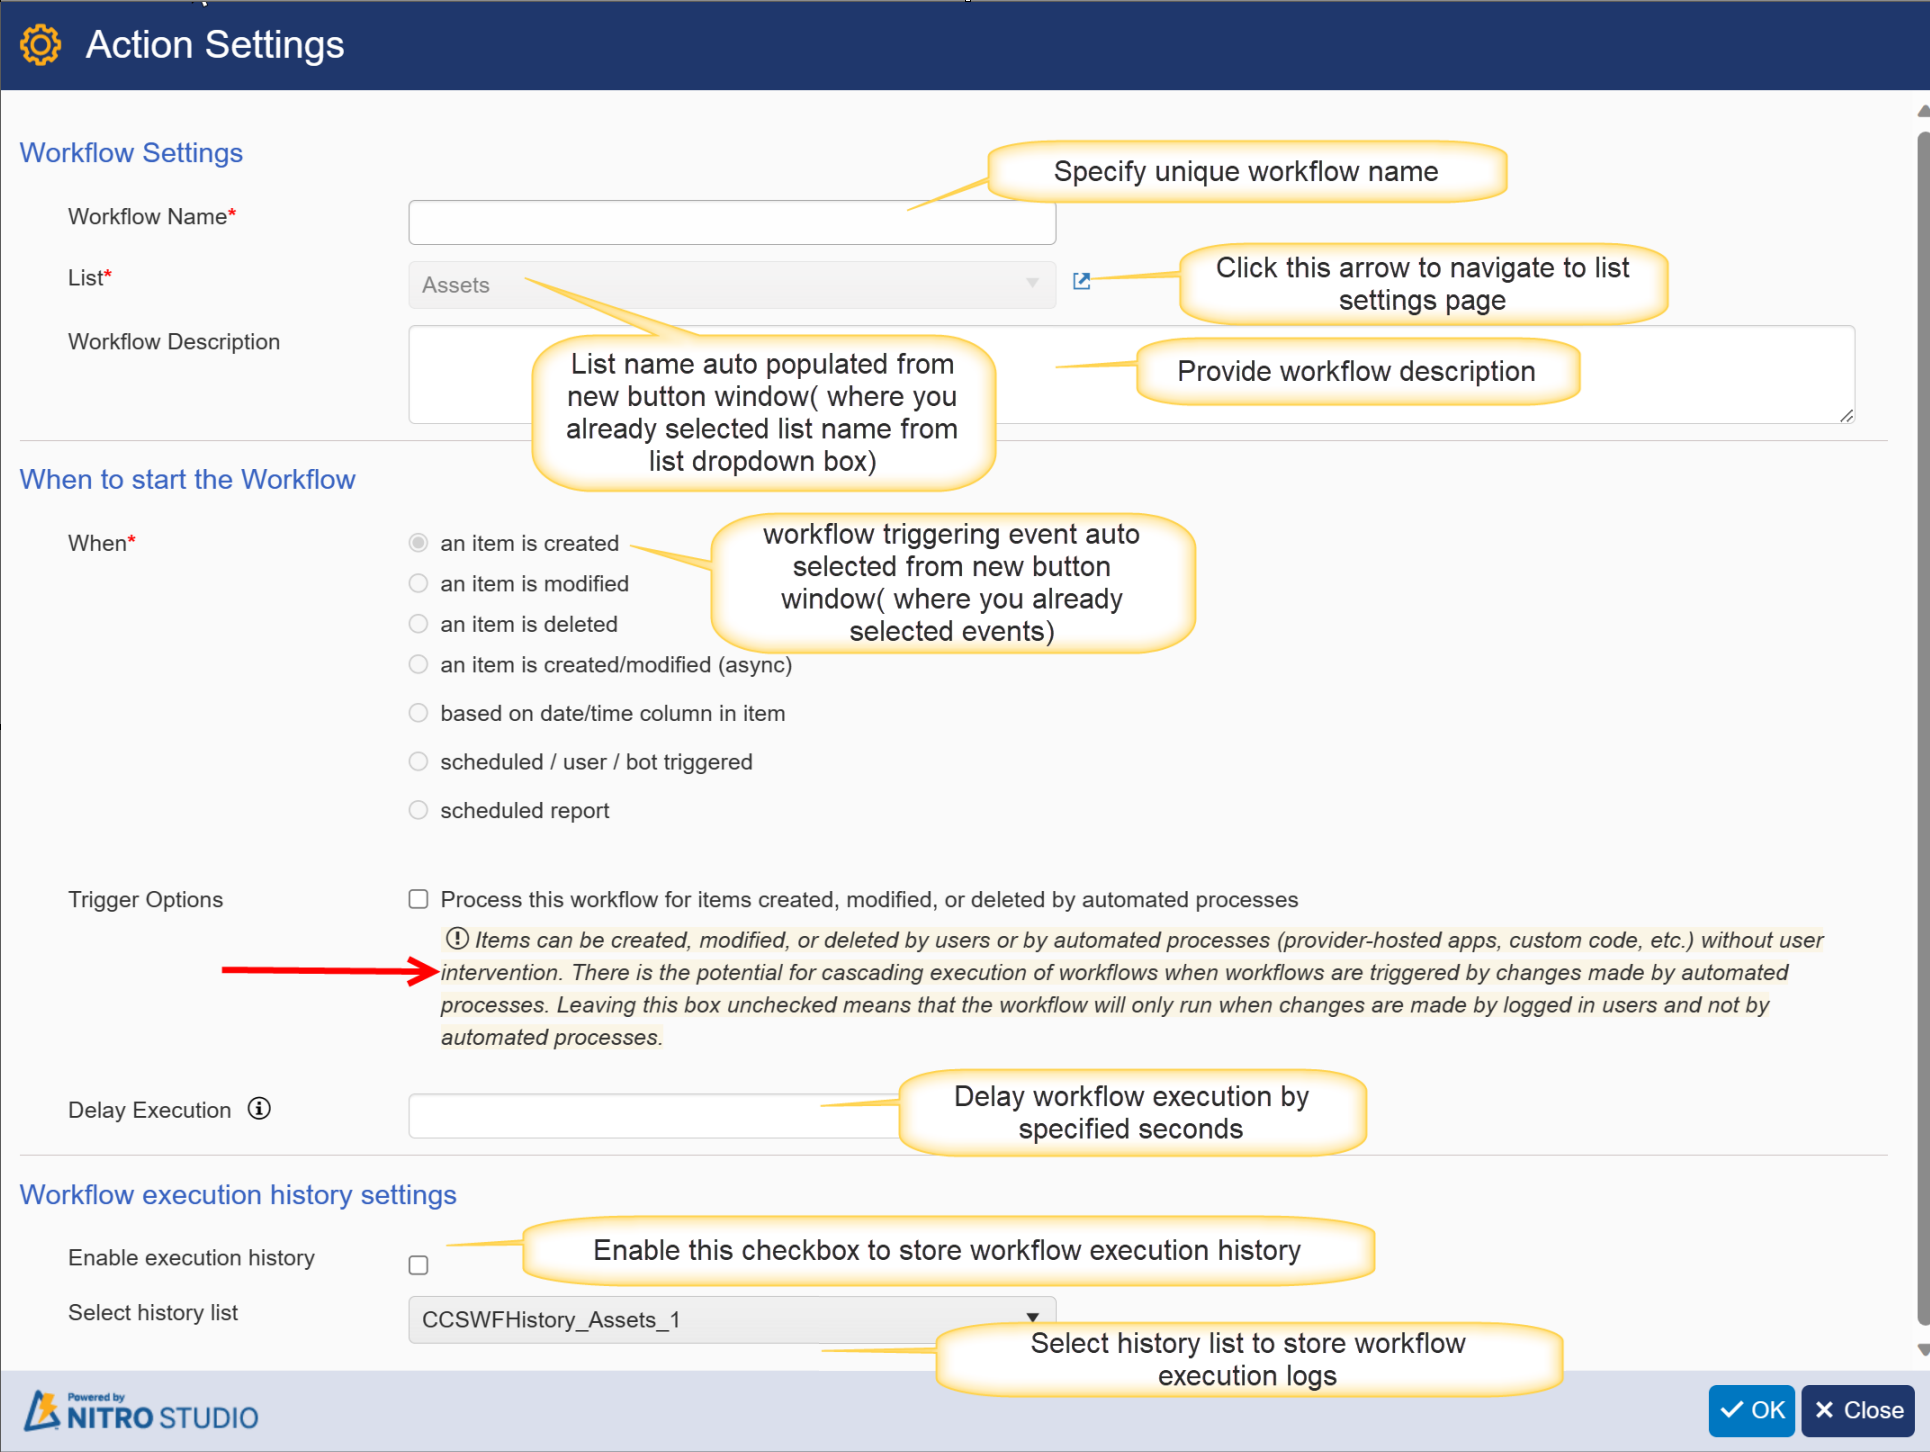
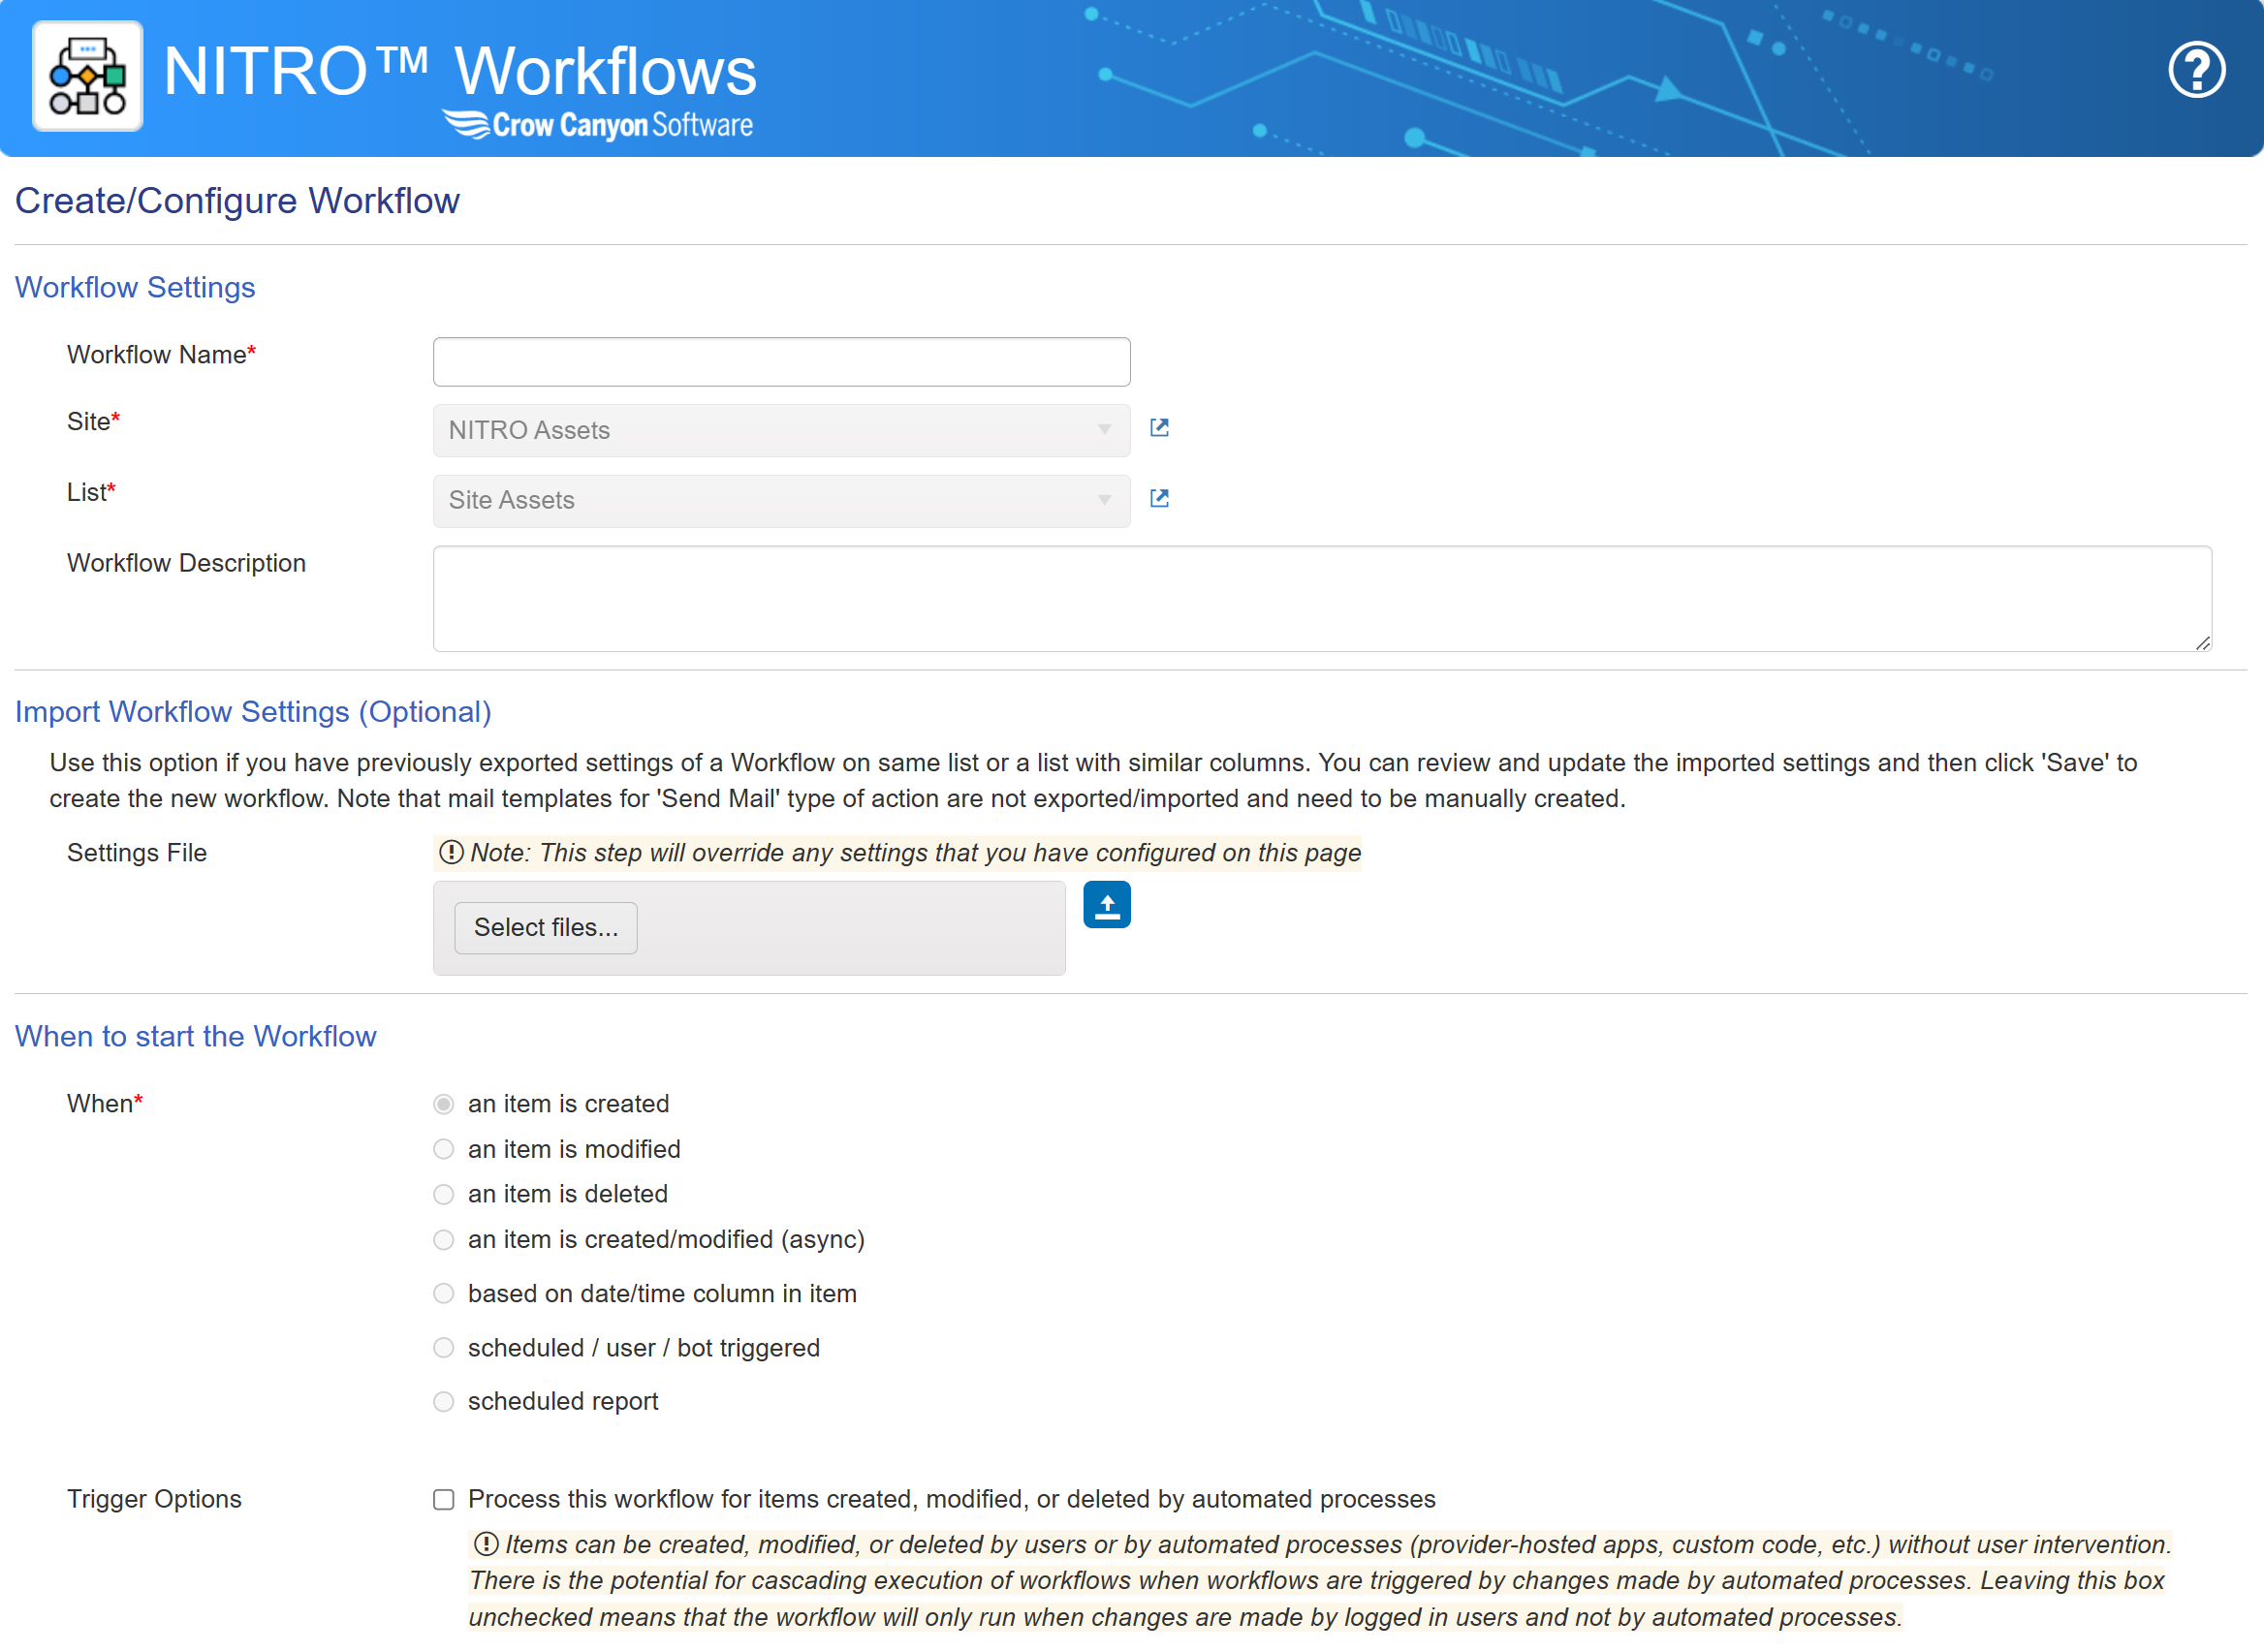
Workflow Name: Enter a unique Workflow Name.
List: Select the source list for the workflow.
Workflow Description: Enter in a description for the workflow for future reference, if desired. This description can later be shown using the  icon for the workflow on the main Workflow screen.
When: Select the type of event that triggers your workflow. Workflows can be triggered based upon data conditions such as list item creation, item update, and item deletion, or they can be be triggered by time (e.g. run at a certain time of day or time interval.) You can also set conditions to further limit when the workflow is triggered.
Data-based events can occur when
1.an item is created - triggered when a new item is added to selected list
2.an item is modified - triggered when an existing item is modified in the selected list
3.an item is deleted - triggered when an existing item is deleted in the selected list
Time based events can be setup at a time before or after an item is created, modified or deleted, or they can be set to repeat at some interval.
In the example below the workflow timer runs every 30 minutes, and all the workflows defined to be run in the past 30 minutes are evaluated. Note a workflow cannot run more frequently than every 30 minutes.
Repeat every - if this option is checked then the workflow will run repeatedly at the specified interval until the number of times has been met. In this example the workflow runs every 30 minutes for 2 times then will stop.
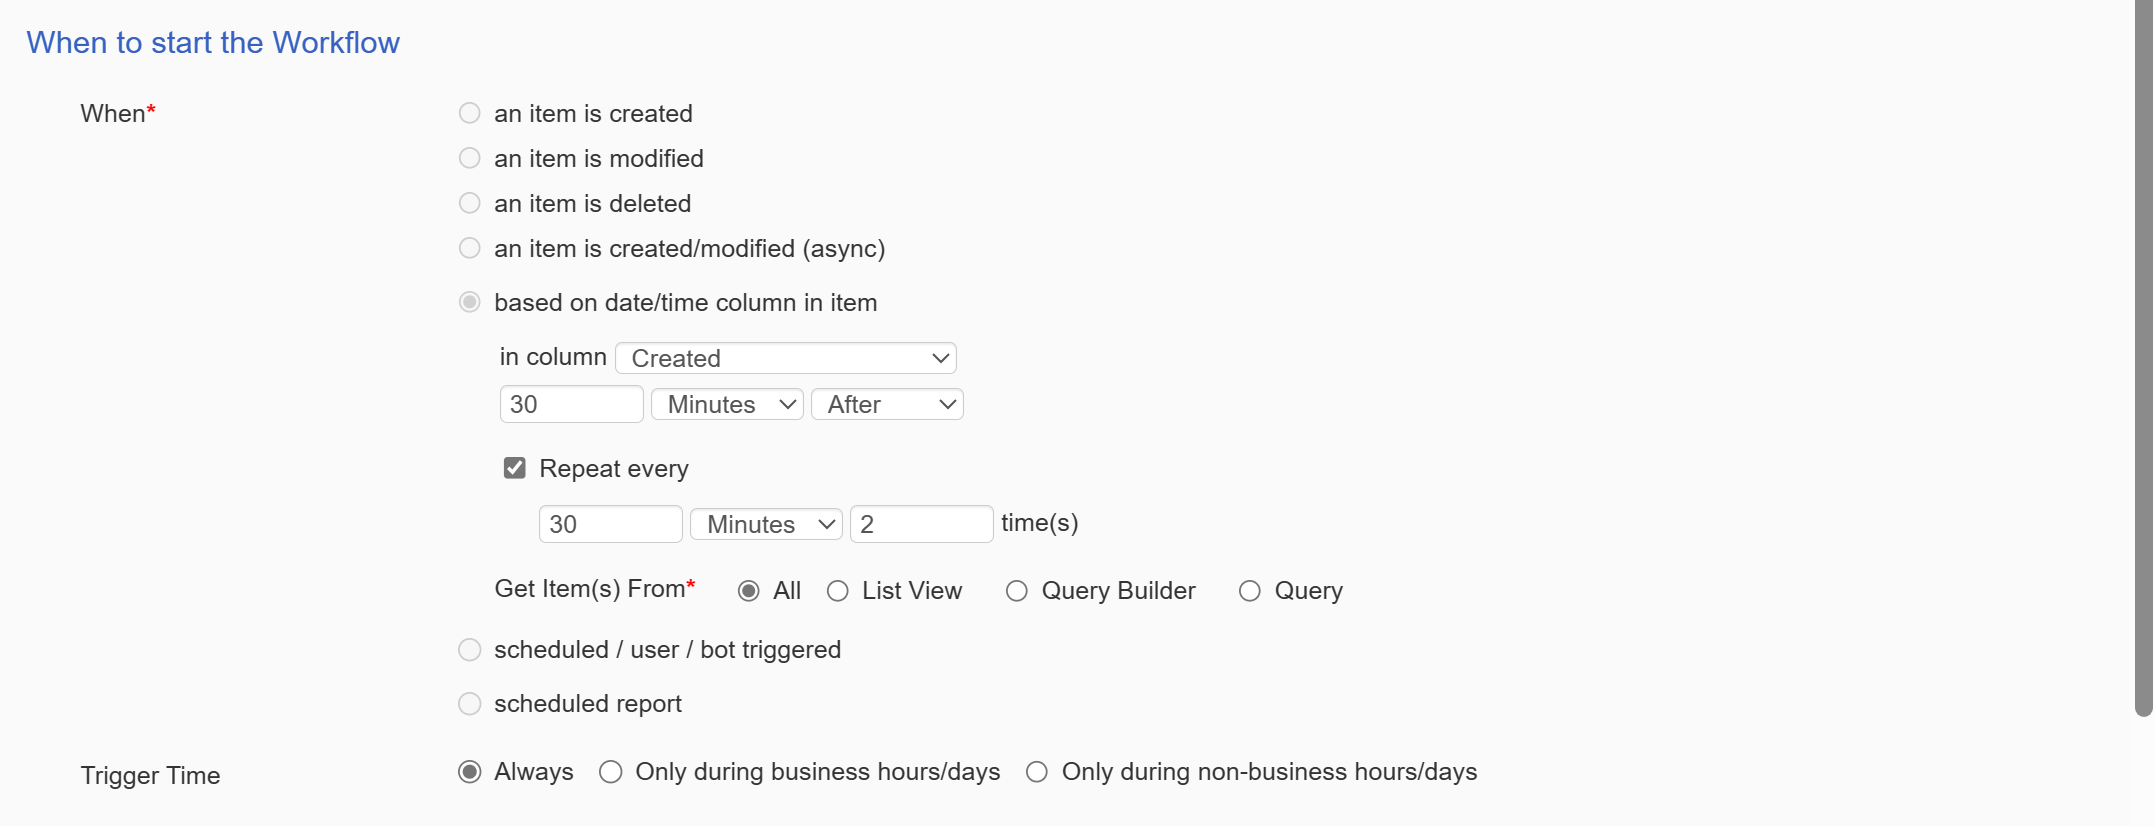
Trigger Time: It supports three options
Always: If this check box is checked, the workflow will be triggered always.
Only during business hours/days - If this check box is checked, the workflow will be triggered only in O365 site business hours.
Only during non-business hours/days - If this check box is checked, the workflow will be triggered during non business hours.
Trigger Options: Process this workflow for items created/modified/deleted by this App. If this check box is checked then Events will trigger when changes are made by automated processes
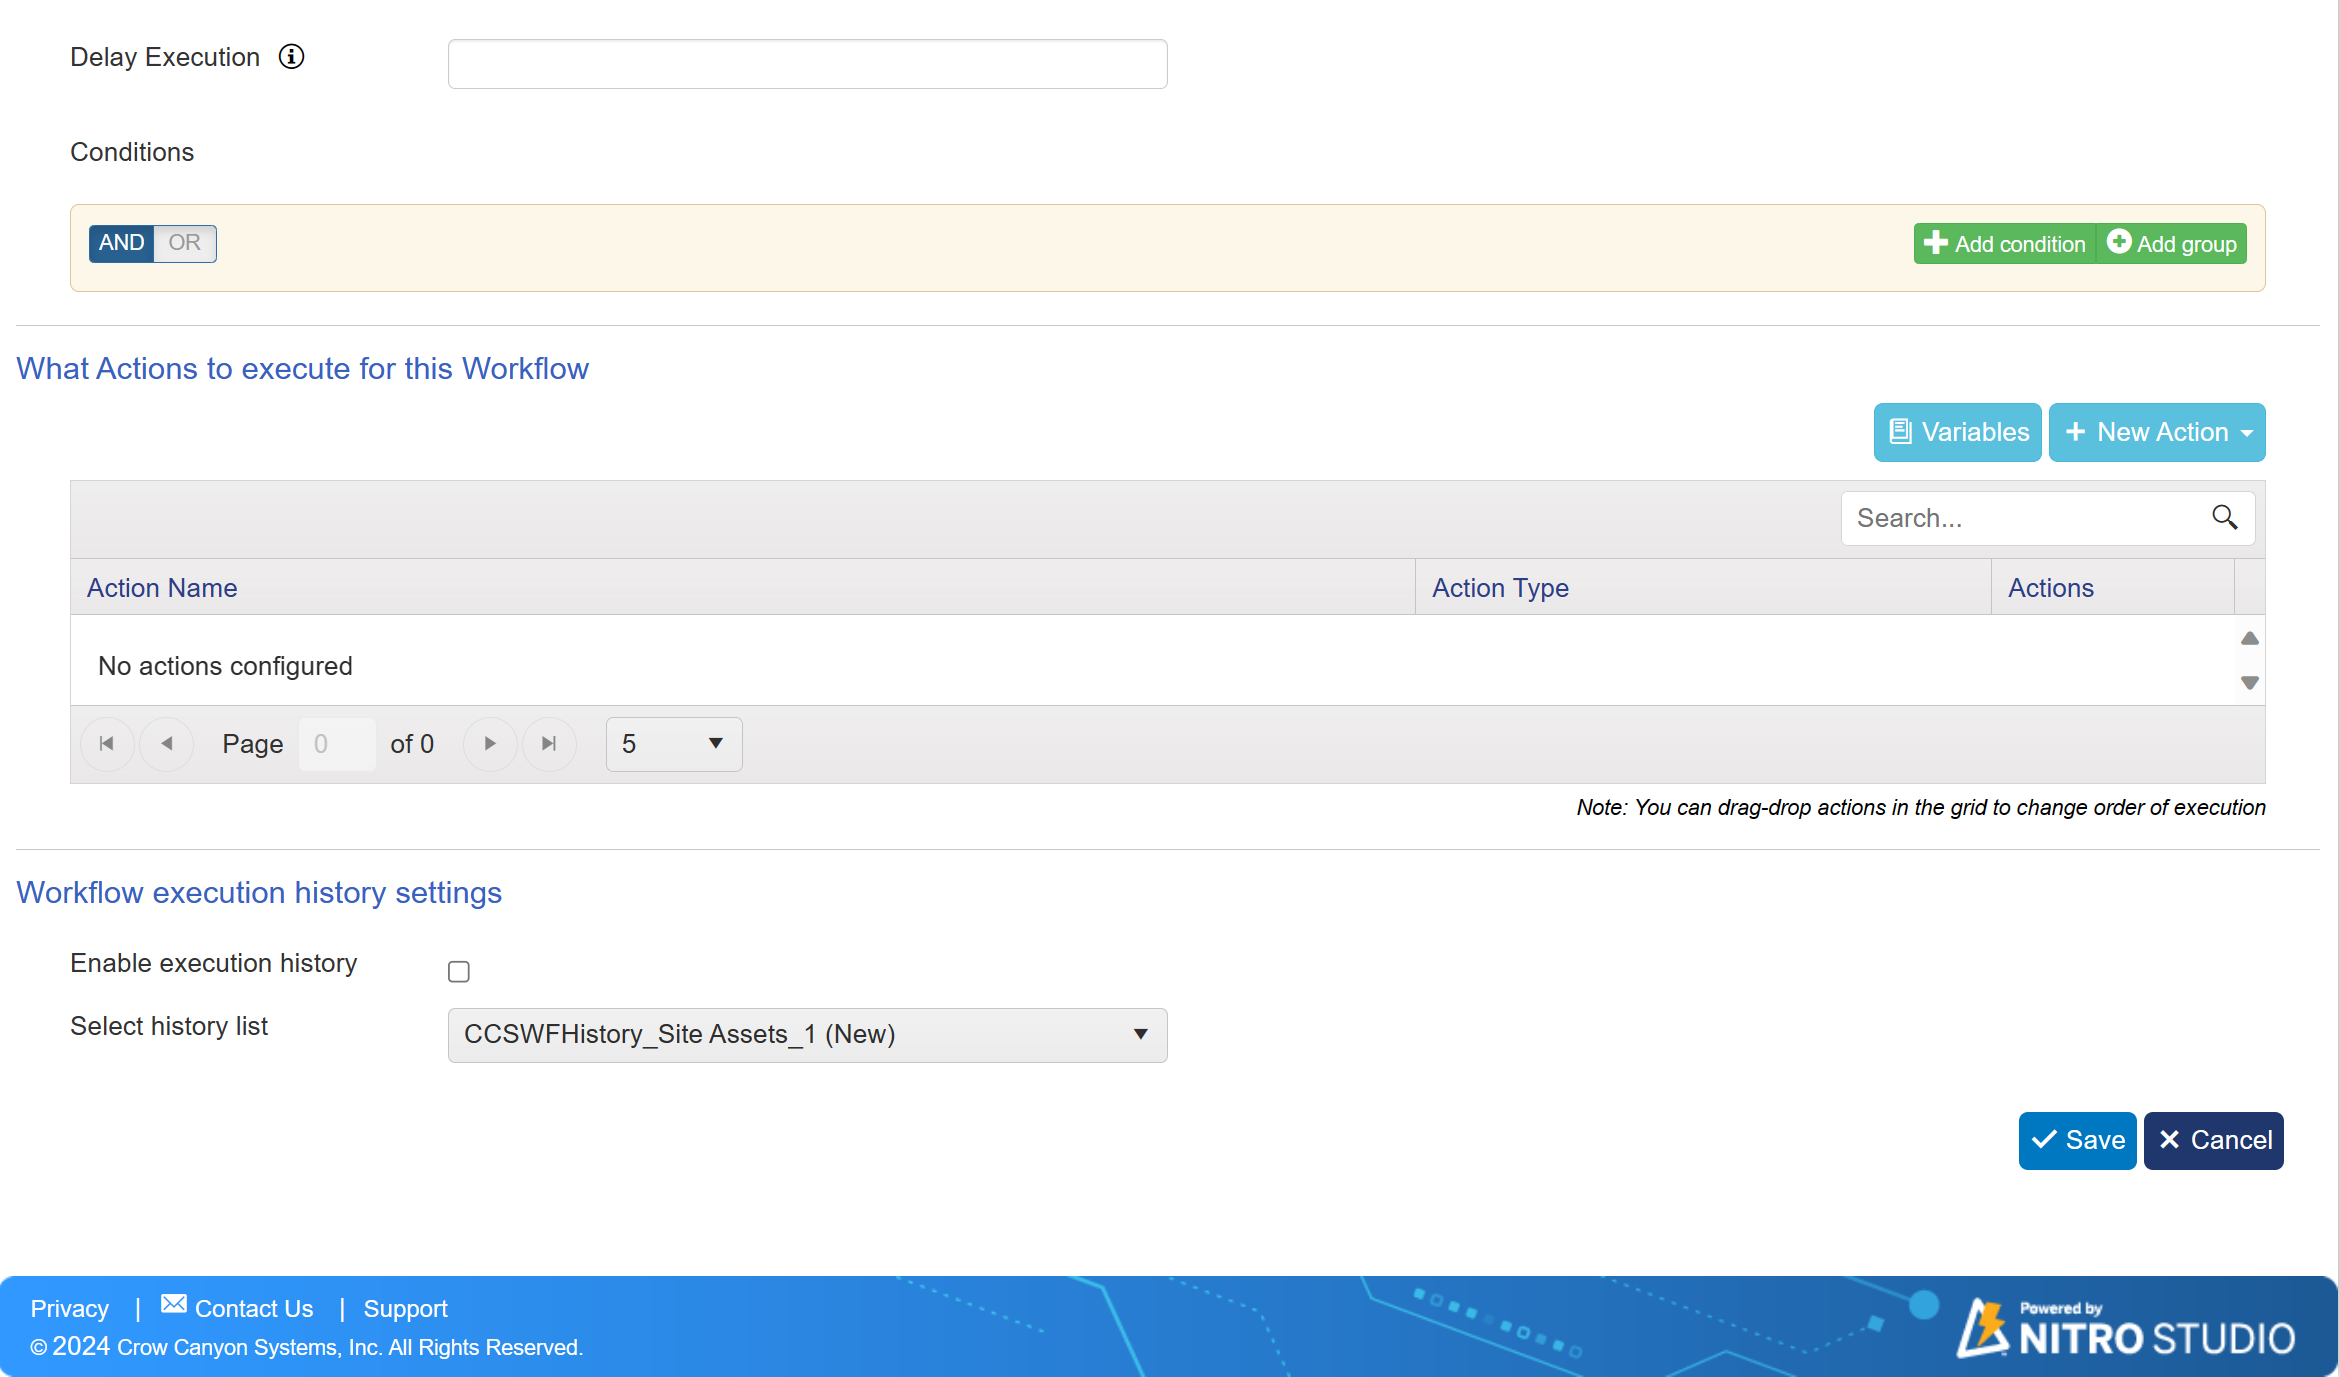
Delay Execution: Enter a number to delay workflow execution by specified seconds.
Note: Process this workflow for items created/modified/deleted by automated processes. If this check box is checked then the workflow will execute when the defined triggering event is set off by an app or custom code. You must use caution with this feature and ensure you don't set off a sequence of workflows with unintended consequences. If you do NOT check this checkbox, then workflow will only execute when users create, modify or delete item data according to the defined trigger conditions.
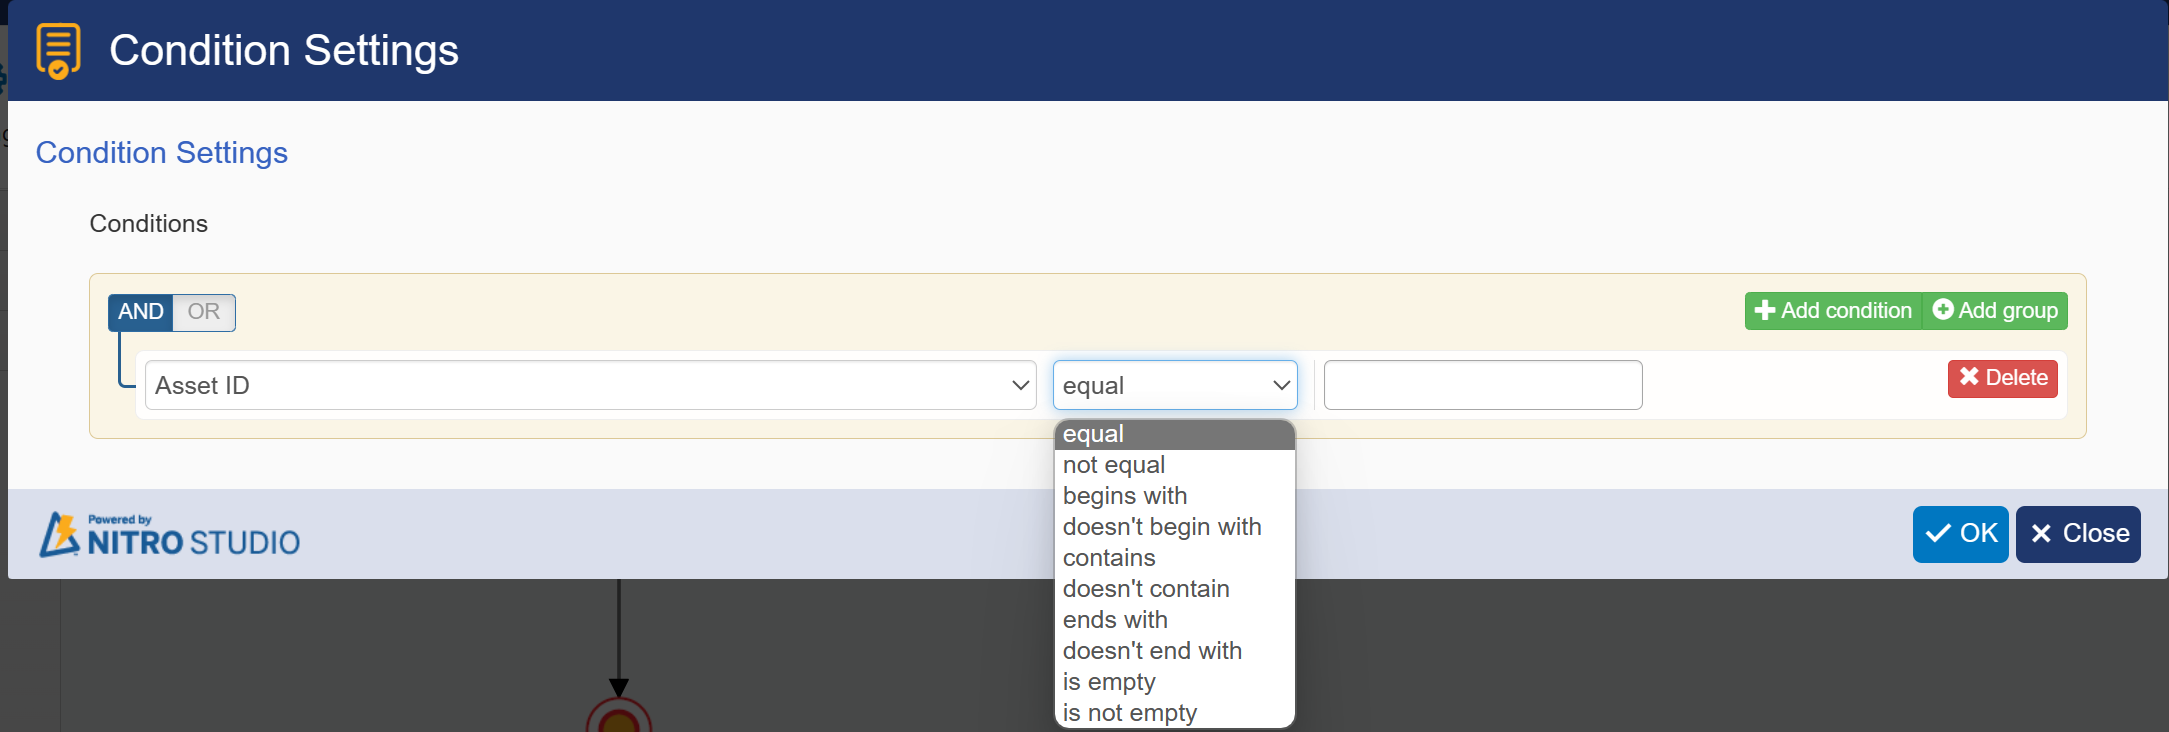
Conditions
Conditions that trigger your workflow can be narrowed to one or more column values. When you click on AND or OR you can select the field you want and set the comparison value based on its datatype as shown below.
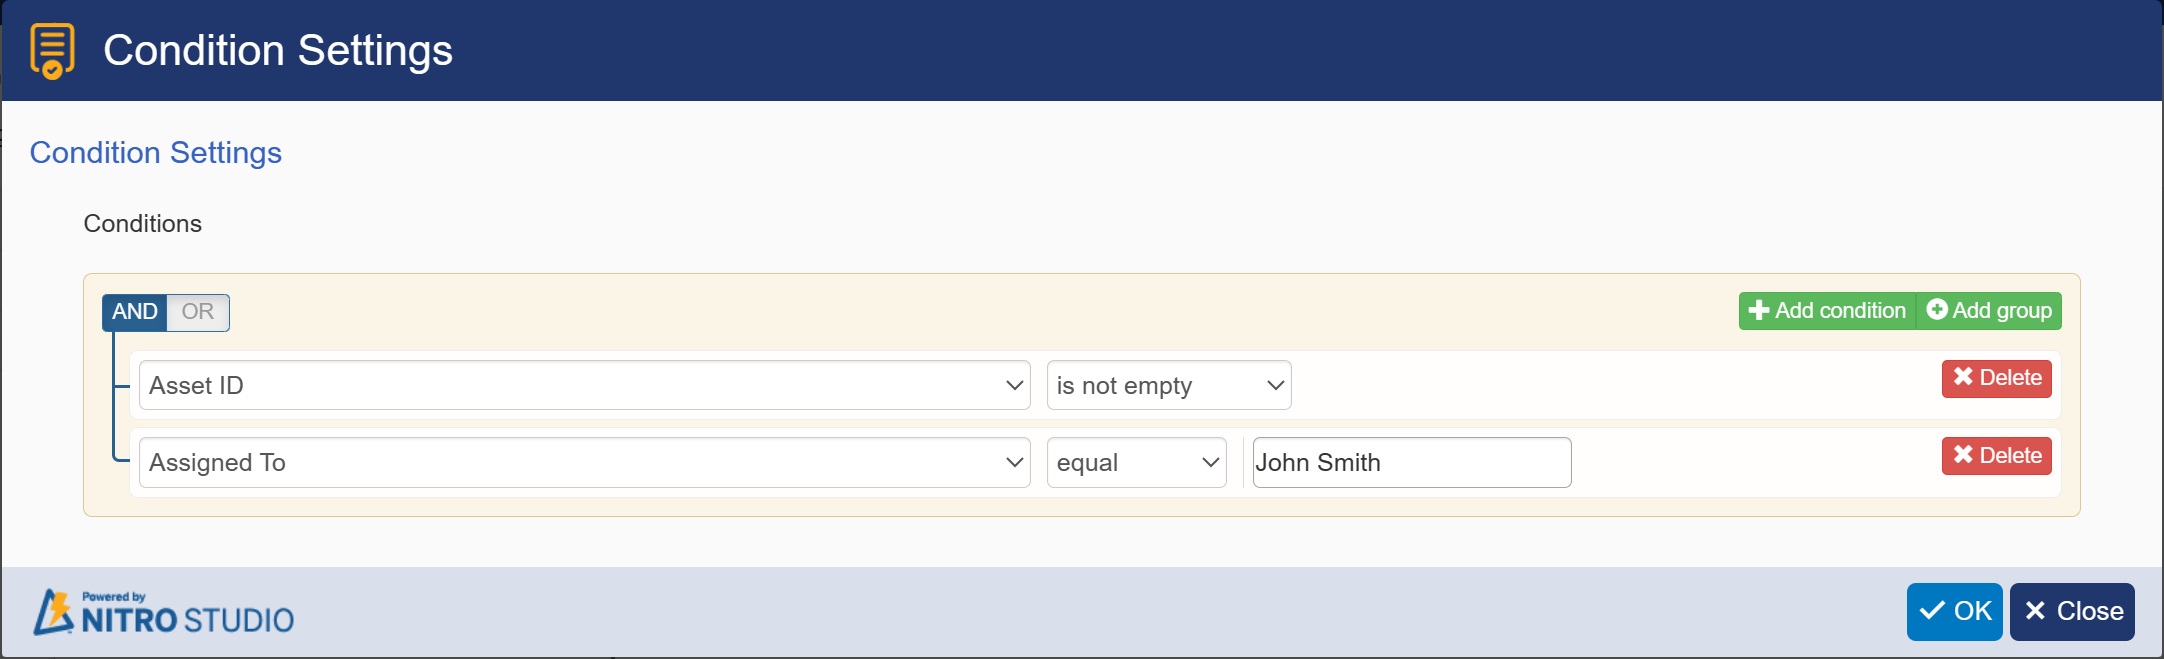
For example you may automatically update a list where certain fields are empty, contain a specific task type value, or where a date has been exceeded.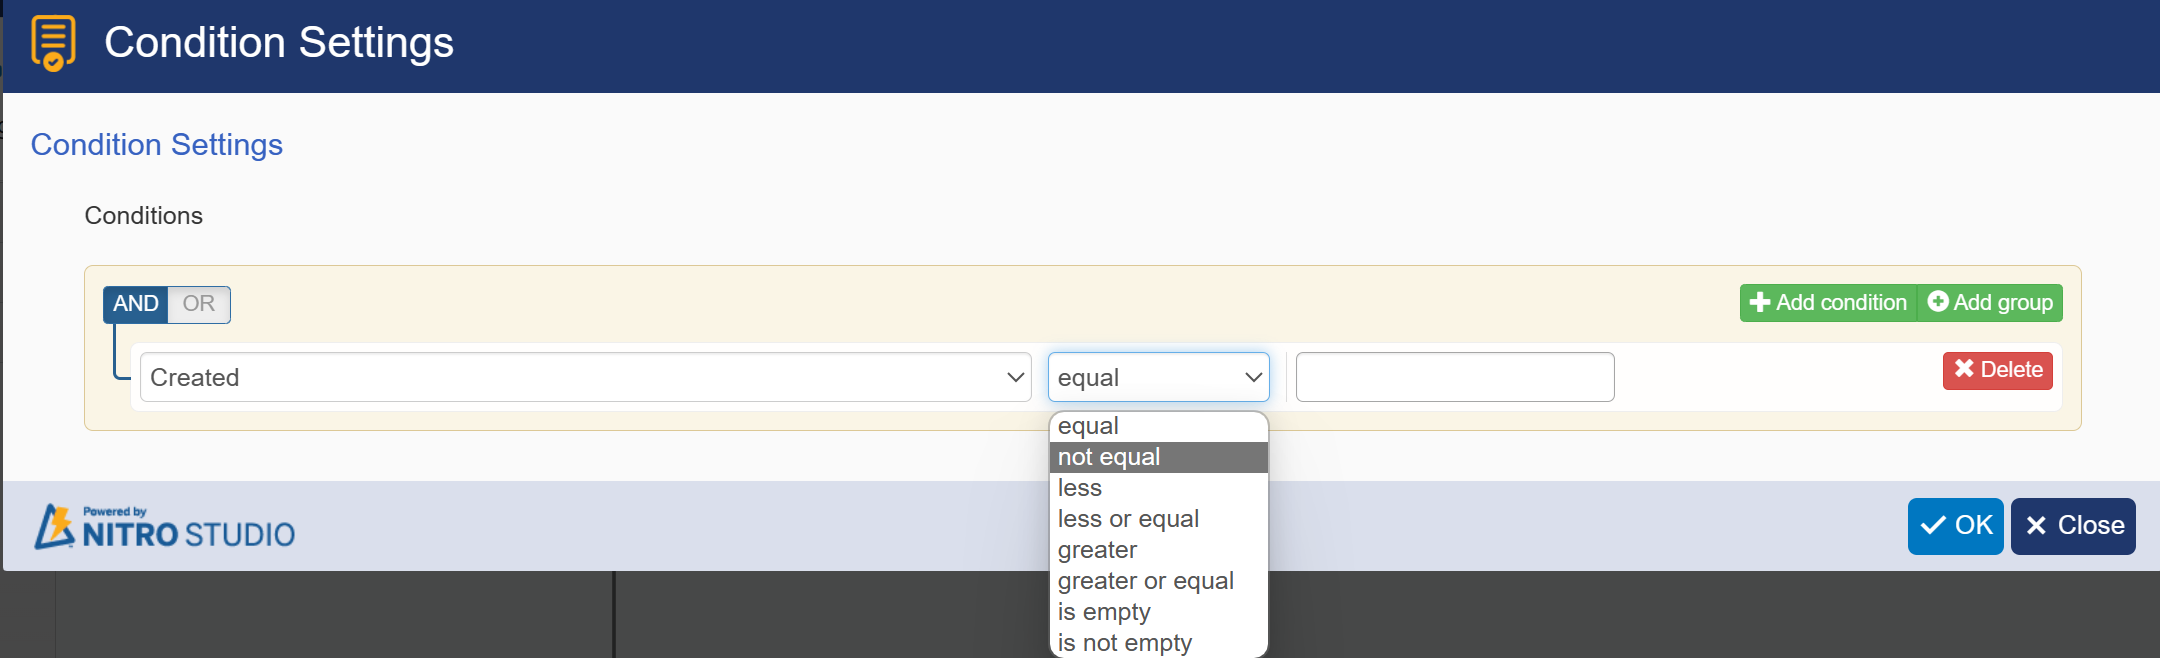
For more on Conditions, click here.
Variables: Click 'Variable' to define various varibles to further use them in actions.
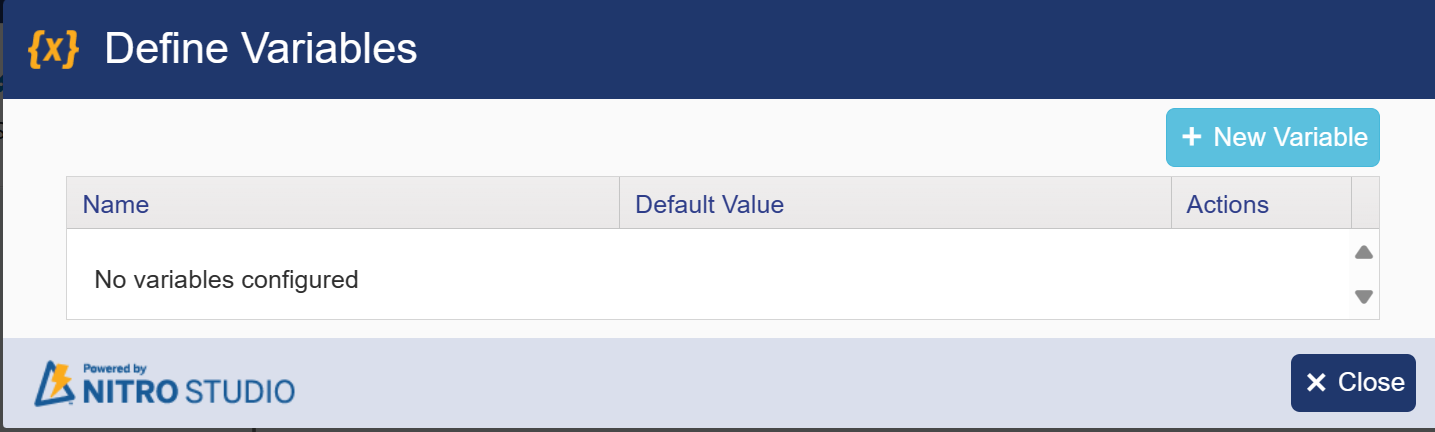
Click 'New Variable' button to define a new variable as shown below

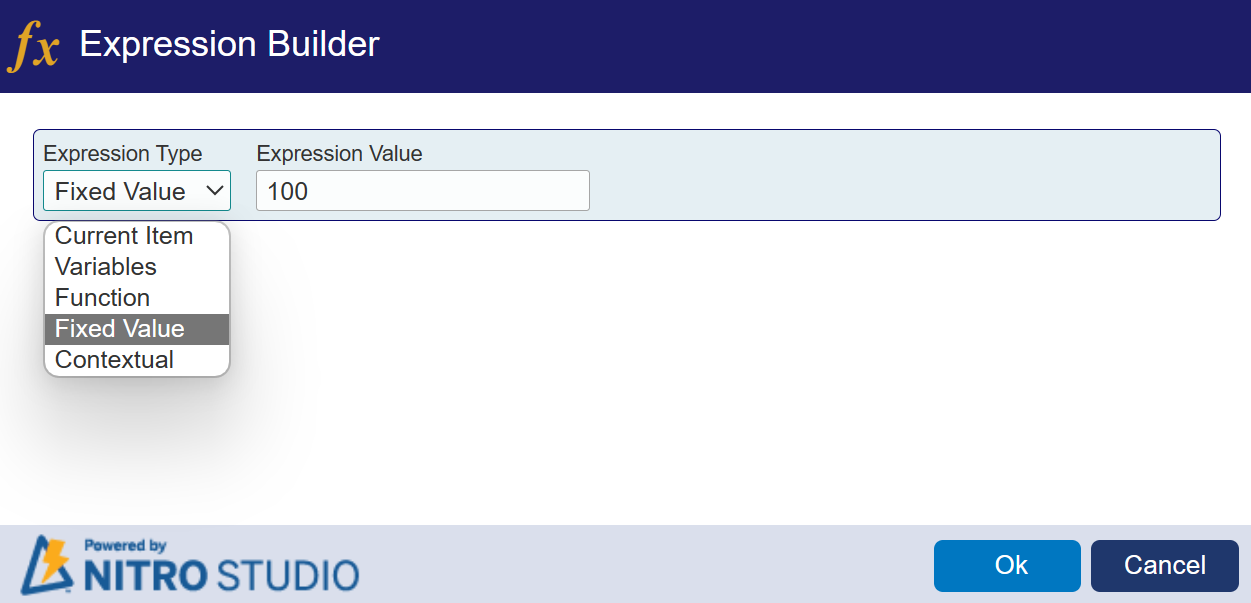
Click three dots button to define value for variable using expression builder as shown below
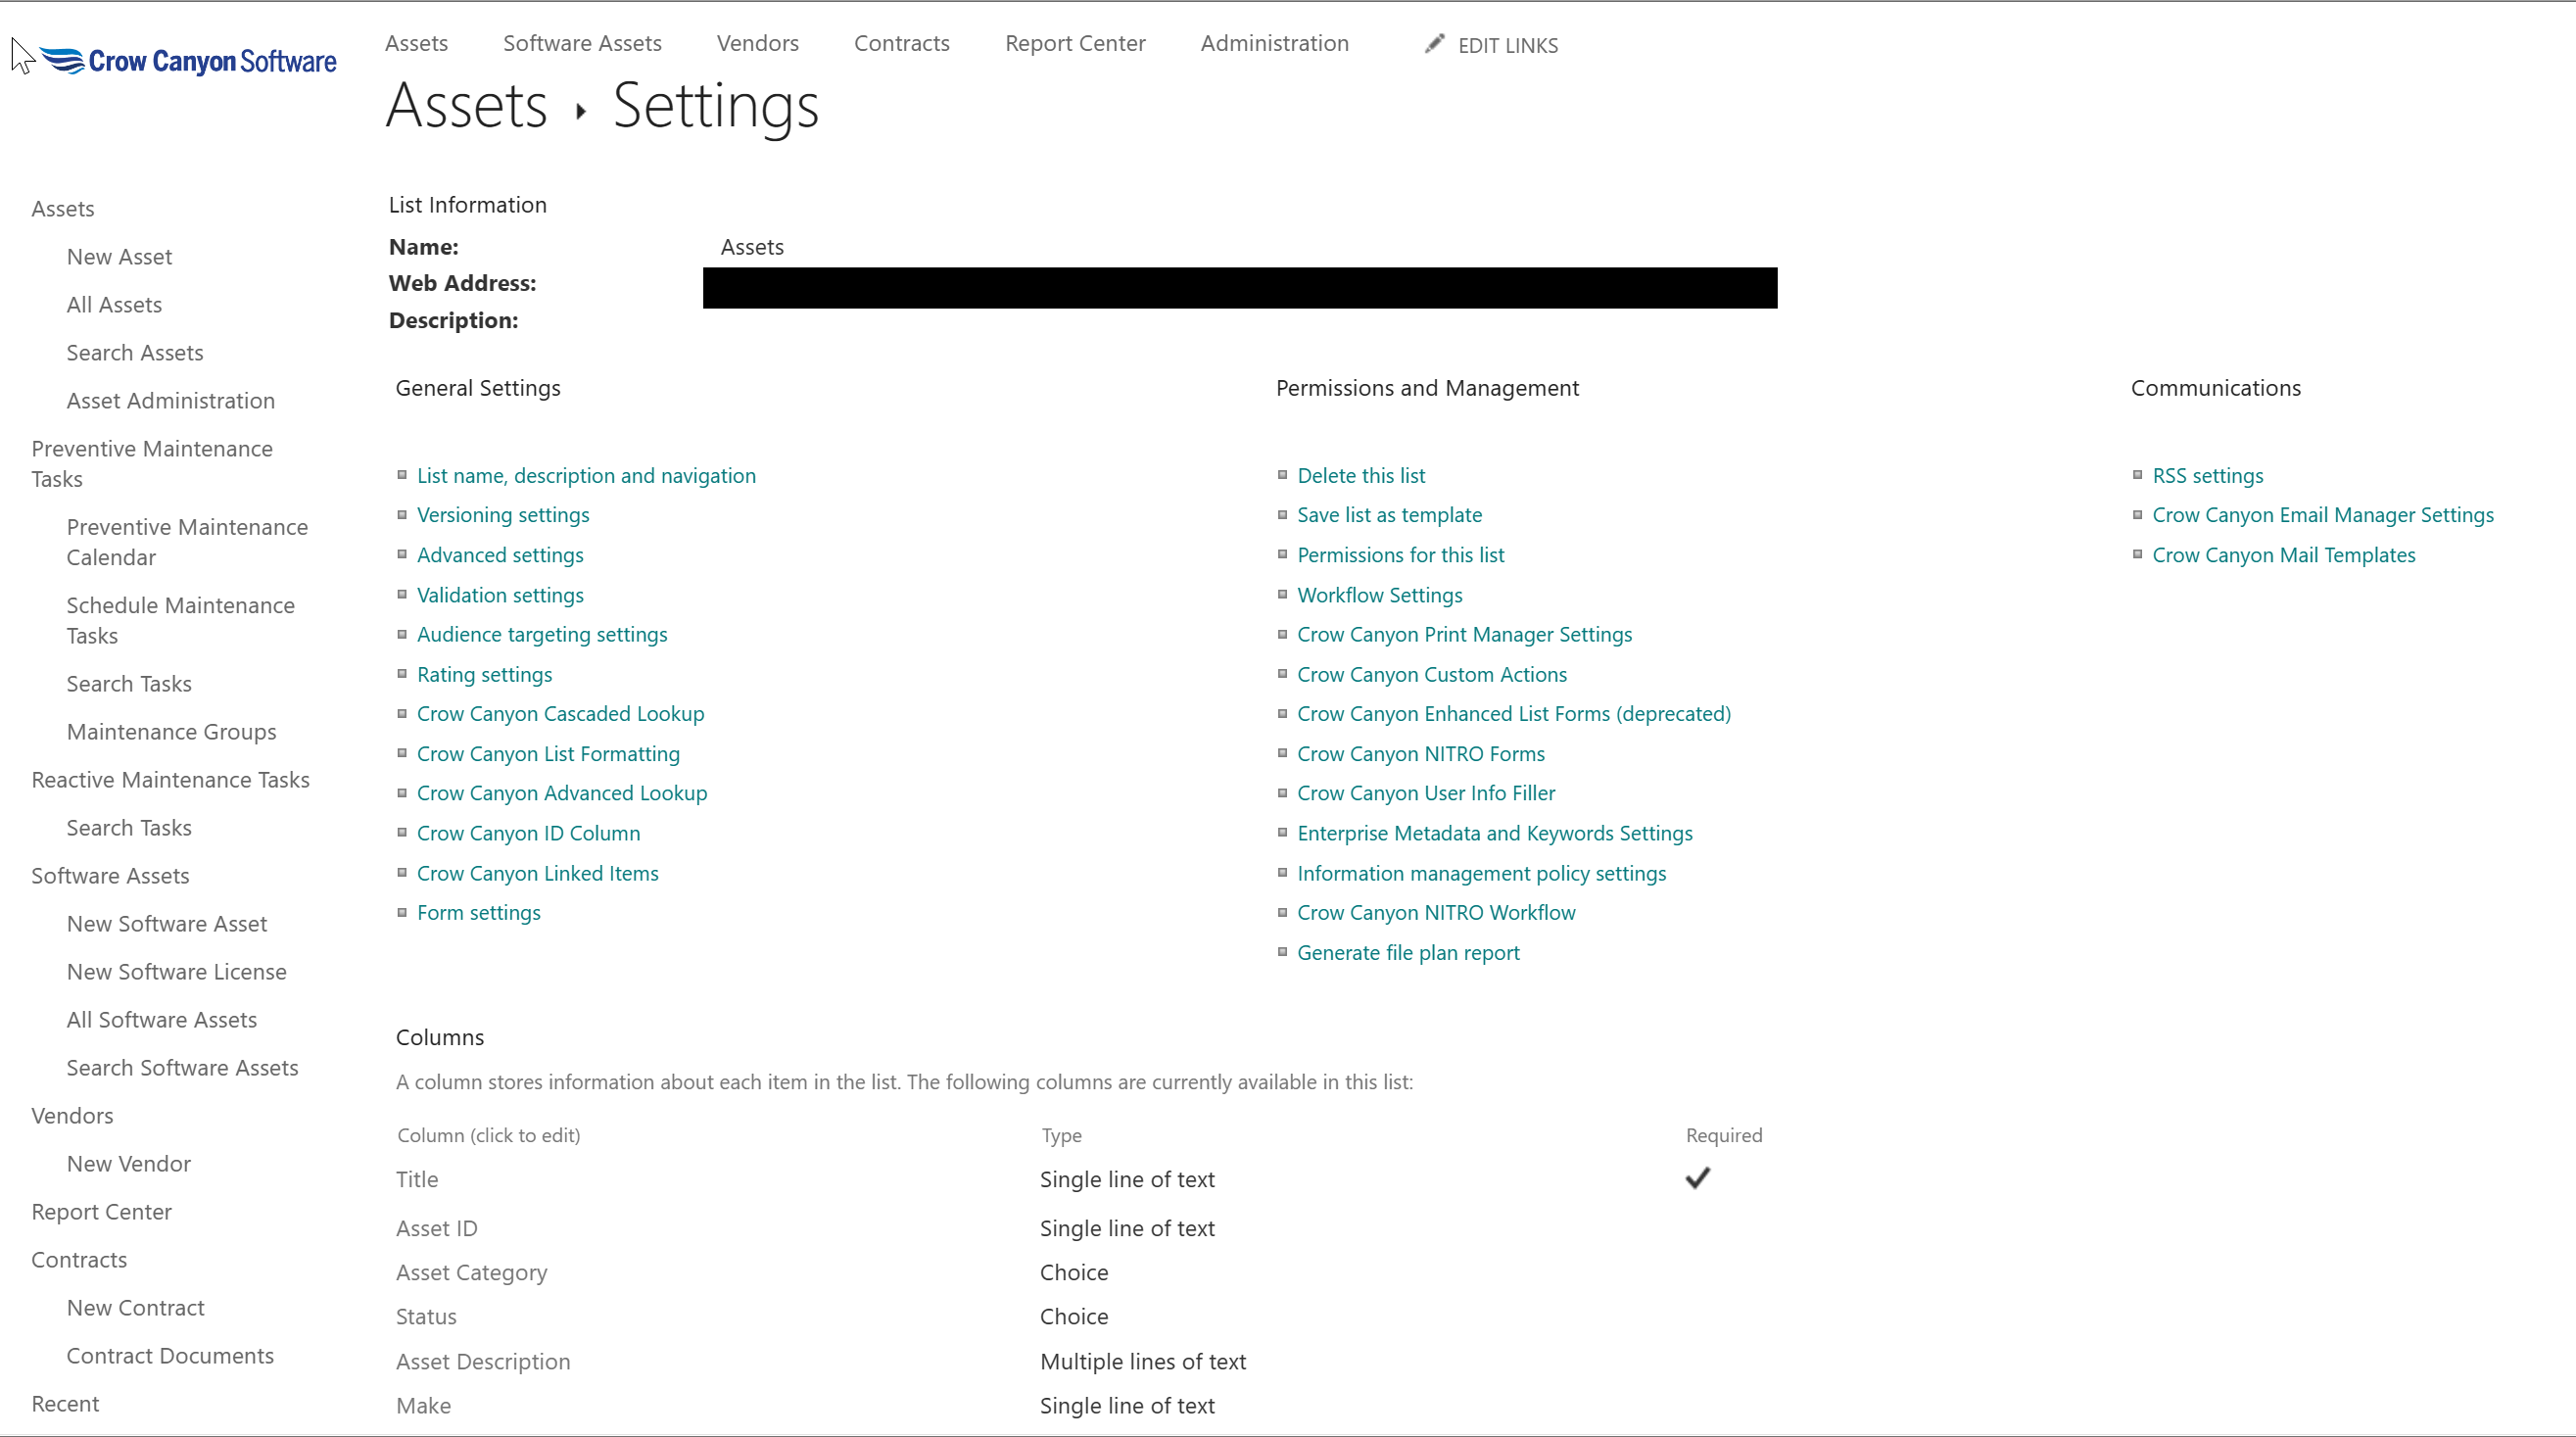
List settings: Click 'List settings' to navigate to list setting page for which workflow is configured as shown below.
Import: Click 'Import' button to import a workflow settings.
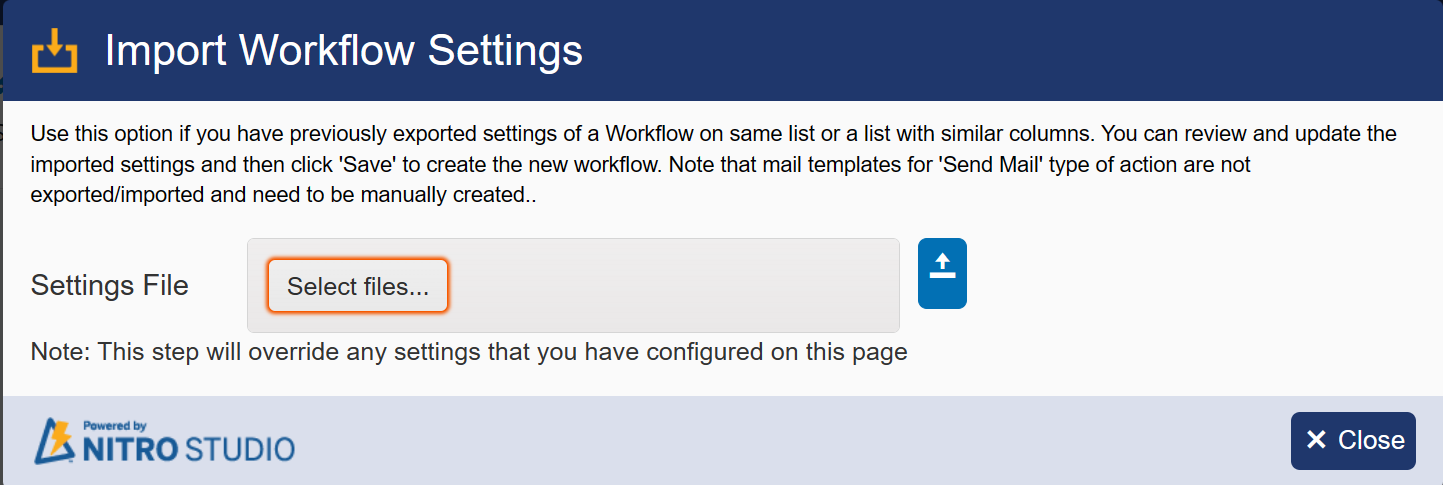
Click 'Select Files' button to select a file then click 'Up arrow' button to import the file settings
What Actions to Execute for this Workflow
Once you have setup the conditions that will trigger your workflow, you can define the actions that will take place. Actions include Create, Update, Delete and Move items, Send Mail, and more technically complex functions like Query List, Worflow Variable and Manage Permission etc. For details on how to use each of these features, see Workflow Actions.
Designer workflow actions:
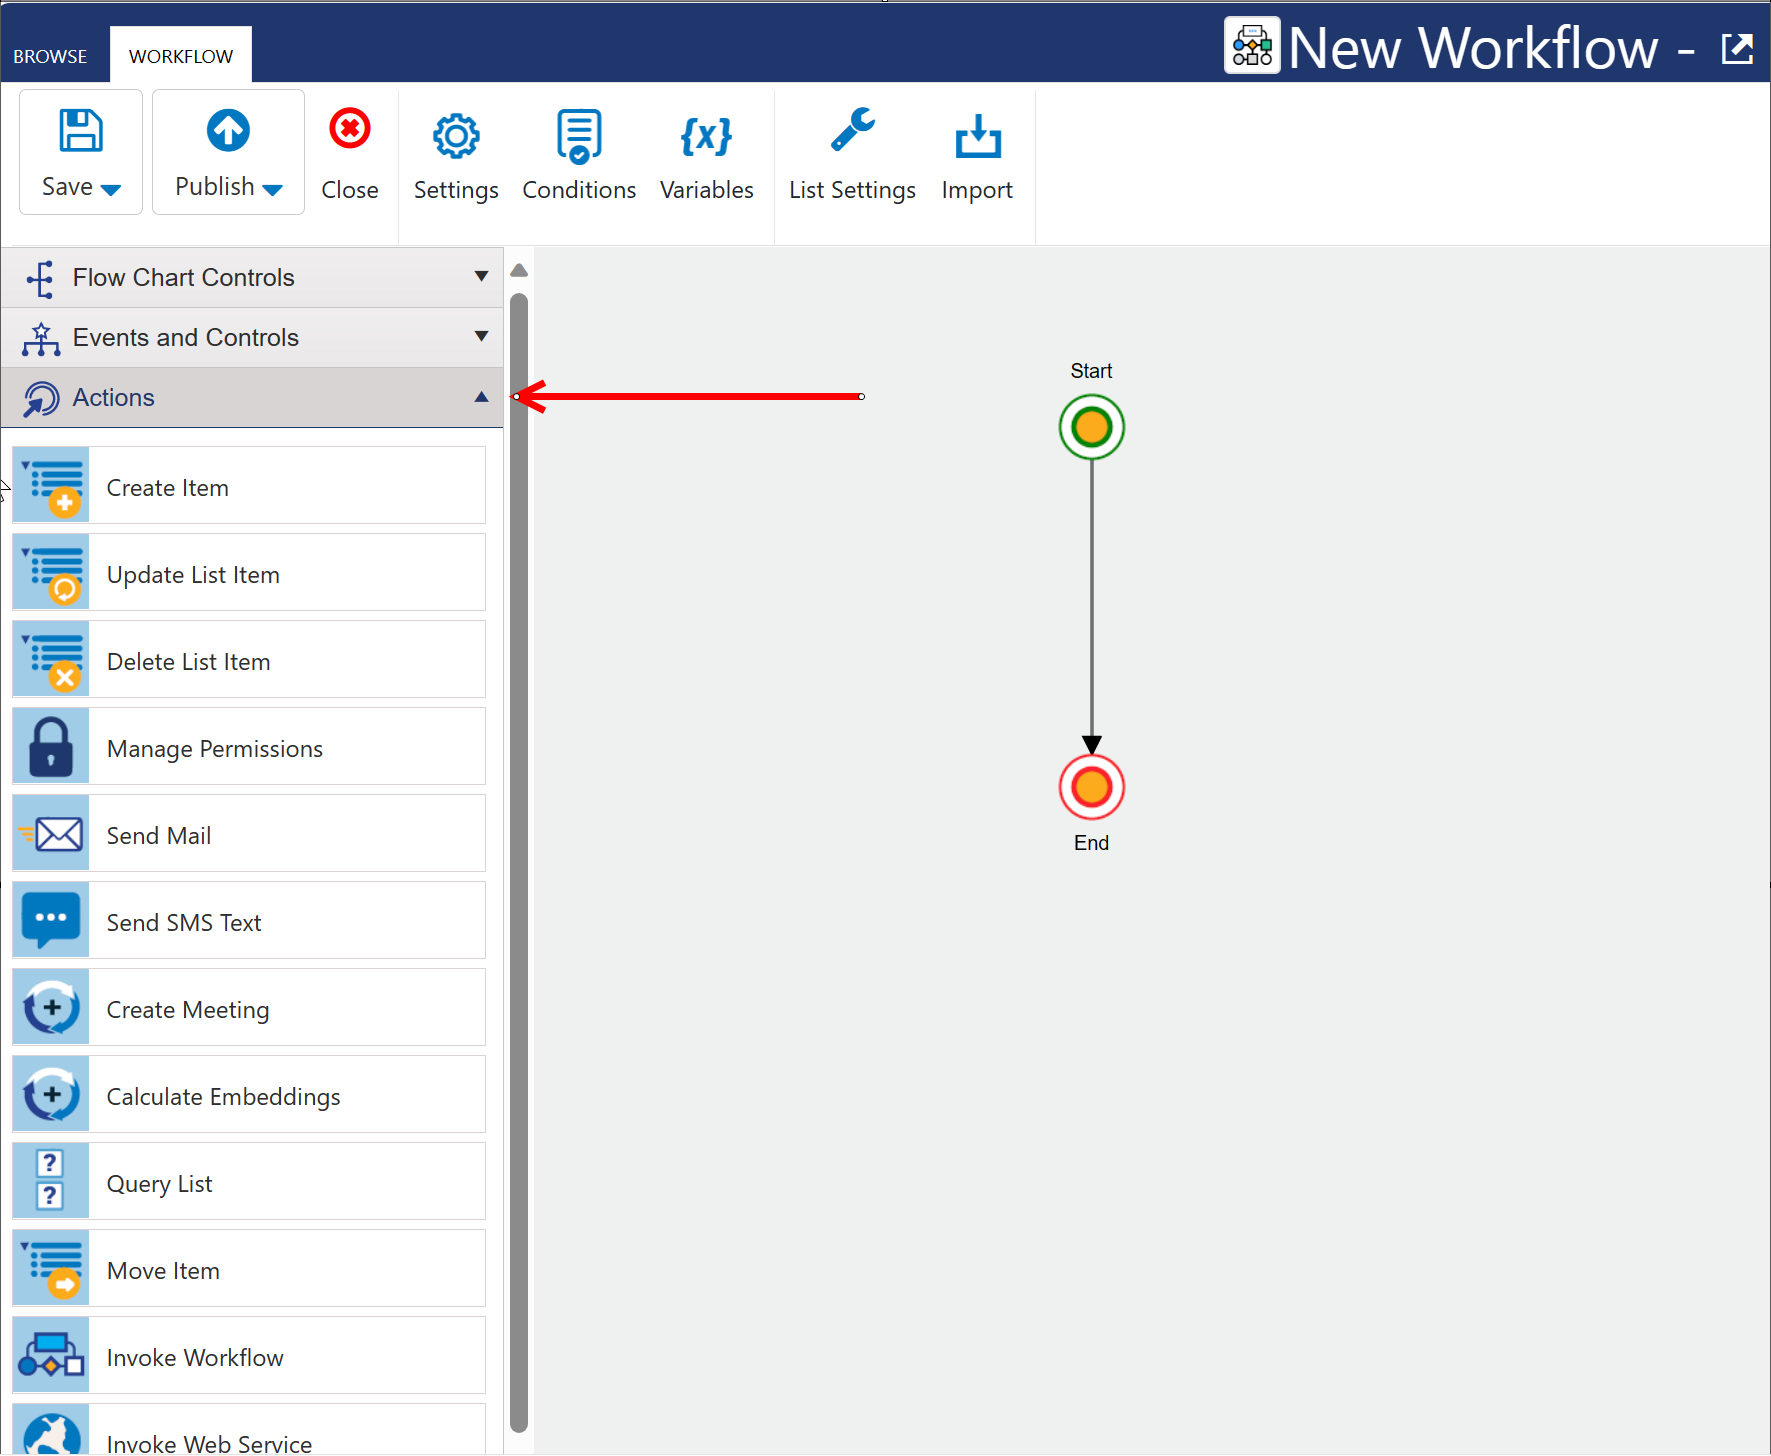
Click 'Actions' dropdown to see all actions available in designer workflow.
Legacy workflow actions:
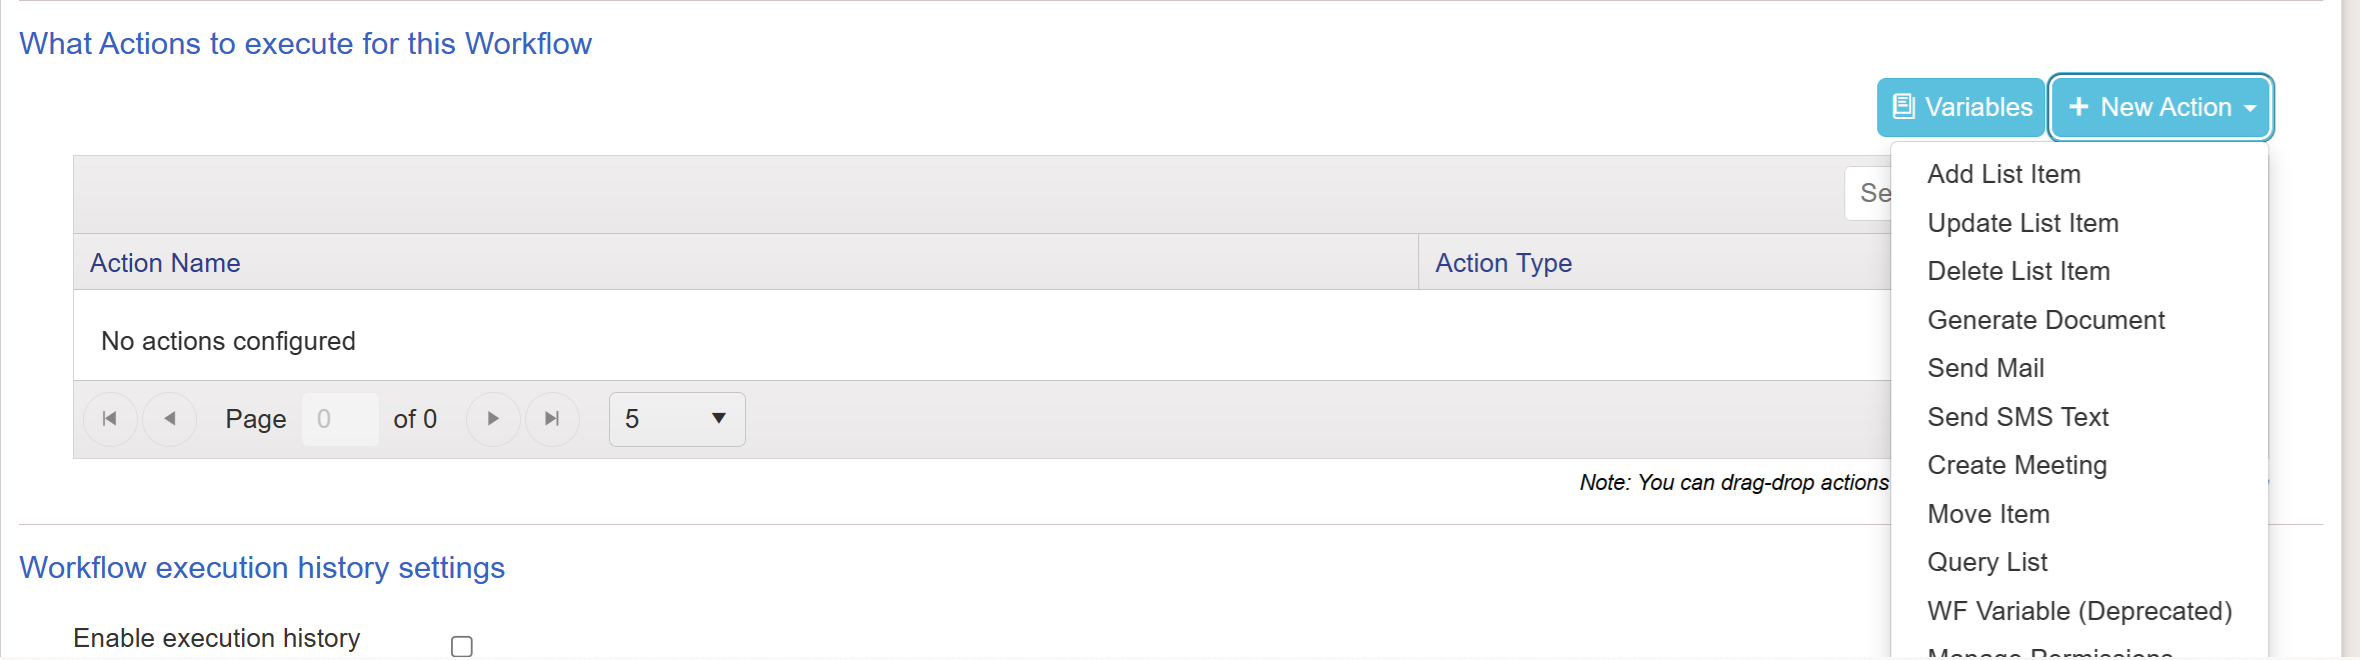
Click 'New Actions' dropdown to see all actions available in legacy workflow.
When to Execute this Action
Conditions
Here you can use Conditions in a similar manner as they would be used on the event trigger. See the section on Conditions above or click here for more details.
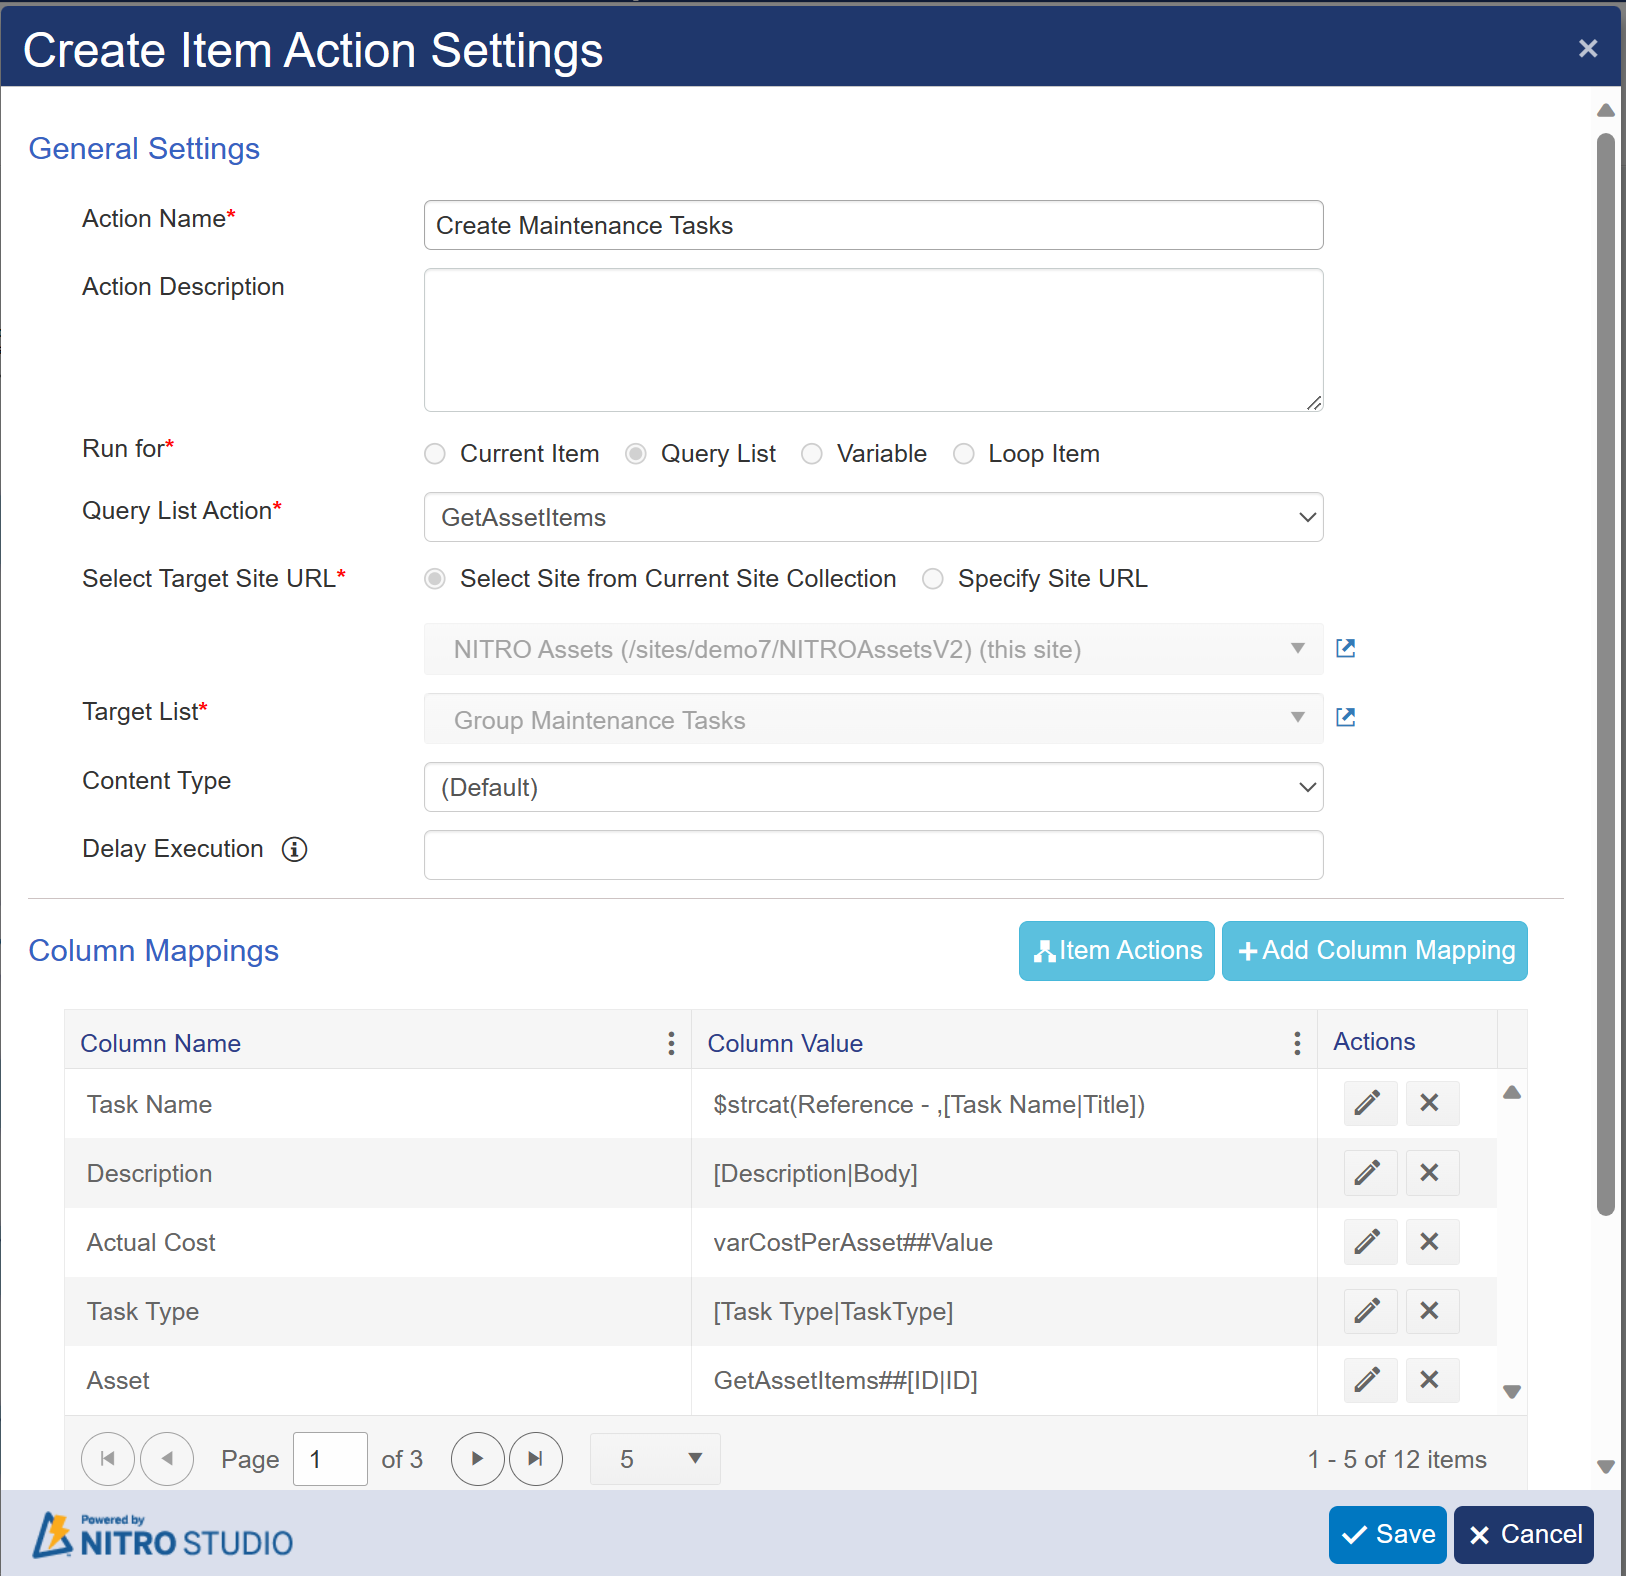
General Settings
Here you define a name for your action and set relevant target info as needed. This will vary by action type so refer to the section for the action you are defining for details. See Action Types section above.
Column Mappings
This section allows you to define the values that will go into the fields/columns of the list you are creating or updating. For each column you will set the value in one of the following ways:
•a literal value
•a column value mapped from your source list
•a placeholder value
•a function
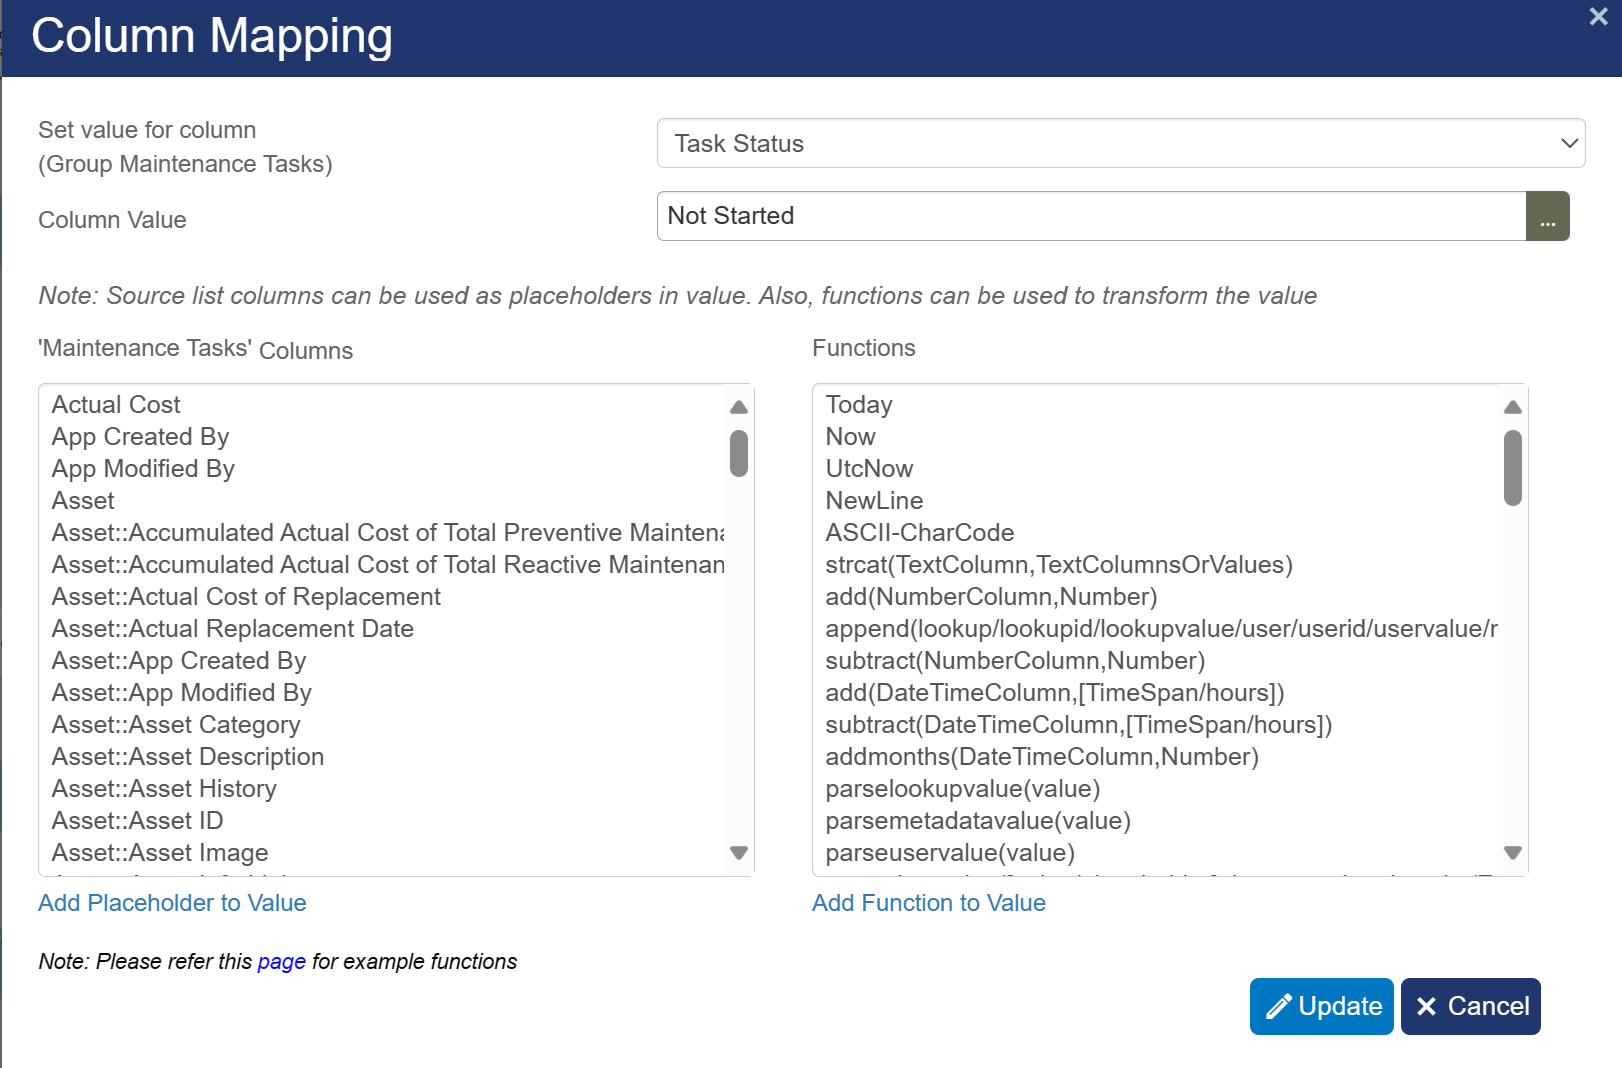
Once you set the column value, hit the Update key and continue defining any subsequent column values you want following the same process.
Define value for a specific column.
Legacy Workflow:
Legacy workflow column settings is same like designer workflow settings. Only the appearence of page is different.