Configure List Template
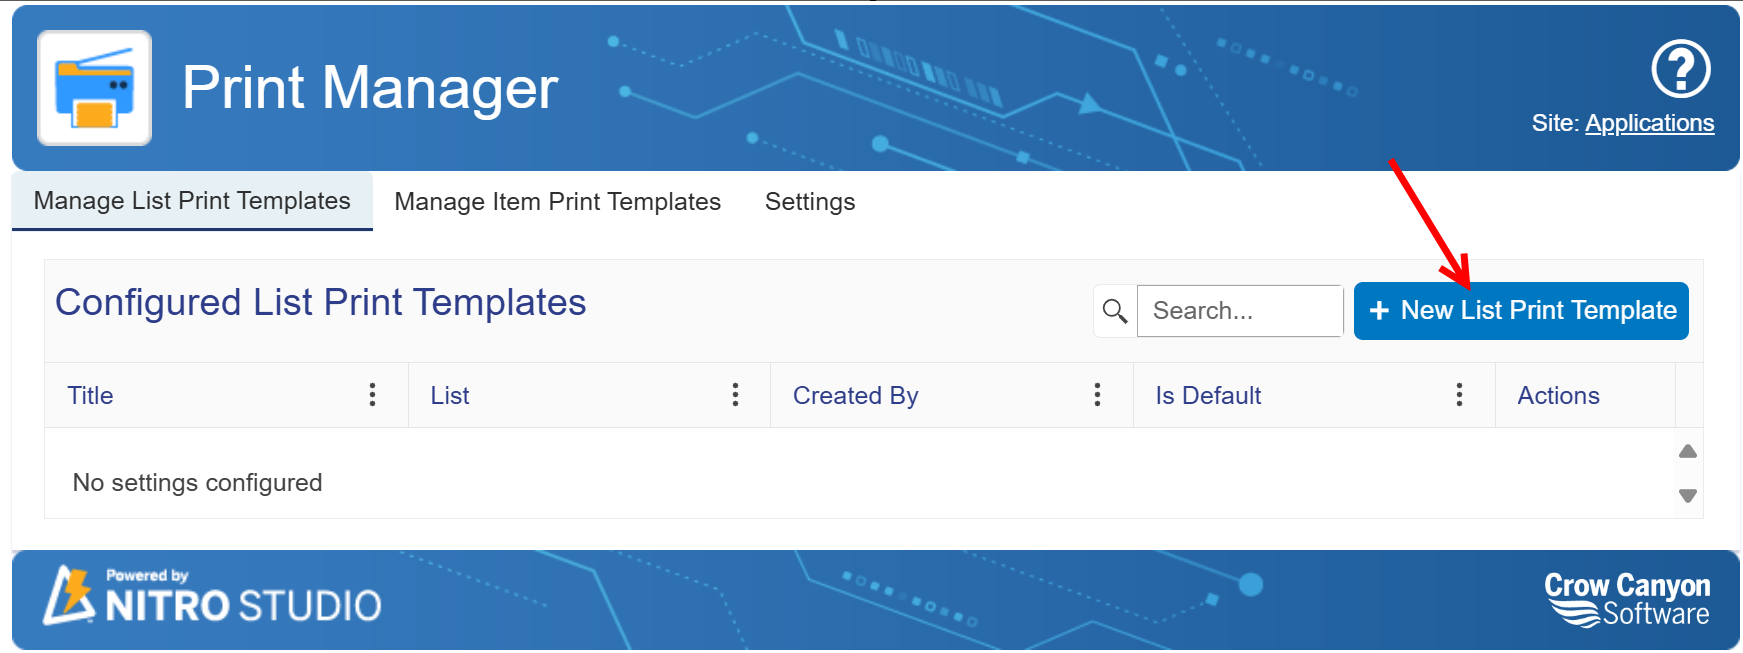
List Templates specify settings for a printout of multiple items from a list. List Templates are listed on the ‘Manage List Print Templates’ tab in the Print Manager.
Create a List Template:
Create a List Template by clicking on ‘New Template’ button
Next, configure the details as follows:
Settings tab
Configure general settings under the ‘Settings’ tab
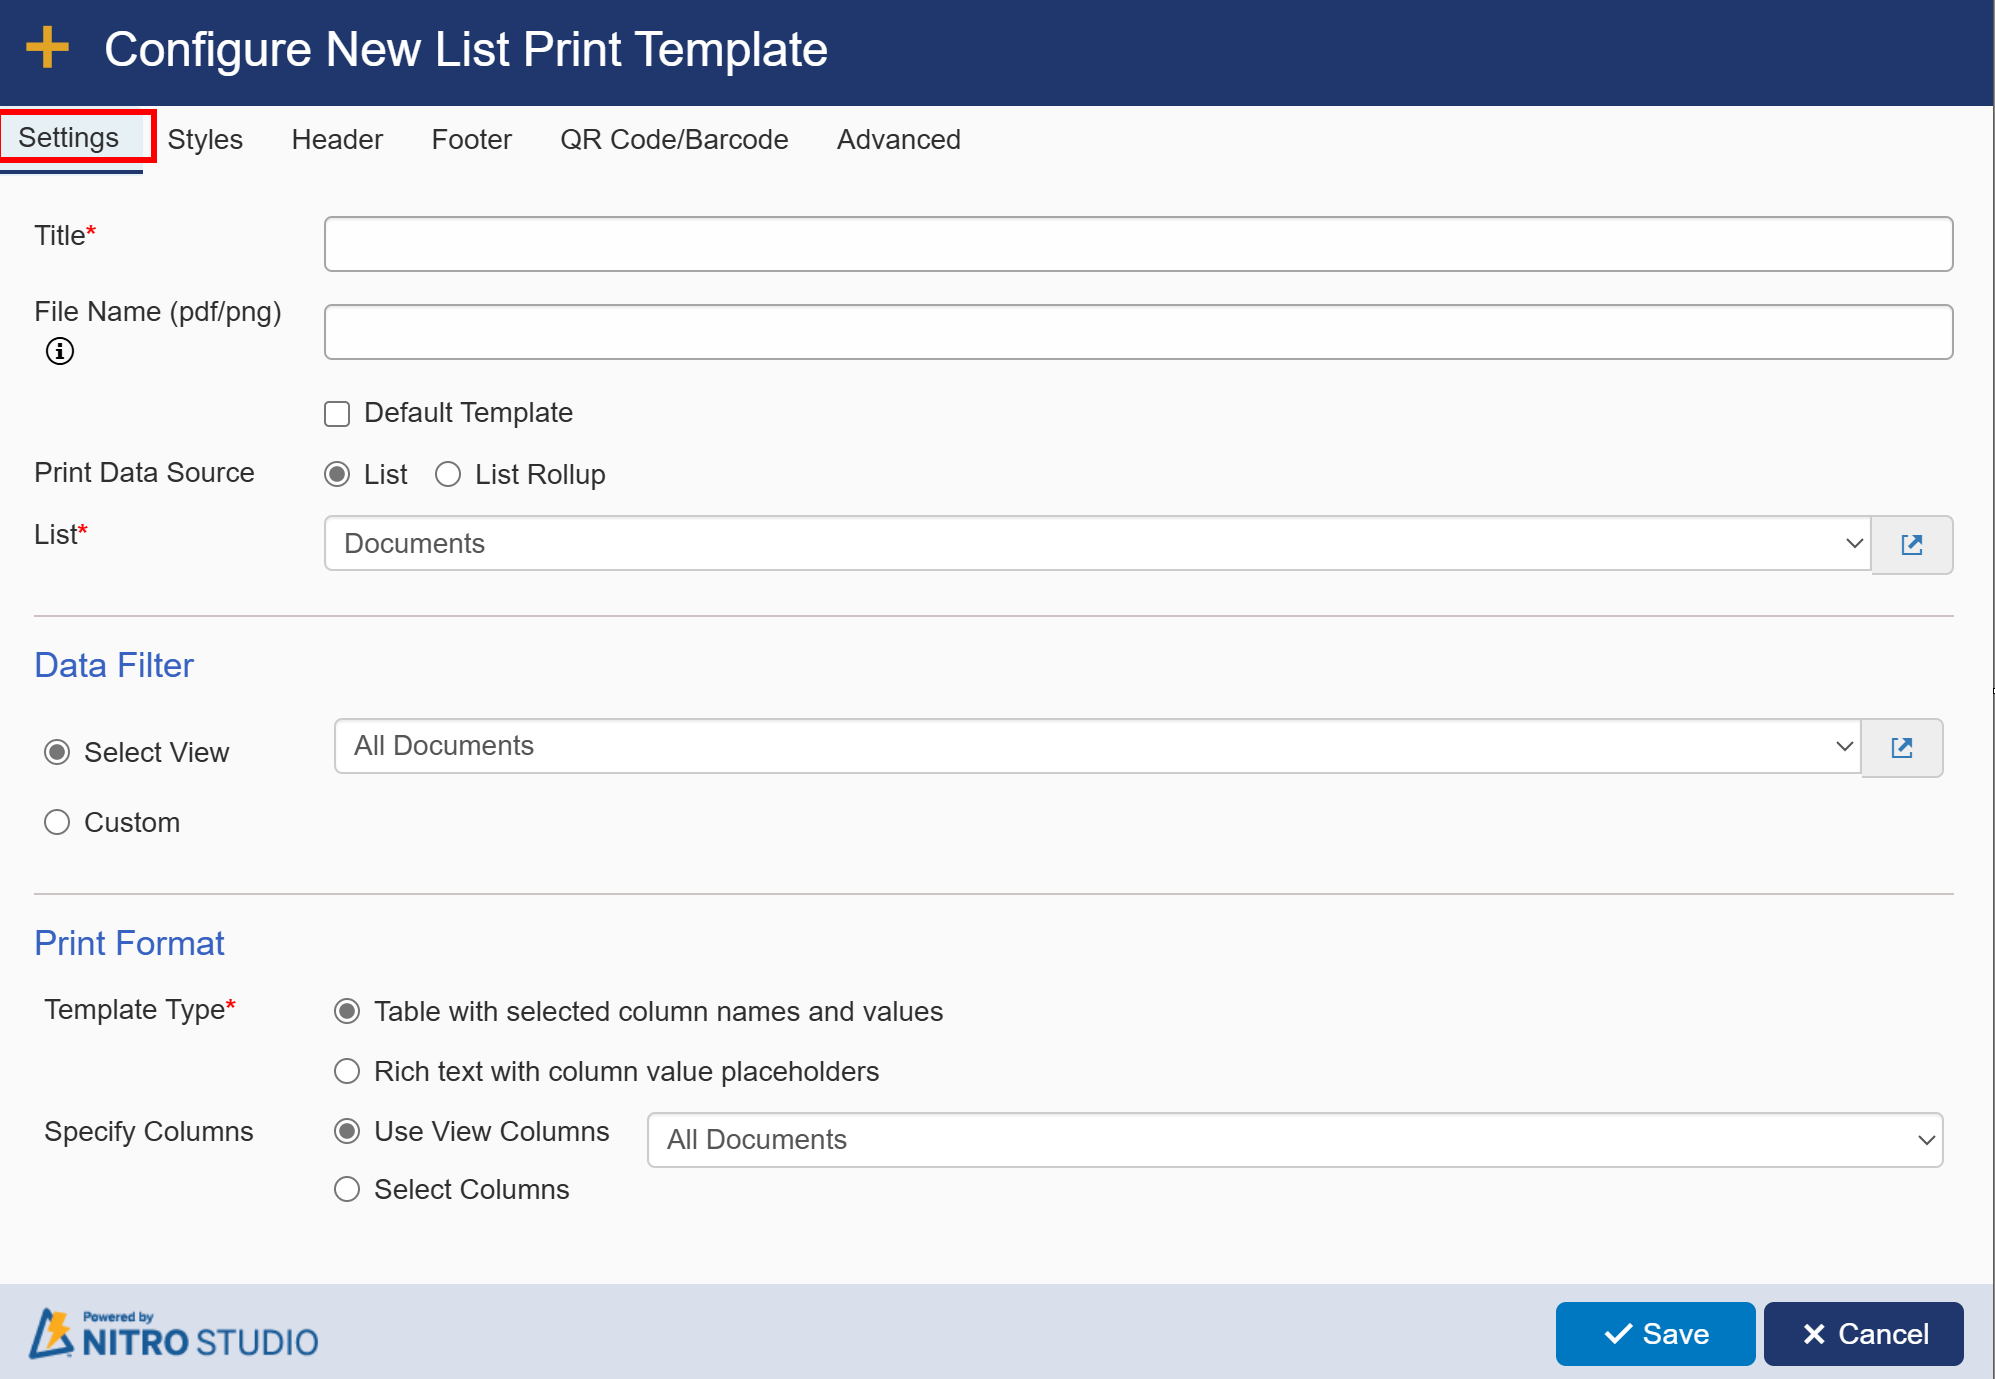
Title - The name of the template. This name will be shown in the drop down when selecting a list print template
File Name (pdf/png) - When using the print manager, you have the option to save the file as a PDF or a PNG file, rather than using the Print tool. This allows you to select a name for the file. It accepts the [[List Title||List Title]] as a placeholder to refer to the title of the list
Default Template - Allows you to set the current List Print Template as the default, pre-selected template when opening up the Print screen
Print Data Source - This can be from a list in the current site, or a List Rollup configured in the current site. Refer to the List Rollup section for more details on how to configure a rollup.
List or List Rollup - Allows you to select a List from the current site or a List Rollup from the current site
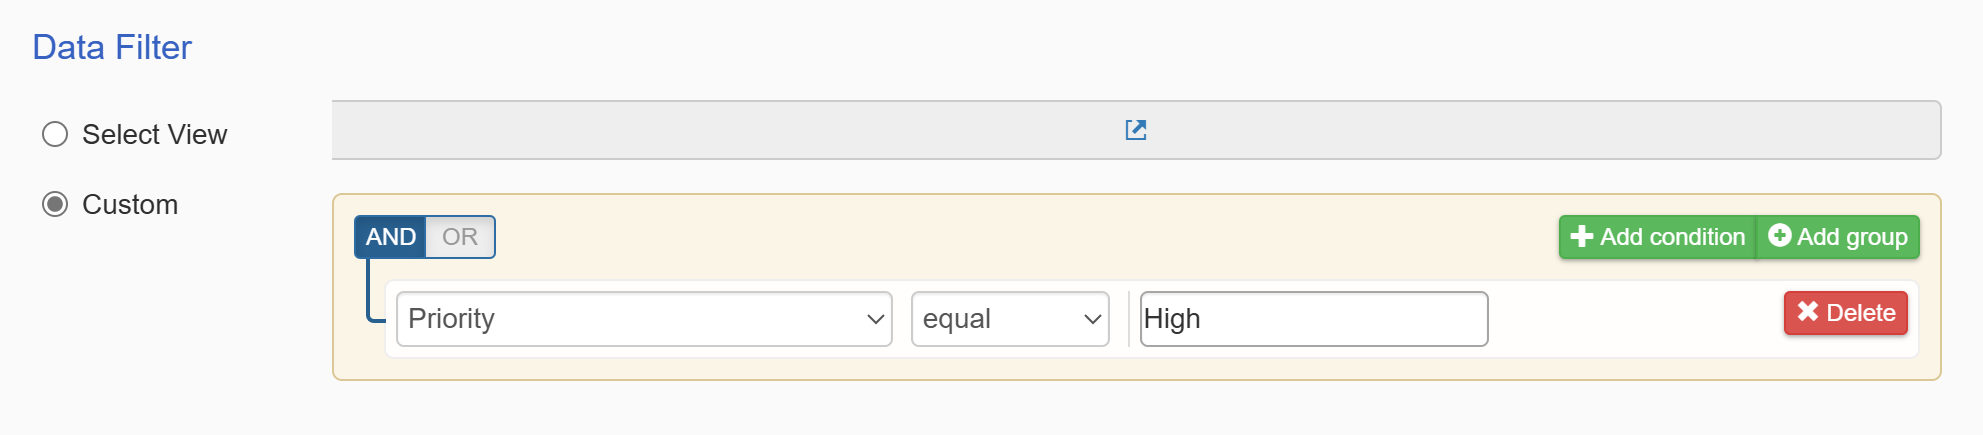
Data Filter:
This section allows you to determine which items to print. This is only for selecting the times to be printed. See the Print Format section below to determine which columns from the list are included in the print out.
1.List Items by selected View
In this scenario, items in the List are printed based on the selected View

2.List Items by Custom query
In this scenario, items in the List are printed based on the configured query
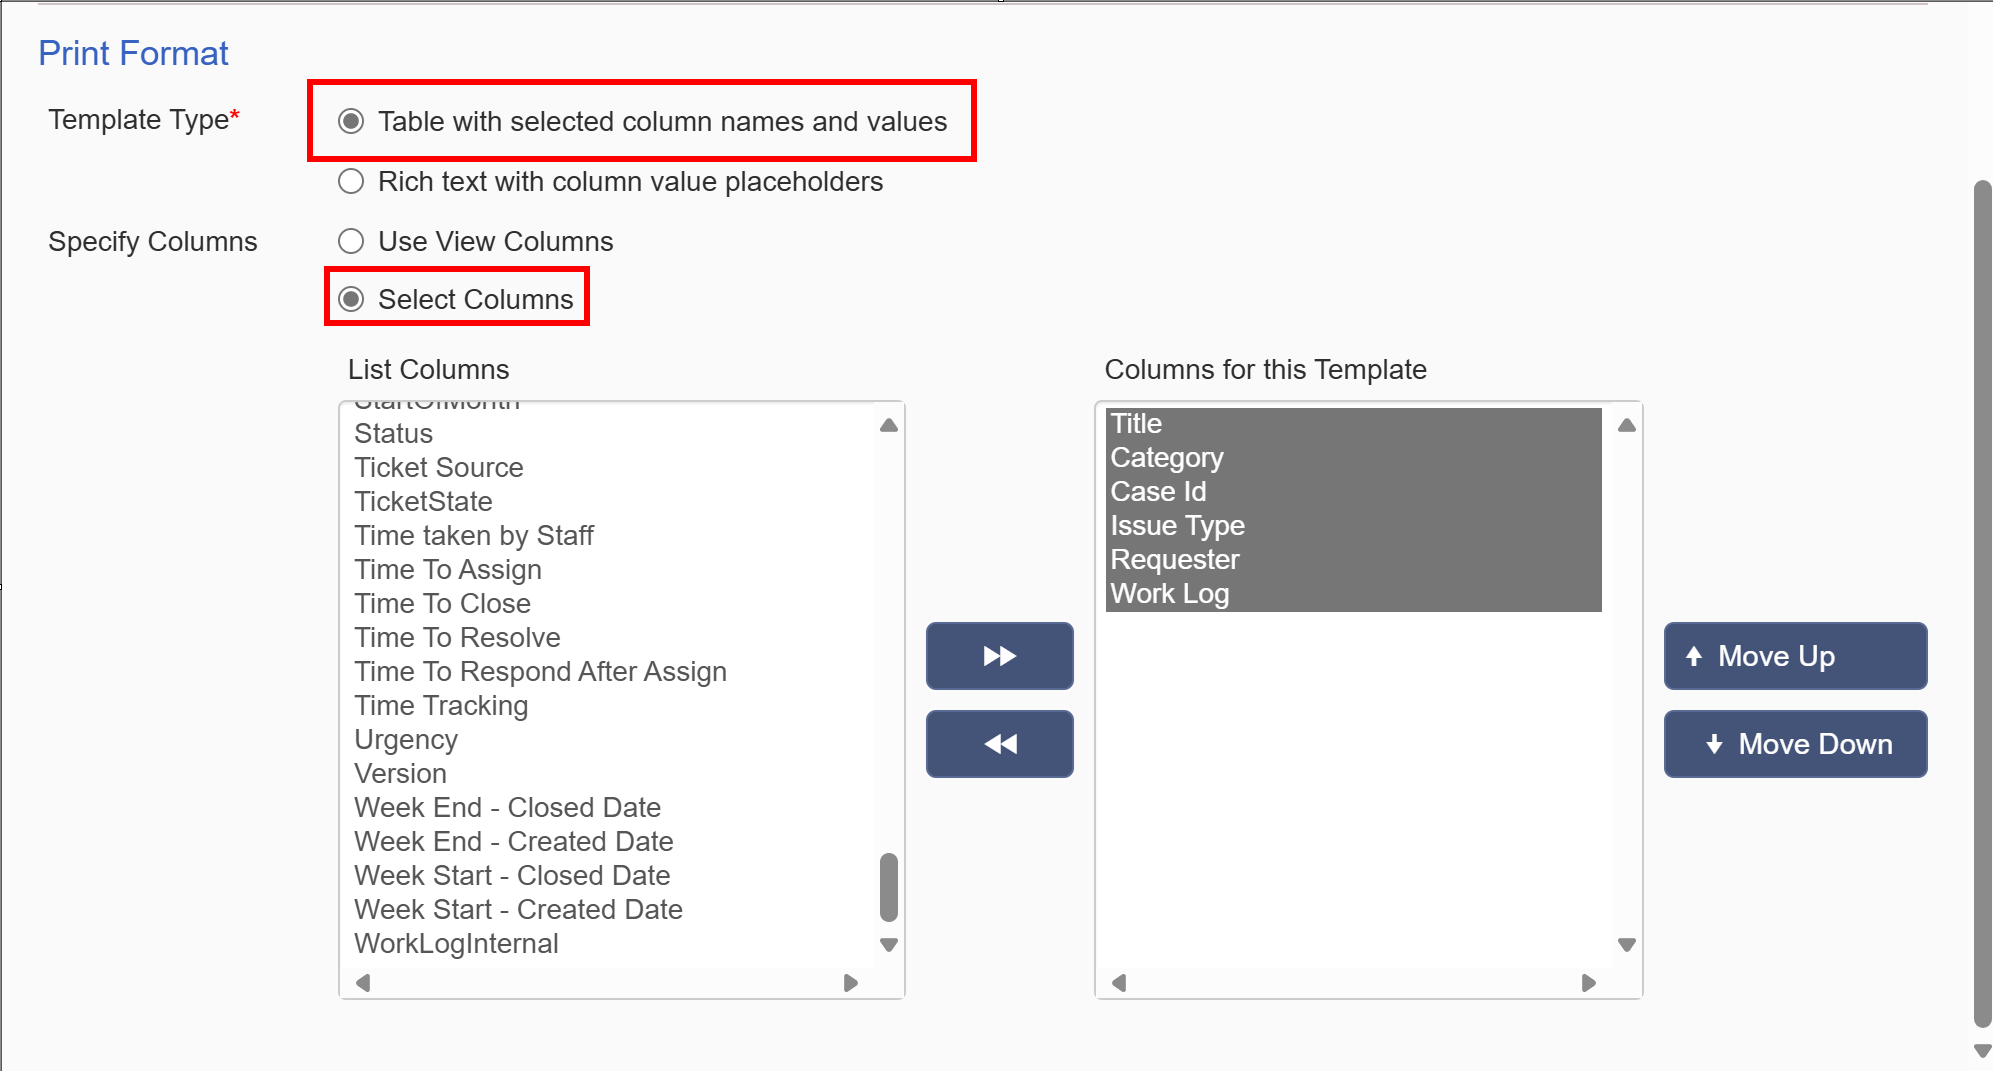
Print Format
This section allows you to determine which columns are included in the print out for each item returned using the Data Filter section. The Format for the printout has two template options. If you choose the "Table with selected column names and values" option, you can further refine the columns used by selecting a view (which can be different from the view selected for the Data Filter) or by specifying which columns to use (see below).
If you choose the "Rich text with Column value placeholders" option, you'll get the full range of rich-text options with column placeholders on the right (see below).
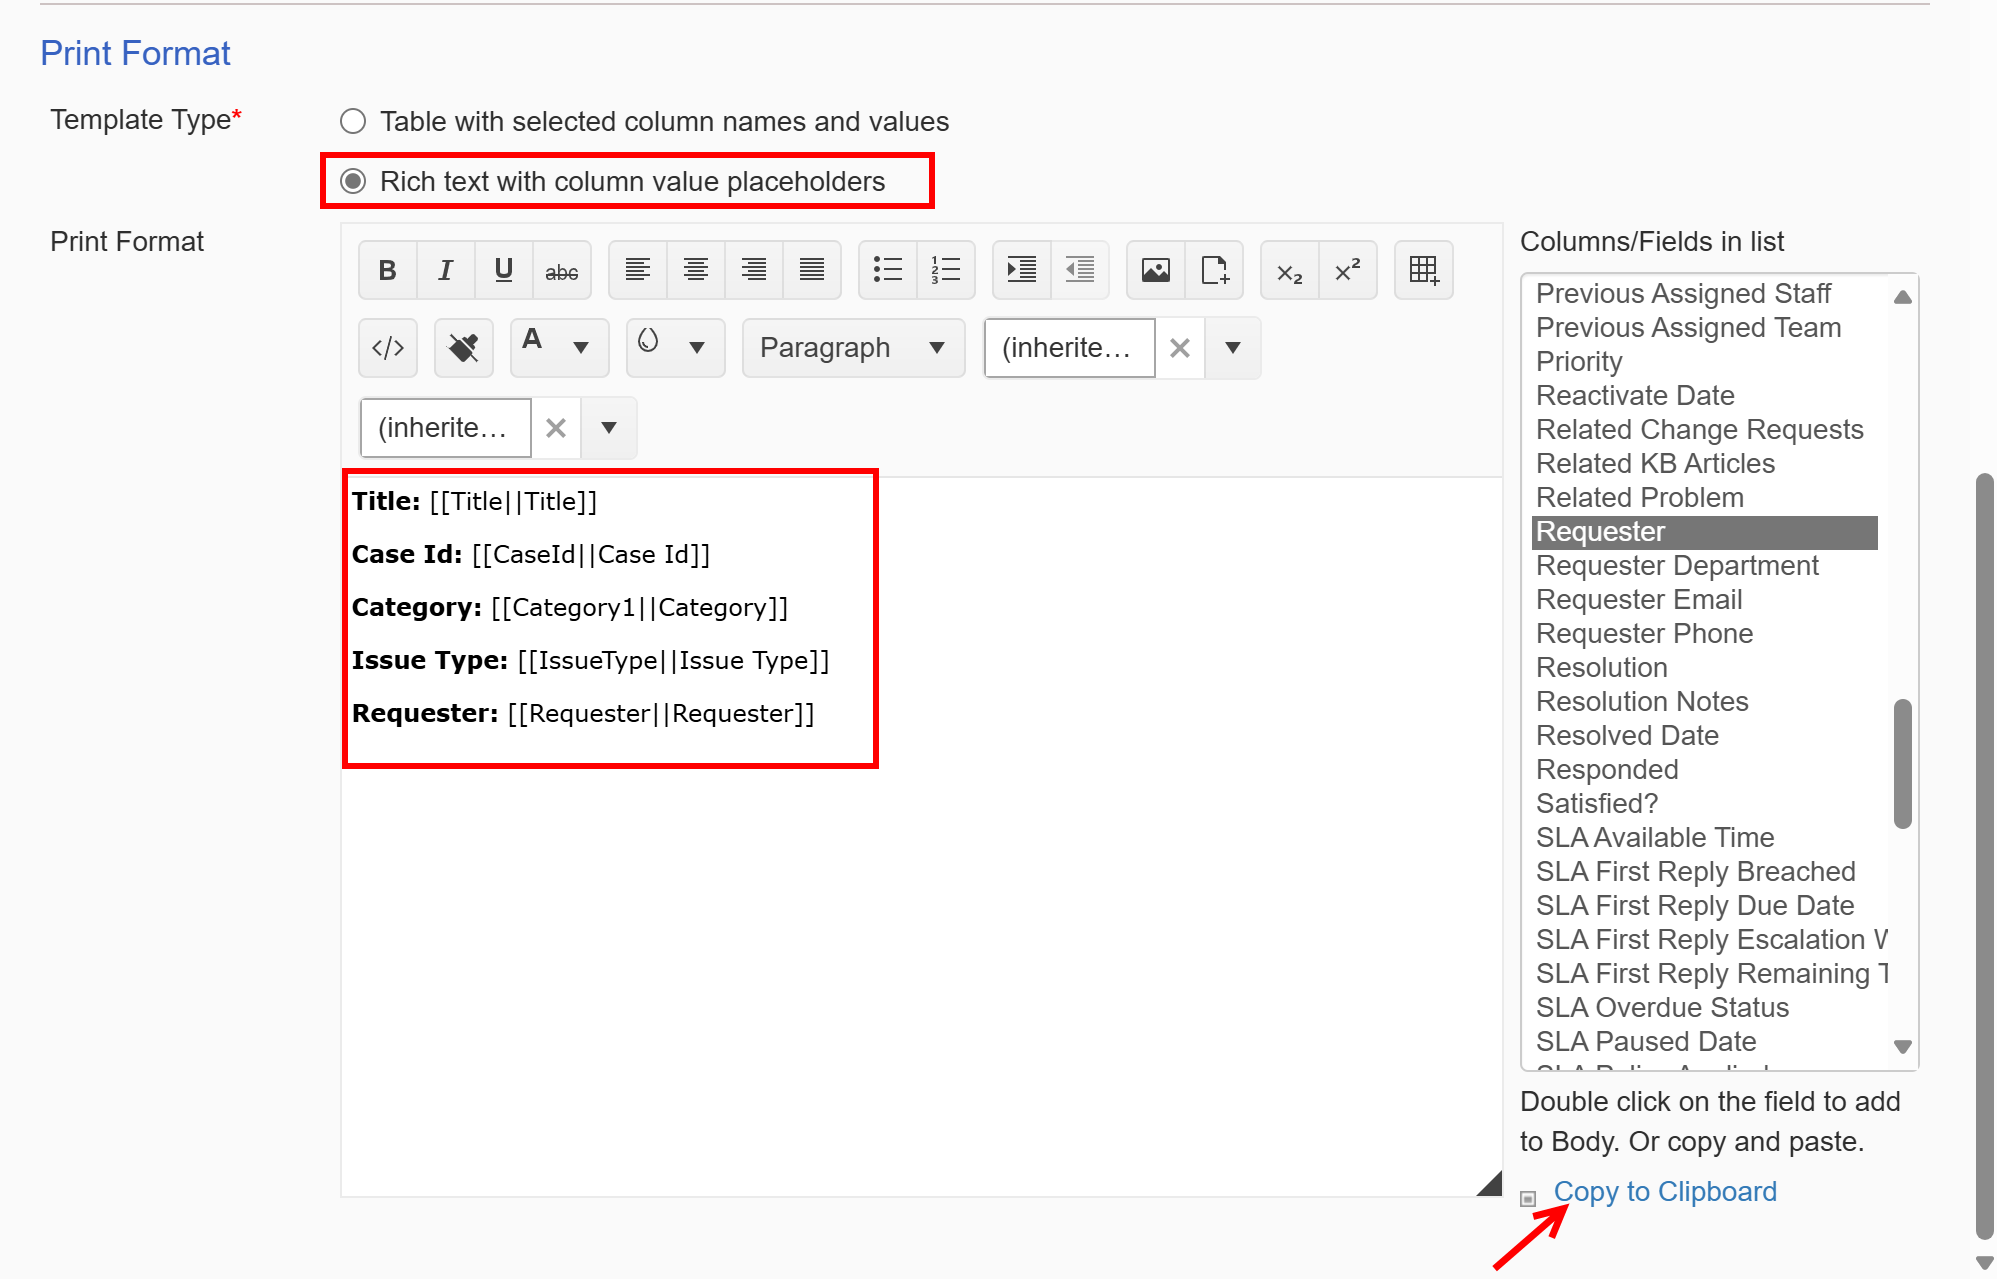
You can add the column placeholders by either double-clicking it or selecting it an using the "Copy to Clipboard" option at the bottom.
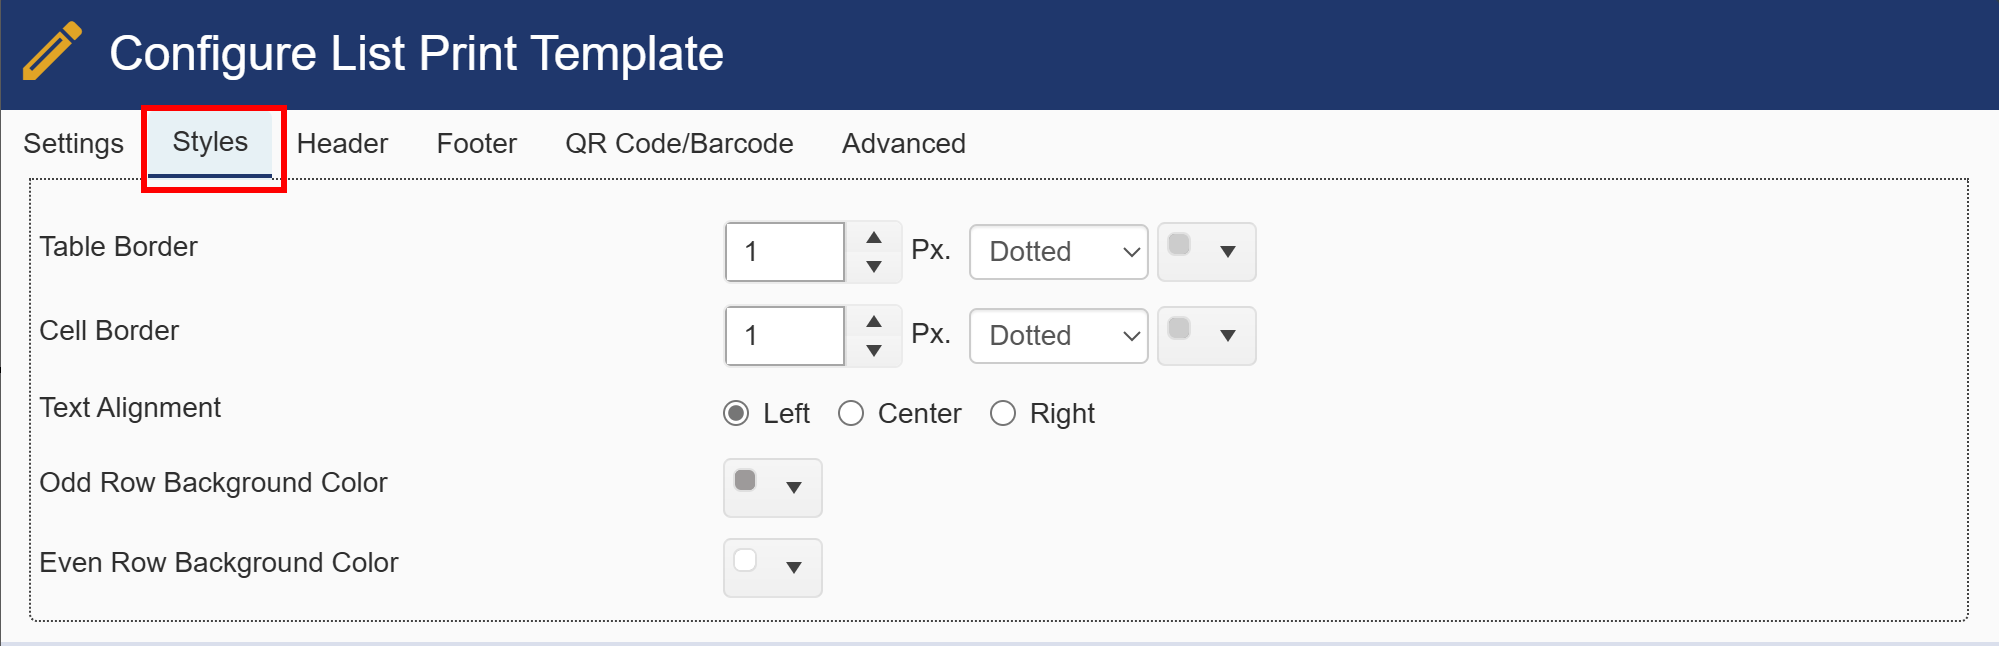
Styles tab
This tab comes into play when using the Template Type of "Table with selected column names and values". Otherwise, it disappears when "Rich text with column value placeholders" is selected.
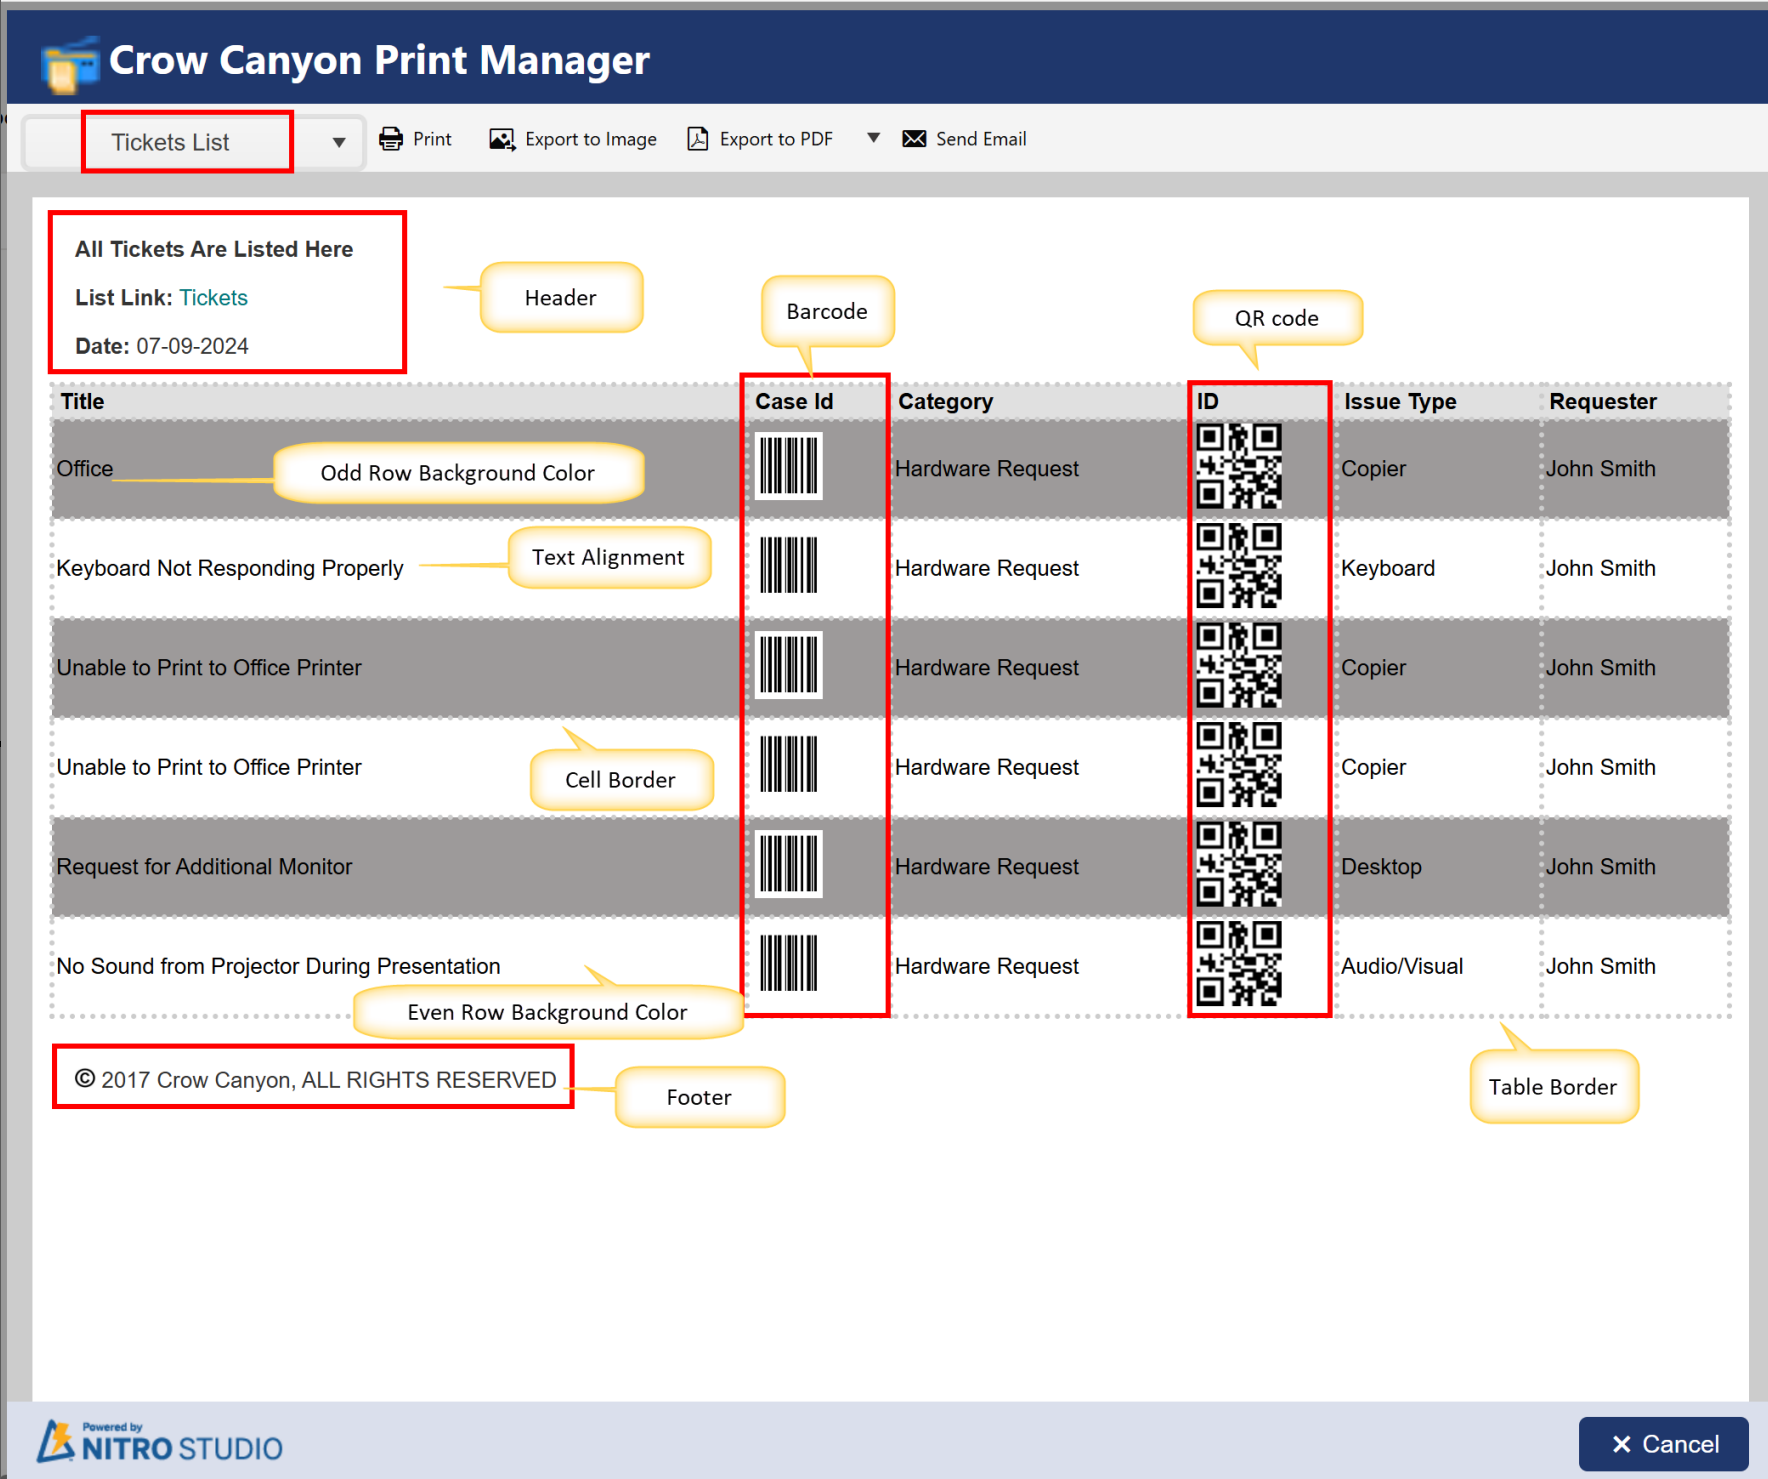
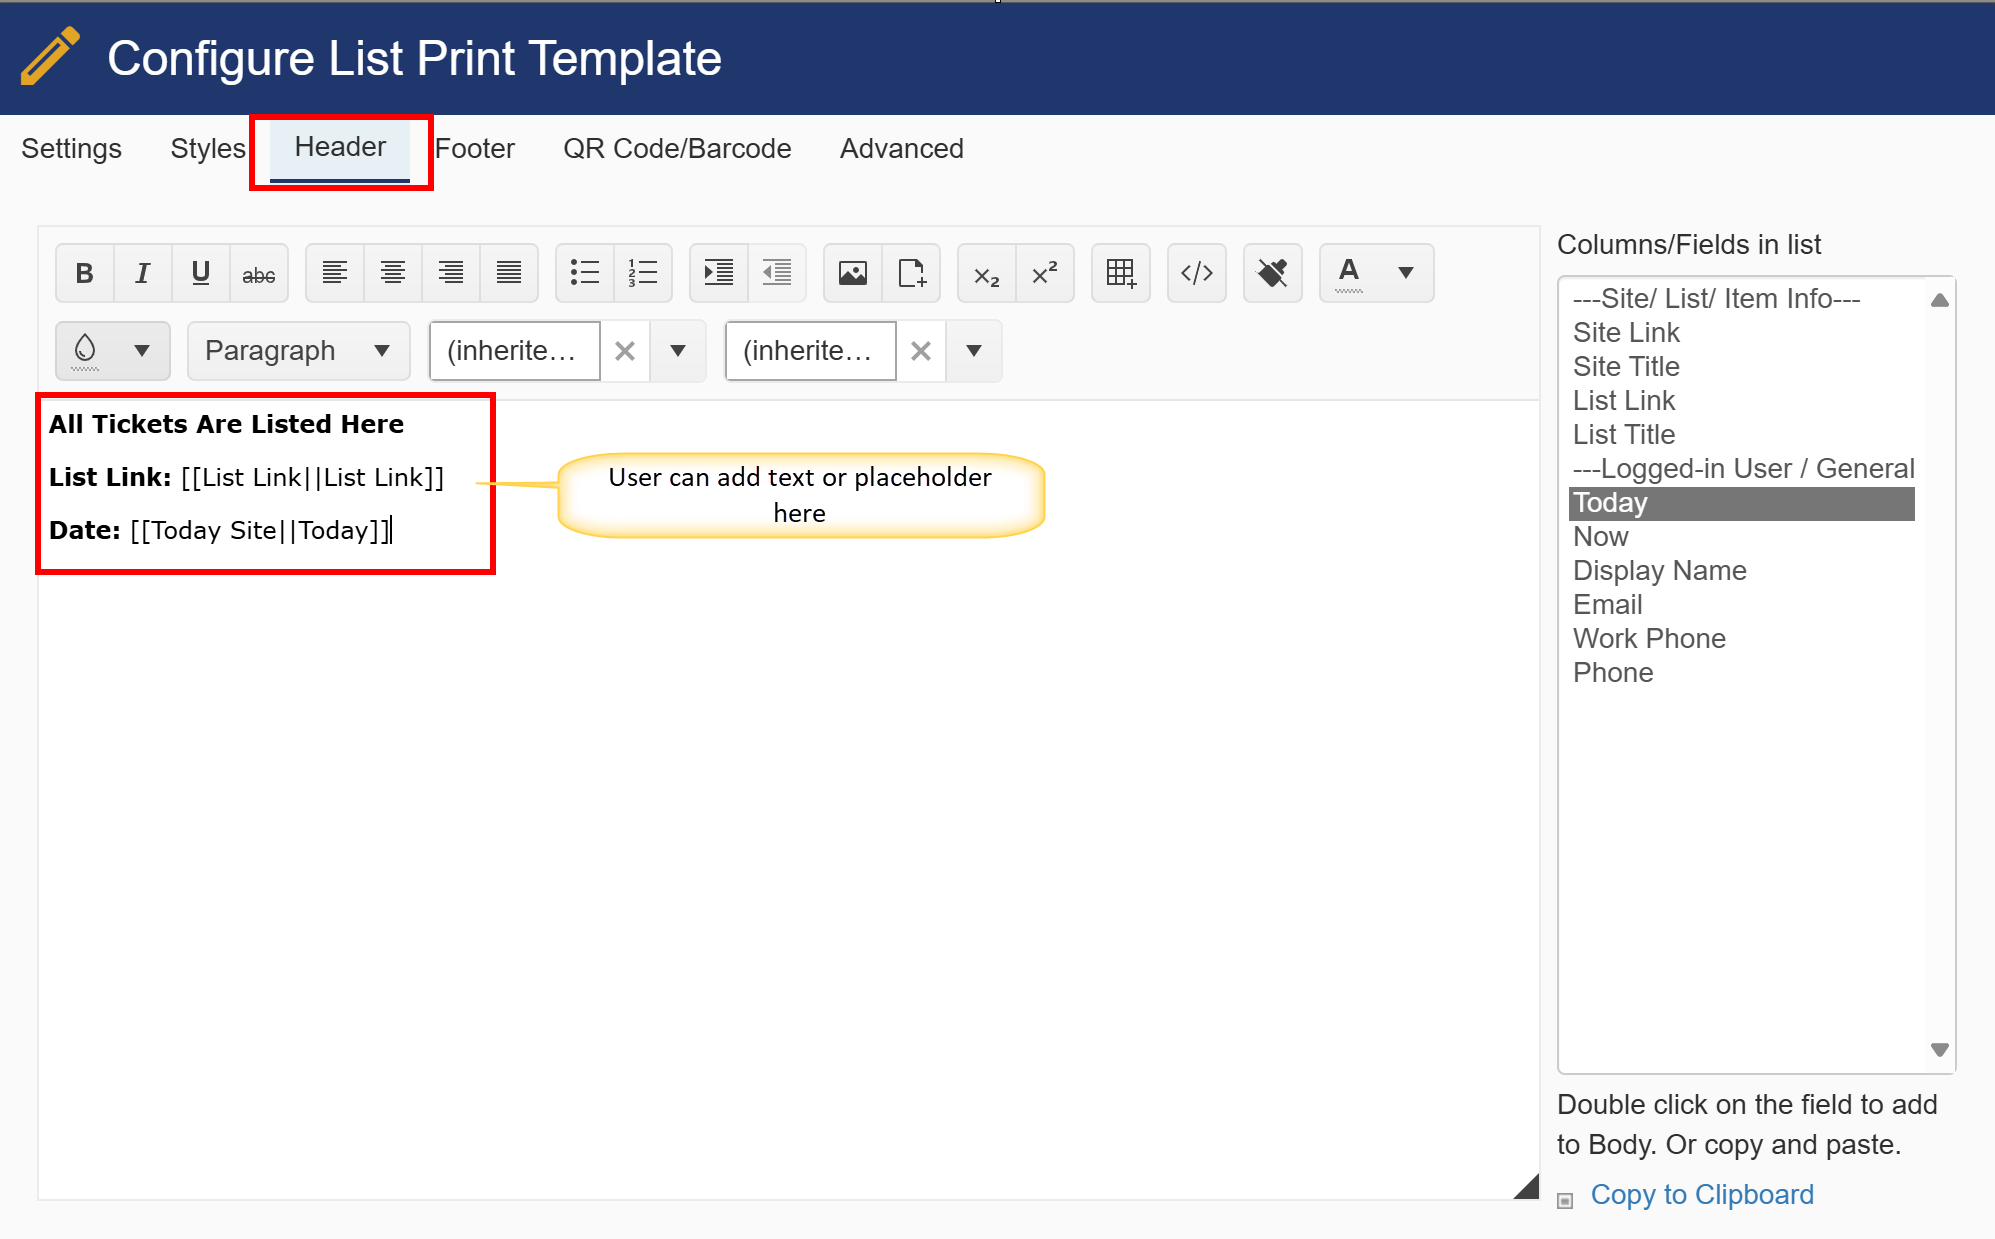
Header tab
Puts header on the print out. This has the full range of rich-text editing capabilities including adding images (e.g. a logo) and other text.
Footer tab
Puts footer on the print out. This has the full range of rich-text editing capabilities including adding images (e.g. a logo) and other text.
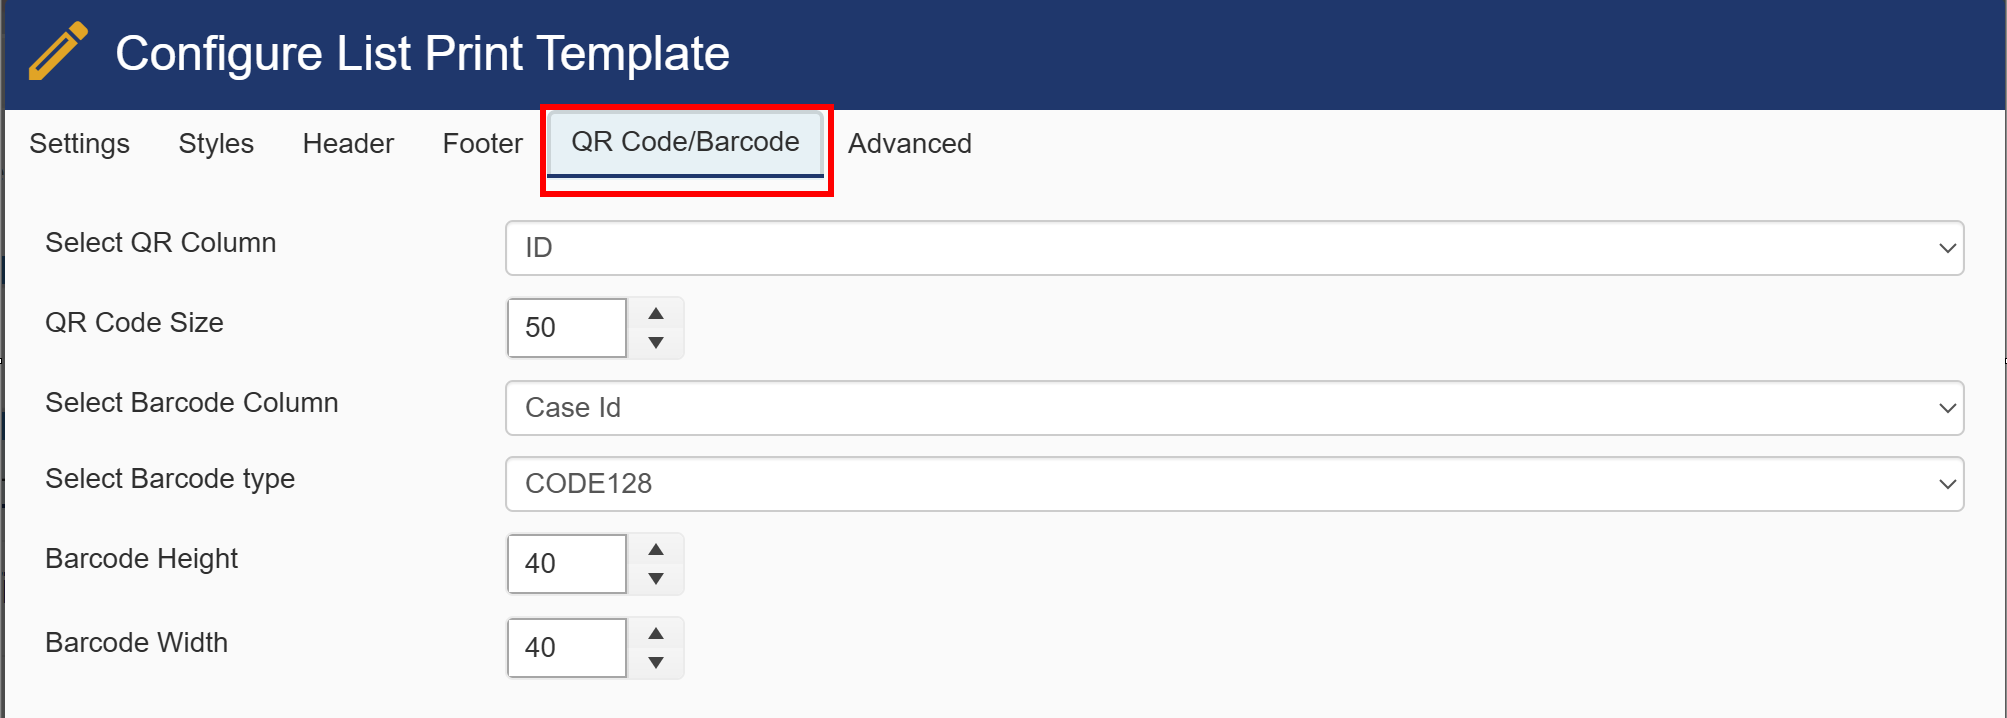
QR Code/Barcode tab
This tab is only used with the Template Type of "Table with selected column names and values". Otherwise, it disappears when "Rich text with column value placeholders" is selected. It will create a QR code or Barcode based on the value in the specified column.
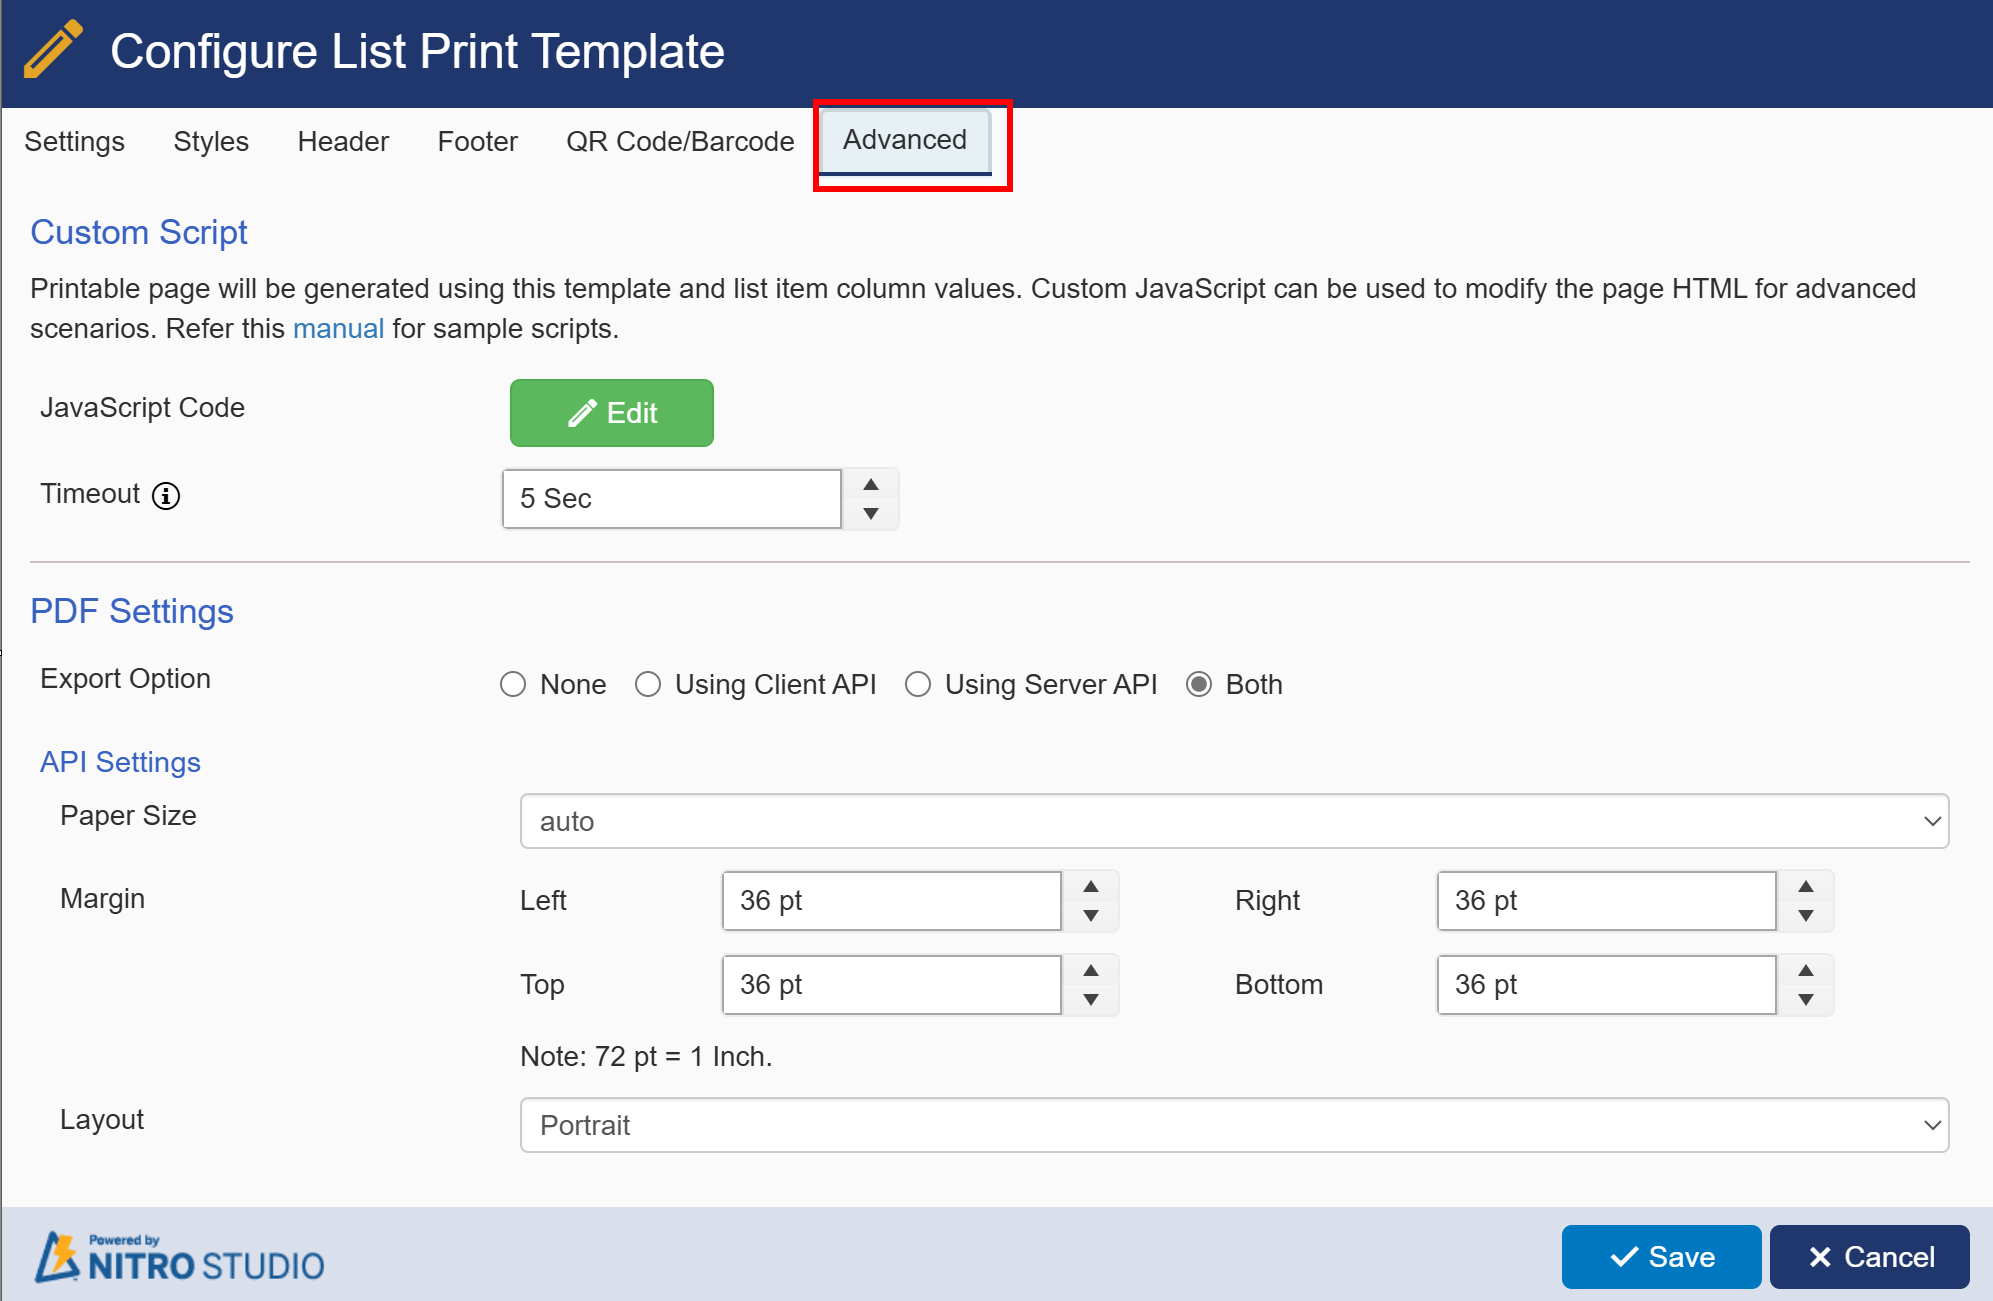
Advanced
When using the Print Manager to save the print out as a PDF, you will have the options to set the size, margins and layout of the PDF, as well as whether you want to export Using Client API, Using Server API, or have the option to select either of these in the Print Manager Dialogue, in which case you would select Both. You can also add JavaScript for advanced scenarios.
See here for example scripts: NITRO Print – Advanced formatting using JavaScript – Crow Canyon Software Knowledge Base
Update a List Template
Click on ‘Edit’ icon  to update a List Template
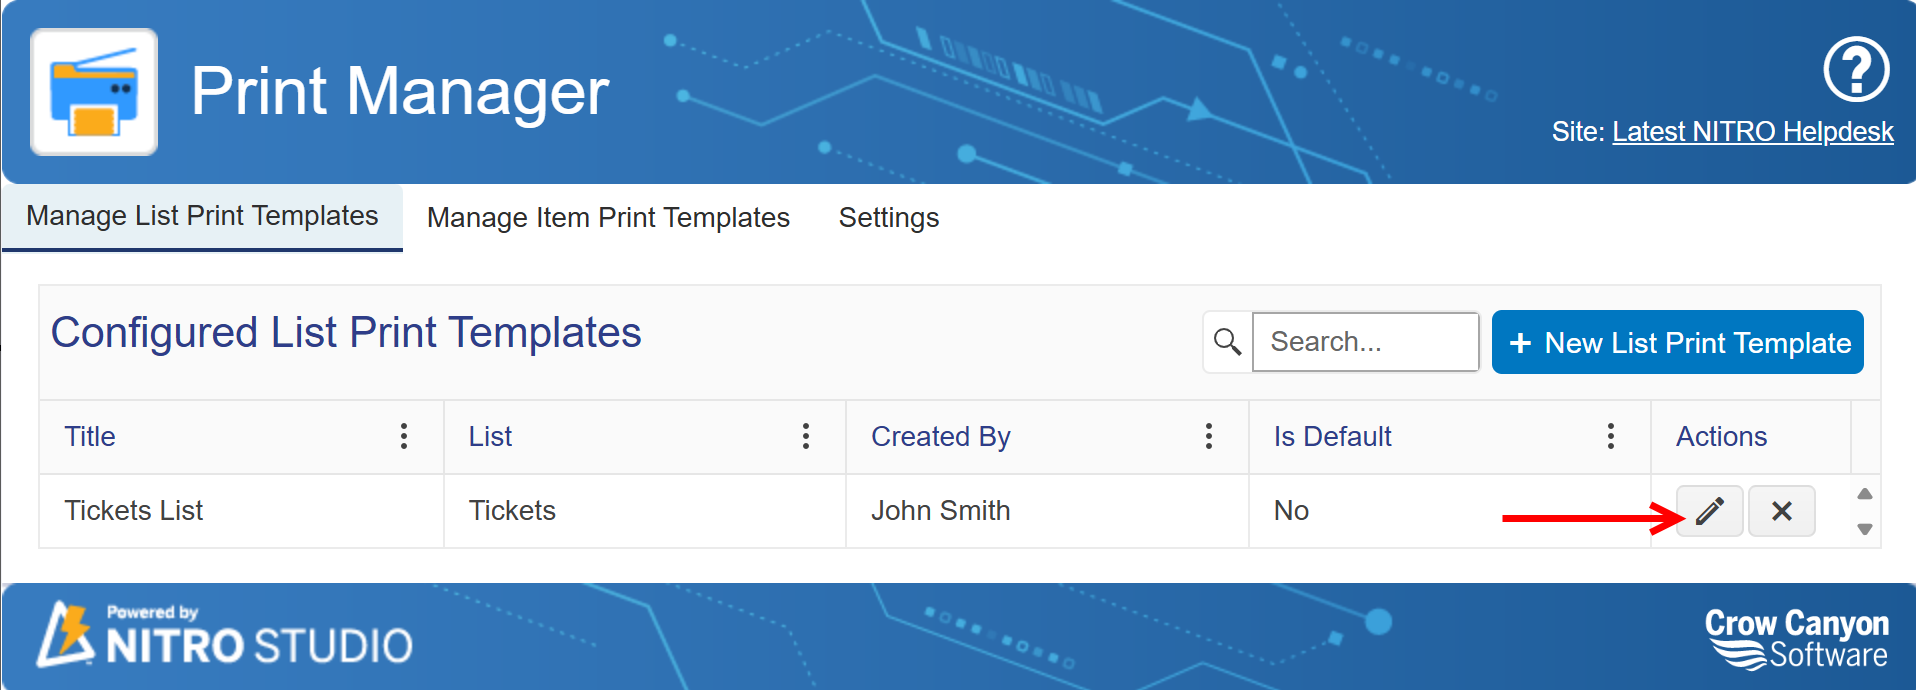
Note: You can change all the settings configured for that Template except what List it is used on.
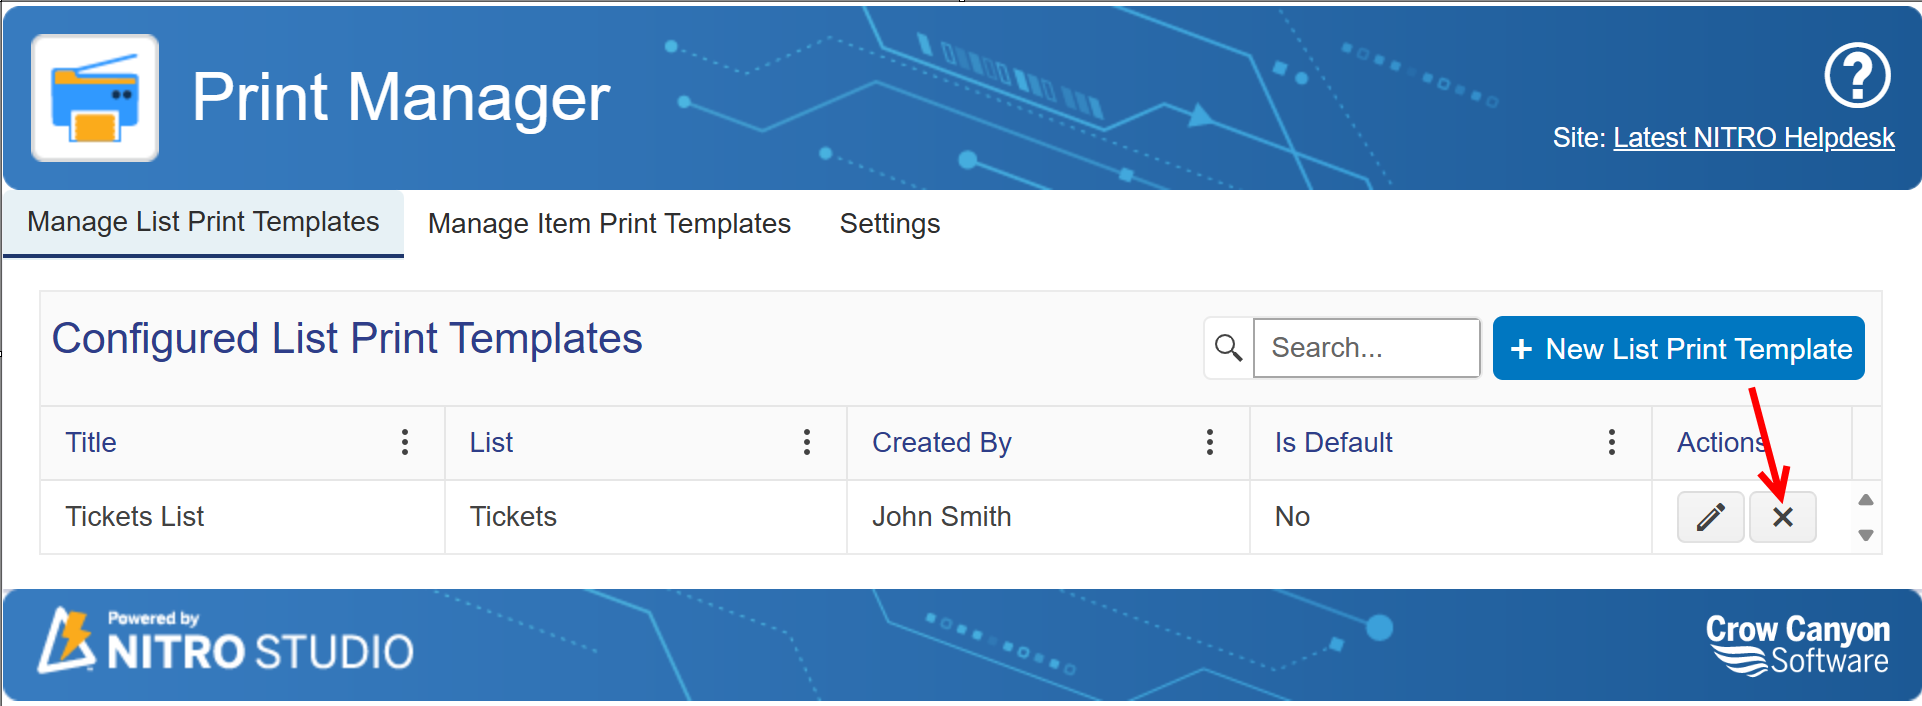
Delete a List Template
Click on ‘Delete’ icon  to delete a List Template
Printing a List
1.Open a list view on which List Template is configured and click on ‘Print’ icon under ‘List’ ribbon
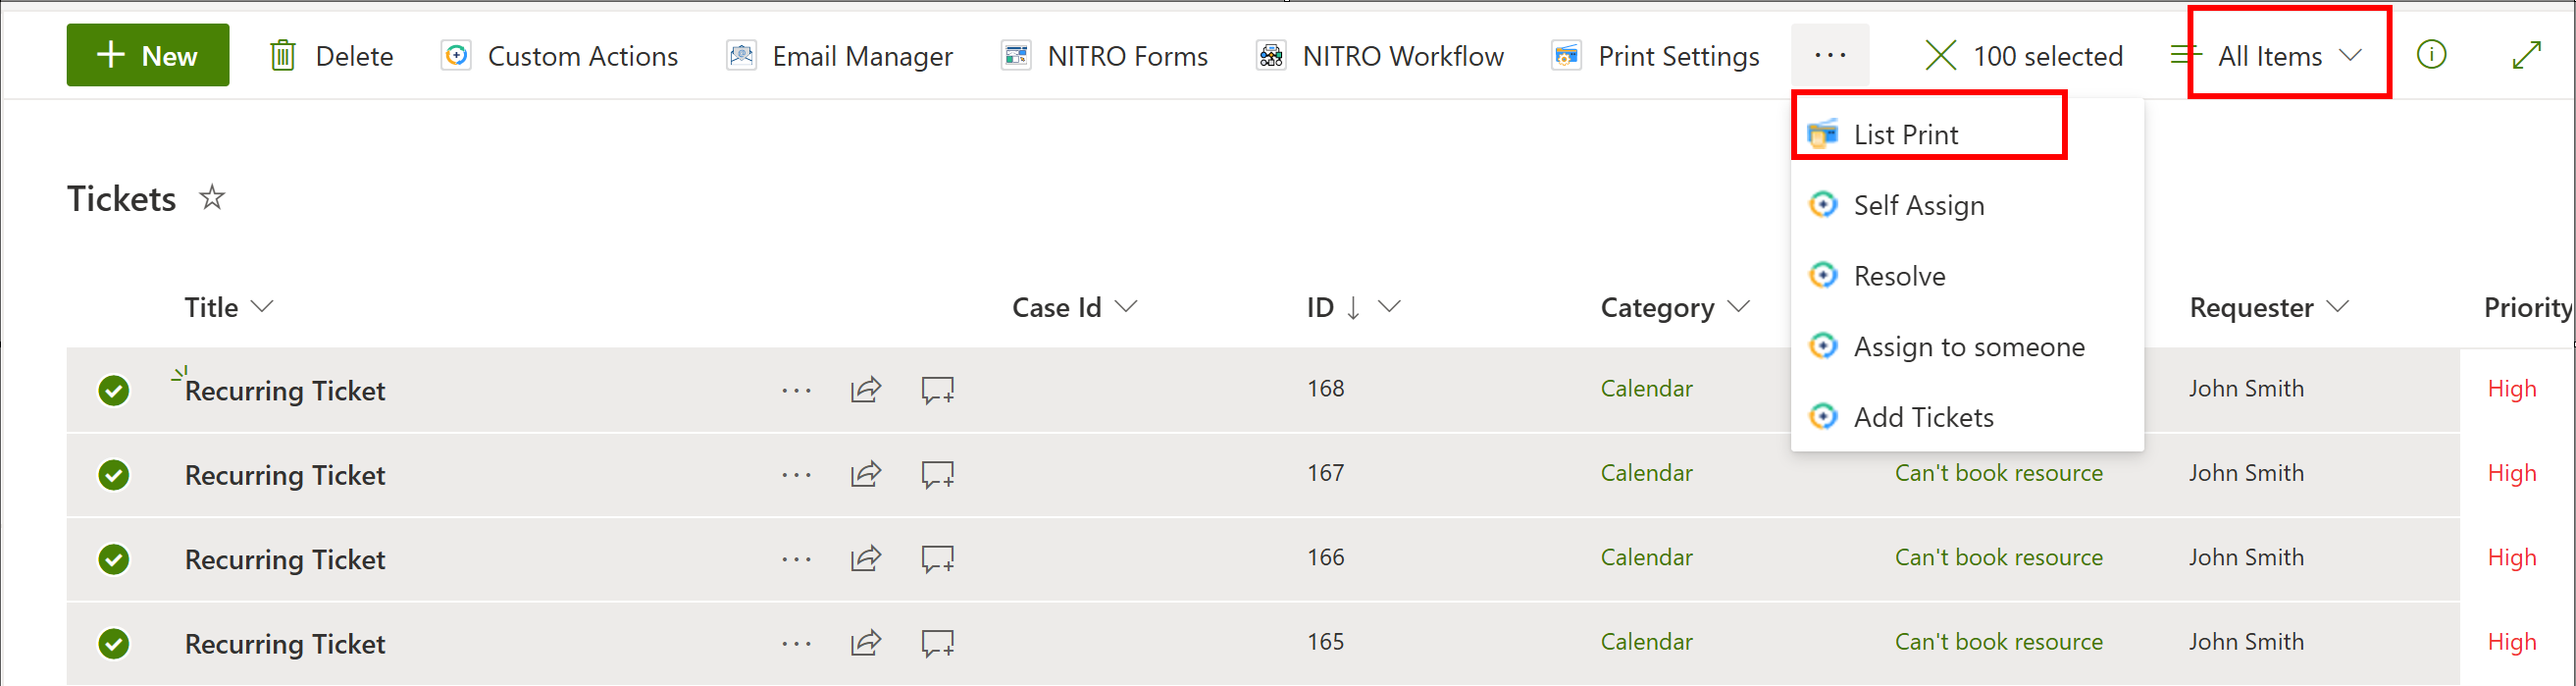
2.Crow Canyon Print Manager auto-selects ‘Default’ list template
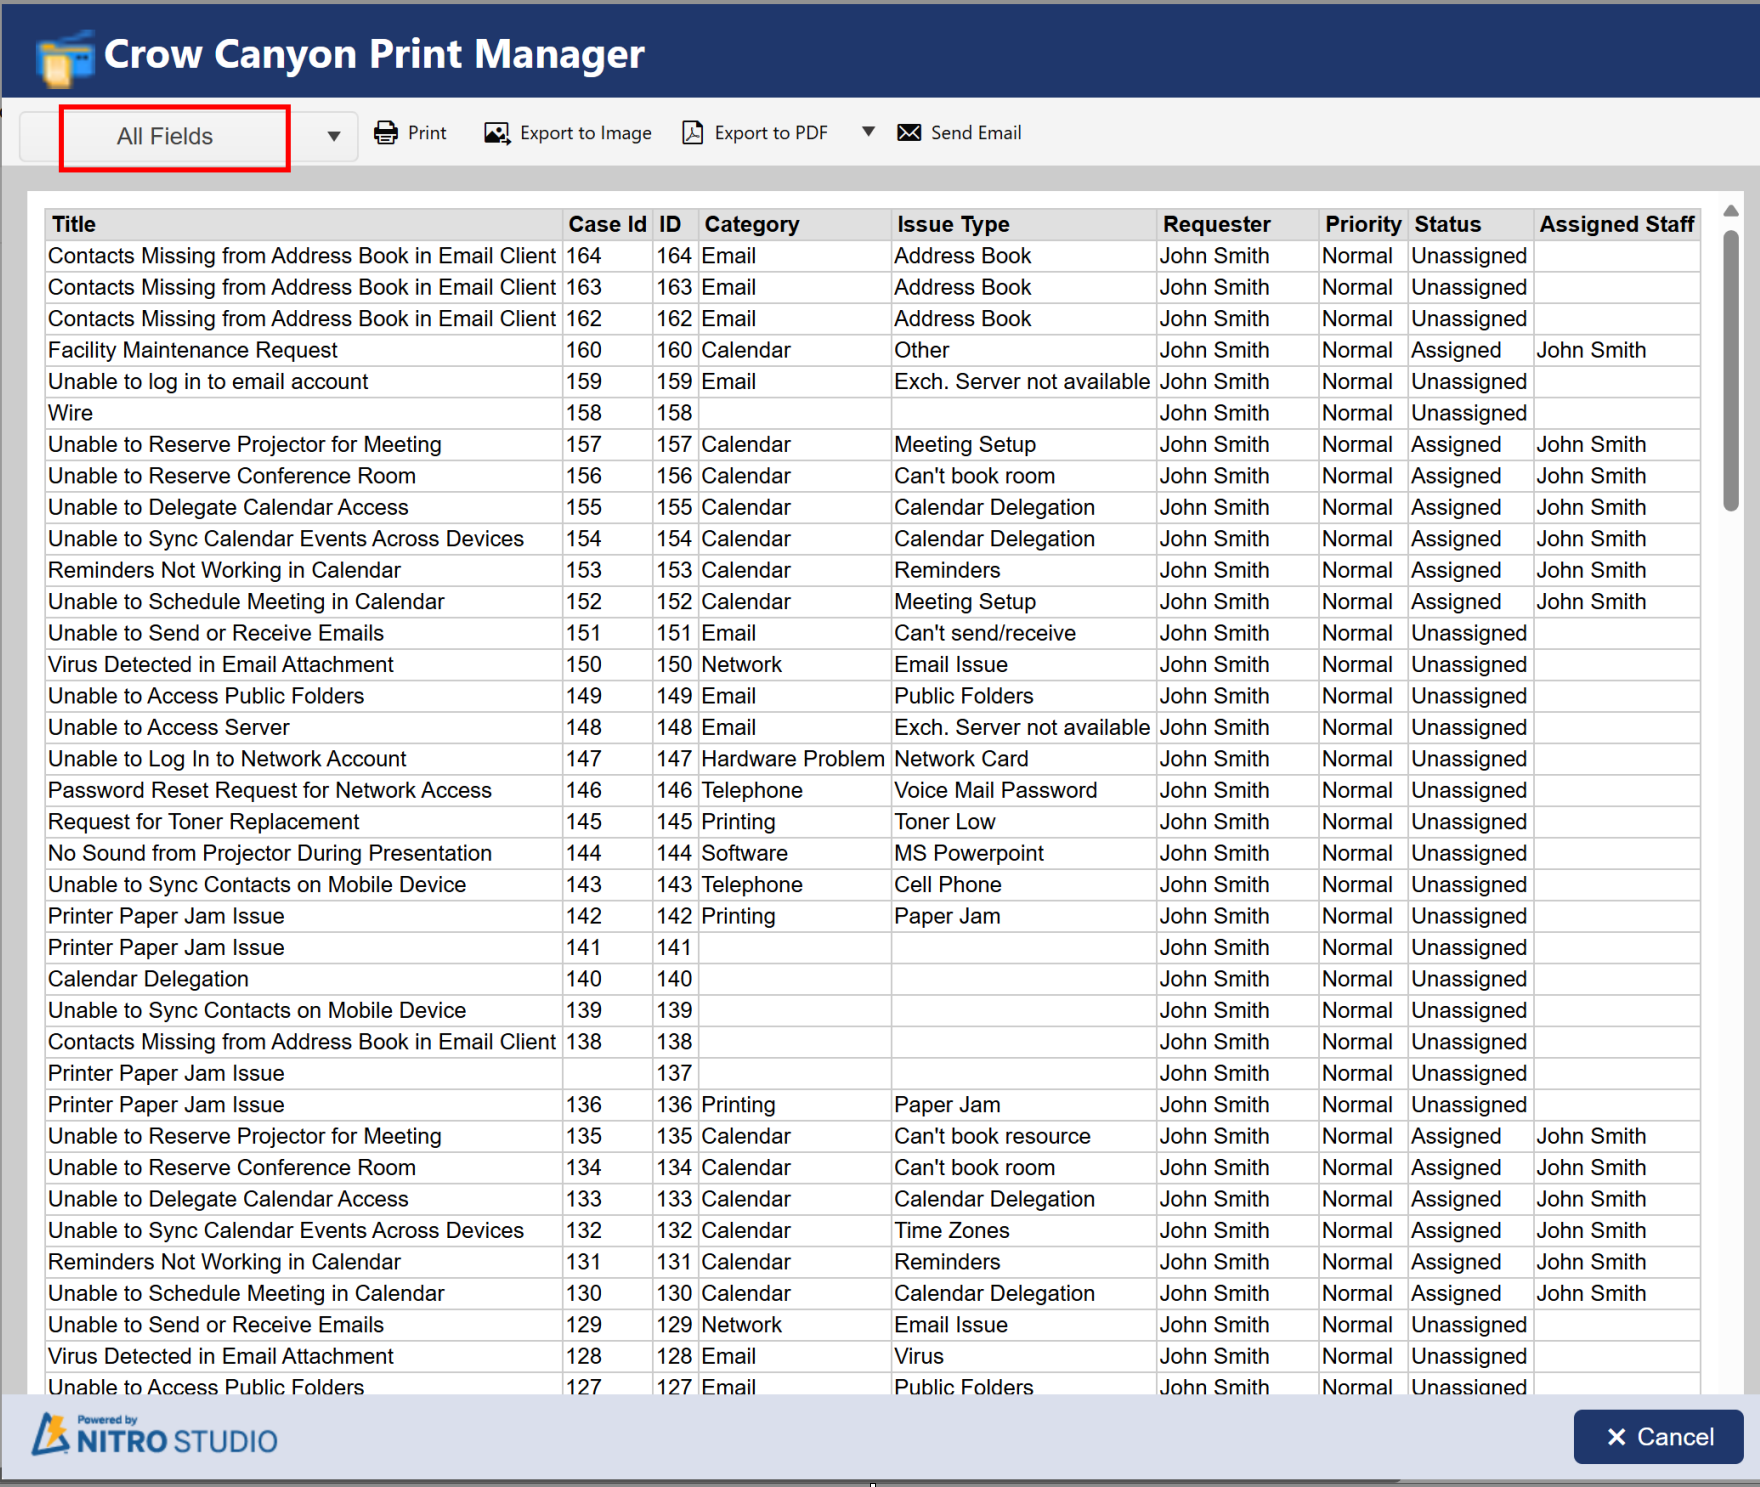
3.Select a list template from the dropdown and click on ‘Print’ Icon