Create Meeting Action
This action allows you to create team meeting from item using mail templates. Create Meeting and Send Mail action share the common mail template feature.
Create Meeting Action in Designer workflow:
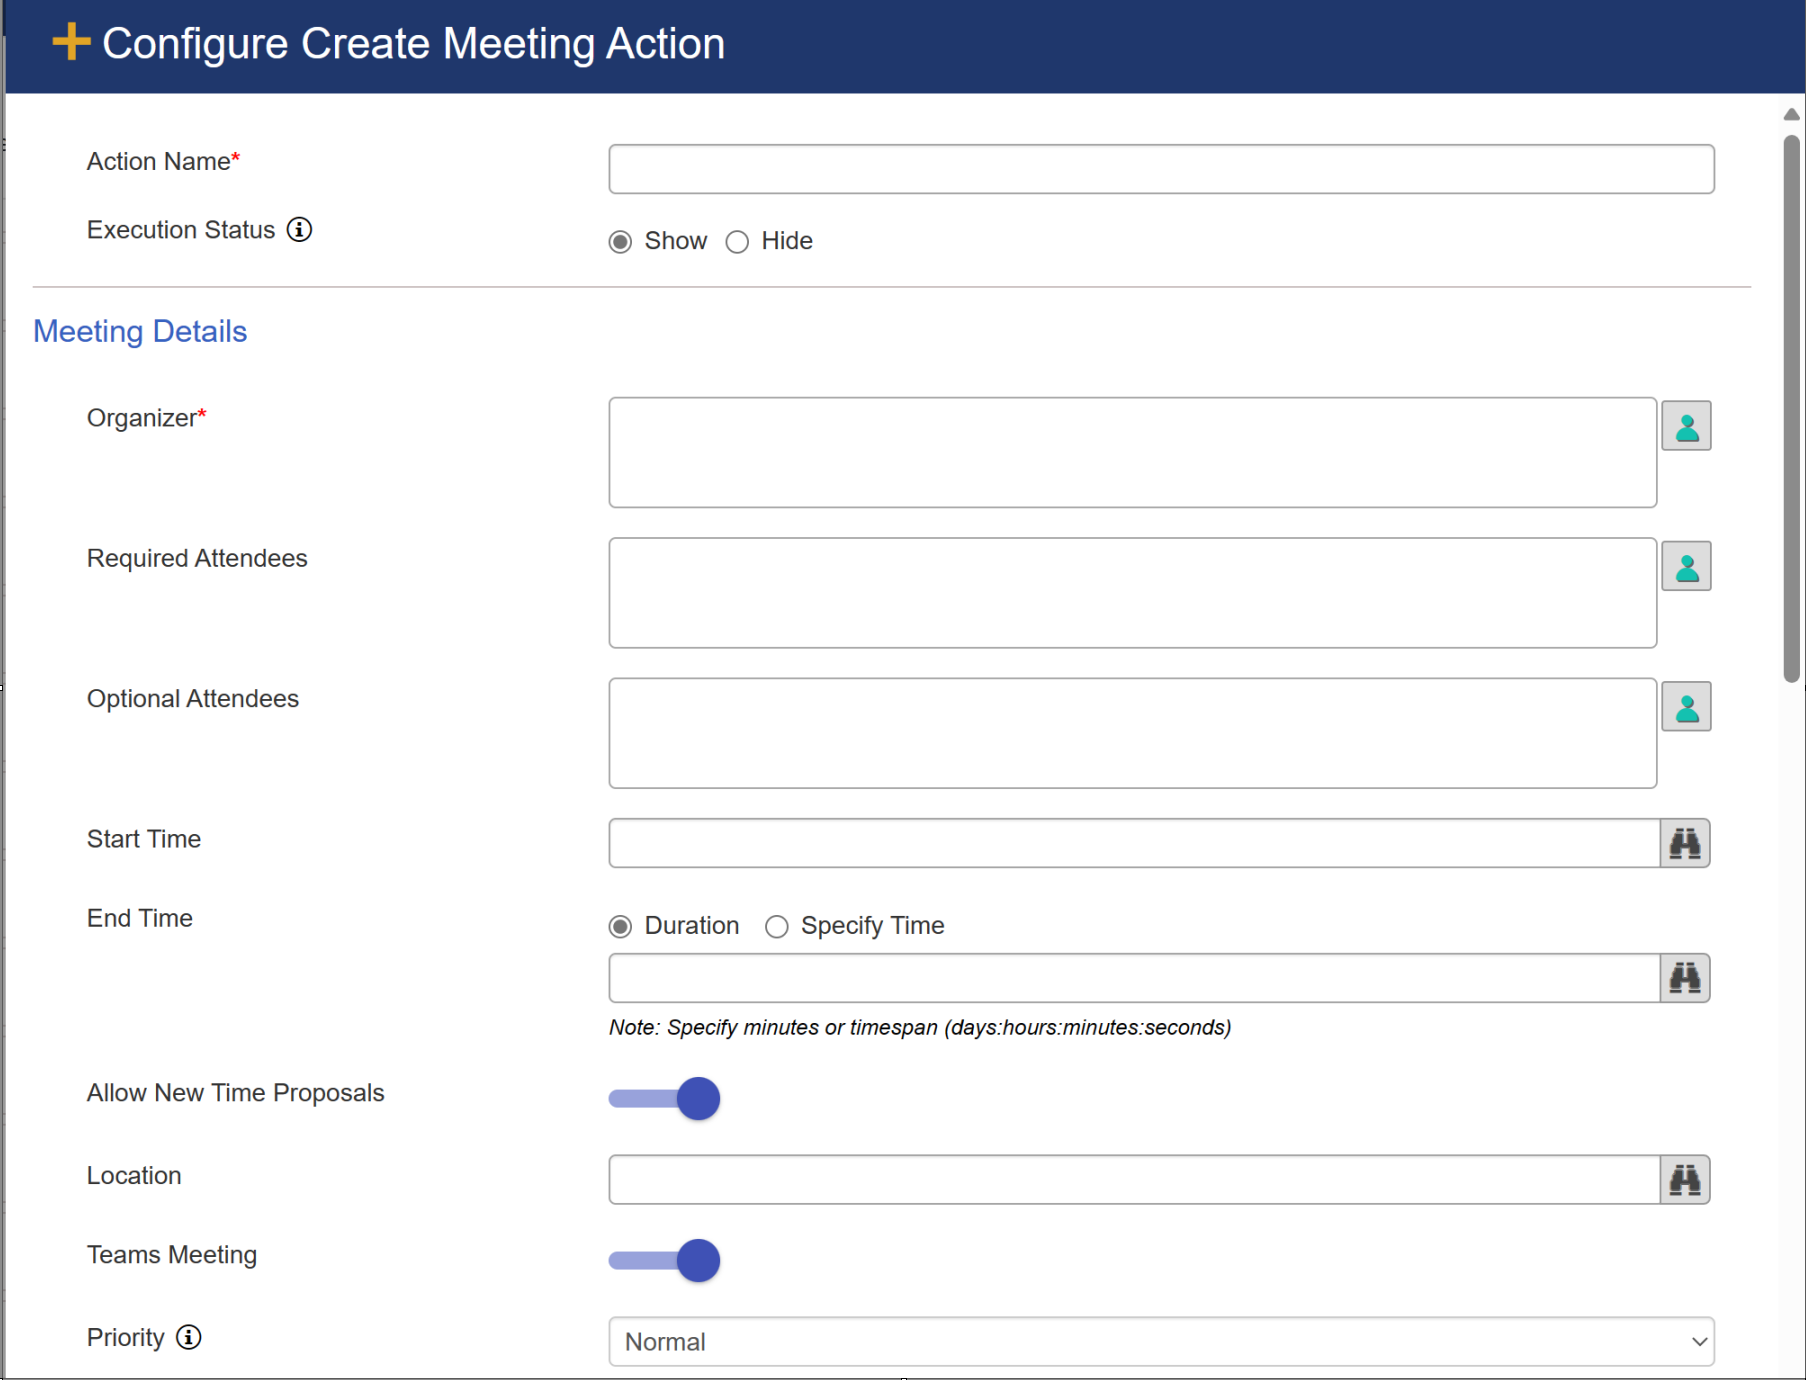
Action Name: Provide unique name for action
Execution Status: select this option to show or hide this custom action from user during execution.
Meeting Details
Organizer: can hold single name. Organizer is the person who is running the action. Organizer is the person who is is responsible for scheduling the meeting, inviting attendees, and setting the agenda. As the organizer, you have the ability to control meeting settings, You can easily add or remove attendees, and send updates and notifications to all attendees.
Required Attendees: supports multiple attendees to a meeting. Required attendees are those users who are expected to attend the meeting. Similar to Organizer, to select Required Attendees, click the buttons after the text boxes. Select the recipients from the Select Users box that comes up.
Optional Attendees: supports multiple attendees. Optional attendees are those users who can choose to attend or not. Similar to Organizer, to select Optional Attendees, click the buttons after the text boxes. Select the recipients from the Select Users box that comes up.
Start Time: Specify meeting start time. Click binocular icon next to the text box to add placeholders or functions.
End Time: specify the duration of meeting. It supports two options
Duration: if this option is selected, then you can specify end time in minutes or timespan (days:hours:minutes:seconds)
Specify Time: just like Start time, it also supports placeholders and functions
Allow New Time Proposals: default value is 'True'. If attendees are not available at requested meeting time, then they can propose new meeting time only if 'Allow New Time Proposals' option is enabled by organizer.
Location: organizer can specify the location of meeting. This supports placeholder and functions. Click button next to the text box to add placeholders or functions.
Teams Meetings: default value is 'True'. If Teams Meetings is enabled, attendees will get meeting notification in Teams also.
Priority: Organizer can define meeting priority here. Default value is ' Normal'.
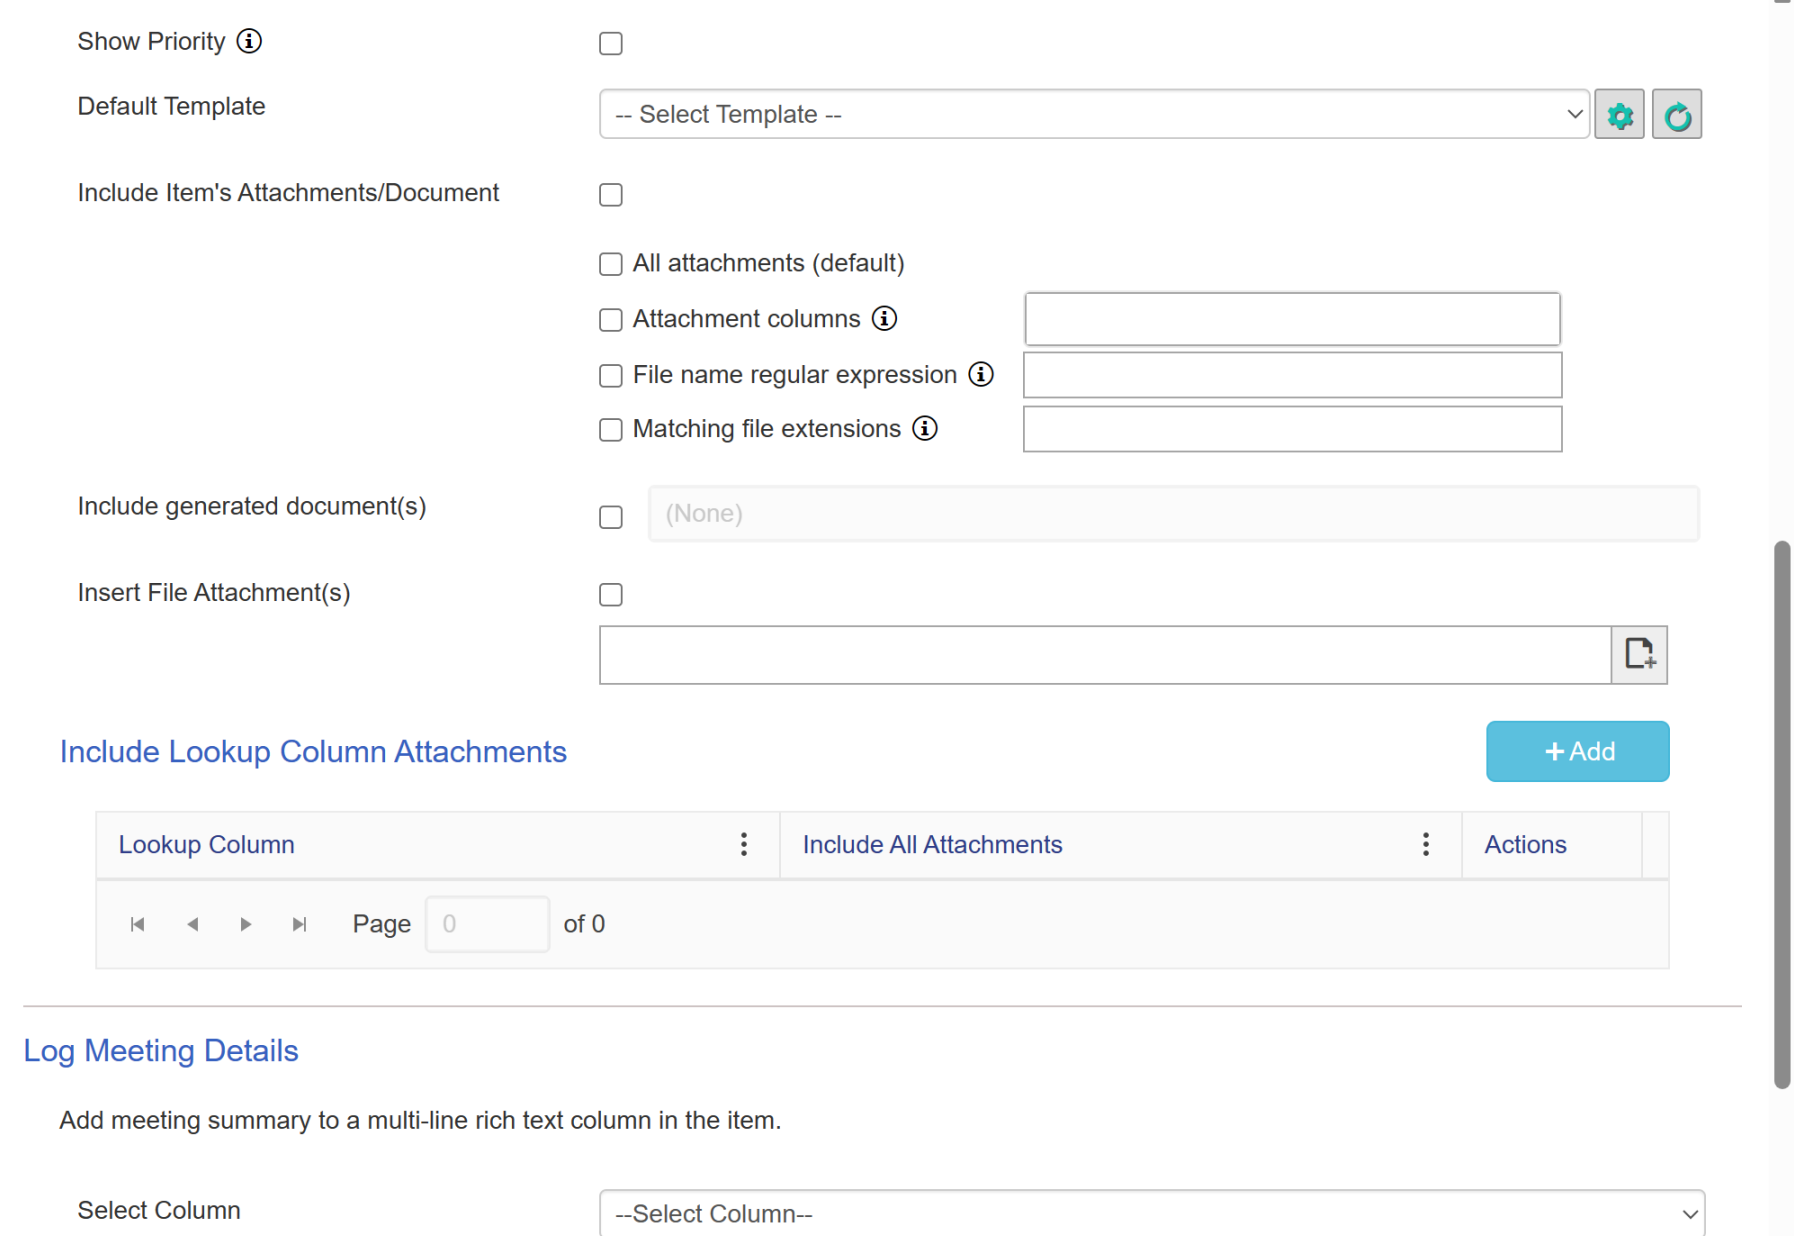
Show Priority: organizer can check this option if they want to show the priority of meeting.
| Default Template: Use the "Mail Template" dropdown list to select a mail template. If no mail templates have been configured in the NITRO Workflow app, click the 'gear' icon to create a mail template. It will navigates you to the "Mail Template' app. To 'Edit ' and ' Delete' mail template, go to the mail template app by clicking 'gear' icon. |
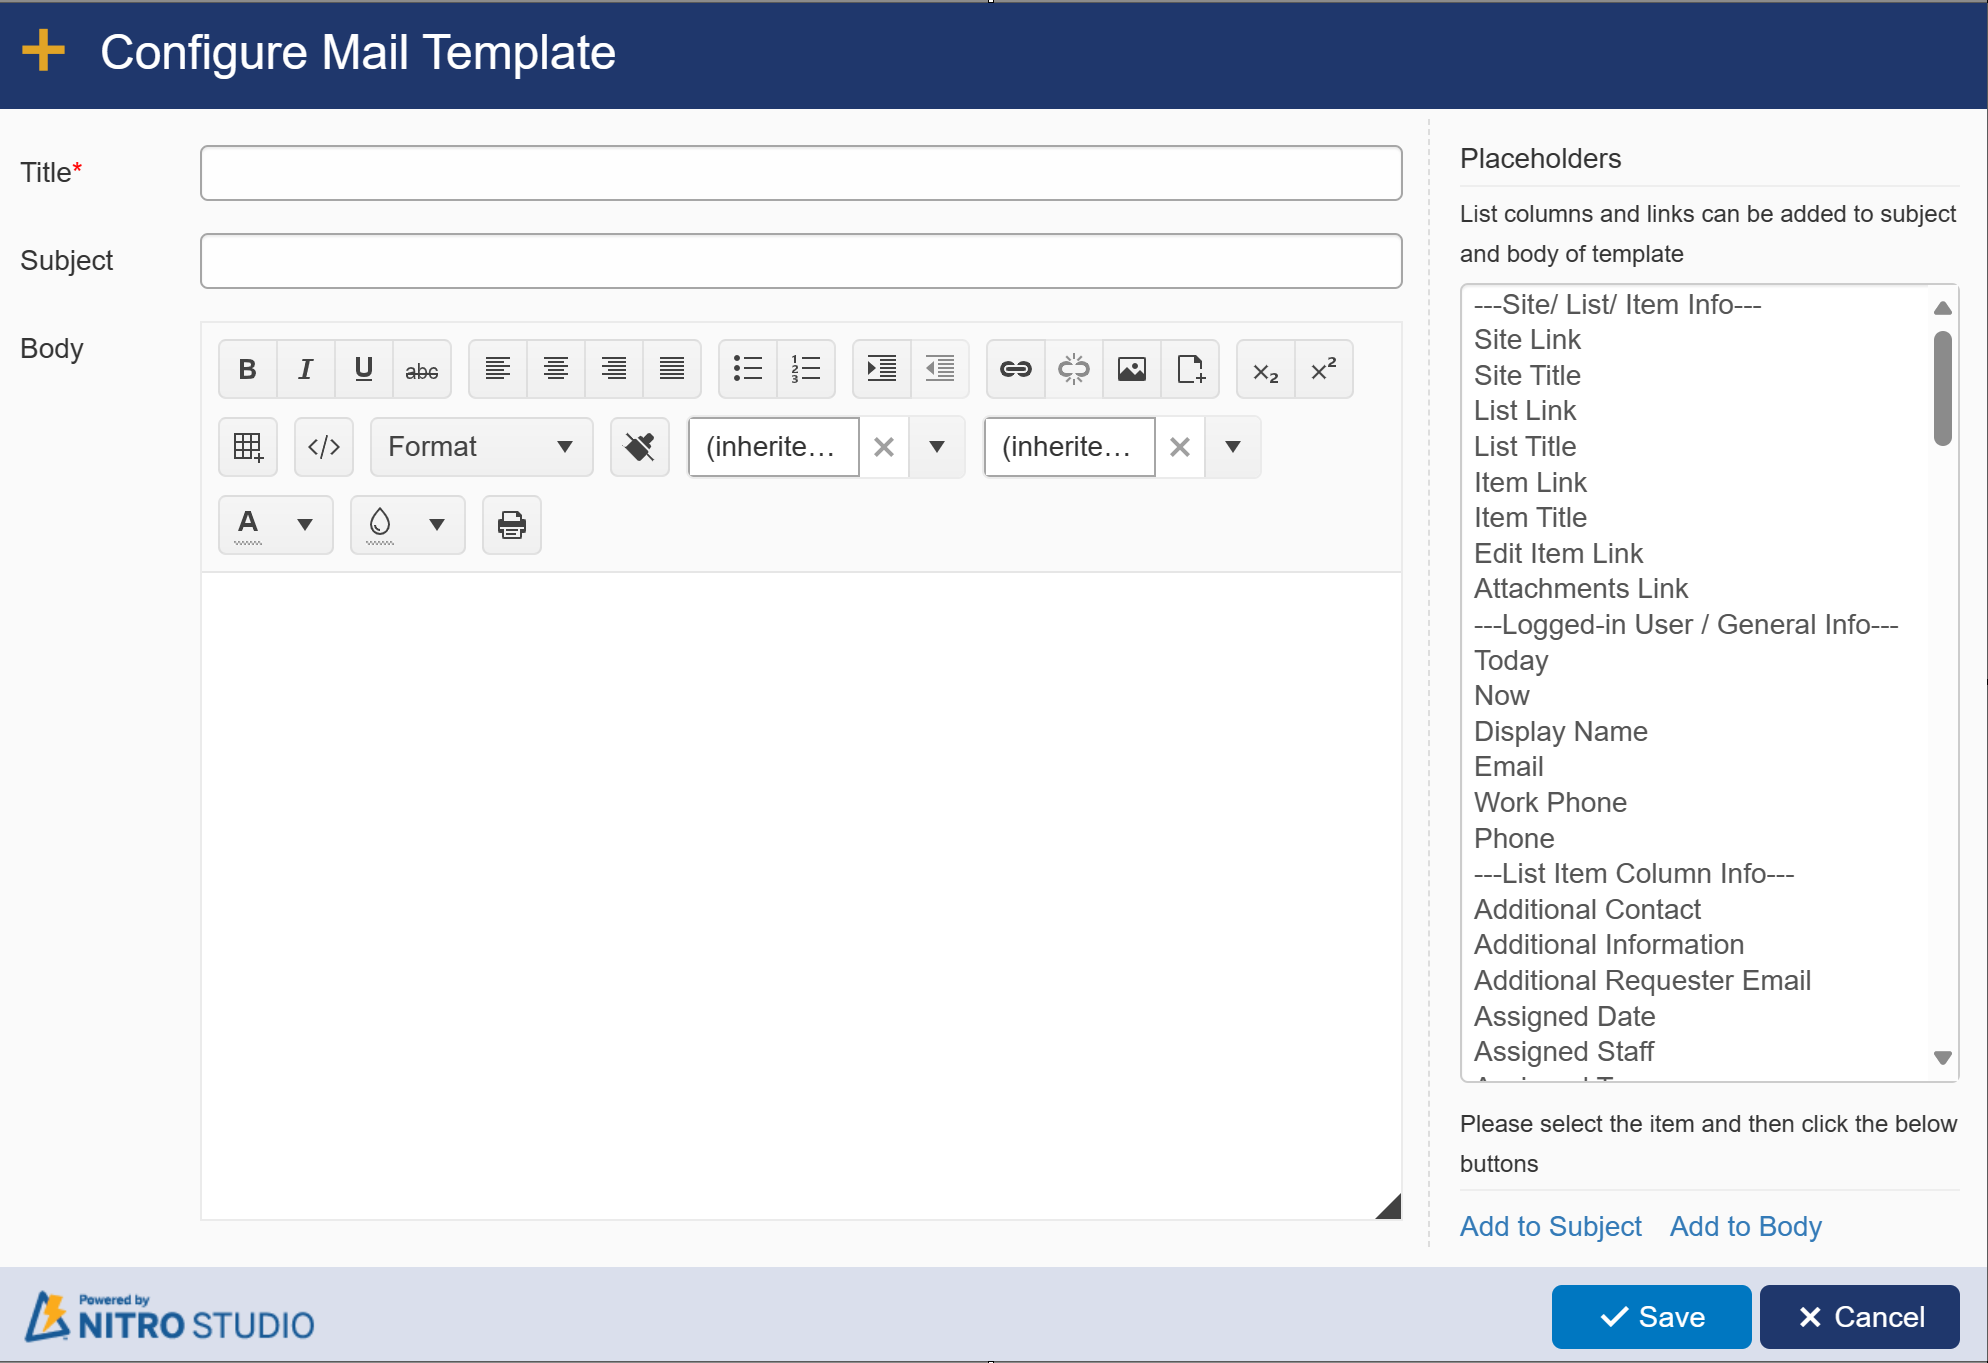
Title: provide the title of the Template.
Subject: provide the Subject of the meeting. This can have Placeholders in it.
Mail Body: specify the mail body of the meeting, which can include rich-text formatting. This can have Placeholders in it. In mail body, organizer can specify the main purpose of meeting.
Include Item's Attachments/Documents: Enabling this setting will allow you to insert columns, attachments and documents and will enable the “All attachments” default setting
• All Attachments: It will include all attachments of item in the meeting.
• Attachment columns: Select one or more text type columns, or select NITRO Attachments.
• File name regular expression: Filter attachments/documents using regular expressions.
| Example: To match all pdf files with word Agreement in their name specify: .*Agreement.*.pdf |
• Matching file extensions: Filter attachments/documents by matching file extensions.
| Example: pdf;docx |
Include generated document(s): select this option to include generated documents in meeting. Select the generated document(s) from the dropdown available to the right side of the checkbox.
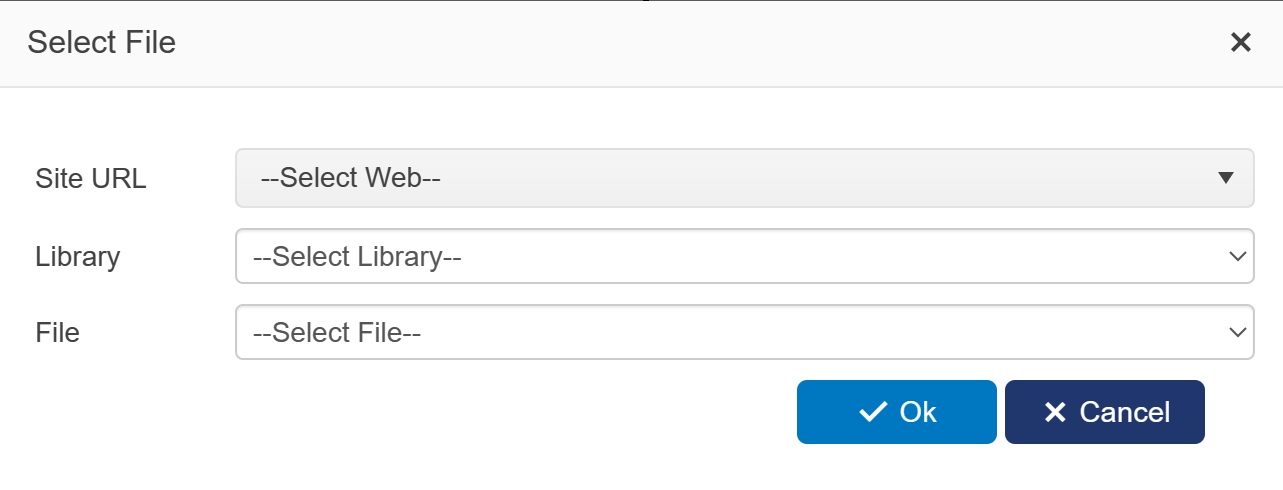
Insert File Attachments: Select this option to Insert SharePoint file(s) from library by clicking '+' button
•Site URL: Select site URL from dropdown
•Library: dropdown will show all library of selected site in above step. Select library from which you want to attach file.
•File: Select file name (from the selected library in above step) that you want to attach in the email.
Insert Lookup Column Attachments: To insert attachments from lookup column, click 'Add' button. A window will pop up
Select lookup column from dropdown. 'All attachments' is by default selected. this will include all attachments of selected lookup column in meeting.
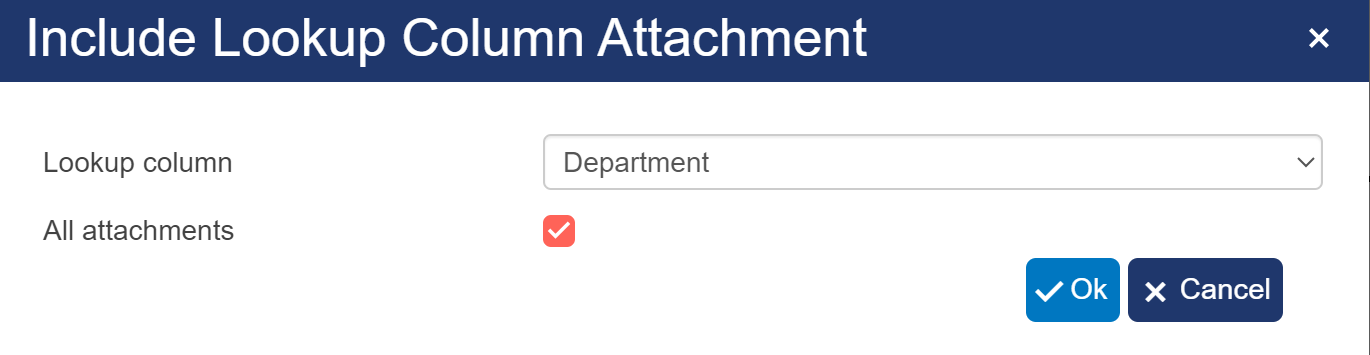
If you don't want to include all attachments of lookup column then deselect 'All attachments'. following columns will be visible after deselecting 'All attachments'
Log Meeting Details
Select multi-line rich text column to put meeting details in the item for which workflow is running.
For example of Create Meeting action see Sample Example section in this link