Create Meeting Action
This action allows you to create team meeting from item using mail templates created within the NITRO Workflows app. Create Meeting and Send Mail action share the common mail template feature.
Create Meeting Action in Designer workflow:
Create Meeting Action in legacy workflow:
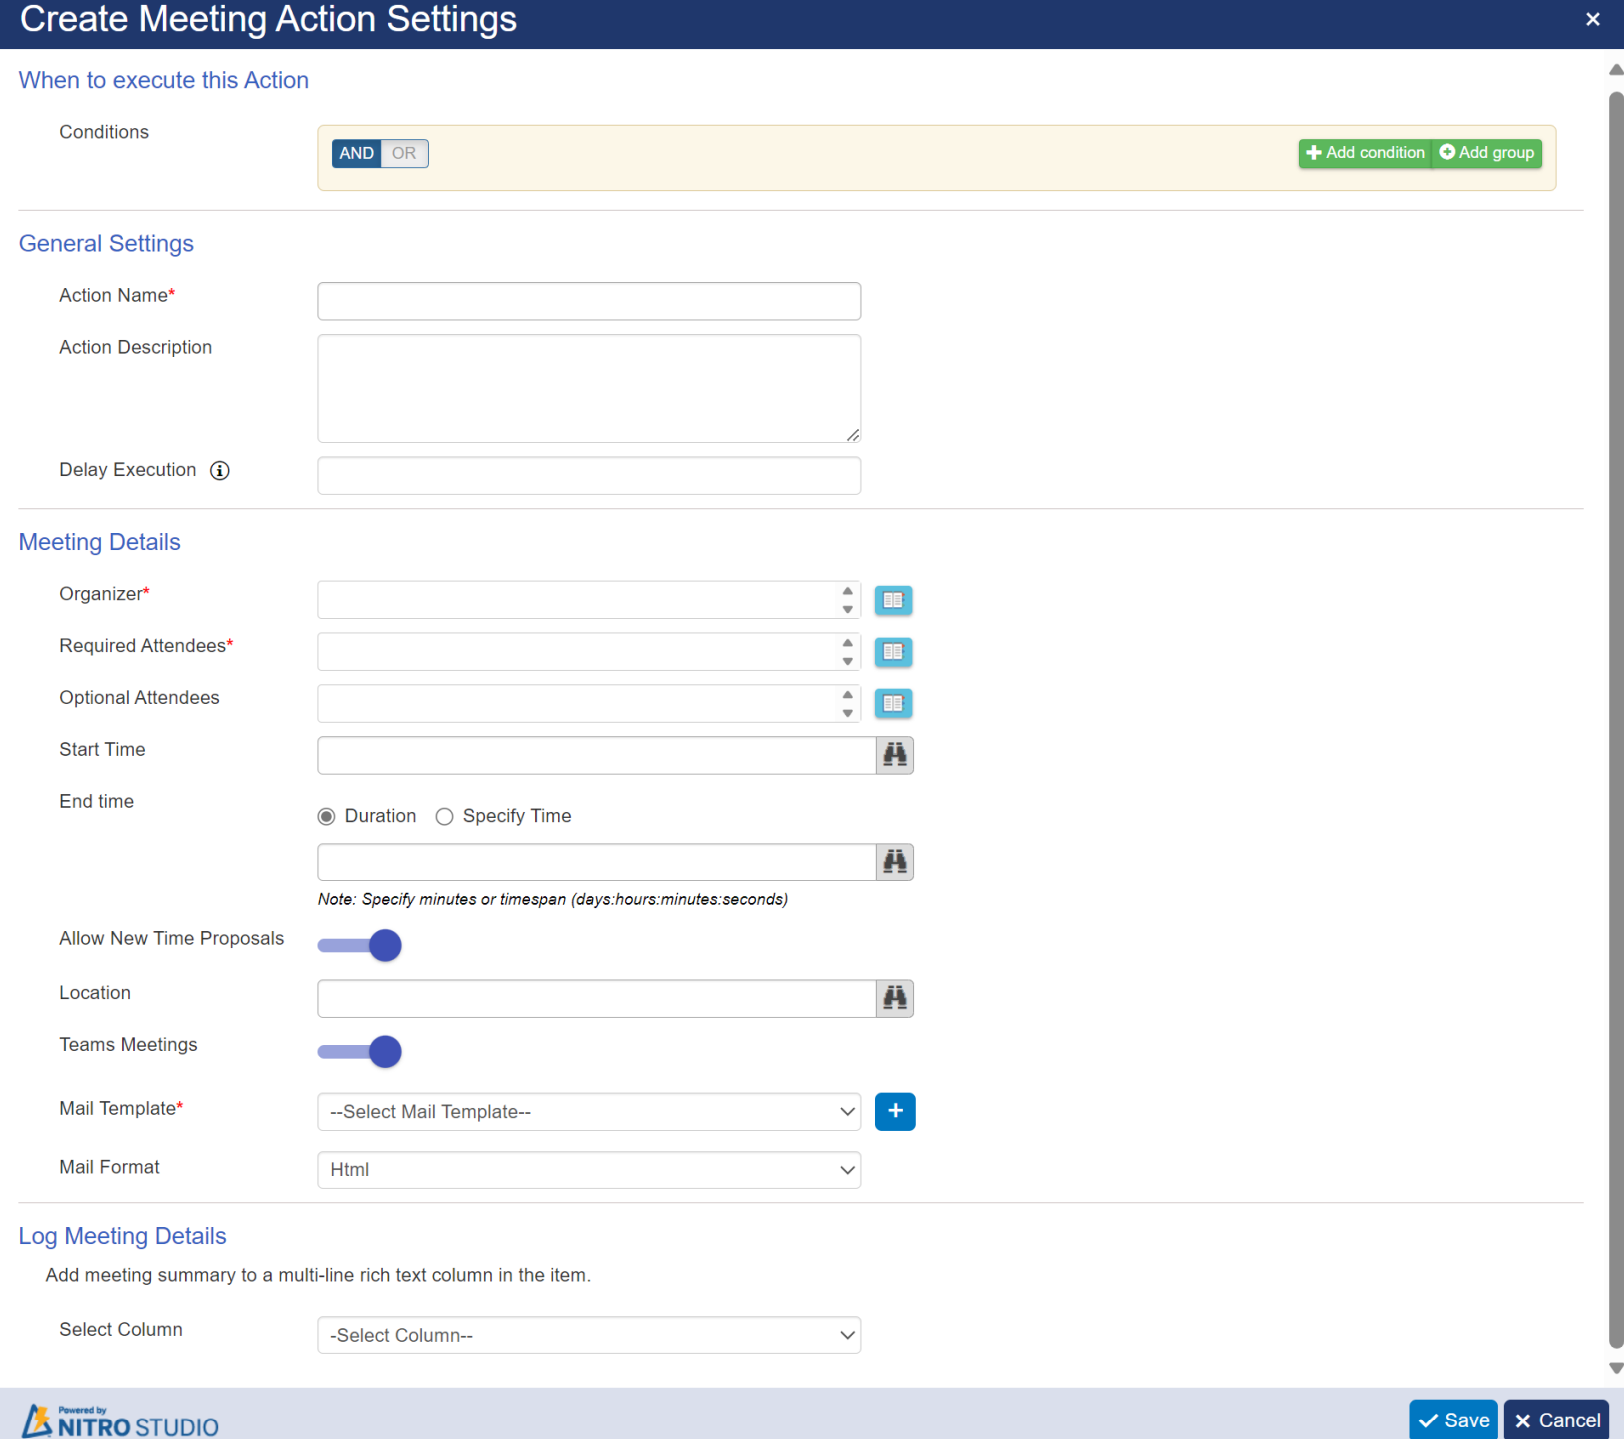
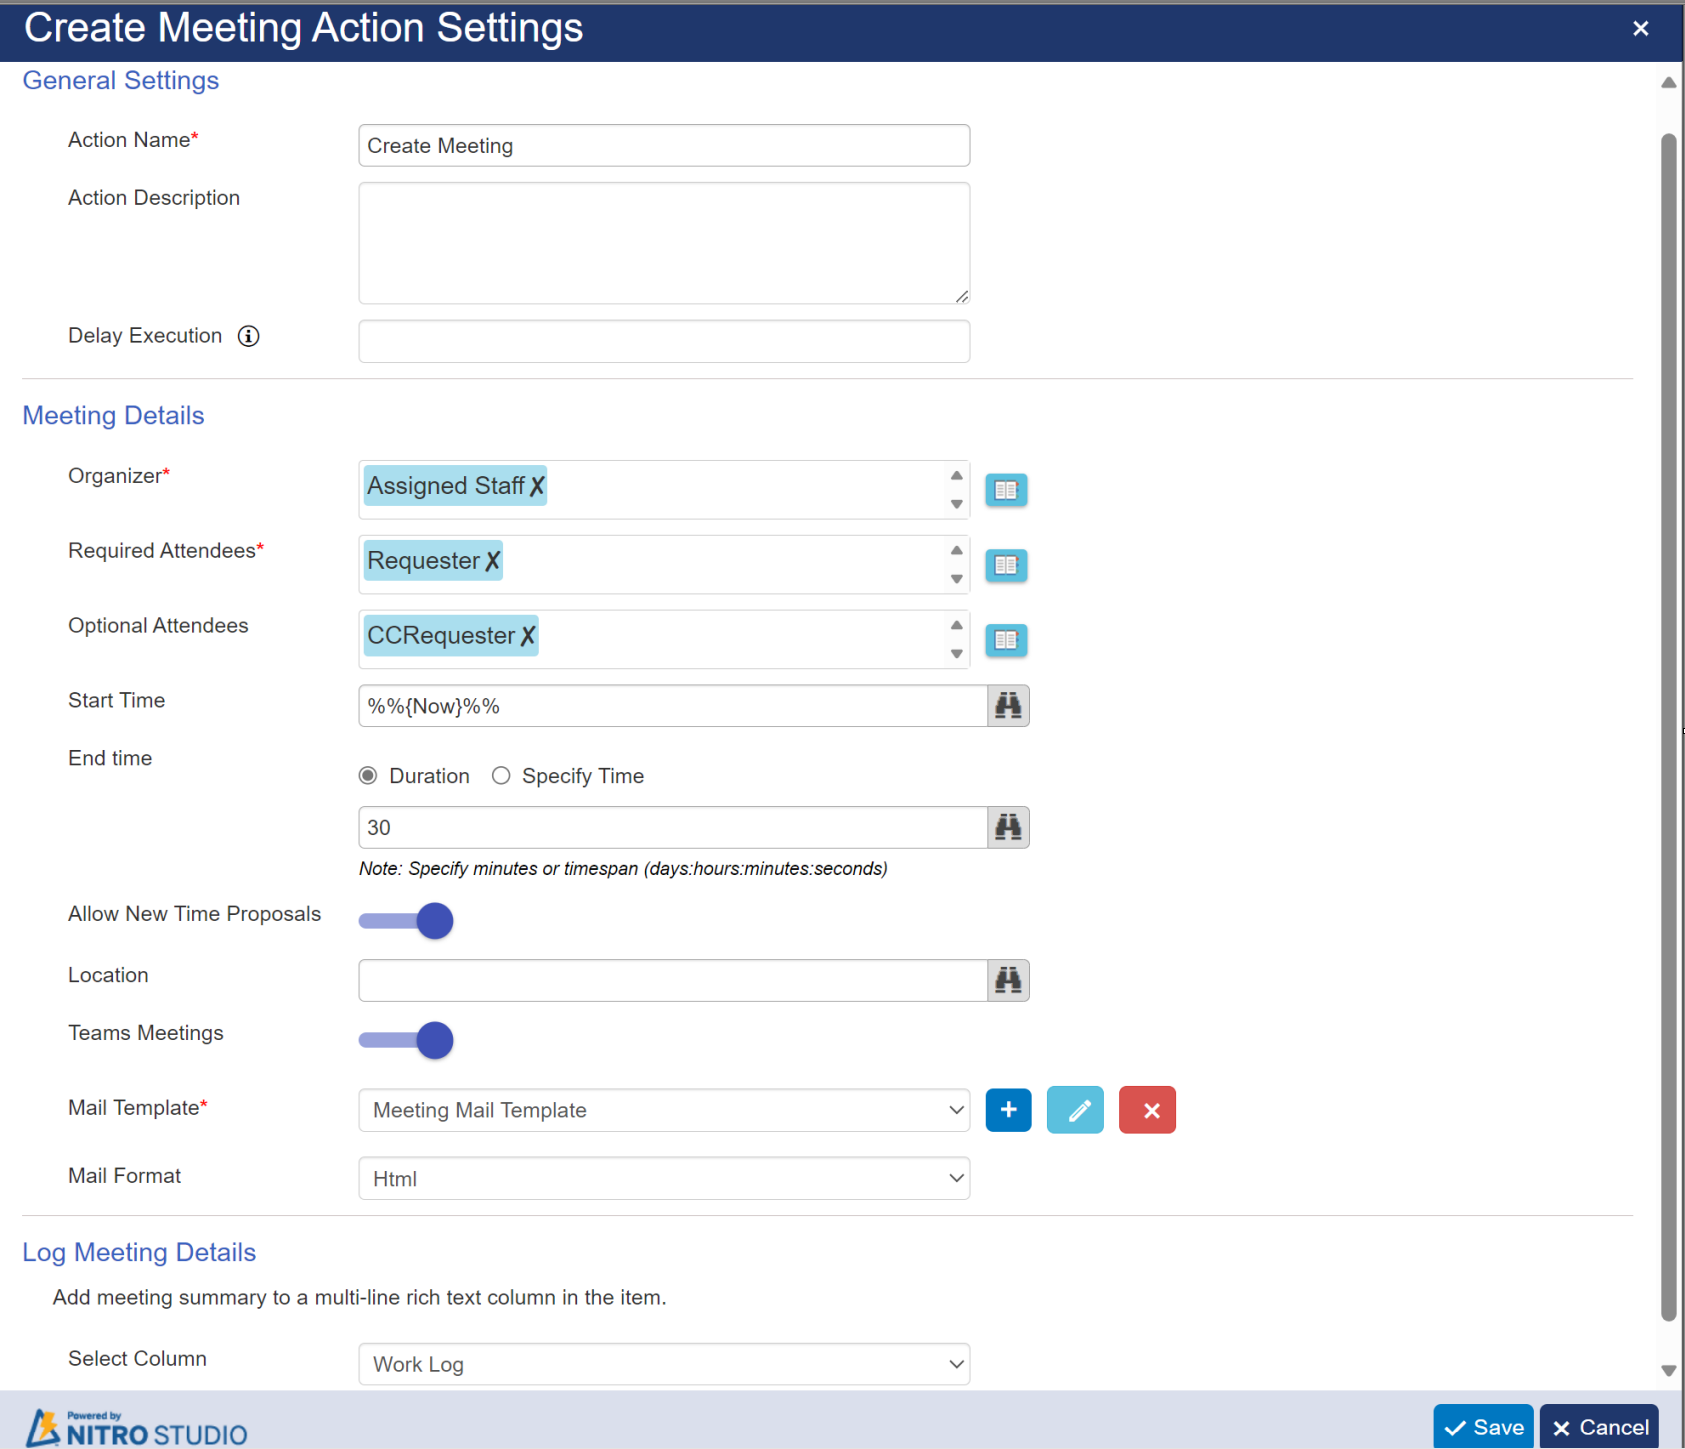
General Settings
Action Name: enter a name for this Create Meeting action
Action Description: enter description for this Create Meeting action
| Delay Execution: it will delay action execution for specified seconds. |
Meeting Details
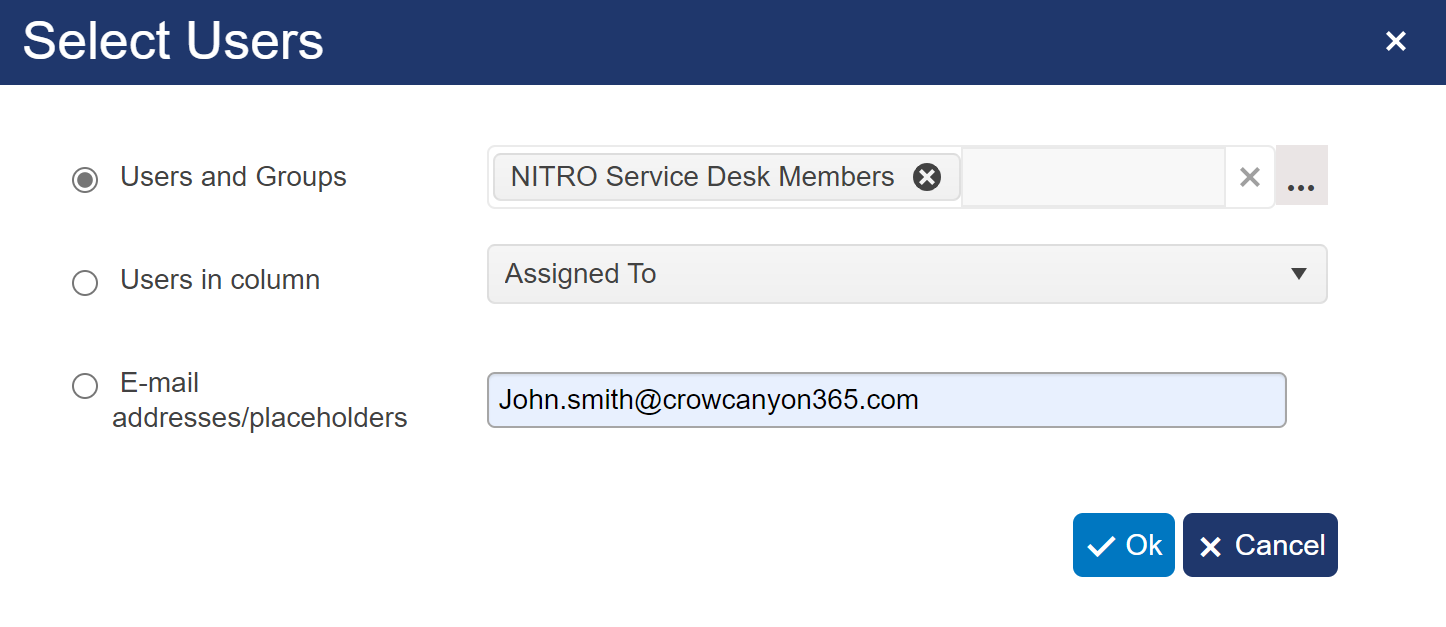
Organizer: can hold single name. Organizer is the person who is running the action. Organizer is the person who is is responsible for scheduling the meeting, inviting attendees, and setting the agenda. As the organizer, you have the ability to control meeting settings, You can easily add or remove attendees, and send updates and notifications to all attendees.
Required Attendees: supports multiple attendees to a meeting. Required attendees are those users who are expected to attend the meeting. Similar to Organizer, to select Required Attendees, click the buttons after the text boxes. Select the recipients from the Select Users box that comes up.
Optional Attendees: supports multiple attendees. Optional attendees are those users who can choose to attend or not. Similar to Organizer, to select Optional Attendees, click the buttons after the text boxes. Select the recipients from the Select Users box that comes up.
Start Time: Specify meeting start time. Click binocular icon next to the text box to add placeholders or functions.
End Time: specify the duration of meeting. It supports two options
Duration: if this option is selected, then you can specify end time in minutes or timespan (days:hours:minutes:seconds)
Specify Time: just like Start time, it also supports placeholders and functions
Allow New Time Proposals: default value is 'True'. If attendees are not available at requested meeting time, then they can propose new meeting time only if 'Allow New Time Proposals' option is enabled by organizer.
Location: organizer can specify the location of meeting. This supports placeholder and functions. Click button next to the text box to add placeholders or functions.
Teams Meetings: default value is 'True'. If Teams Meetings is enabled, attendees will get meeting notification in Teams also.
Mail Template:
Use the "Mail Template" dropdown list to select a mail template. If no mail templates have been configured in the NITRO Workflow app, click the Create button to create a mail template. The Edit and Delete buttons can be used to edit or delete an existing NITRO Workflow mail template.
 Create a Mail Template -- Note that the mail templates created here apply only to the NITRO Workflows app and are not used elsewhere in NITRO Studio.
 Edit a Mail Template -- a template must be selected in the drop list in order to edit it.
 Delete a Mail Template -- a template must be selected in the drop list in order to delete it.

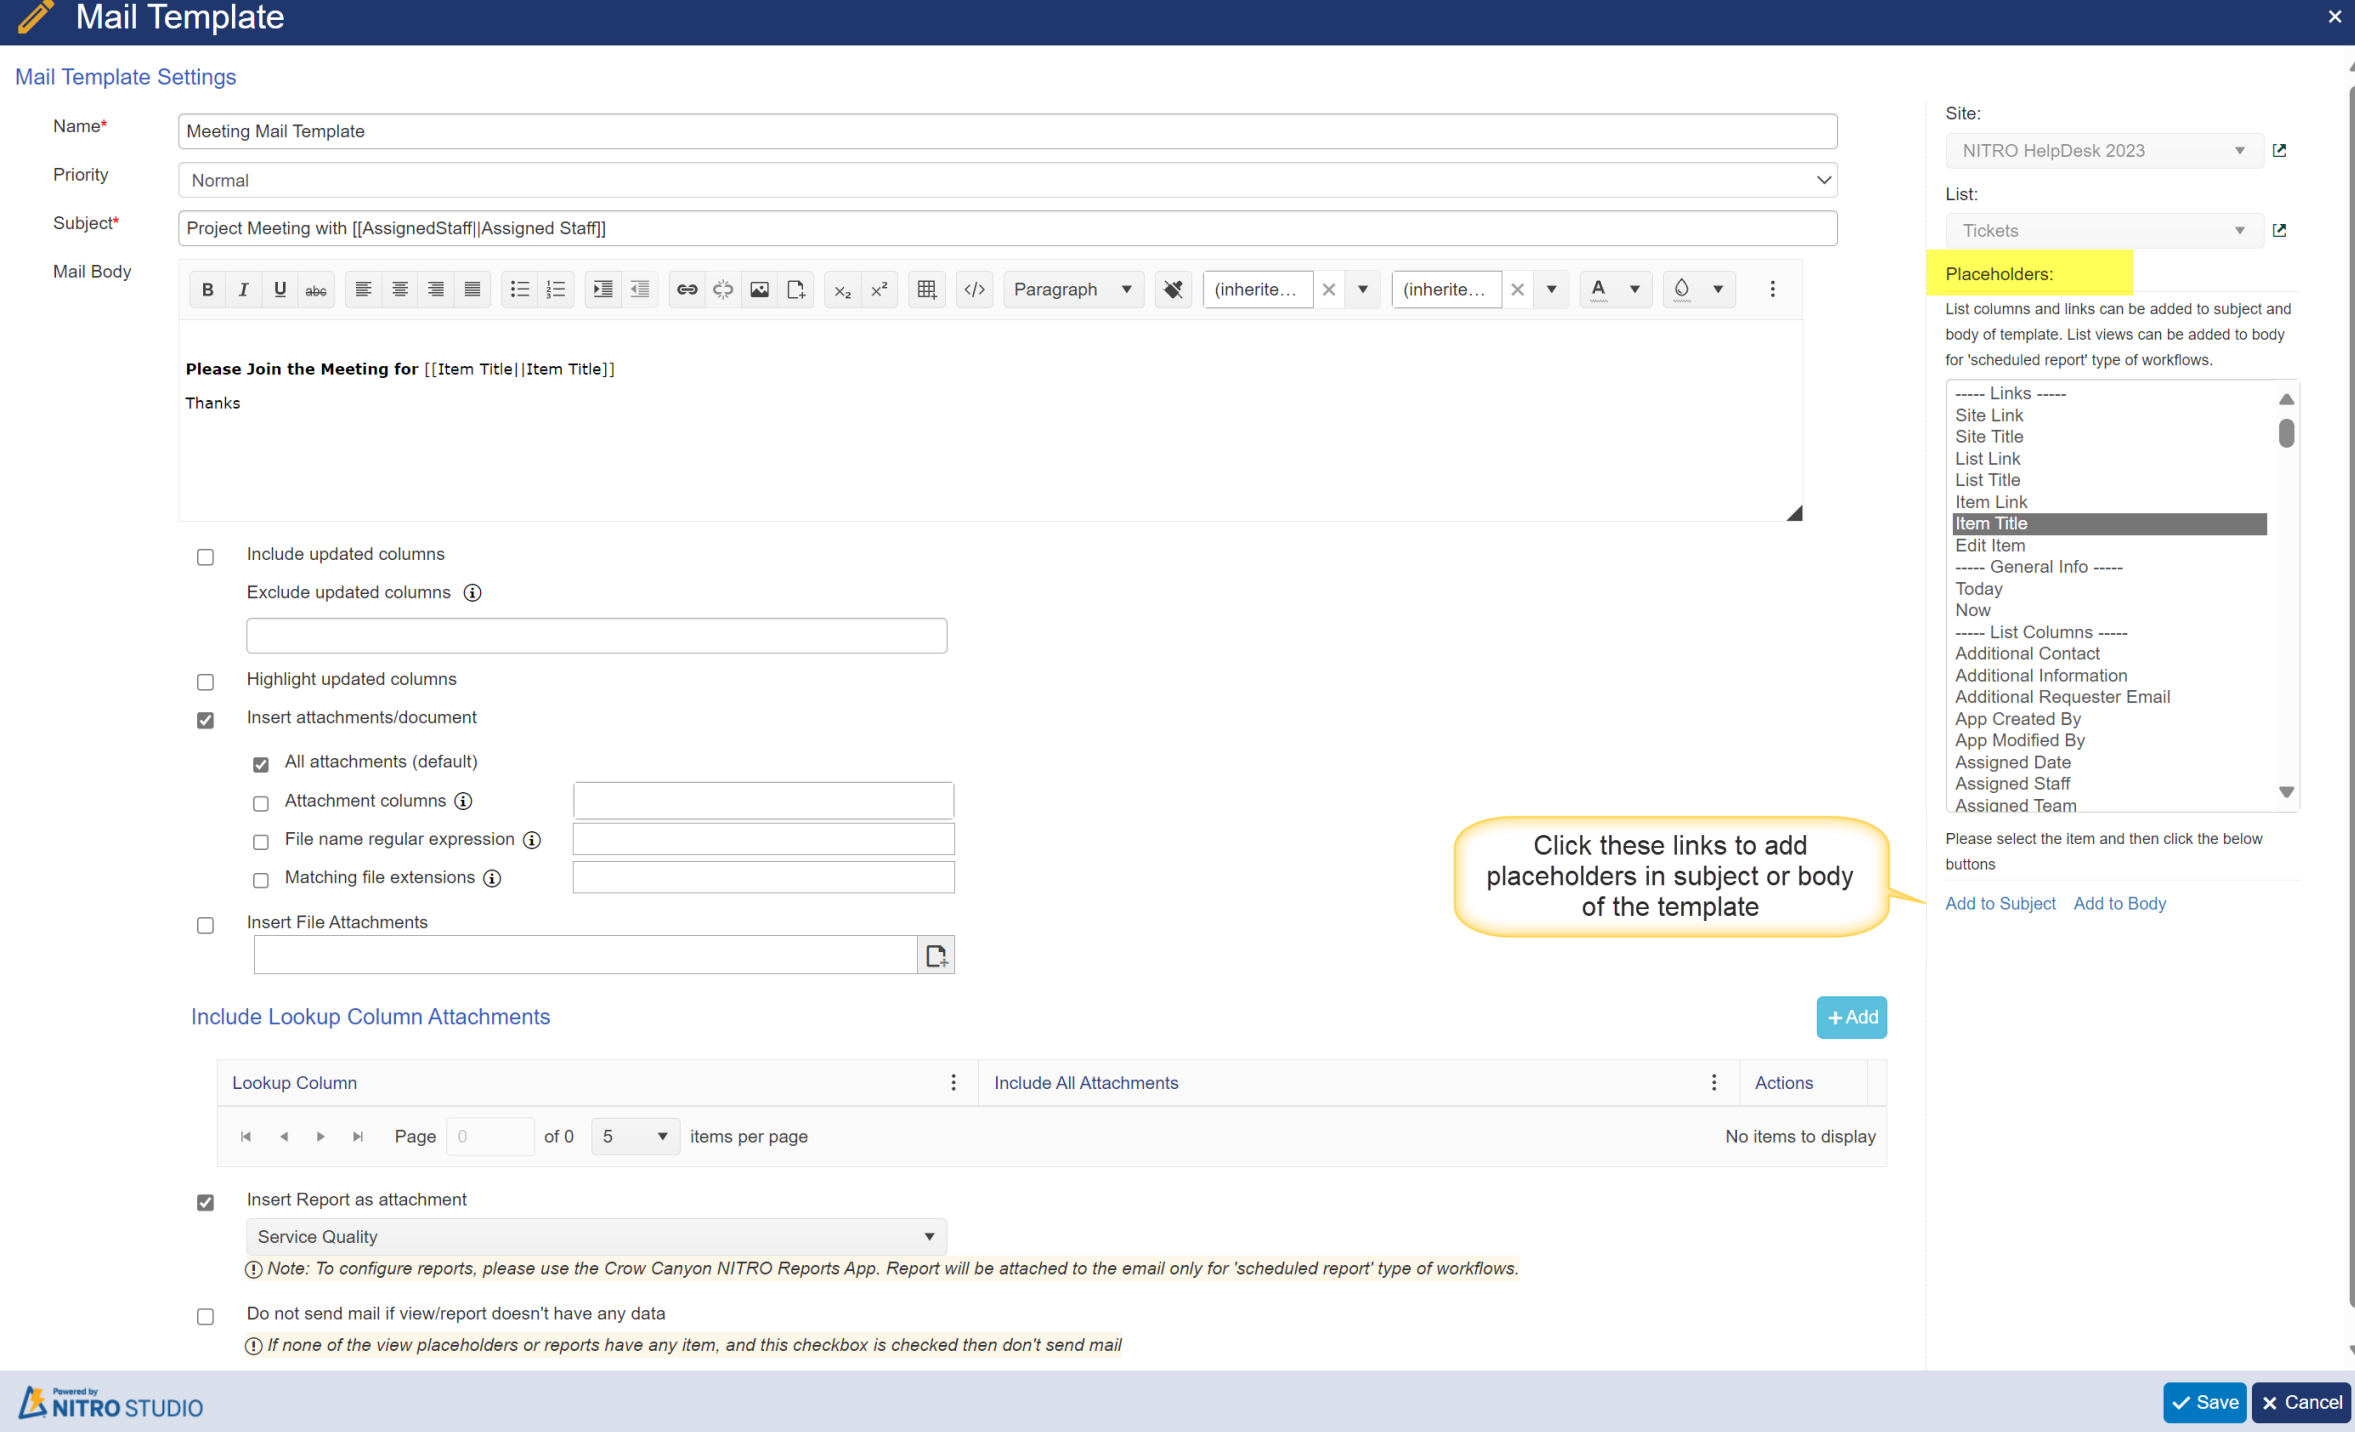
Name: the name of the Template
Priority: Select the importance(Priority) of meeting from the dropdown
Subject: provide the Subject of the meeting. This can have Placeholders in it.
Mail Body: specify the mail body of the meeting, which can include rich-text formatting. This can have Placeholders in it. In mail body, organizer can specify the main purpose of meeting.
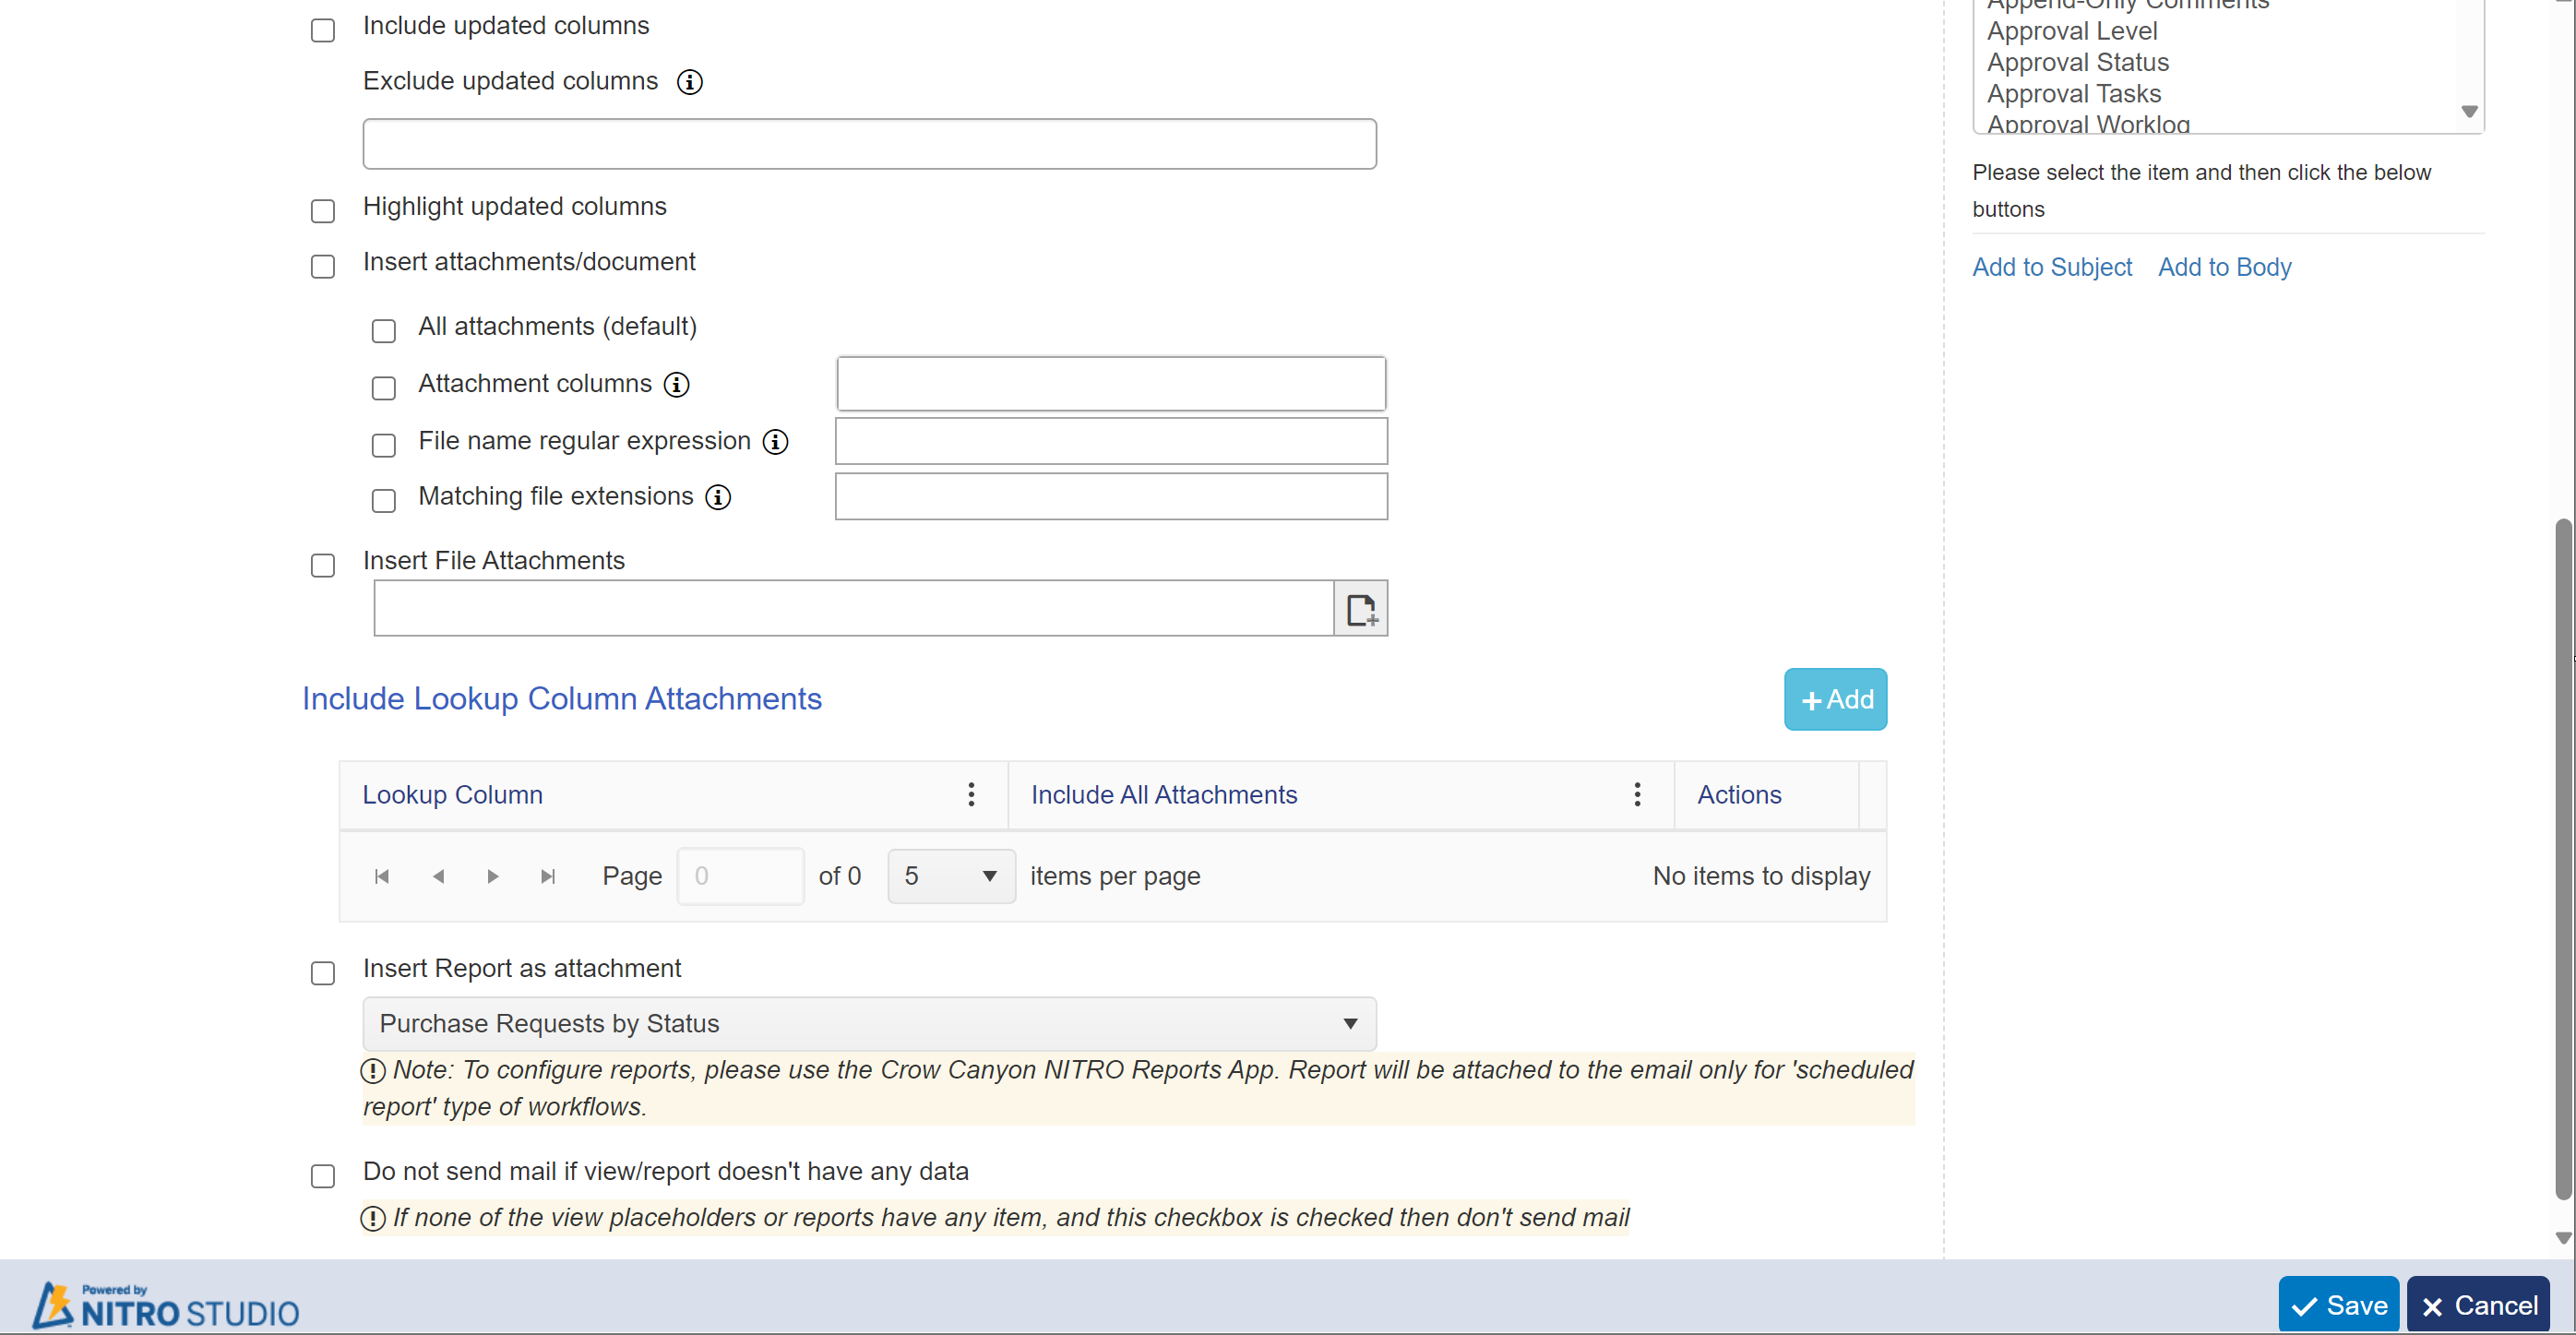
Include updated columns: any columns that have been updated will be included in the email.
Exclude update columns: do not include the updated columns designated in the box.
The format to identify the excluded columns is: [[Column internal name || Column display name]]
for multiple columns: [[Column1 internal name||Column1 display name]] [[Column2 internal name||Column2 display name]] ... (etc.)
Highlight updated columns: any updated columns that are included in the meeting will be highlighted.
Insert attachments/documents: Enabling this setting will allow you to insert columns, attachments and documents and will enable the “All attachments” default setting
• All Attachments: It will include all attachments of item in the meeting.
• Attachment columns: Select one or more text type columns, or select NITRO Attachments.
• File name regular expression: Filter attachments/documents using regular expressions.
| Example: To match all pdf files with word Agreement in their name specify: .*Agreement.*.pdf |
• Matching file extensions: Filter attachments/documents by matching file extensions.
| Example: pdf;docx |
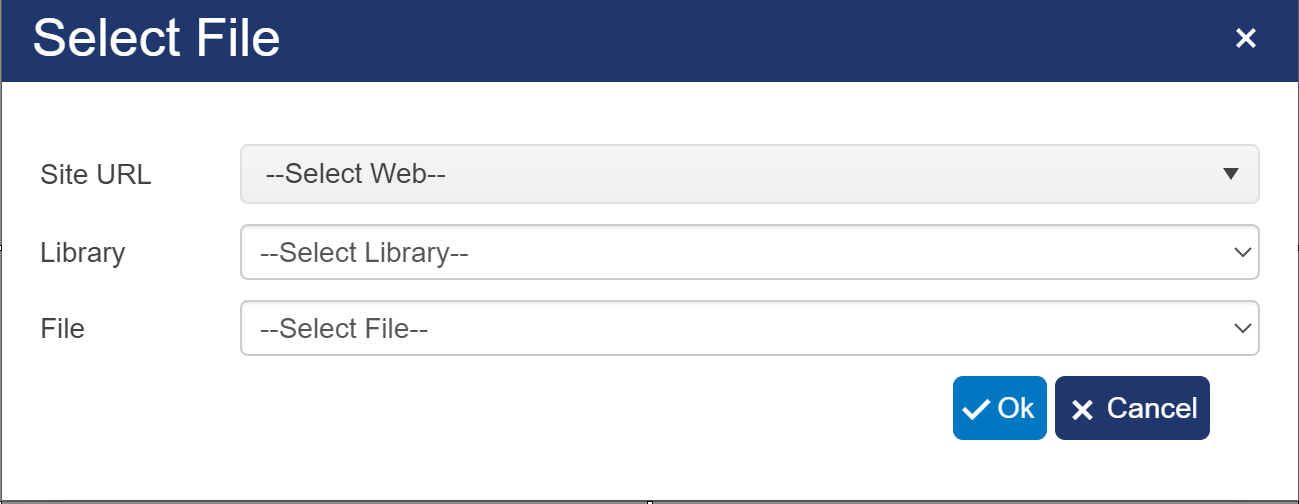
Insert File Attachments: Select this option to Insert SharePoint file(s) from library by clicking '+' button
•Site URL: Select site URL from dropdown
•Library: dropdown will show all library of selected site in above step. Select library from which you want to attach file.
•File: Select file name (from the selected library in above step) that you want to attach in the email.
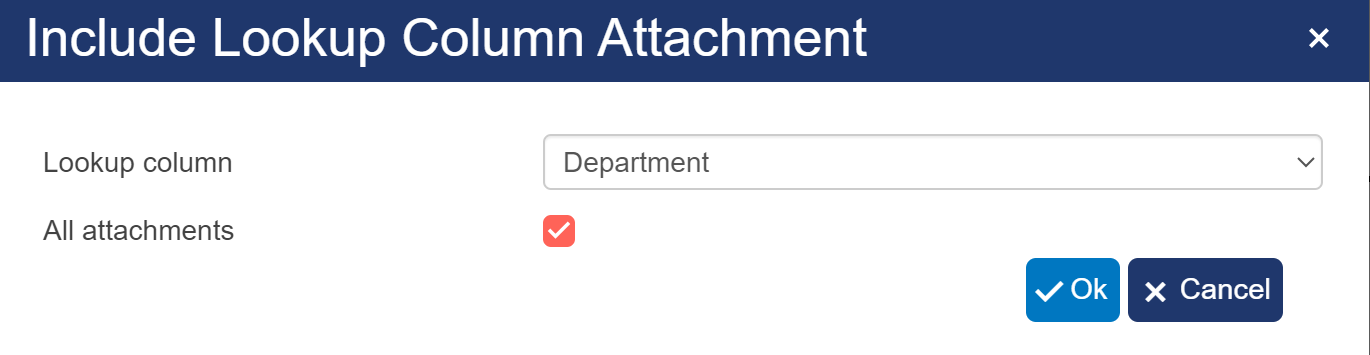
Insert Lookup Column Attachments: To insert attachments from lookup column, click 'Add' button. A window will pop up
Select lookup column from dropdown. 'All attachments' is by default selected. this will include all attachments of selected lookup column in meeting.
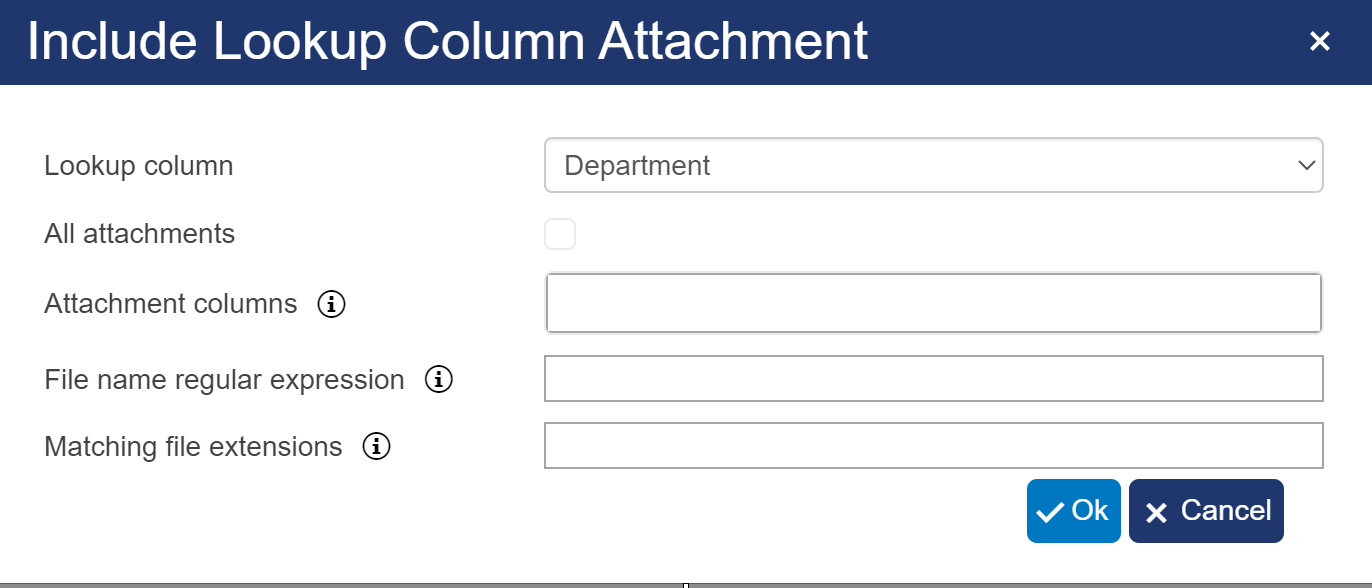
If you don't want to include all attachments of lookup column then deselect 'All attachments'. following columns will be visible after deselecting 'All attachments'
• Attachment columns: Select one or more text type columns, or select NITRO Attachments.
• File name regular expression: Filter attachments/documents using regular expressions.
| Example: To match all pdf files with word Agreement in their name specify: .*Agreement.*.pdf |
• Matching file extensions: Filter attachments/documents by matching file extensions.
| Example: pdf;docx |
Insert Report as Attachments: Select this option to insert report as attachment in meeting. From dropdown user can select report to attach with email.
To configure reports, please use the Crow Canyon NITRO Reports App. Report will be attached to the email only for 'scheduled report' type of workflows.

Do not send mail if view/report doesn't have any data: Select this option to don't send mail if none of the view placeholders or reports have any item.

PLACEHOLDERS
List columns and links can be added to subject and body of template. List views can be added to body for 'secheduled report' type of workflows.
Select the list columns and links from 'Placeholders' option available on the right side of mail template and click "Add to Subject" or "Add to Body" buttons below the 'Placeholders' to put the selected list columns(placeholders) in the corresponding place.
The placeholders include Site and Item information as well as all the fields in the list where this mail template is being created.
"Site Link", "List Link", "item Link", and "Edit Item Link" will put a clickable URL in the email. "Site Title", "List Title", and "Item Title" will put the name as text, not as a clickable link.
Here is an example Template with placeholders in it:
To insert query list item link in mail template, please refer this article Query list item link in mail template
Mail Format: supports three mail format. Default format is Html.
•Html: This is the default format.HTML allows you to create messages by using different fonts, colors, and formatting options. You can also embed pictures directly within the message.
•Plain Text: Plain text format doesn’t support bold or italic text, colored fonts, or other formatting. Pictures cannot be displayed within the message body, but you can include them as attachments.
•Plain Text - Strip Html: Strip HTML removes all HTML tags and gives plain text.
 |
Log Meeting Details
Select multi-line rich text column to put meeting details in the item for which workflow is running.
Sample Example:
Create Meeting workfow (See Image 1) is executed on below item
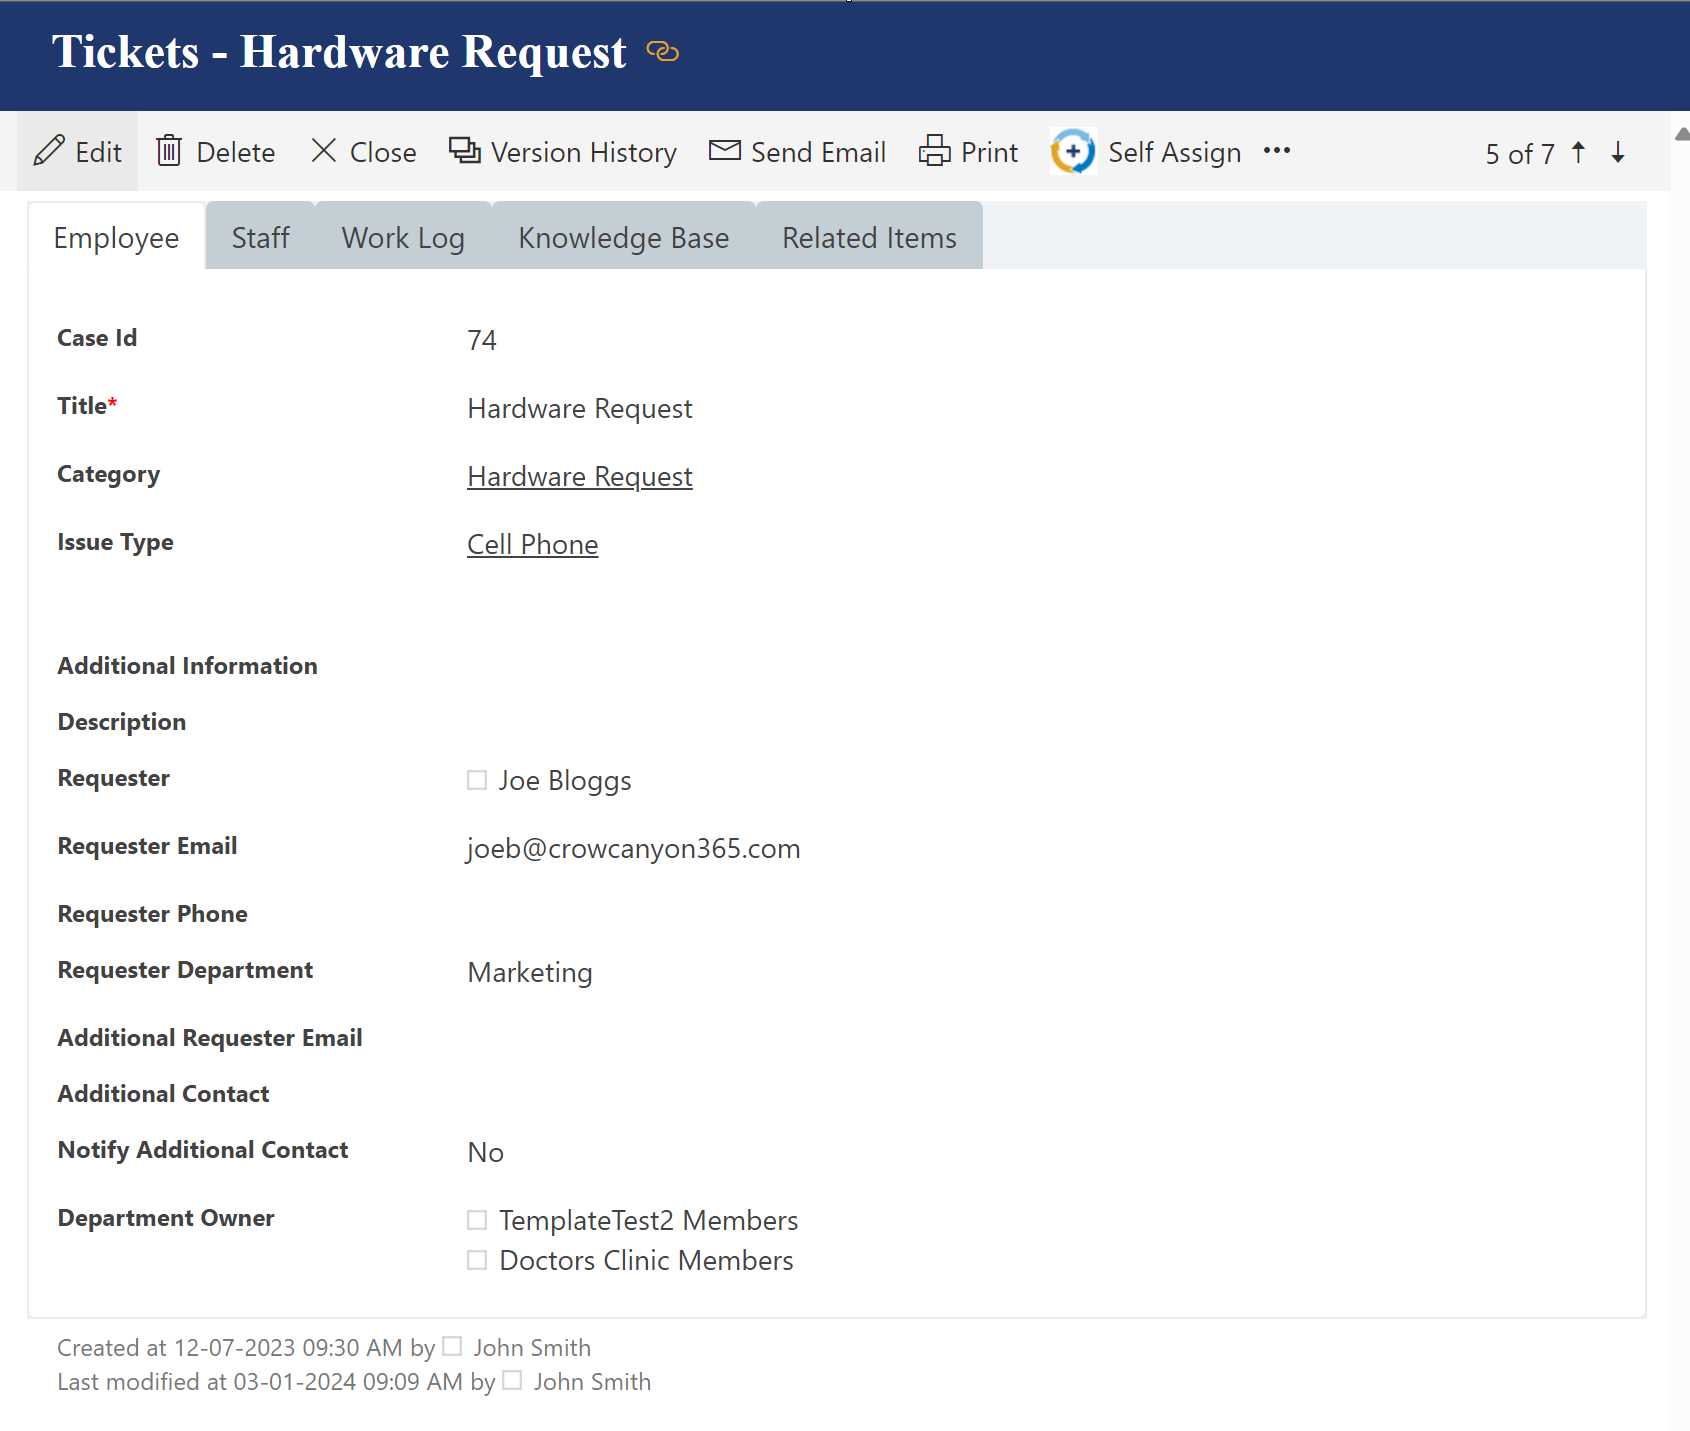
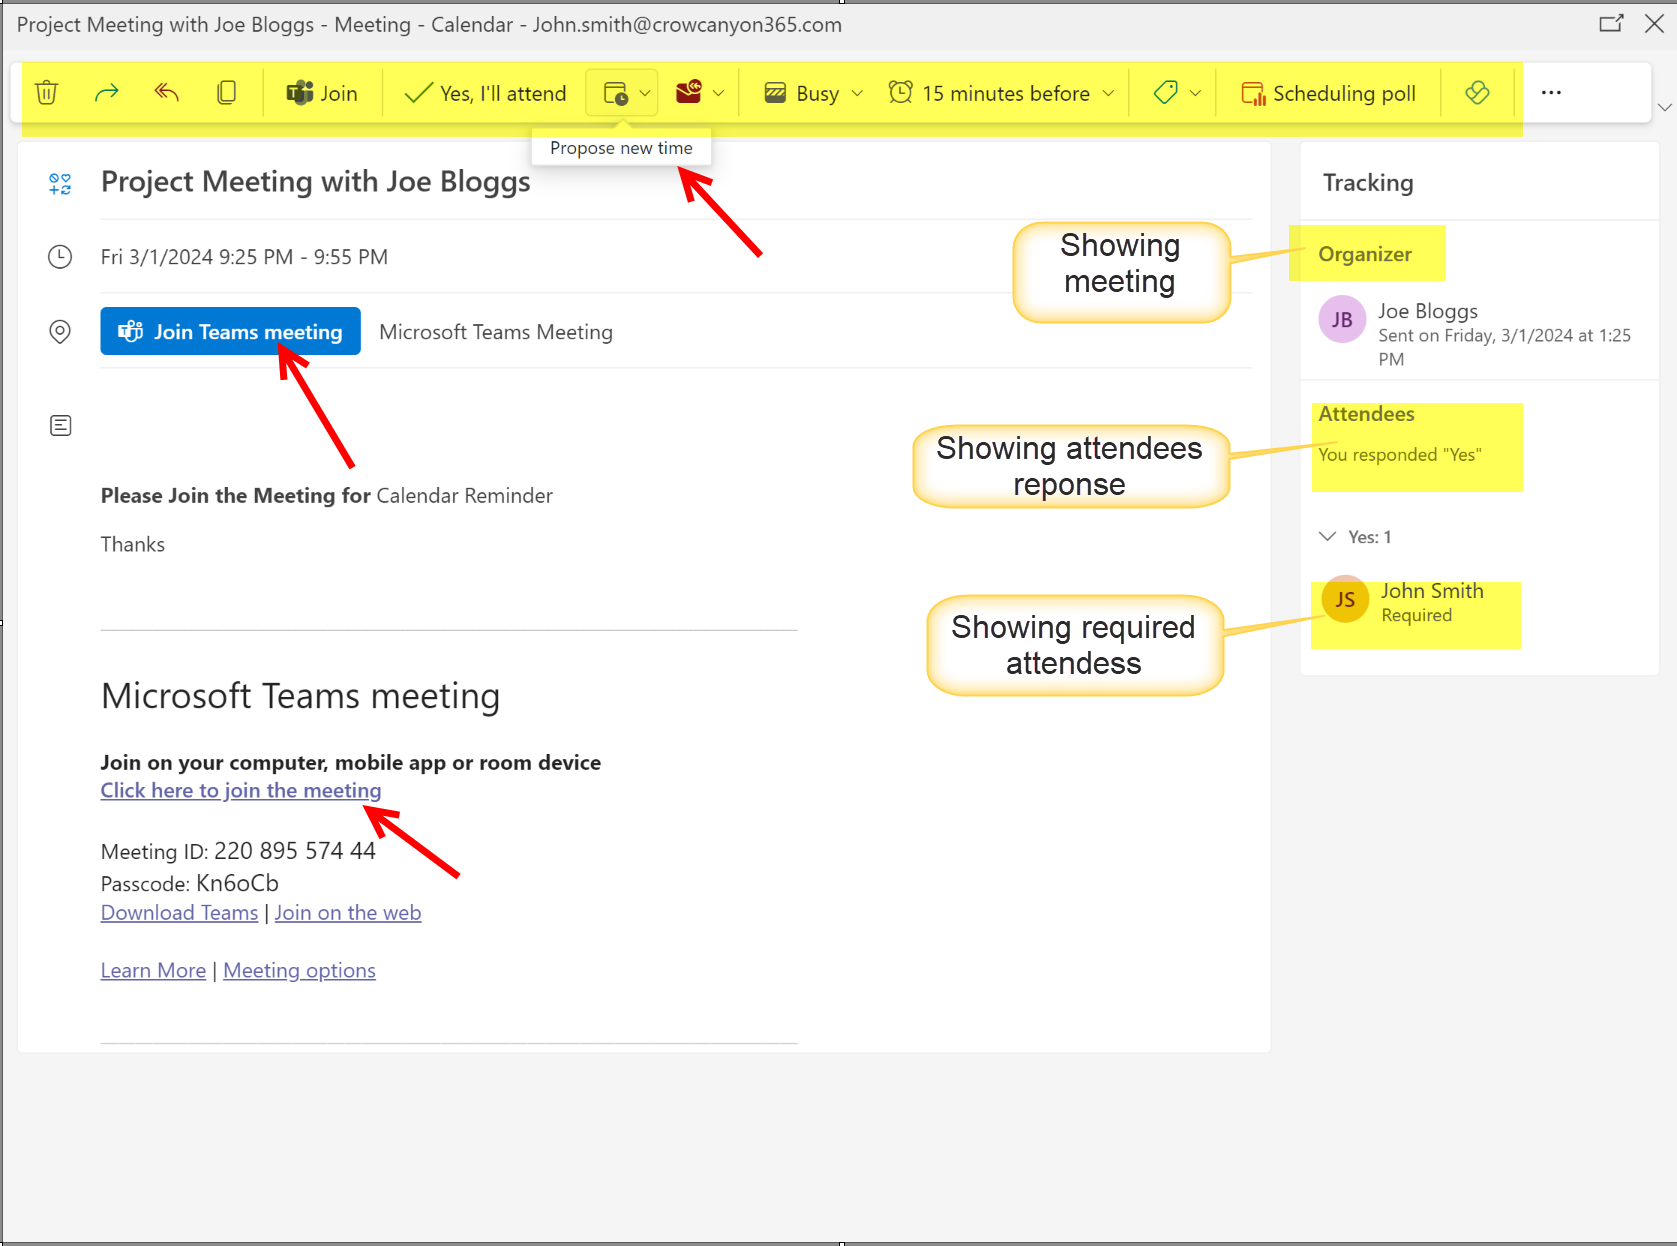
Organizer and Attendees will get meeting notification in mail.
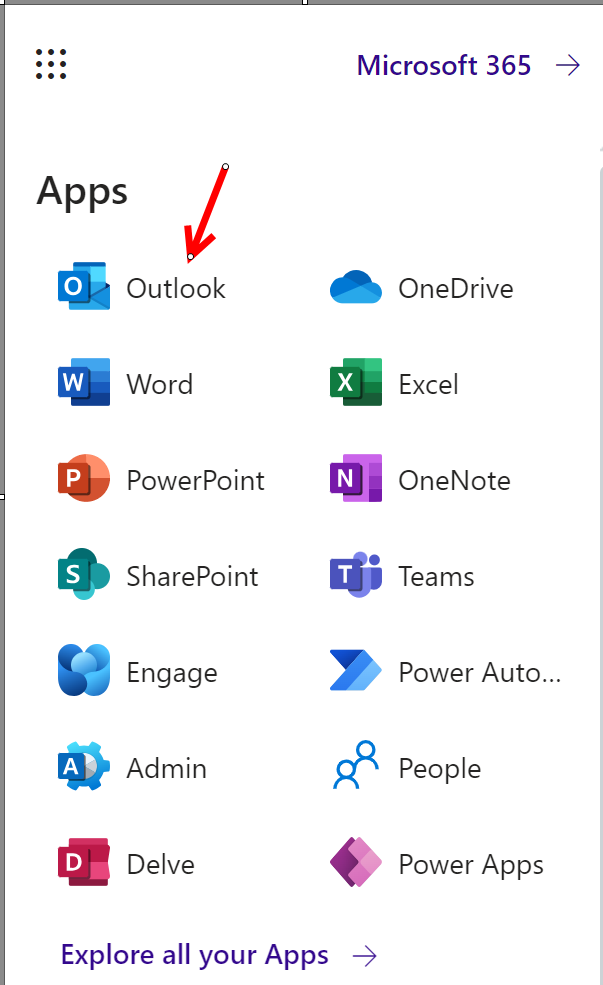
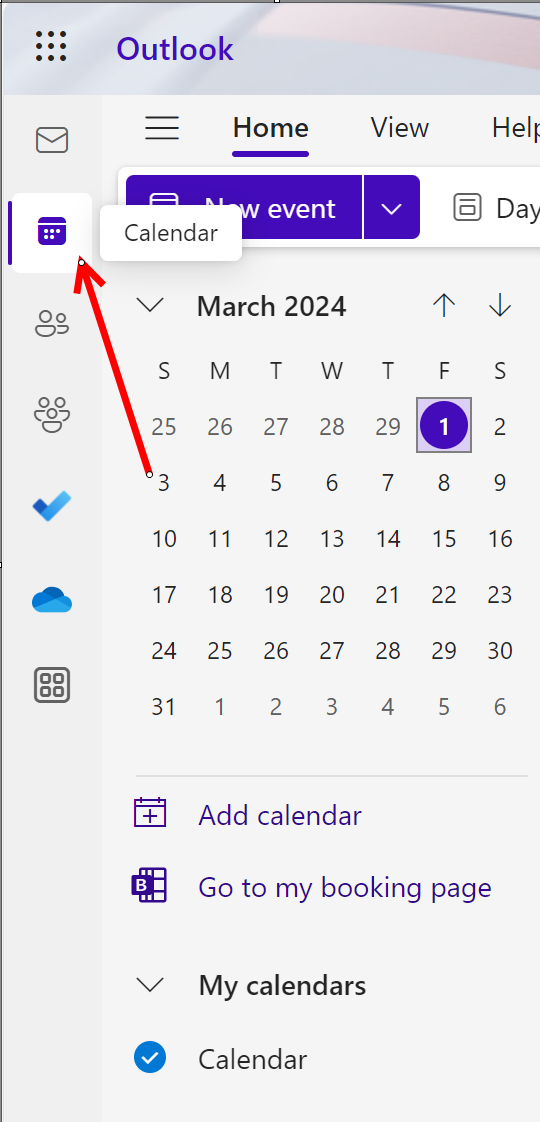
To check Meeting details:
Go to Outlook in Microsoft 365 -> Calendar in left panel
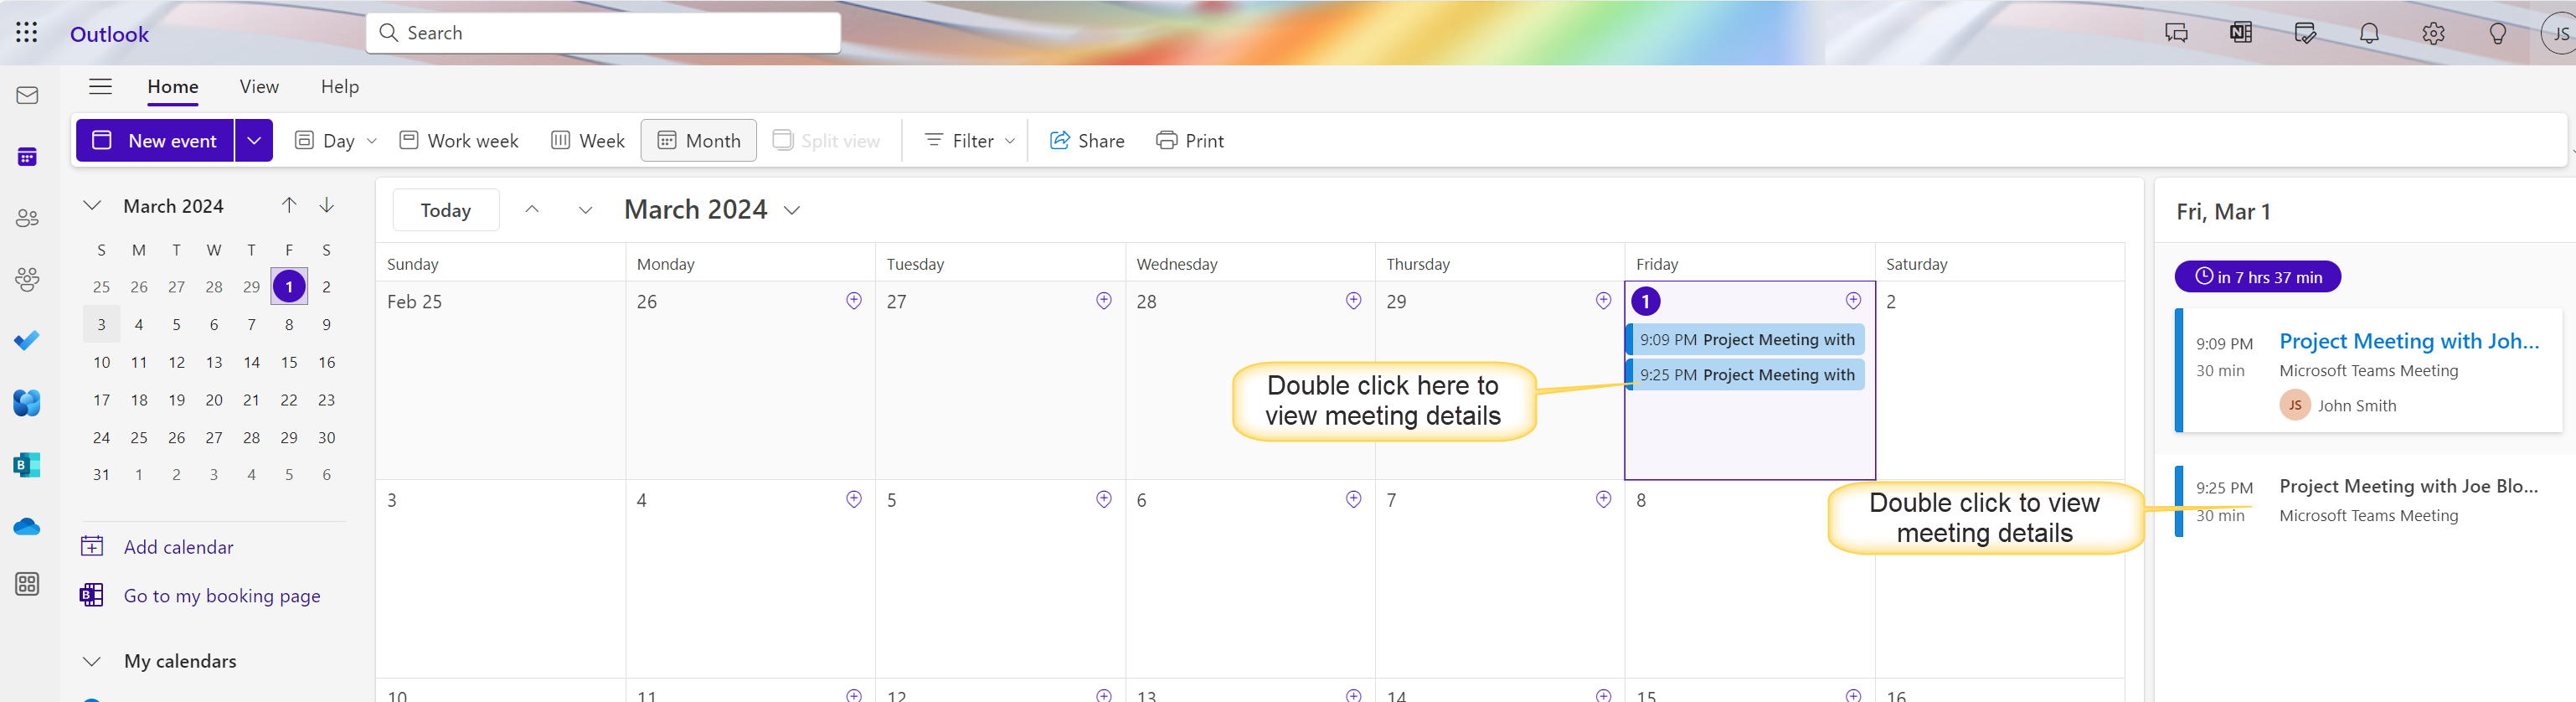
Organizer can click Join meeting to join the meeting.
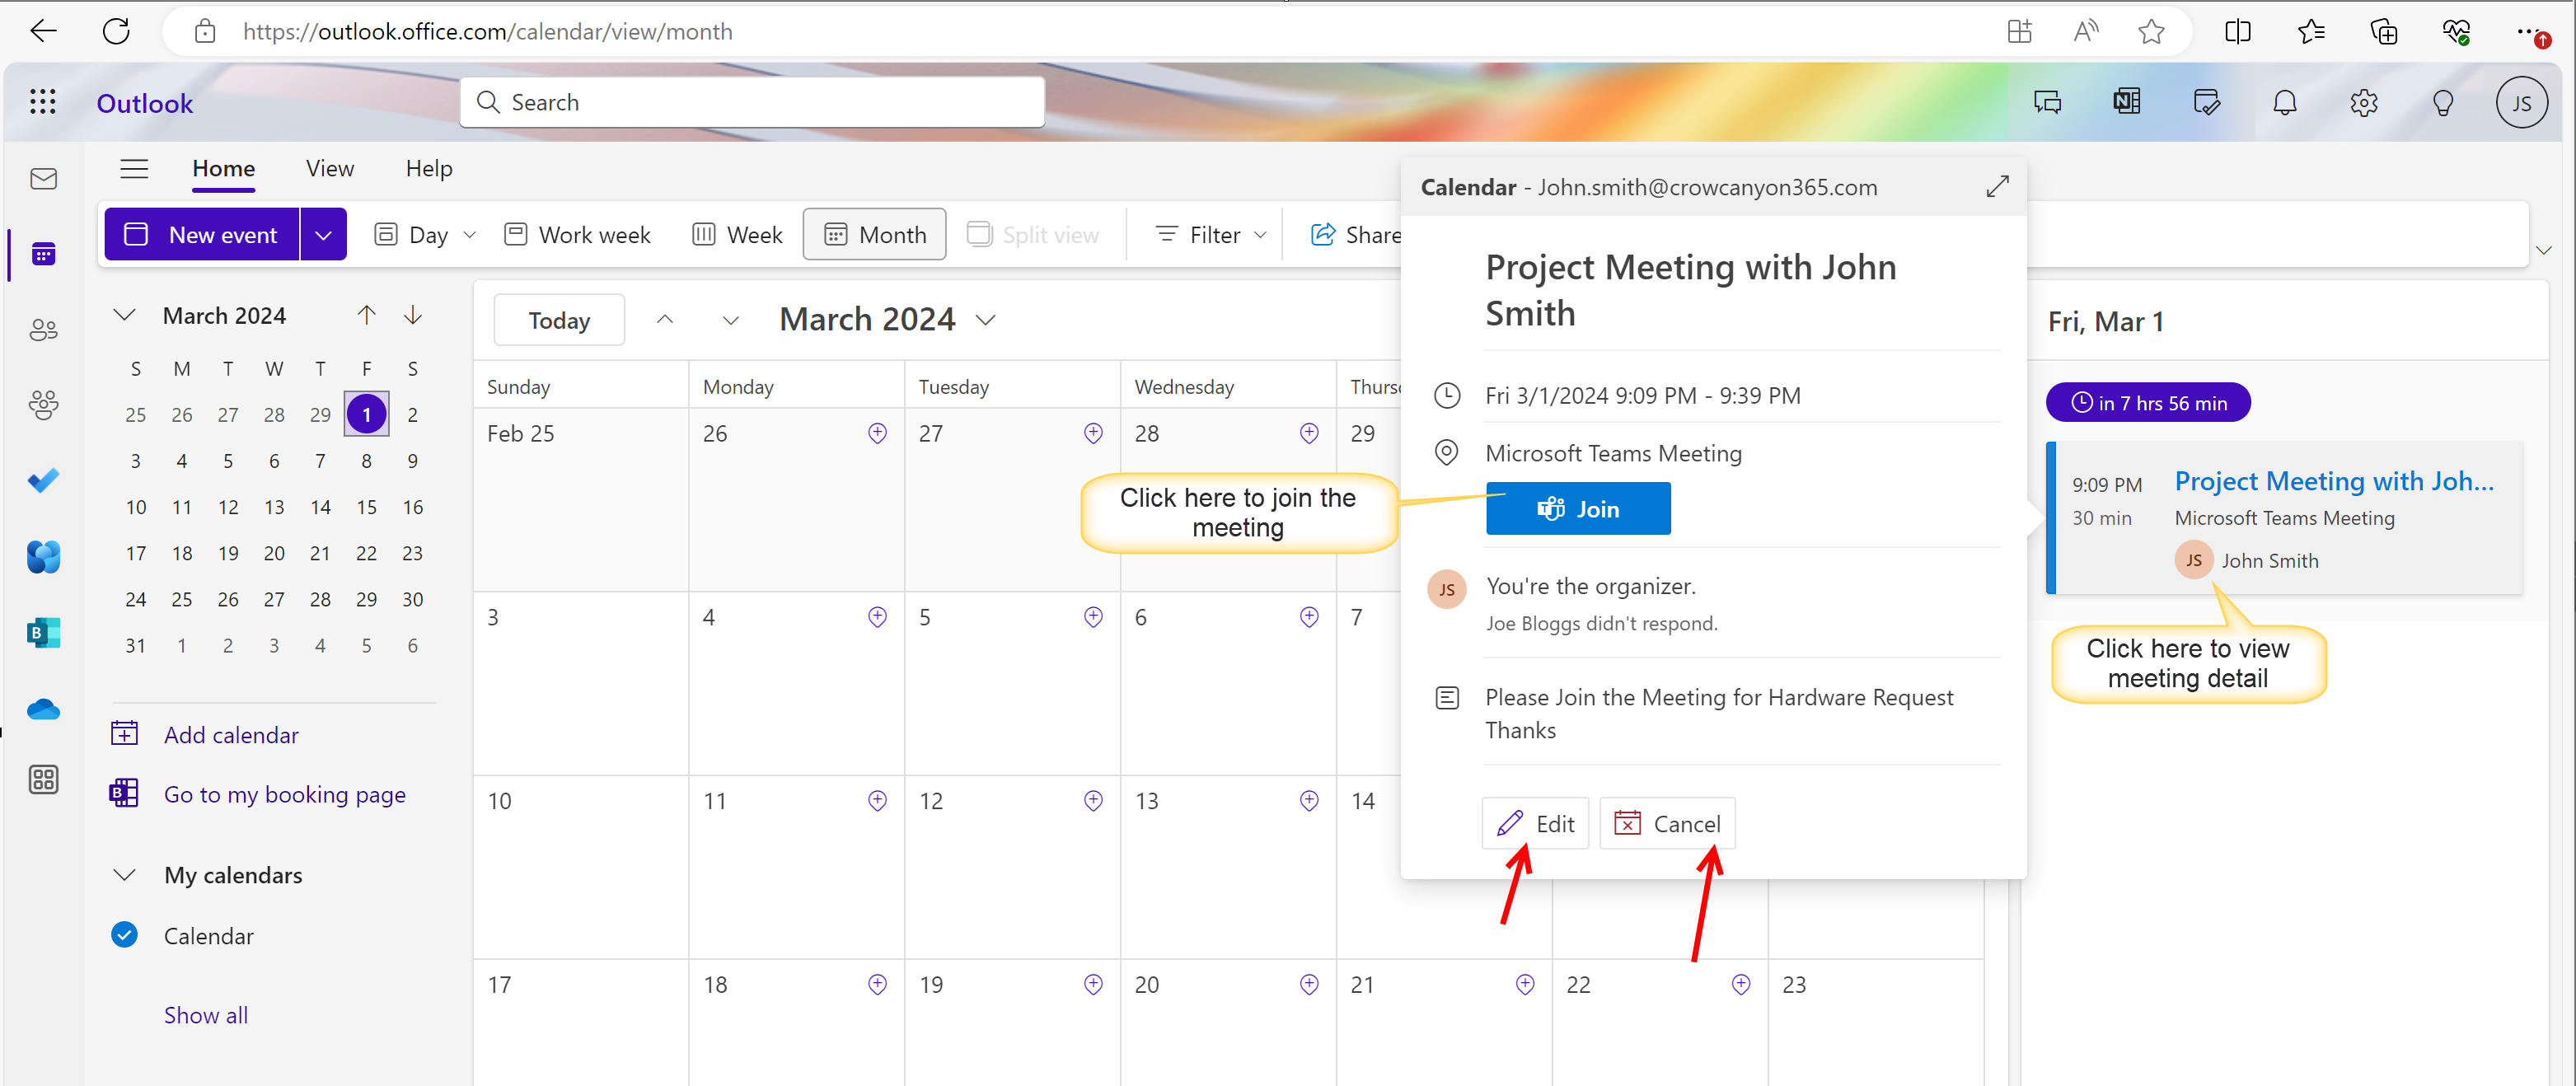
Click 'Edit' button to edit meeting detail and 'Cancel' button to cencel the meeting. Organizer can perform other actions available in ribbon to edit meeting settings.
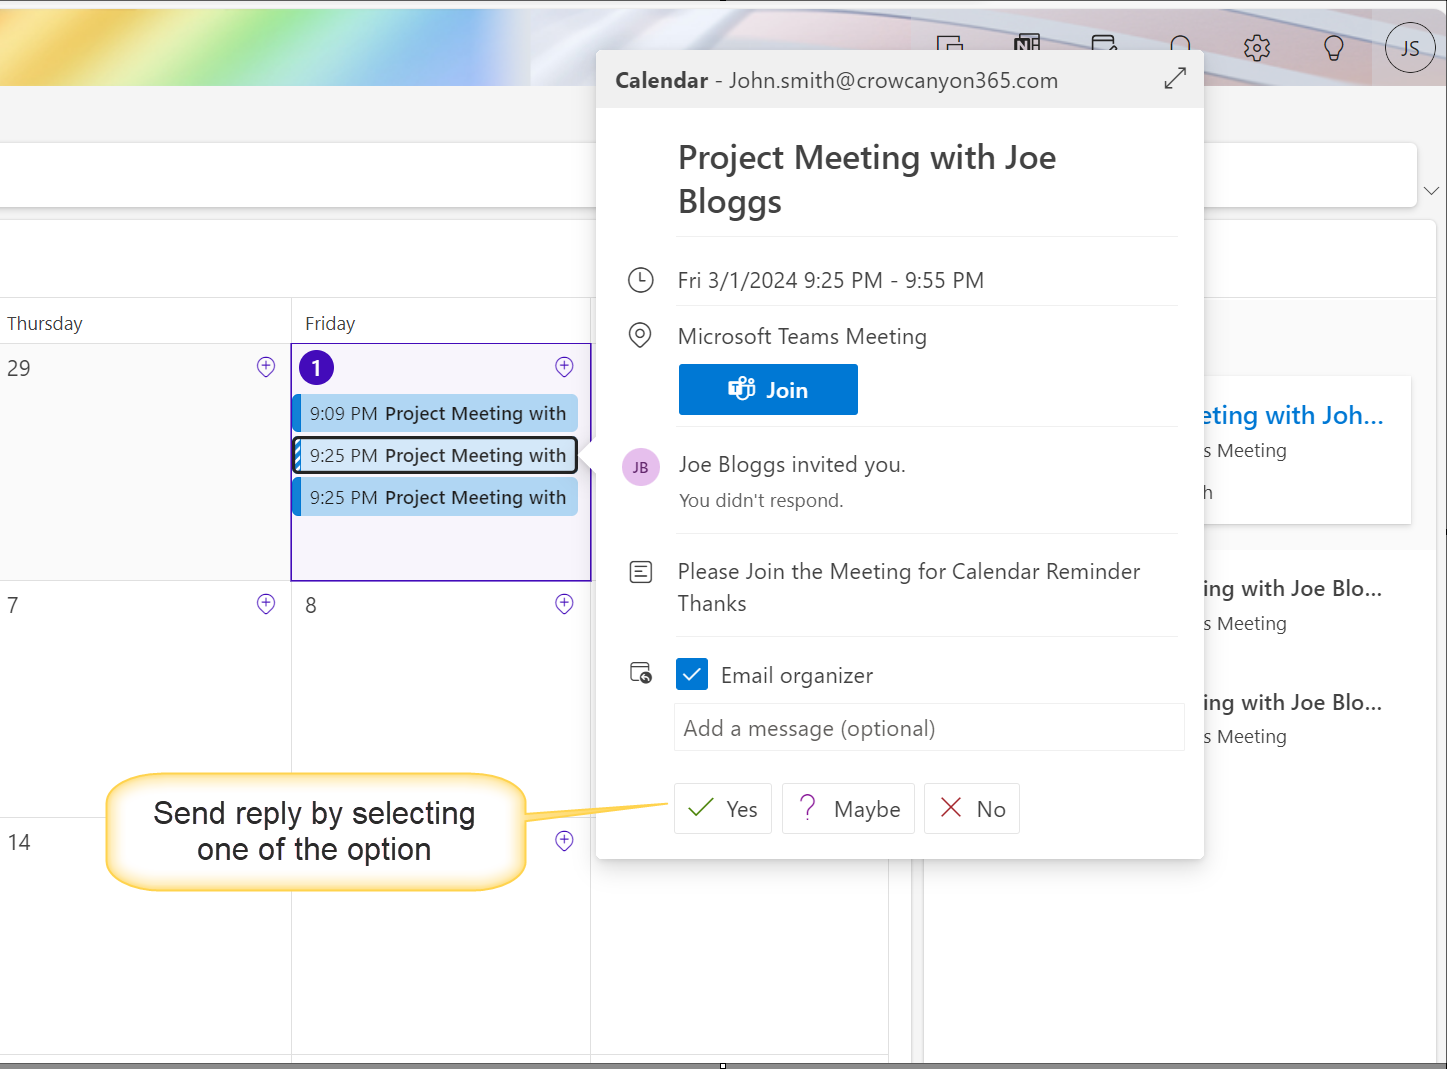
Attendees can send reply be selecting one of the option available in meeting detail
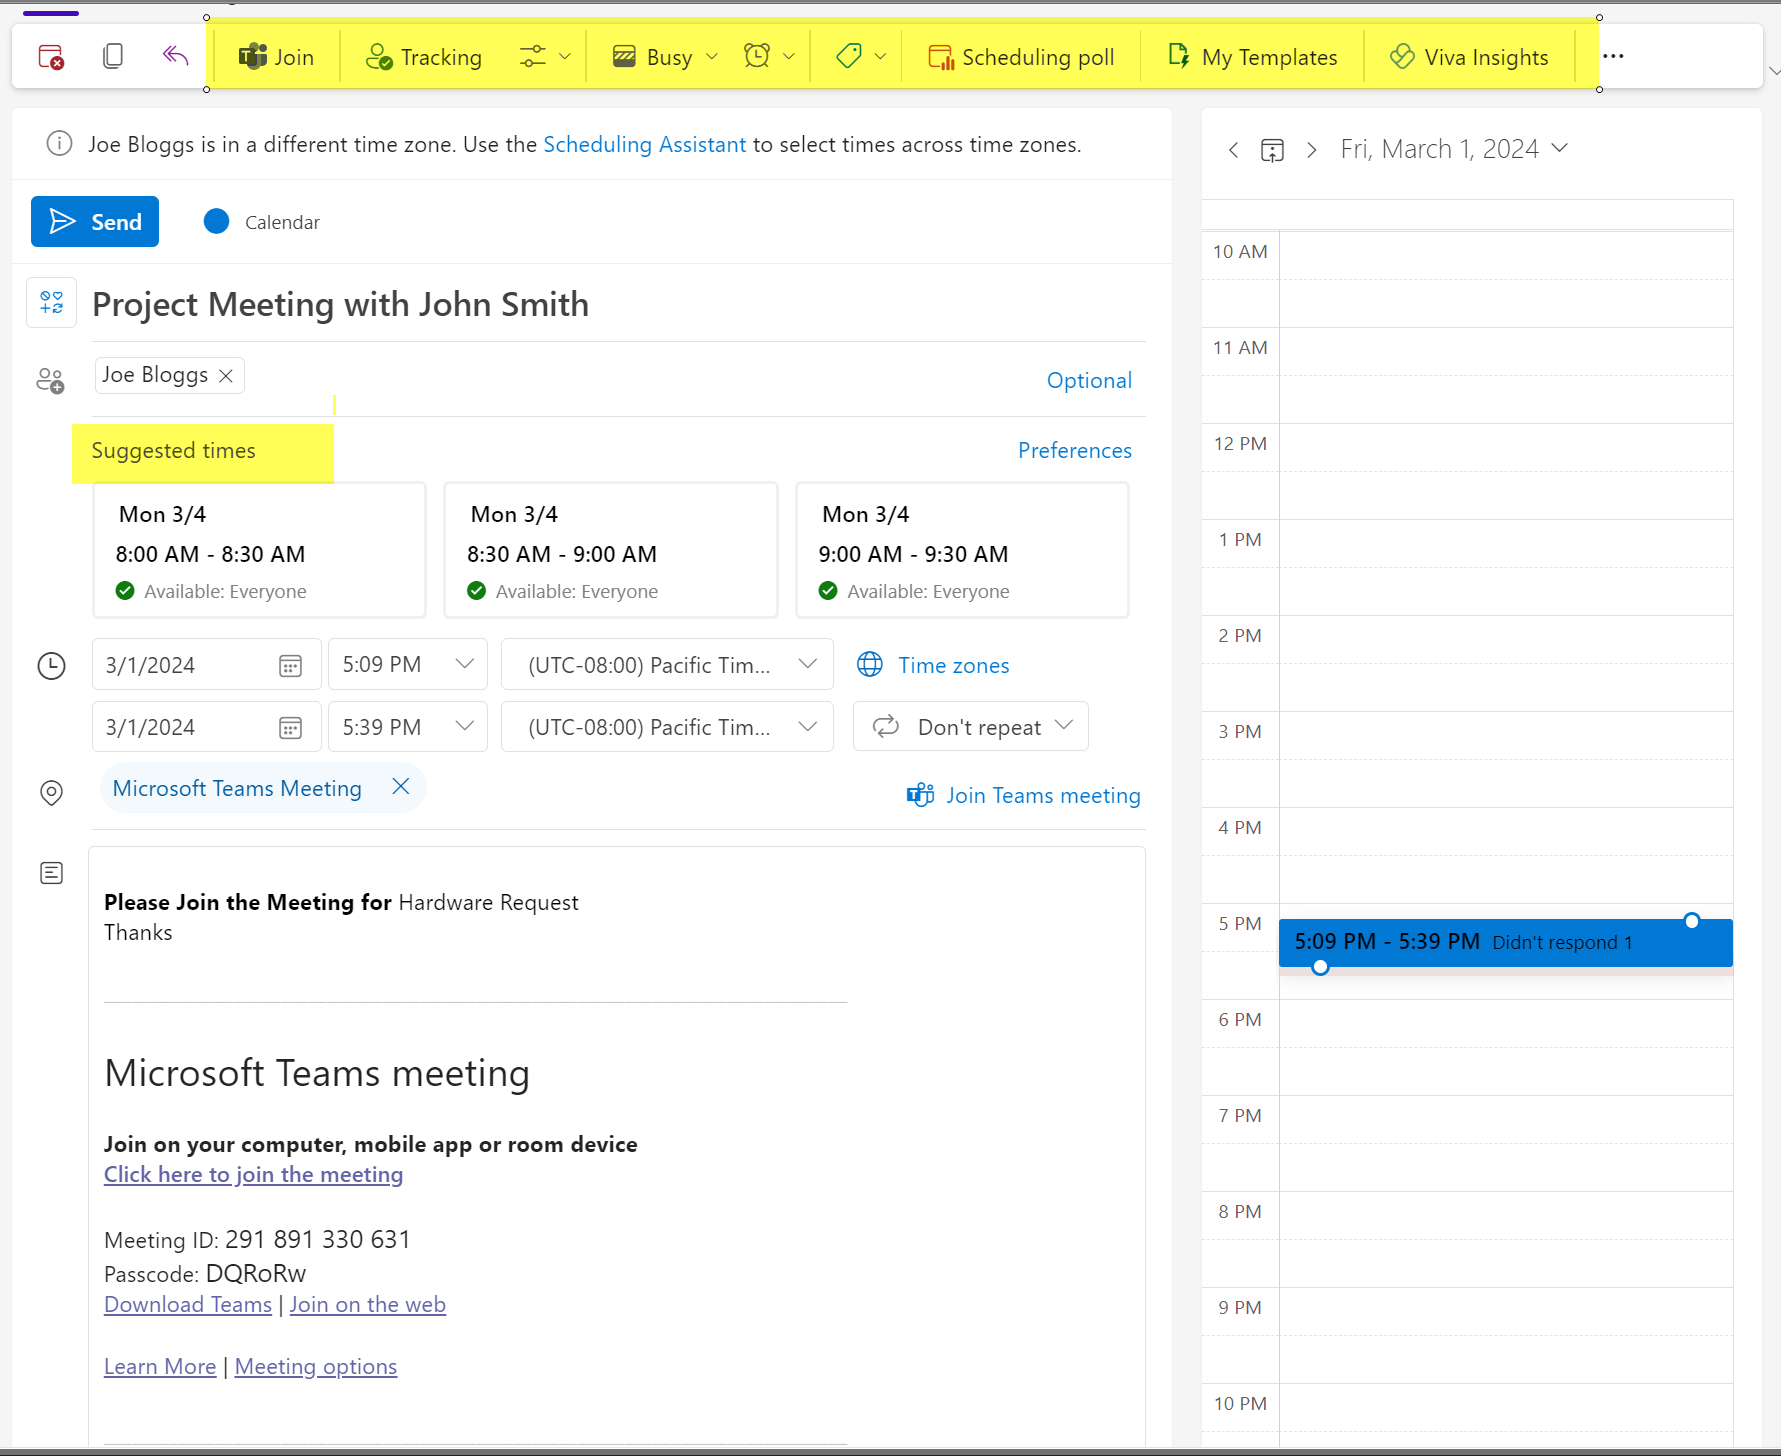
Other actions that attendees can perform are highlighted in below image.
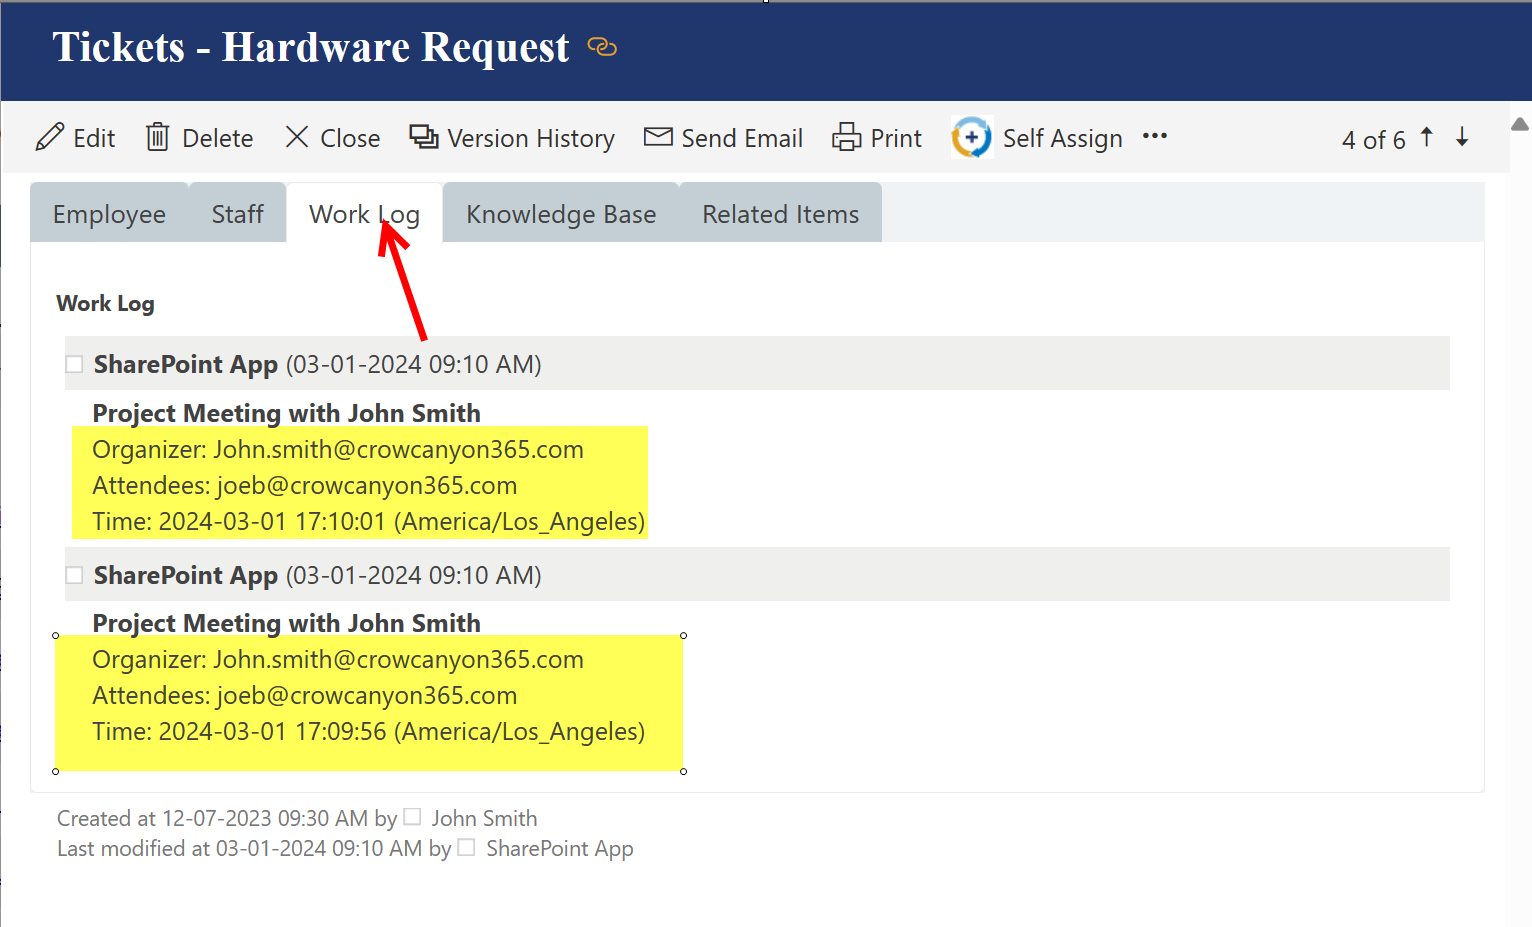
Meeting detail will also be updated in item 'WorkLog' column( which is selected in Create Meeting Action 'Log Meeting Detail') on which workflow is executed.
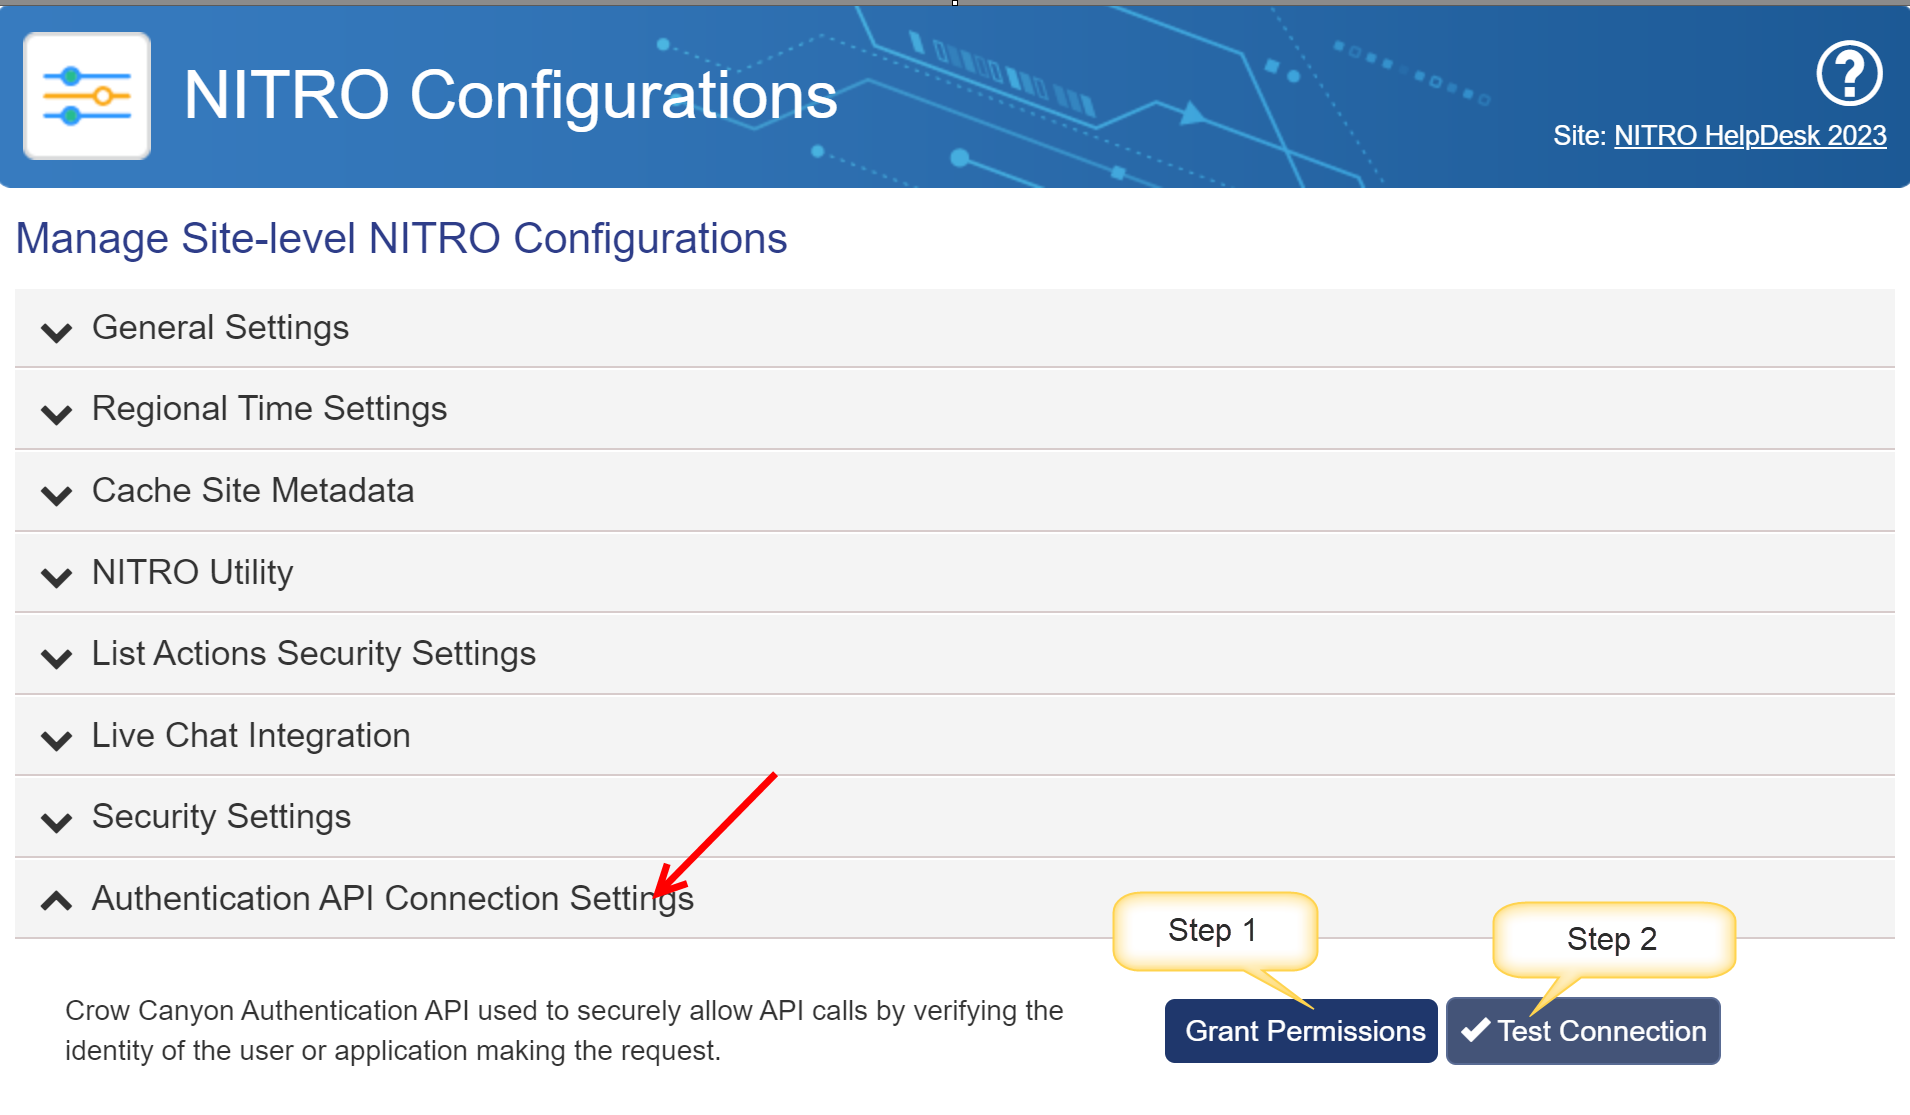
Two types of authentication is needed to configure 'Create Meeting' action
1. Calendar API Connection Settings
2. Authentication API Connection Settings
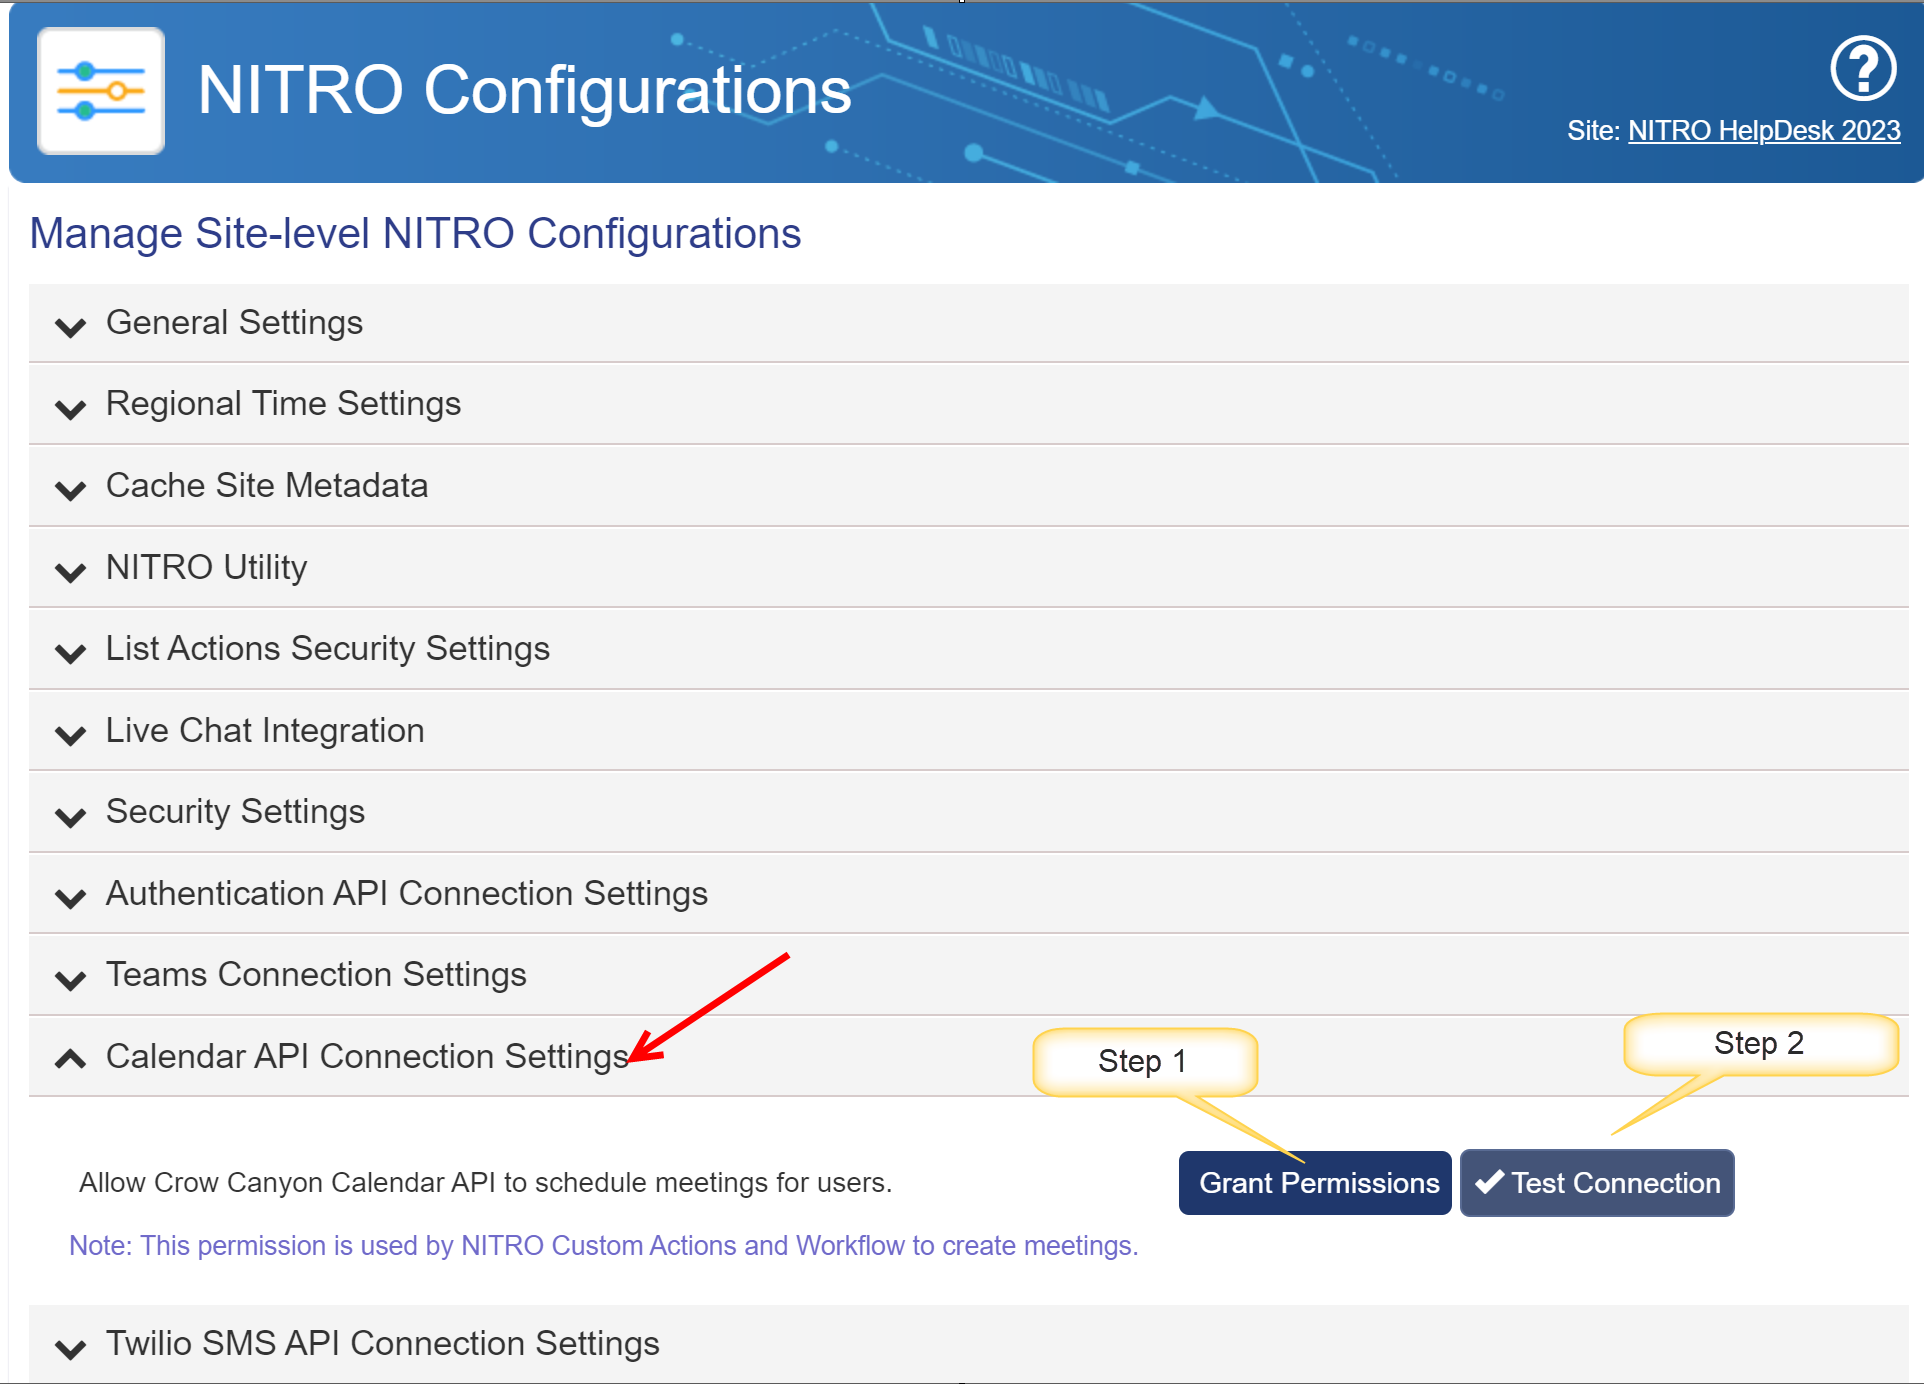
For these settings go to Setting -> Site Contents -> Site Settings -> Crow Canyon Nitro Site Settings
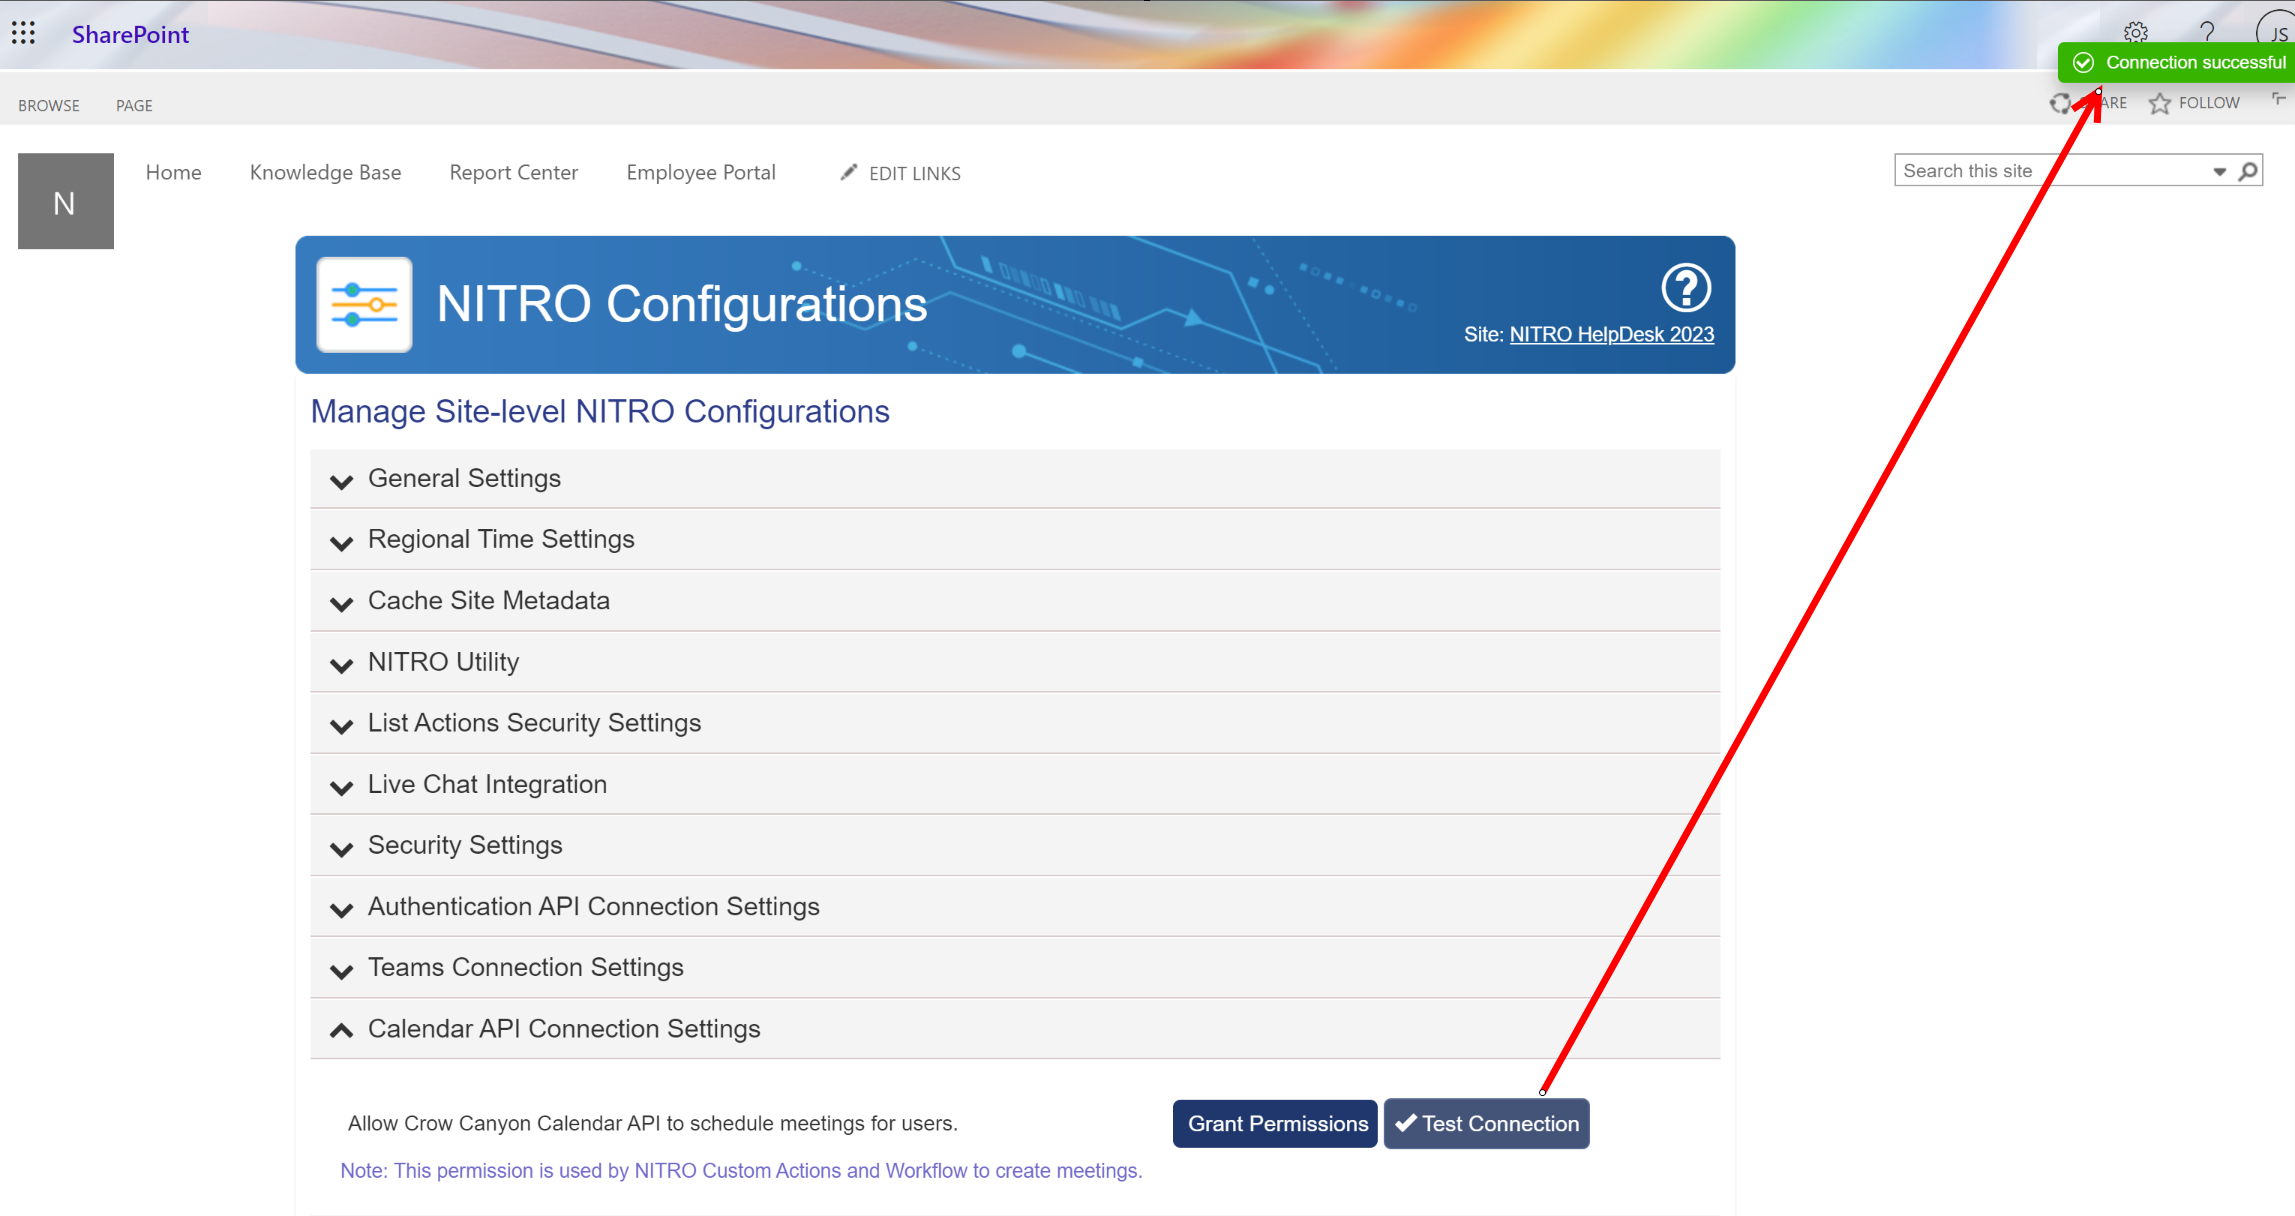
Calendar API Connection Settings: To configure 'Create Meeting' Action Organizer must have permission in Calendar API Connection.
For this, User can click 'Grant Permission' button to check whether he is having permission or not.
It will ask for account details. Enter account details.

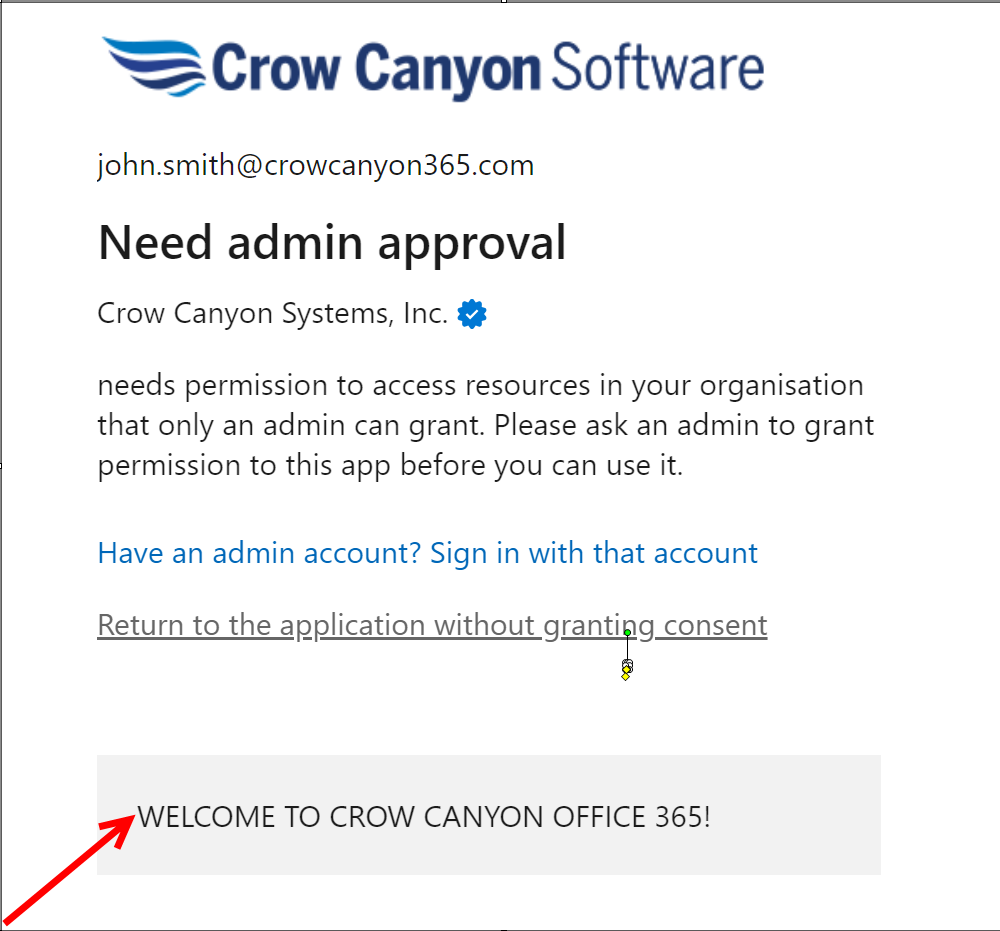
If user is not having permission, then a message will be displayed which tells user to ask admin to grant permission.
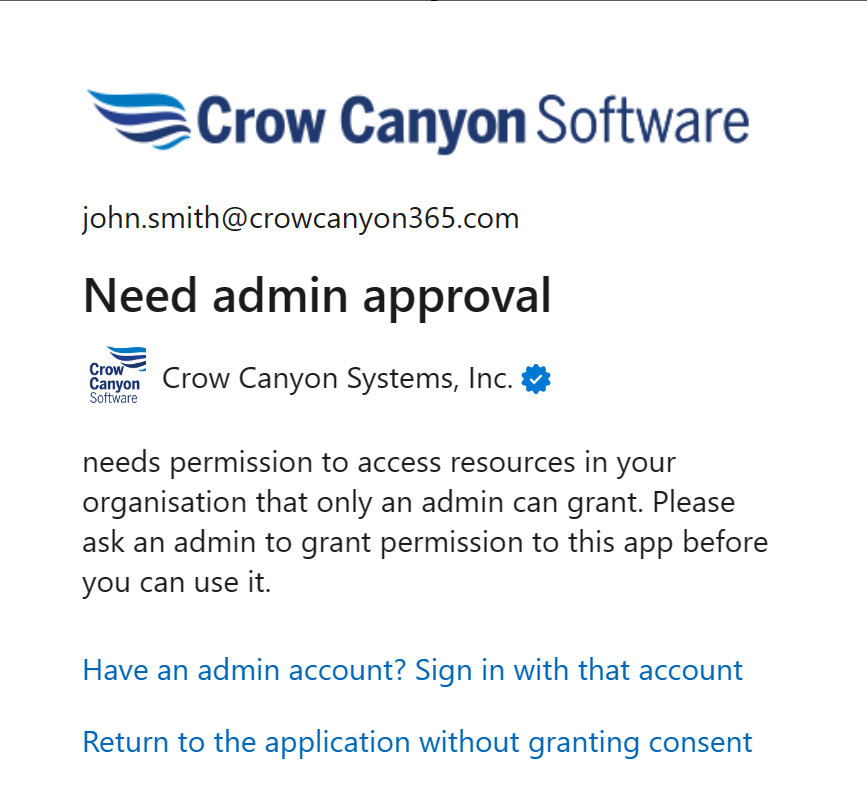
Once 'Admin' grants the permission, a welcome message will be displayed as shown in below image.
Step 2: Test Connection: once admin grants the permission then click 'Test Connection' button to check whether connection is successful or not.
Authentication API Connection Settings: All Steps for 'Grant Permission' and 'Test Connection' is same as 'Calendar API Connection Settings'. This is done for security reason. Crow Canyon Authentication API used to securely allow API calls by verifying the identity of the user or application making the request.