The Attachments column gives you a way to break out where the user can upload different types of attachments. For example, let's say you have someone making a change to their benefits information through the HR Request system. You may need to capture multiple documents (e.g. birth certificate, marriage license, etc) to justify the change in benefits. SharePoint provides an option to attach multiple files, but there is no way to indicate what types of files have been uploaded. The custom NITRO Attachments column gives you a way to specify exactly which documents you want.
Another use case is if you need to request different documents in different situations. Using the example above, you may only want a birth certificate if the user is adding a dependent to their benefits. You only want to show the Birth Certificate Upload button when the benefits change is "Add Dependent." You can do this by using Column Permissions on the NITRO Attachments Columns.
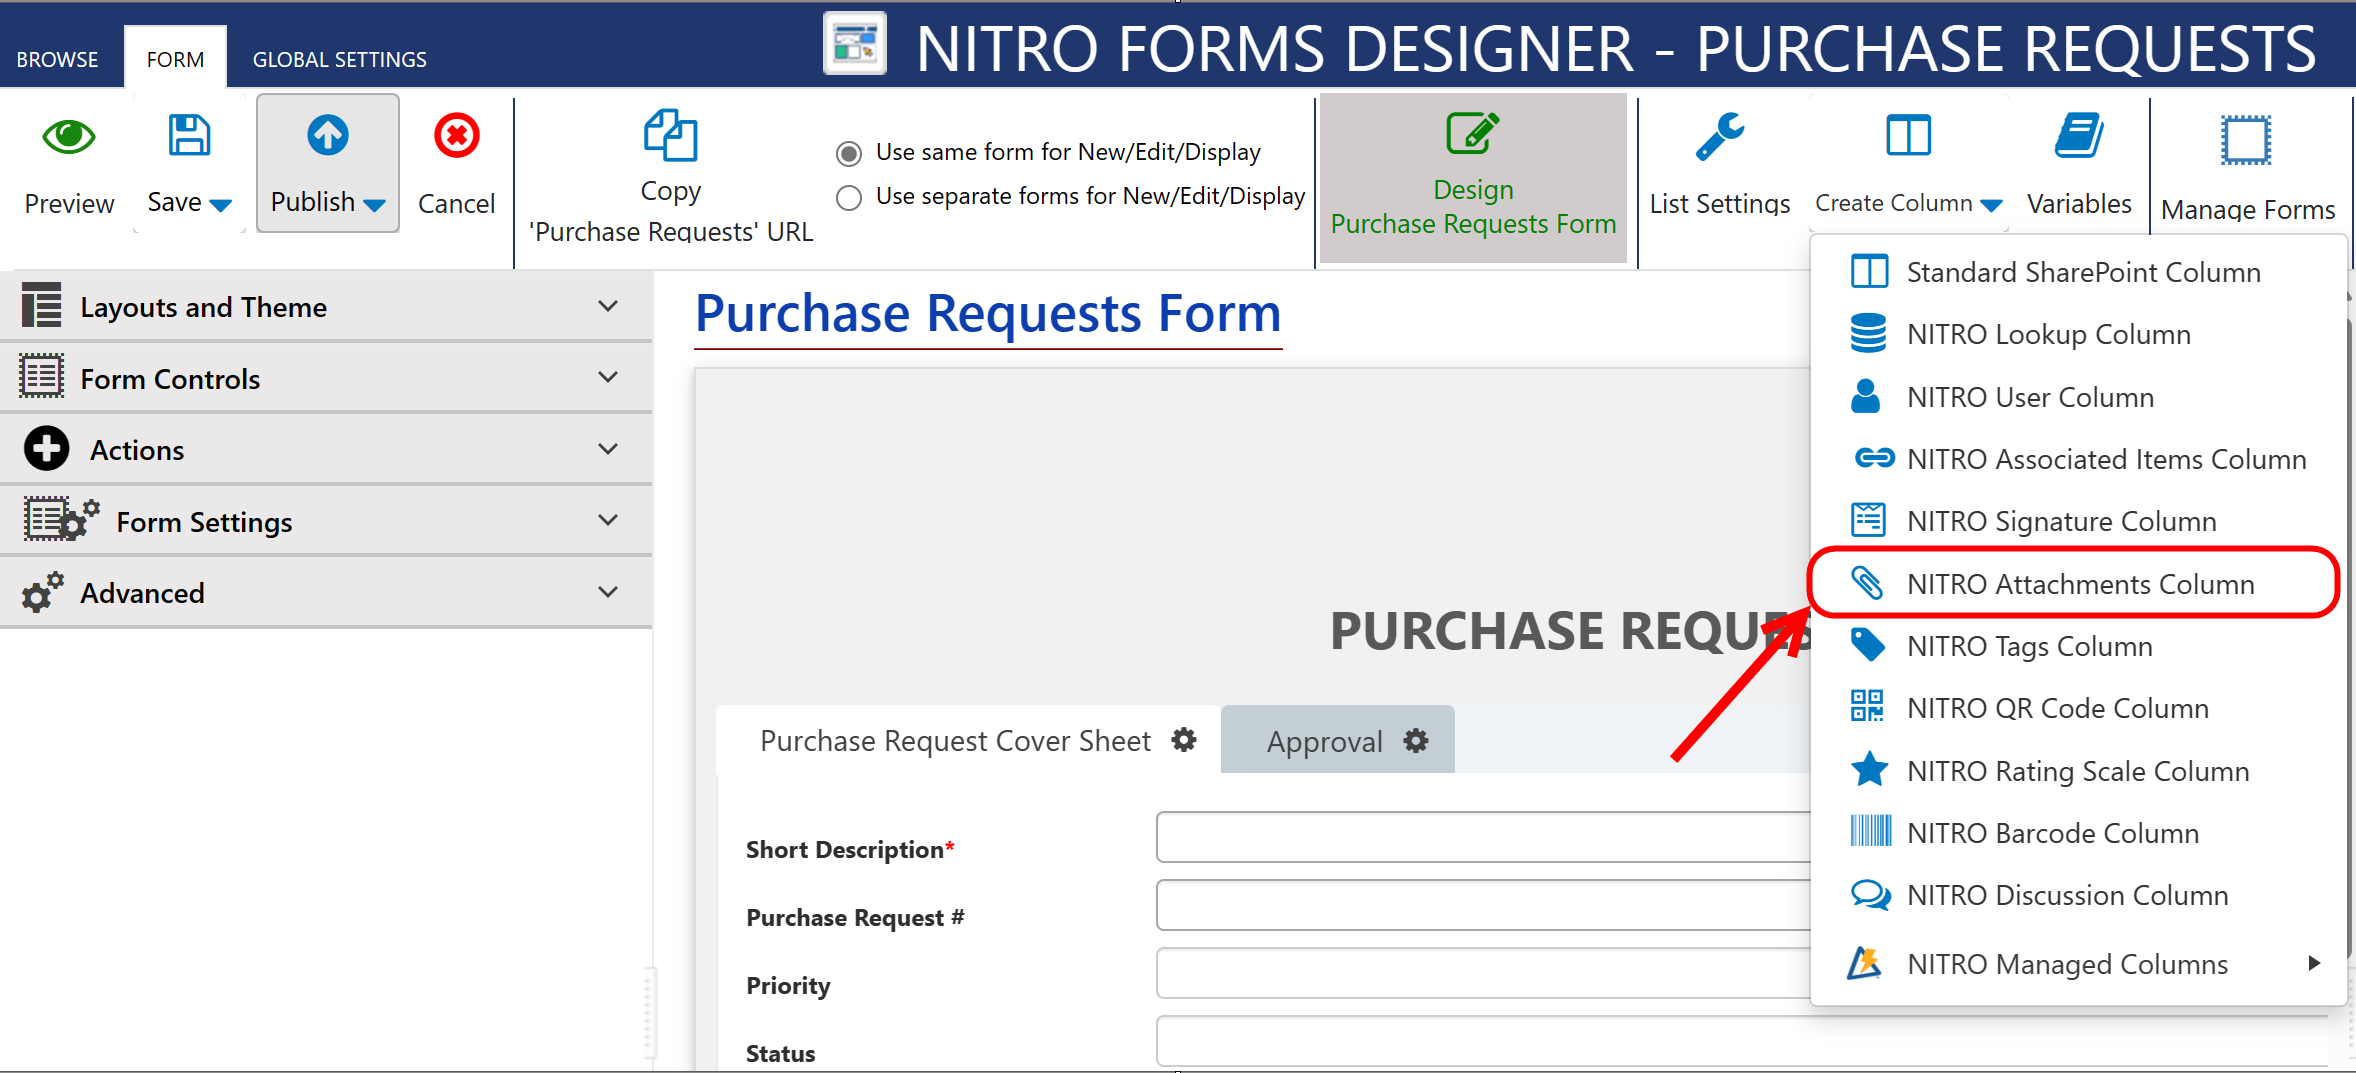
To create a new custom Attachments column, go to the Create Column button in the ribbon, and select NITRO Attachments Column from the dropdown:
This will bring you to the following screen:
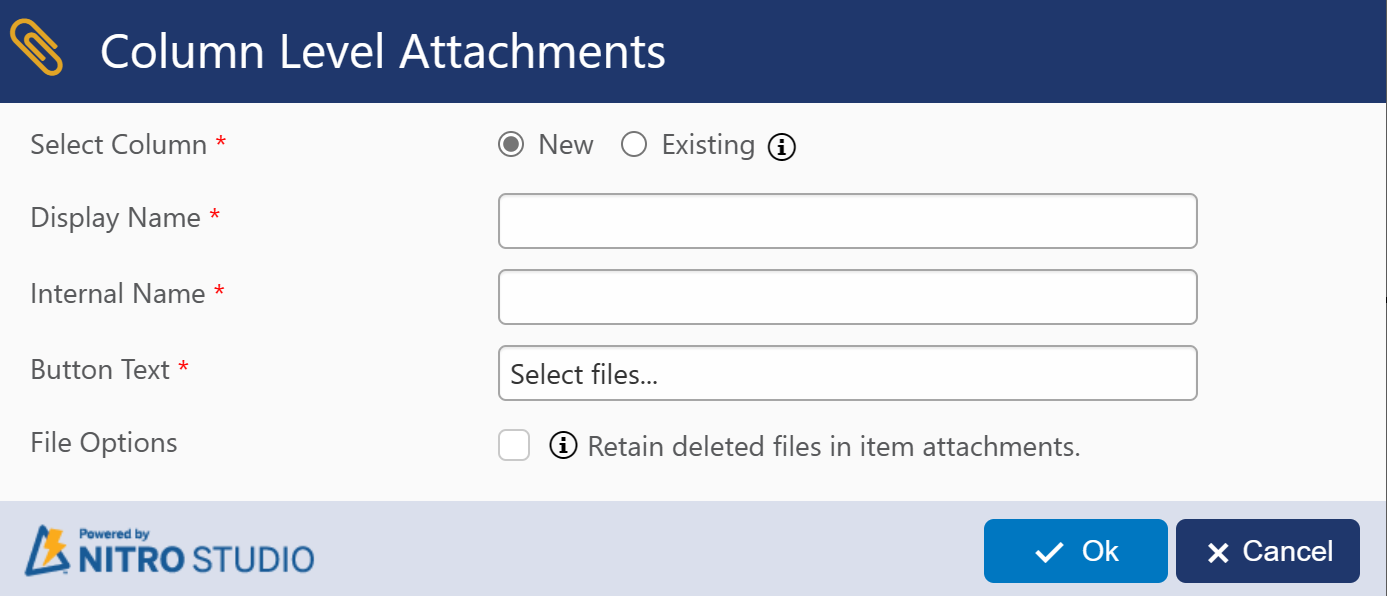
You can create a new column for your list or convert an existing Plain Text Multiple Lines of Text column.
Display Name - What will be shown on the form
Internal Name - What will be stored in SharePoint. Display and Internal names can be the same or different. Crow Canyon recommends using an Internal Name without spaces in case this field needs to referenced in Workflows or Custom Actions
Note:
•Auto populating internal name from display name if internal name is empty when tabbing out from title of setting in new column creation.
Button Text - What the user will see when they are looking at the form.
File Options: Enabling this option means if file is deleted, it will be removed from NITRO Attachments Column but retained in item attachments.
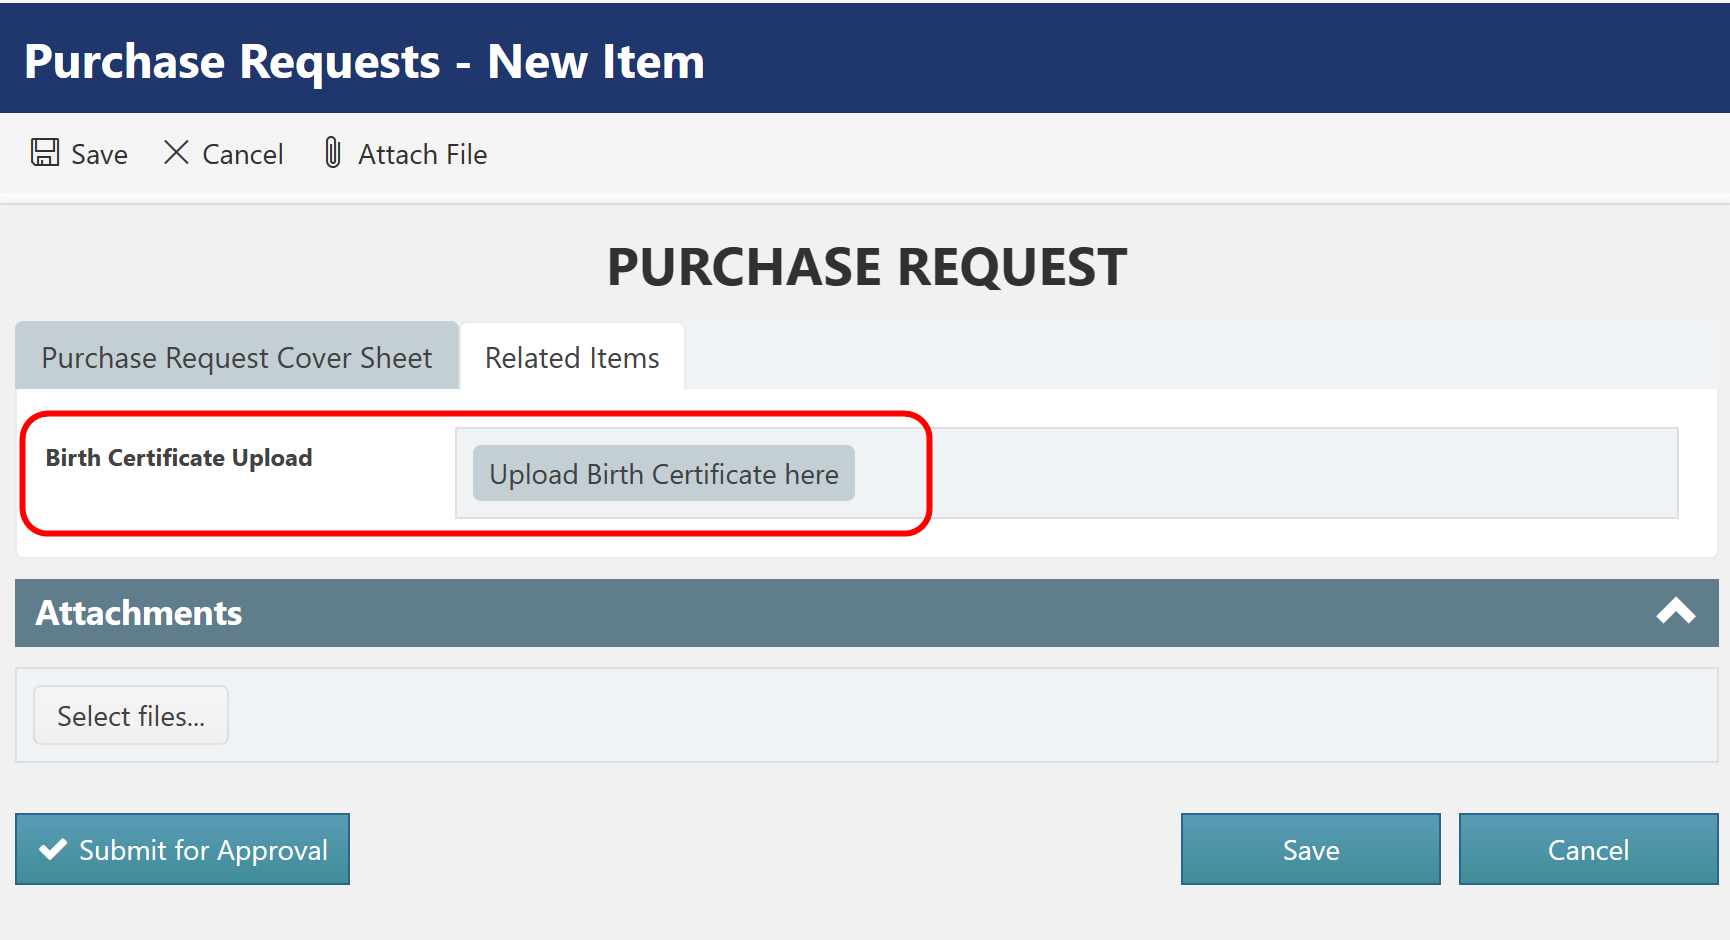
Using the following configurations:

This is the result on the form:
Refer below article for more details
NITRO Attachments Column In NITRO Forms
Restrict The Type Of Files Allowed For Attachments In NITRO Forms