Legacy
General Settings is in the top part of the configuration screen.
Designer
General Settings is accessed from the "Settings" link in the top ribbon.

General Settings
Here you will choose the display settings for your custom action including what to name it, what kind of button to use, and where and how the button gets displayed.
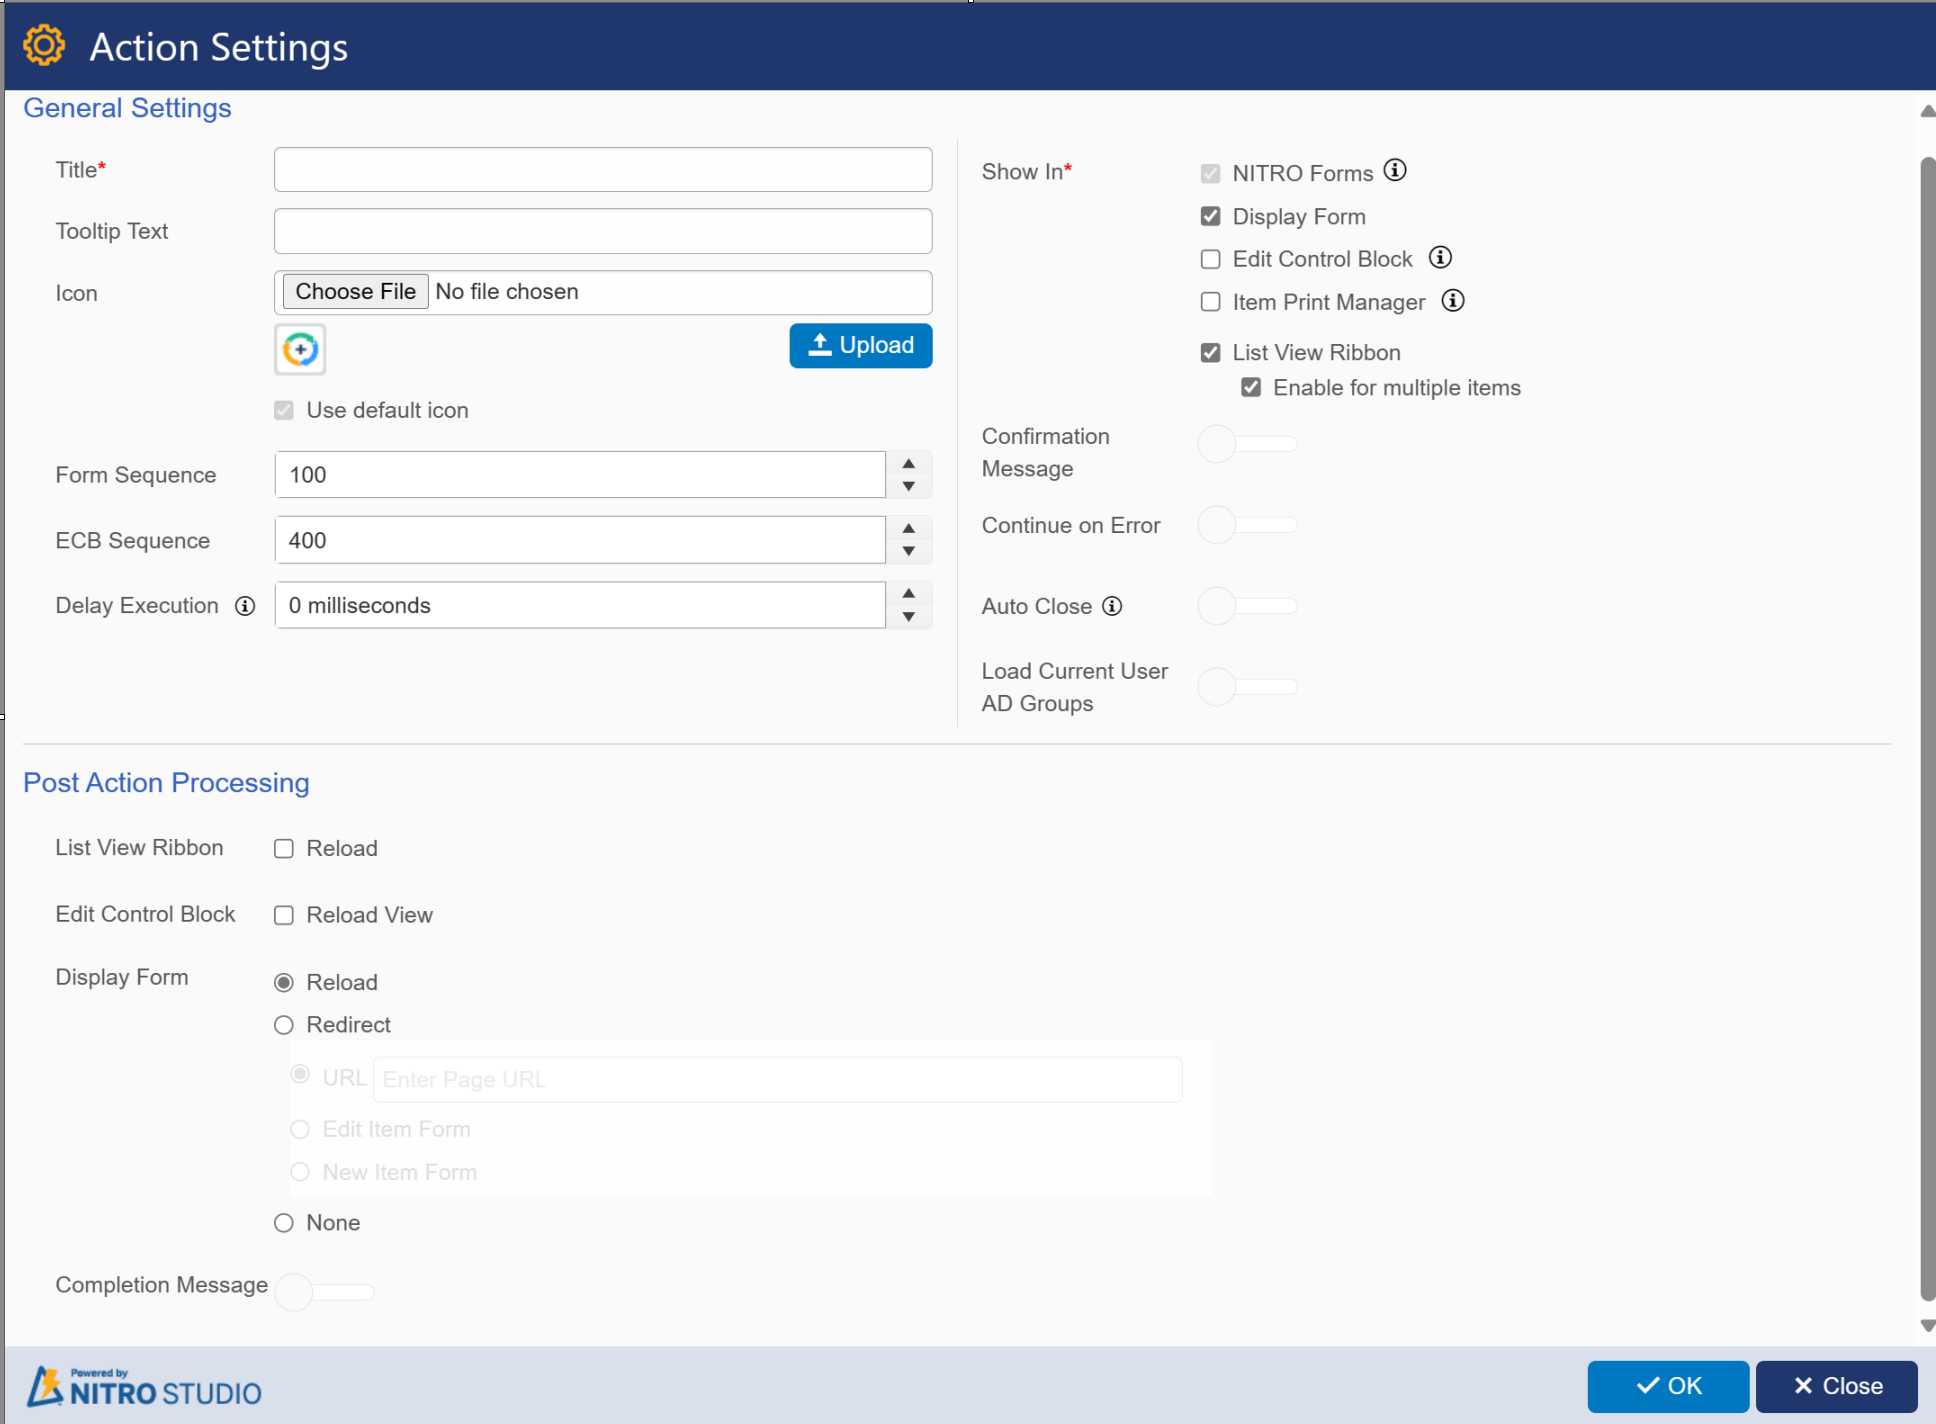
General Settings:
Title - Enter a unique title for this action
Tooltip Text - (Optional) Enter in a short description that shows when the user scrolls over the Action button
Icon - use the default icon shown or select an icon using Browse and Upload. NITRO can upload .jpg and .png files as Custom Action icons and will generally shrink larger images if needed.
Form Sequence - sets the order of Custom Action buttons in the ribbon. The buttons will line up in ascending order from left to right depending on the Form Sequence number in each Custom Action.
ECB Sequence - this number acts in the same way as Form Sequence, but in the ECB (ECB = Edit Control Block, which shows up upon right-clicking the three dots next to a list item).
Delay Execution: it will delay action execution for specified seconds.
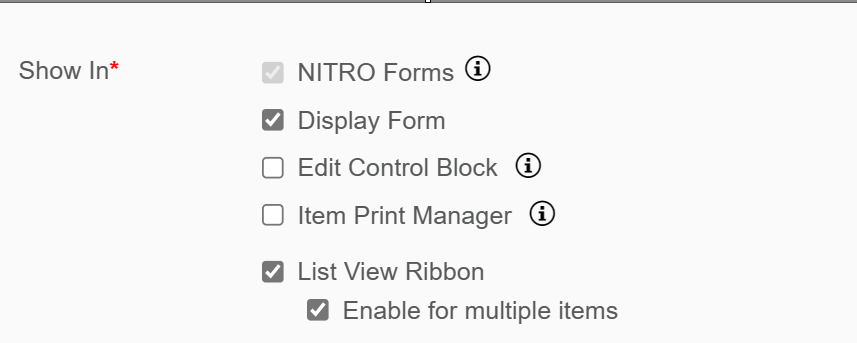
Show in - determines where the button will be shown
Click here to see how the Custom Actions display in each of the following areas:
•NITRO Forms
•Display Form Ribbon
•Edit Control Block
•Item Print Manager
•List Ribbon (Items tab) -- note that this custom action can be enabled for multiple items. It will run on the items that are selected in the list view if the "Enable for multiple items" box is checked.
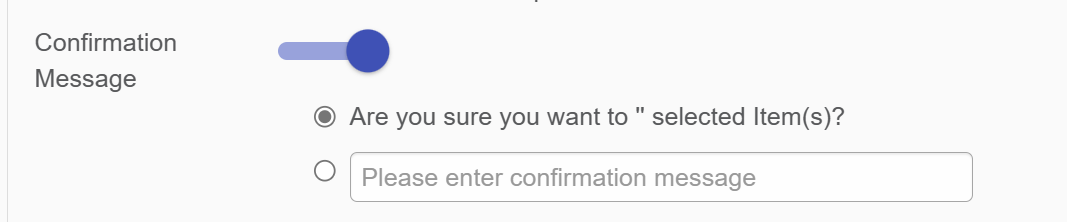
Confirmation Message: Enable this option if you want to take confirmation before action execution.
Continue on Error: default value for this is 'No'. Enable this option if you want to continue the action execution if error occurs.
Auto Close: After action execution auto-close the progress dialog. Dialog is not auto-closed if there is an error in execution or is not executed due to conditions/permissions
Load Current User AD Groups: Enable this option if you want to load current user AD group name.
Post Action Processing: click Post Action Processing for details.