This action allows you to create a new list item in any site and any list, including the current one. You can map column values from the current list into the new list item. You can also use functions and default values such as 'Today', 'Me' etc. to set column values. This action can also be used to copy an item either into the same list or into another list. This copying is done by mapping all the fields in the current item to the new one.
Add List Item action consist of below columns.
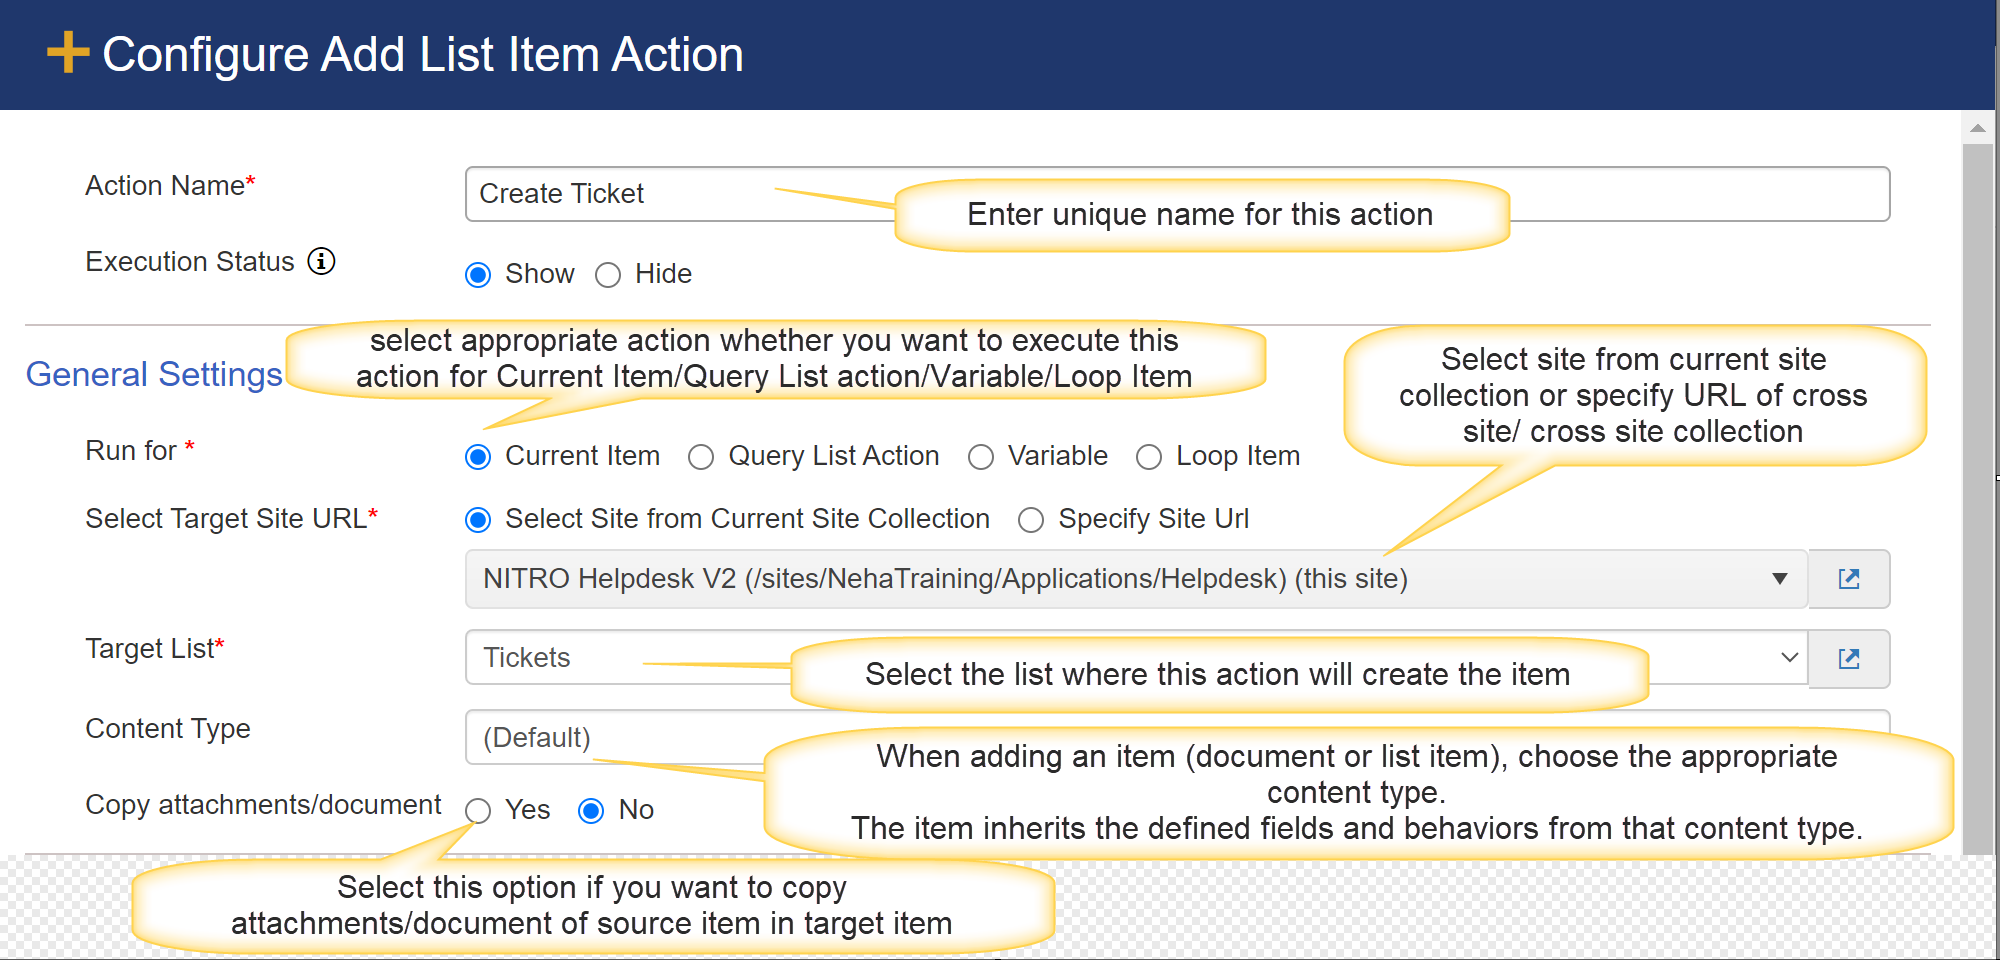
Action Name: Provide unique name for action
Execution Status: select this option to show or hide this custom action from user during execution.
General Settings:
Run for: This specifies the method used for source data mapping.
oCurrent Item - to create an item based on mappings from current list.
oQuery List Action - to create single or multiple items based on item(s) returned from a query list. Select query list action from dropdown.
Create query list item(s) in target list. Choose the query list from the drop list. This will create the item(s) that query list fetched in target list.
oVariable - to create one or more items based on variable data returned from the WF Variable. Select variable from dropdown.
oLoop Item - create item(s) for which loop runs in target list. Choose the loop name( applicable only for loop configured for query list) from the drop list. This will create the item(s) from the query list for which loop runs.
Select Target Site URL:
It has two options
o Select Site from Current Site Collection: this will show all sites available in current site collection. select site from dropdown.
o Specify Site URL: user can directly provide URL of site from current site collection, cross site or cross site collection.
Target List: select list from dropdown ( it will show all lists of selected site in above step) where you want to create items.
Content Type:
If target list is 'Custom list' then it will show 'Default' and 'Item' as a default option in dropdown.
o Default: it will create item in target list with specified column mappings
o Item: it will create item in target list with specified column mappings
If target list is 'Document Library' then it will show 'Document' and 'Folder' as a default option in dropdown.
Note: If target custom list is 'Folder' enabled then 'Content Type' will show Folder as third option.
To enable folder option: Go to list -> List settings -> Advanced settings -> Folders, here select 'Yes' and click 'Ok' button.

o Folder: it will create folder in target list with specified column mappings
Note: User can add more content types.
•For more detail on content types refer: Steps to add content types to SharePoint List
Item column Value settings
It provide three options to map column values
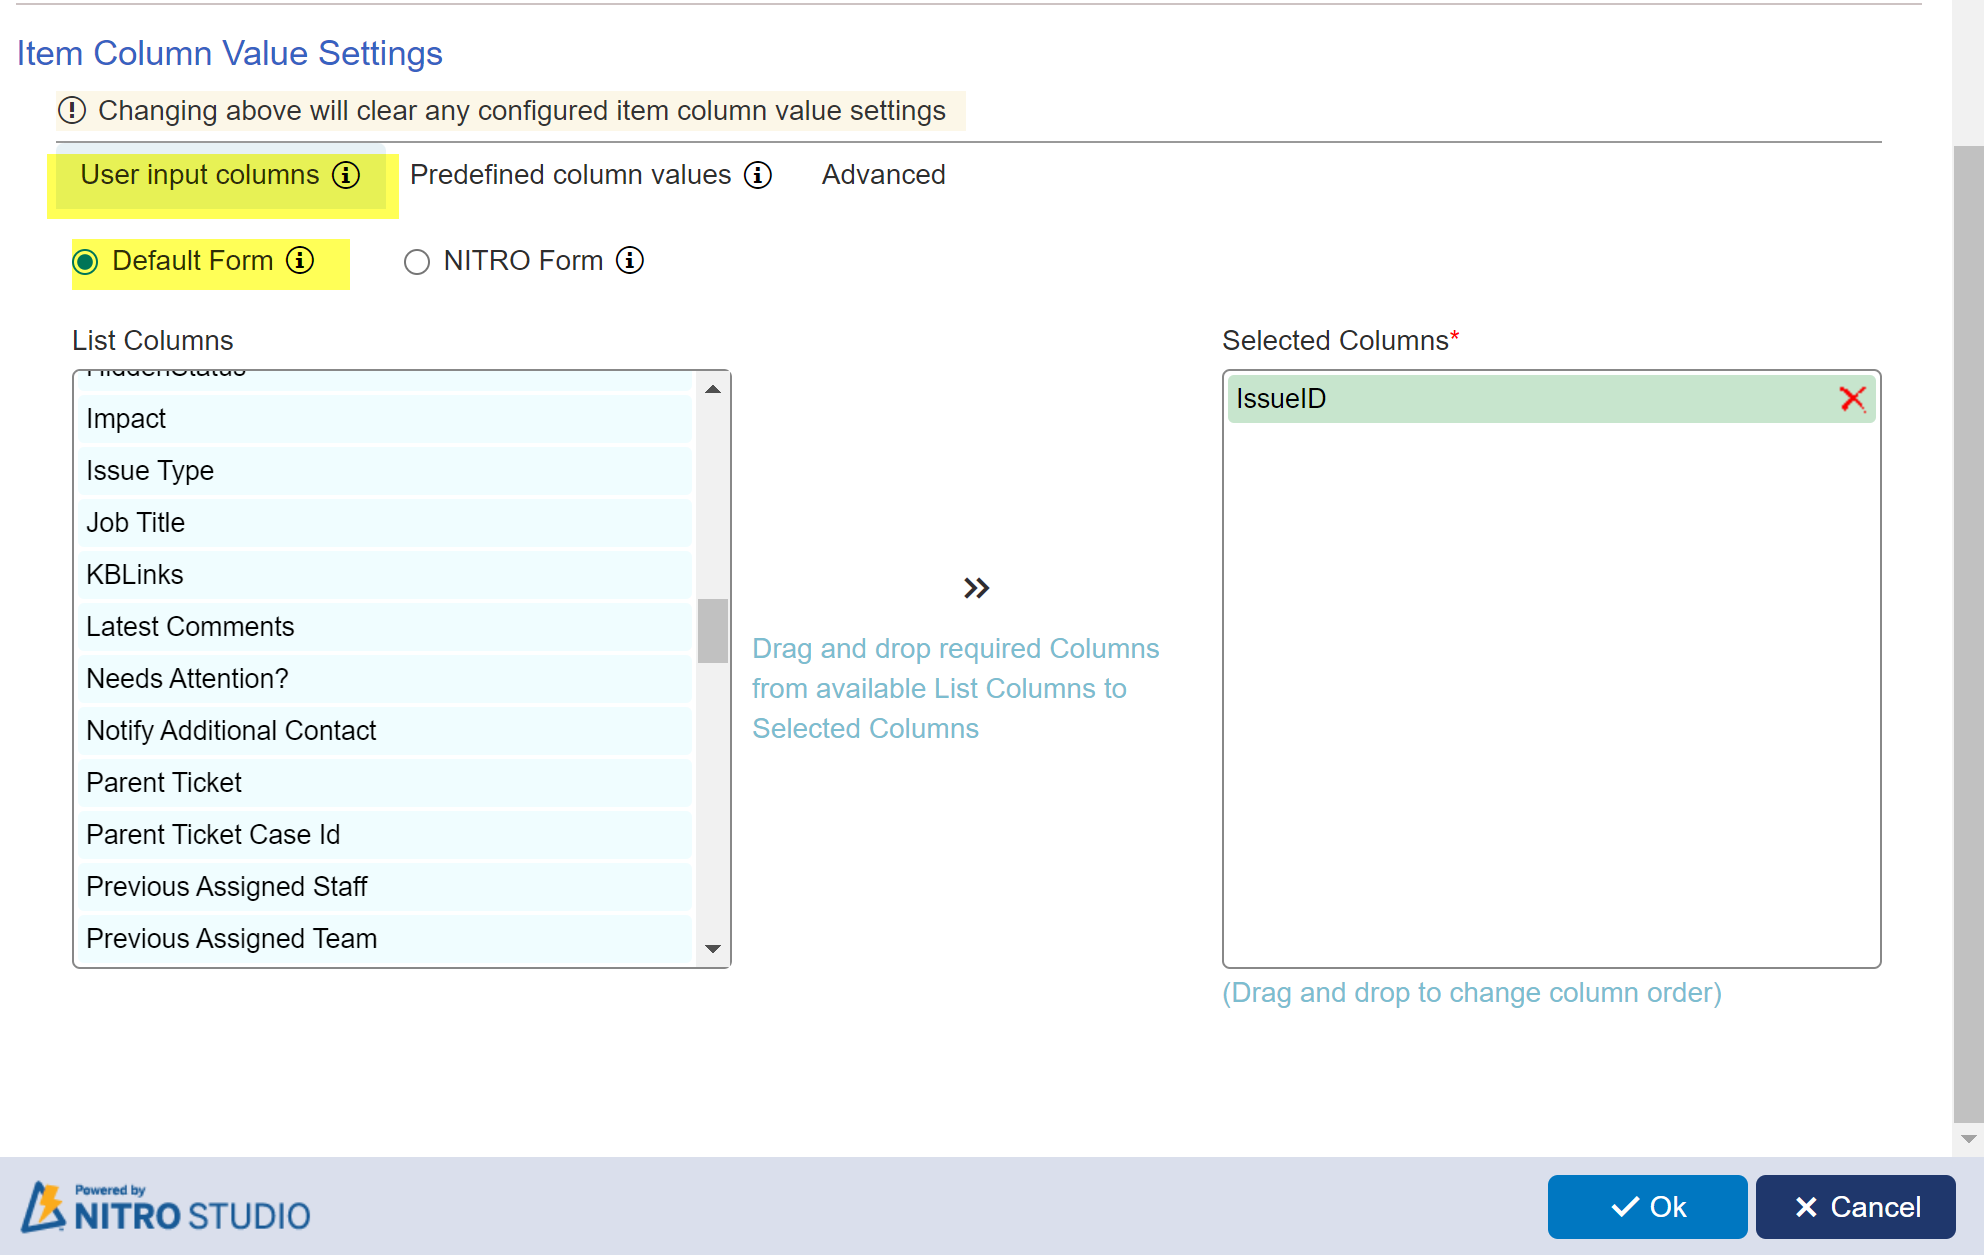
1. User input columns
It further has two options: Default Form and NITRO Form
2. Predefined column values
3. Advanced
User input columns
User can enter value for these columns while executing the action.
Default Form
Default form option will show auto-generated form that shows selected column for data input. In below example, auto generated form will show 'IssueId' column
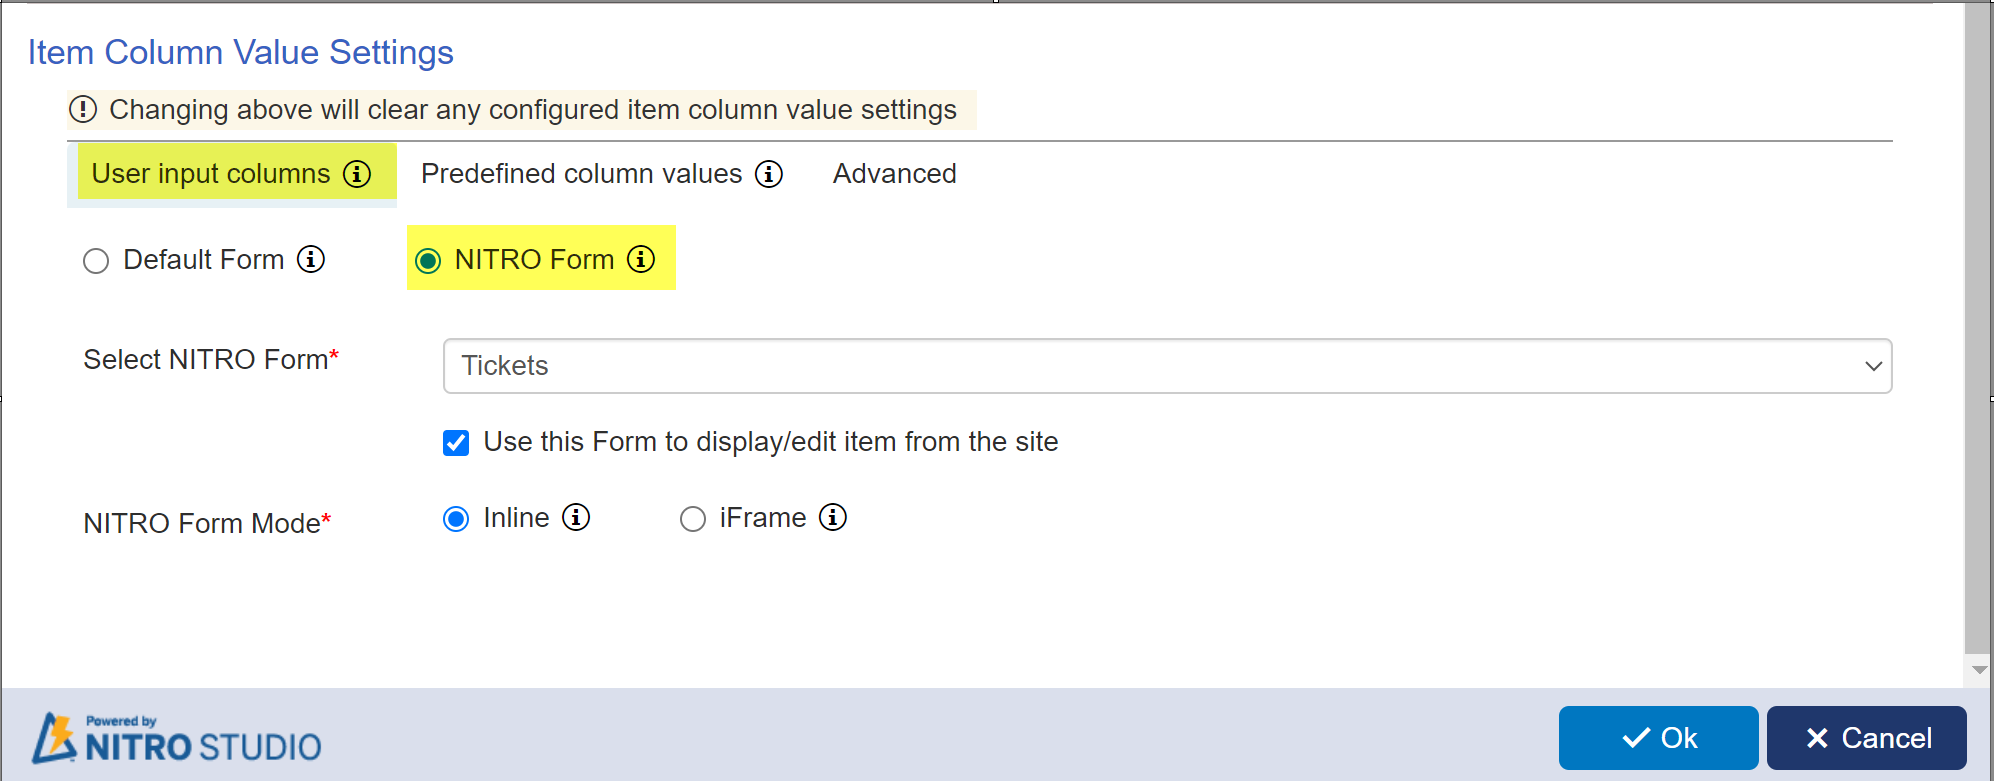
NITRO Form
It will show the form as per the advanced configurations done in selected NITRO form settings.
Select NITRO Form: This dropdown will show all the NITRO forms configured for selected target list.
if you want to use the same for for displaying and editing item then checked the box under this column.
NITRO Form Mode: It provide two options : Inline and iFrame
1. Inline mode: open the NITRO Form as pop-up dialog in context of the parent page itself. Parent page and NITRO Form can share window variables.
Some advanced NITRO Forms feature are not supported in this mode
2. iFrame Mode: NITRO Form Opens up as a pop-up dialog in an iFrame. This mode support all advanced NITRO Forms features.
PreDefined column values:
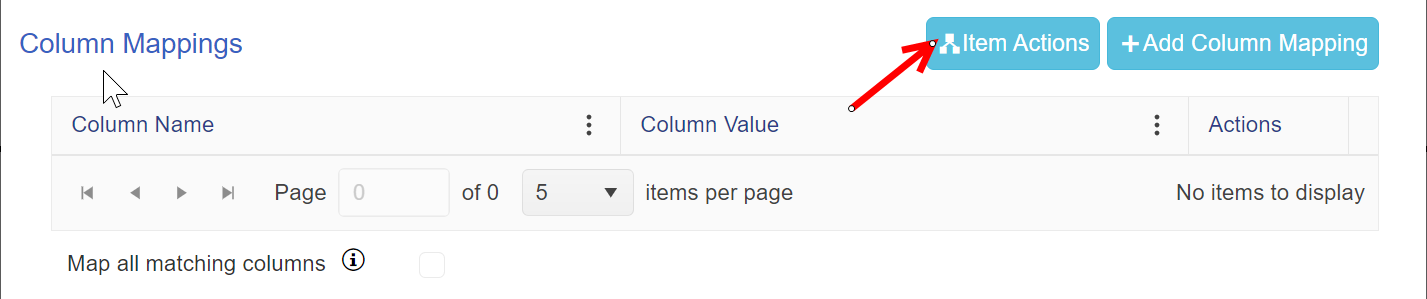
Here you will be able to setup Column Mappings by selecting columns in the list that you want to populate. You can have common expressions, hard-coded values, and mappings from the same or other list items. It has two buttons: Item Actions and Add Column Mapping
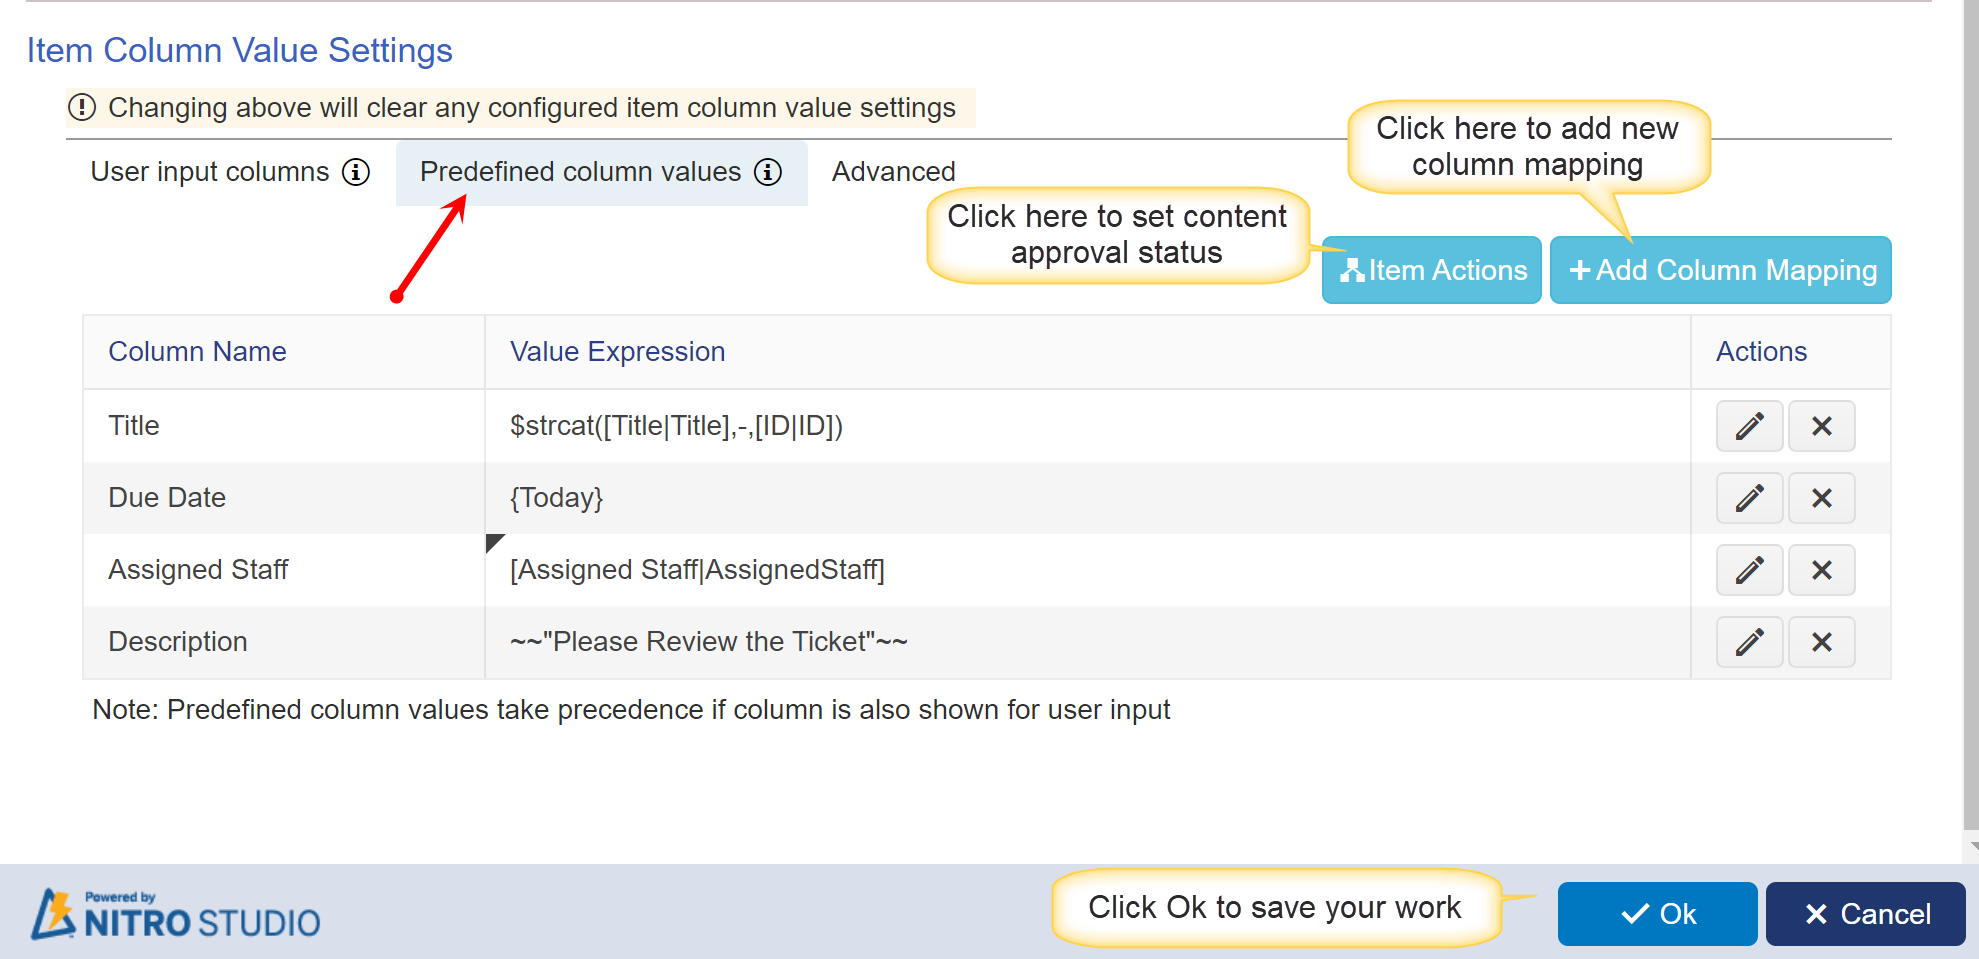
Add Column Mapping
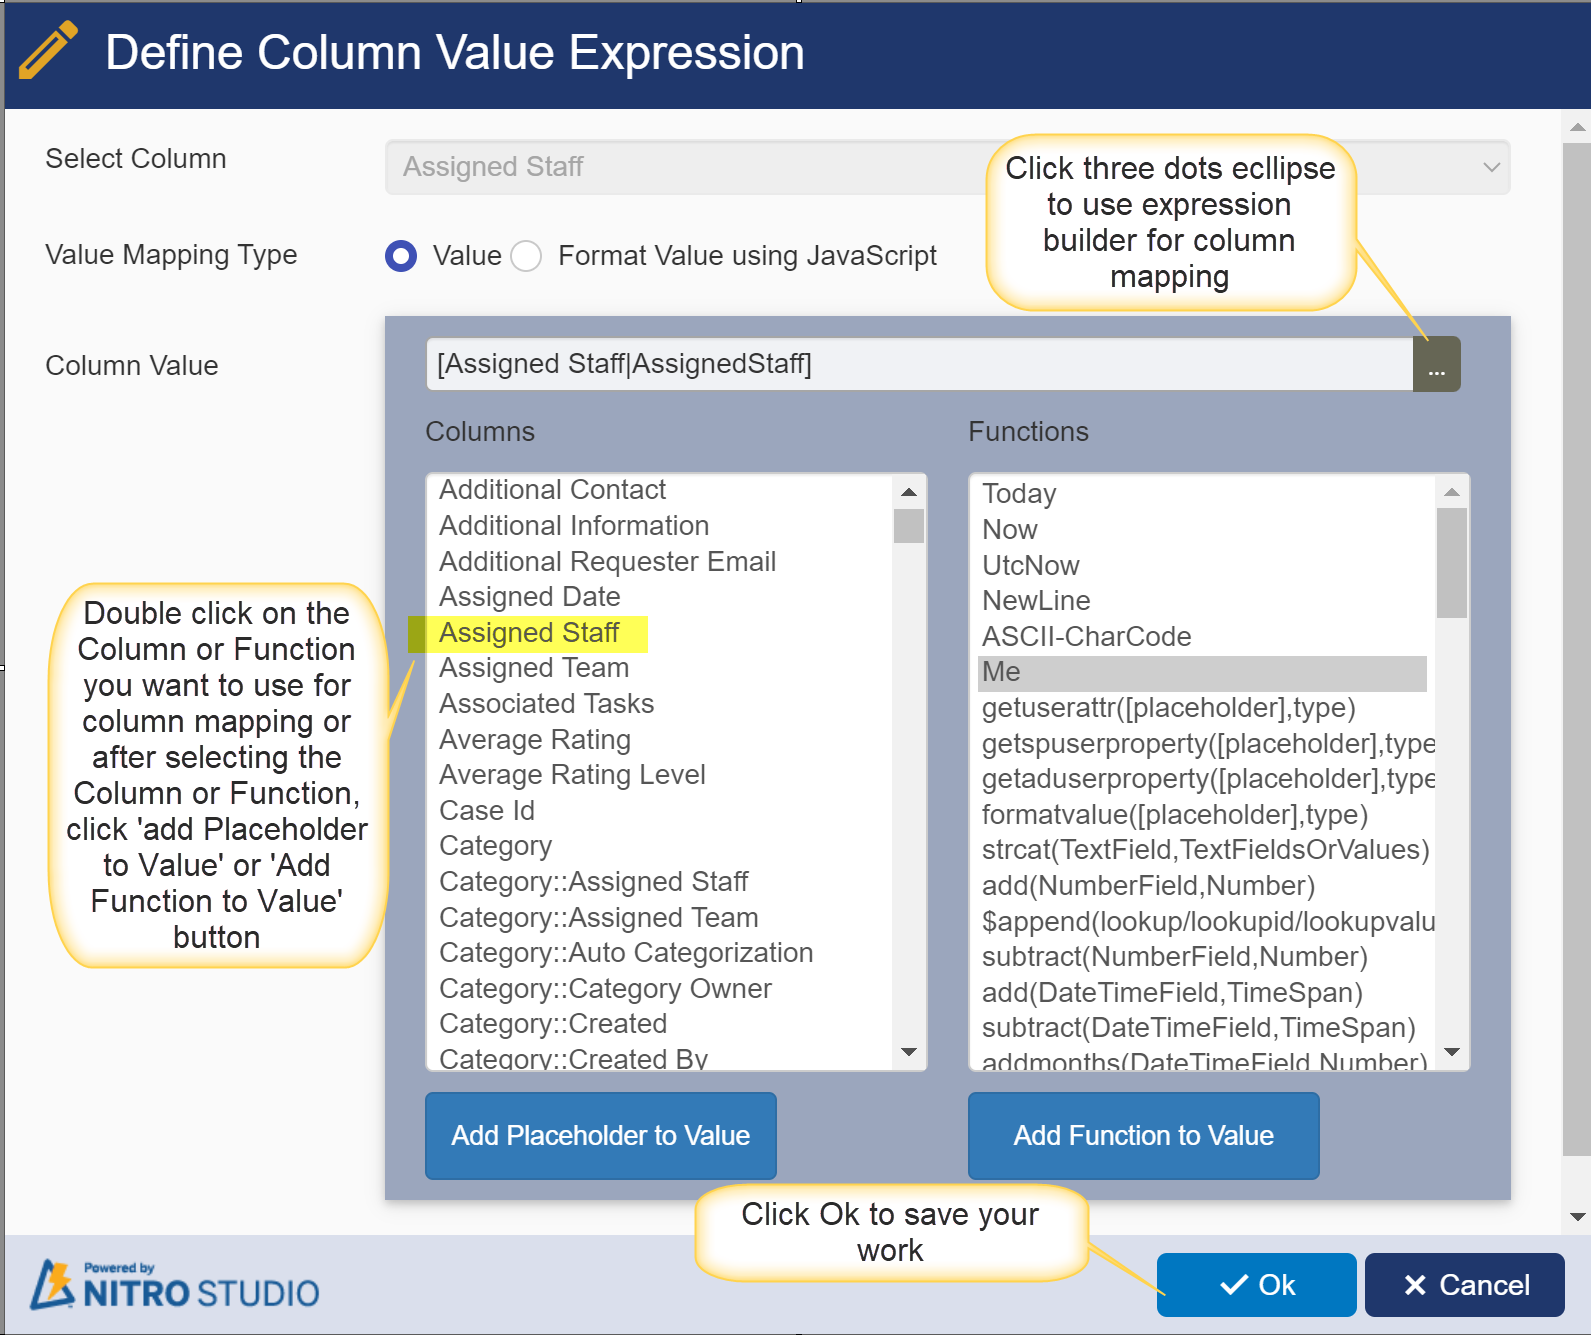
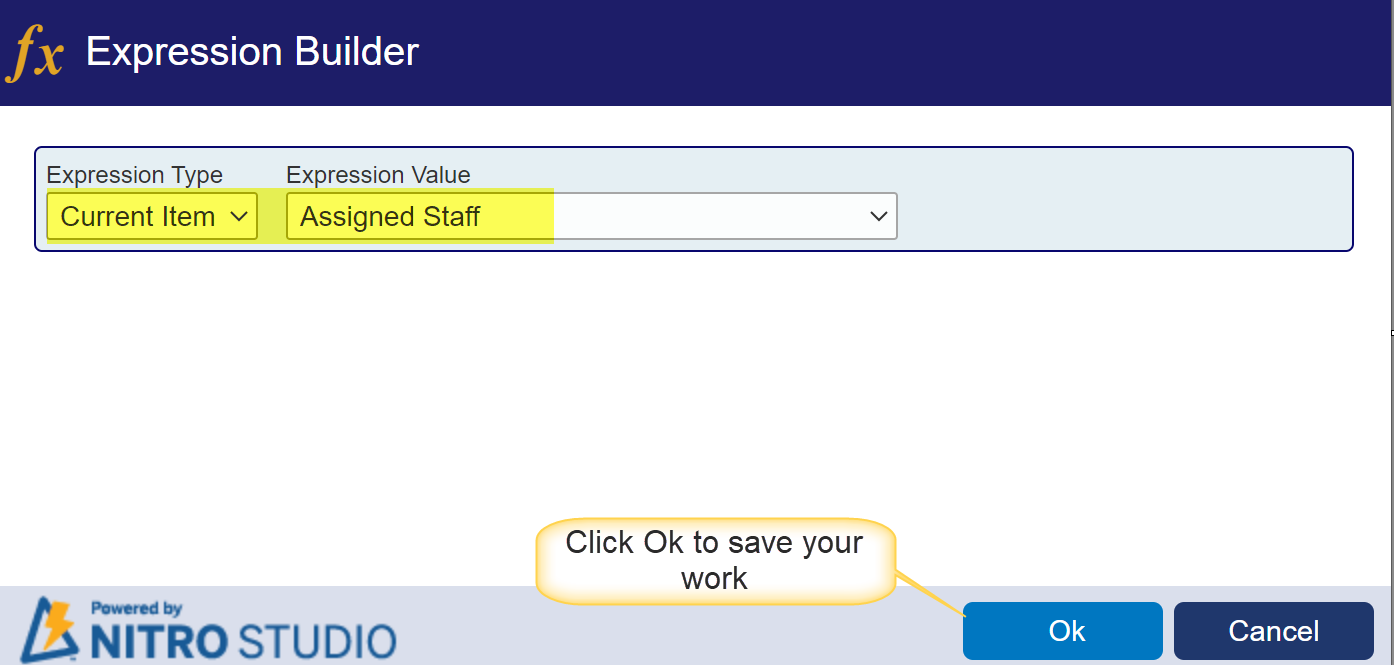
You can use expression builder for above column mapping as shown below:
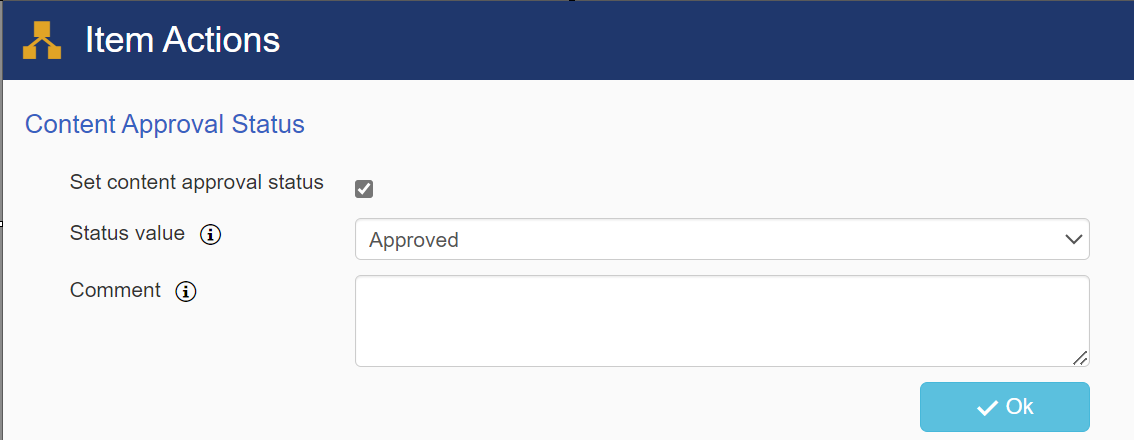
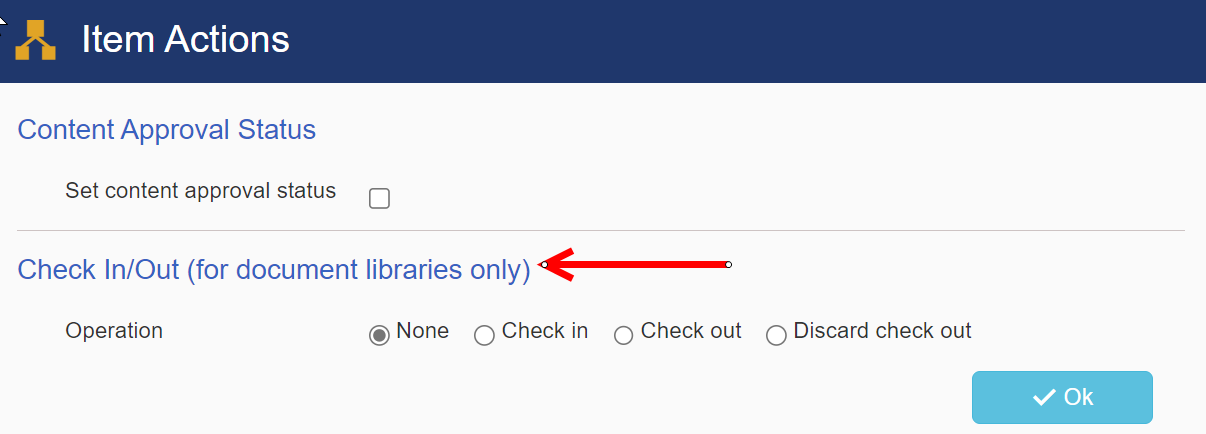
o Item Action: click this button to set content approval status as shown in below image
 |
| If target list is custom list, then 'Item Actions' shows below Options |
o Content Approval Status: It has 'Set content approval status' column
Set content approval status: enable this to set content approval status. 'Set value' and 'Comment' columns will be visible only when this option is enabled.
By default 'Set content approval status' is not enabled.
| Set Value: approve, reject or leave the status as pending for others with the manage list permissions to evaluate the item |
Comment: Use this field to enter any comment about why the item was approved or reject
| If target list is document library, then 'Item Actions' shows below columns |
o Content Approval Status : It has 'Set content approval status' column
Set content approval status: enable this to set content approval status. 'Set value' and 'Comment' columns will be visible only when this option is enabled.
By default 'Set content approval status' is not enabled.
Set Value: approve, reject or leave the status as pending for others with the manage list permissions to evaluate the item
Comment: Use this field to enter any comment about why the item was approved or reject
o Check In/Out option has four operations
None: this is default option
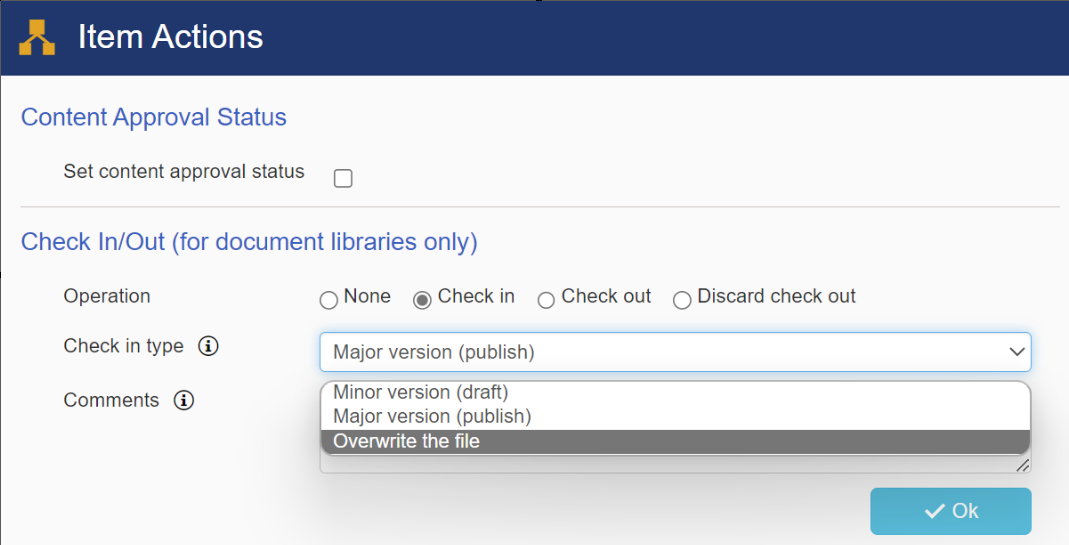
Check in: Once all the updates are done, a checked out document can be checked in. This will make the document available to all users. Select the type of version you would like to check in. It further has three options
•Minor version (draft): version values are incremented as minor version
•Major version (publish): version values are incremented as a major version
•Overwrite the file: overwrite the previous version
Comments: It describe what has changed in this version
Check out: Document is locked and others are not allowed to make changes. Users can still read the document.
Discard check out: Check out can be discarded if done by mistake or is not required any more.
For more detail refer this article: Major vs Minor Version
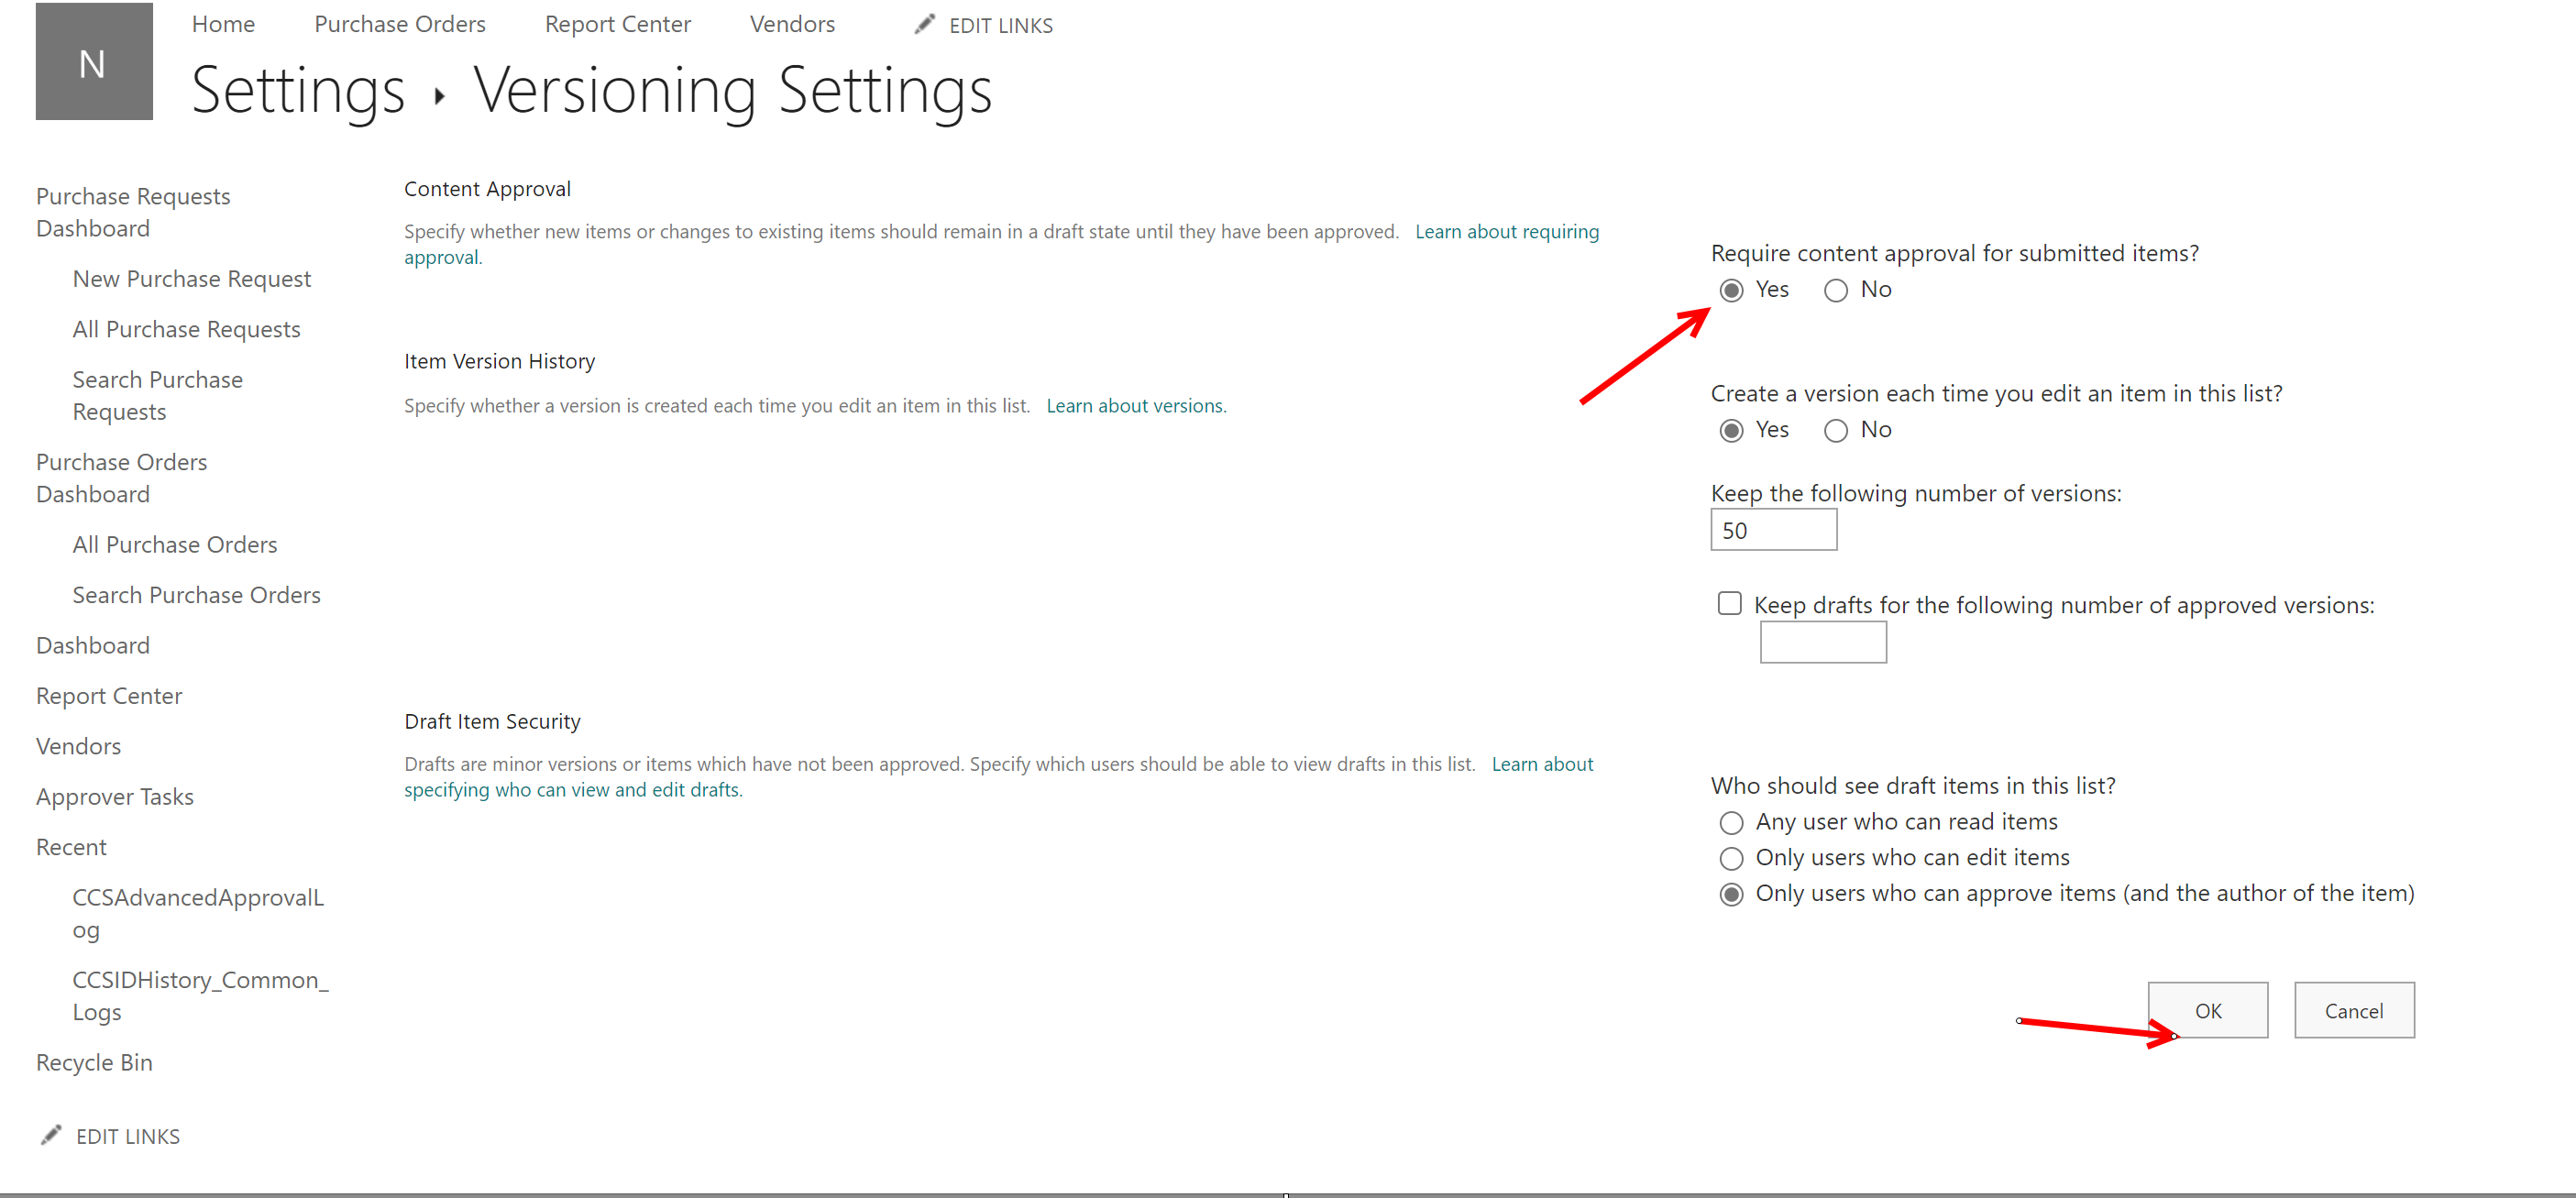
Note: for Item Action to work, 'Content Approval' setting in the Target list should be enabled.
Go to settings -> List settings -> Versioning Settings
Saving your Work
It is important to note that you must hit OK and Save at all levels of the Custom action in order for your individual actions to be saved. Changes to the custom action are committed only on the ‘Save’ button click on the main custom action new/edit page (AddEditSettings.aspx). When user opens any pop-up and changes anything (like edit action, add action etc.), those are not immediately saved to the settings.
Note:
• For more detail on expression builder refer to - Expression Builder
• For more information about Functions, refer to - Functions
• For ‘Query’ syntax, refer to – Query Syntax