Crow Canyon's Advanced Email App is an add-in for Office 365 that allows user to send outgoing emails from SharePoint lists and performs updates on item.
Key Features of Advanced Email App
•Allows users to send mails from SharePoint lists.
•Allows users to create multiple Mail Templates.
•Allows to store history of Outgoing emails in any other list linking to parent list (Email Tickets)
•Allows to update list Items on sending outgoing emails by specifying Item actions
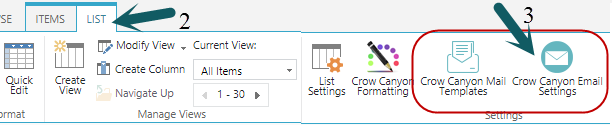
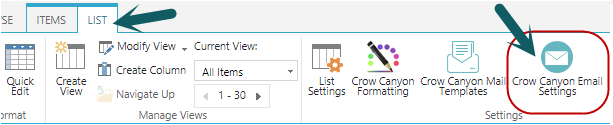
How to reach Advanced Email settings page
Select any item in the view of the list to enable ‘List’ ribbon. Click on ‘CrowCanyon Mail Template’ to create mail templates. Click on ‘CrowCanyon Email Settings’ to configure Email settings.
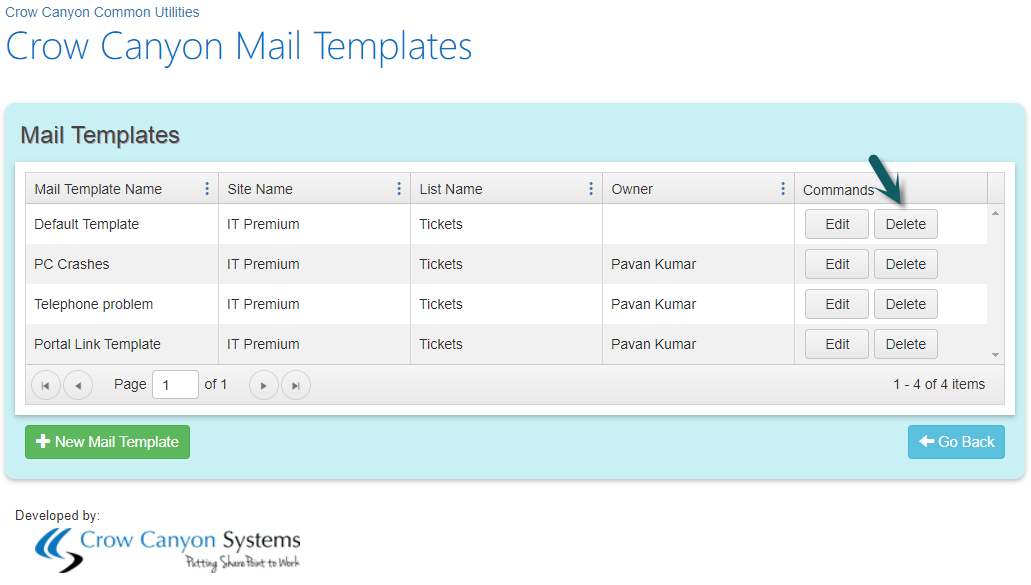
Create New Mail Templates
Navigate to CrowCanyon Mail Template by clicking on “CrowCanyon Mail Templates” in the List ribbon.

After navigating to ‘CrowCanyon Mail Template’, click on ‘New Mail Template’ button to create a new mail template.

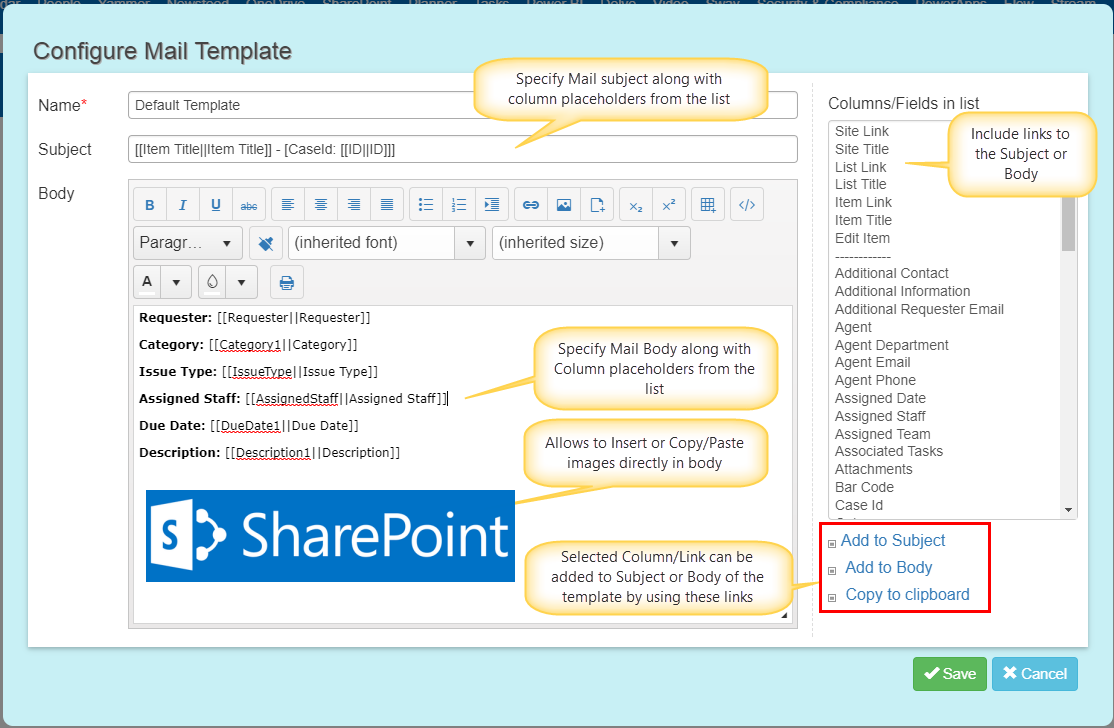
Configuring Mail Template
Mail Template Update/ Delete
Click on “Edit” button to update an existing Mail Template
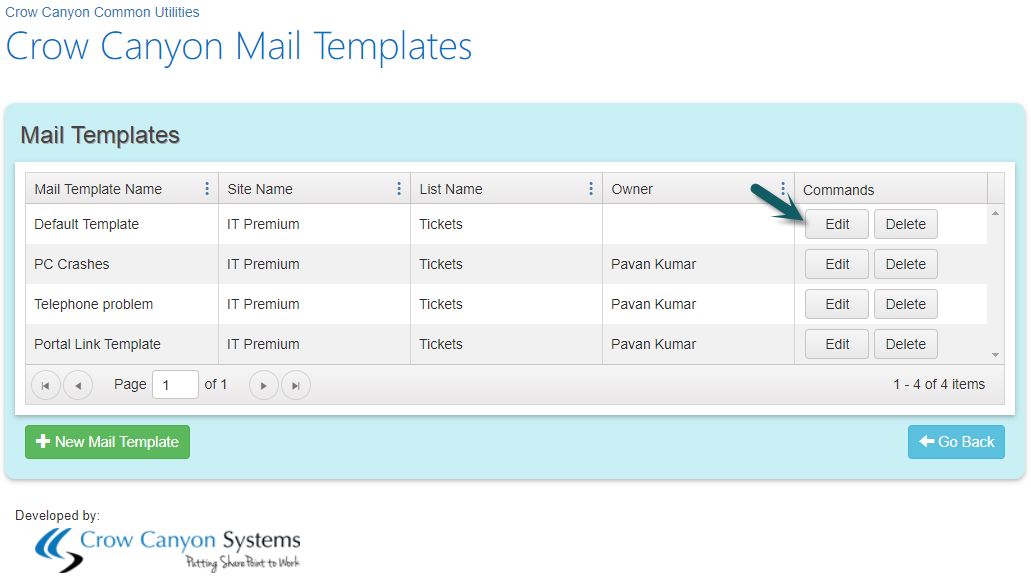
Click on “Delete” button to delete an existing Mail Template.
Configuring CrowCanyon Email Settings
Navigate to CrowCanyon Advanced Email settings by clicking “CrowCanyon Mail Settings” from the list ribbon.
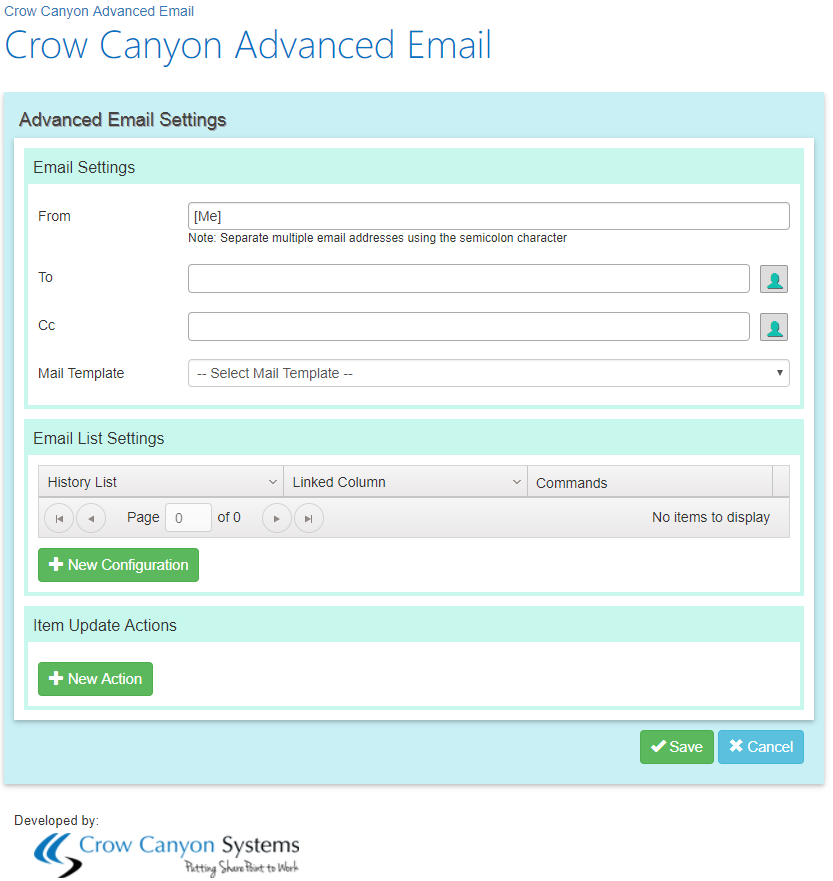
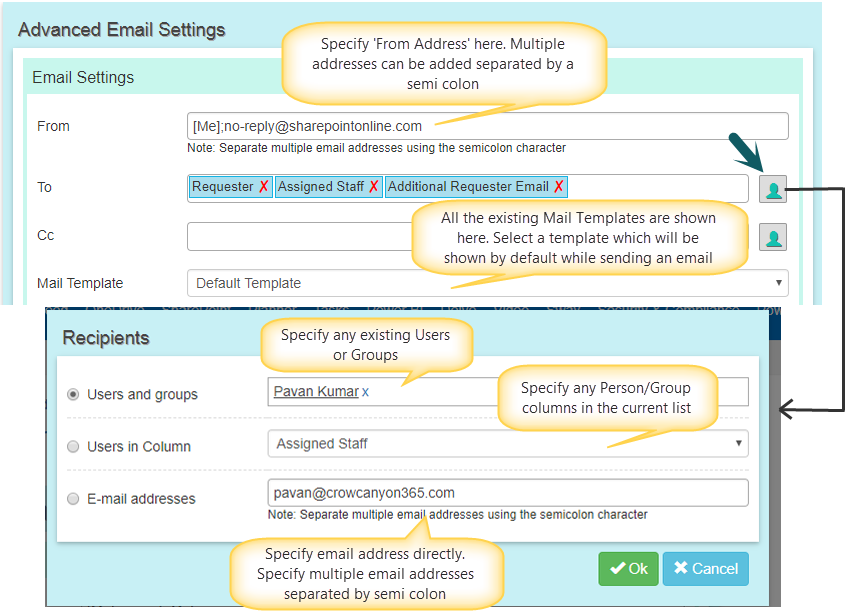
Configuring Email Settings:
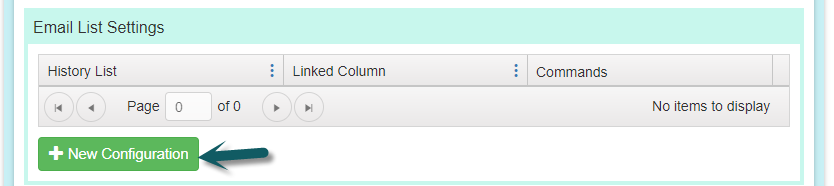
Email List Settings: Email List settings are to store Outgoing emails sent in another list. To configure settings, click on ‘New Configuration’ button
Ex: When an email sent from Tickets list will create an item in Email Tickets list.

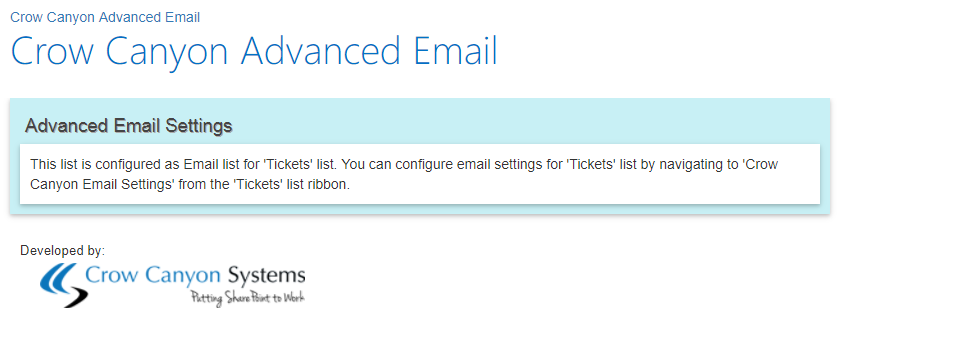
Note: When we try to configure ‘Crow Canyon Mail Settings’ on a list which is already configured in ‘Email List settings’ then it shows below message.
Ex: When we try to configure CrowCanyon Email Settings on “Email Tickets” list it will be shown like below.
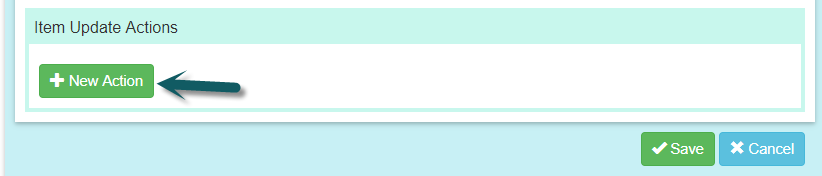
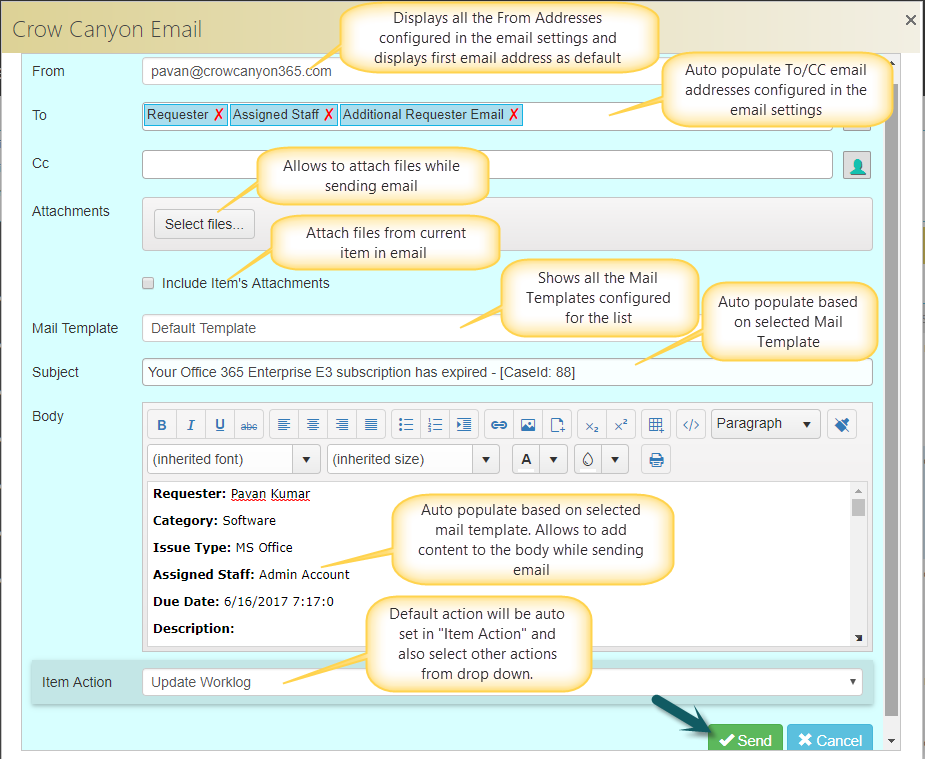
Item Update Actions:
Allows to perform item update actions while sending mails from SharePoint lists.
Click on “New Action” button to create Item Update Actions
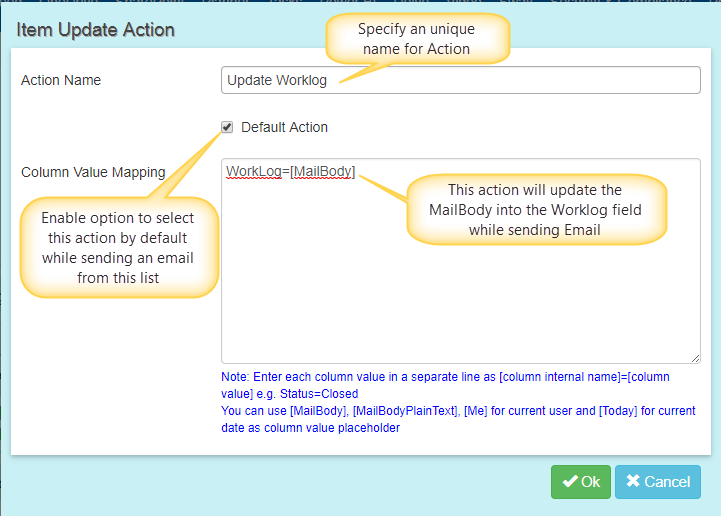
Note: Column Value Mappings are in this format:
[Column Internal Name]=[Column Value], for example:
RequestStatus=Closed
Worklog=[MailBody]
AssignedStaff=[Me]
DueDate=[Today]
Edit/Delete Multiple Item Update Action
Allows to create Multiple Item Update Actions and there will be only one default action.
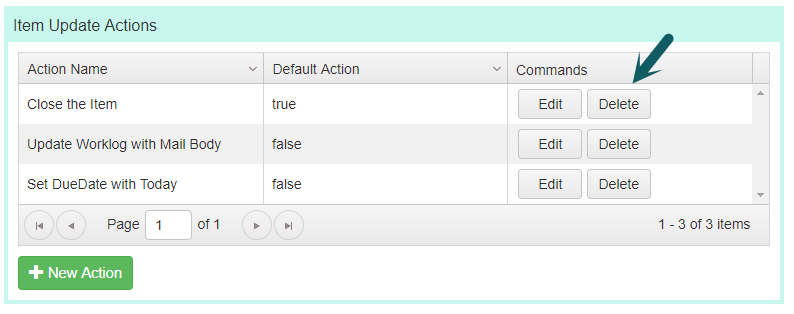
Click on “Edit” button to update the existing Item Action
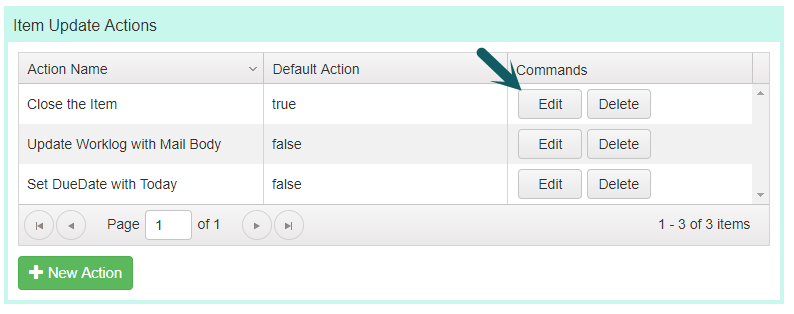
Click on “Delete” button to delete the existing Item Action
Sending Email Notification from SharePoint list
Sending mails from SharePoint lists is available in two scenarios:
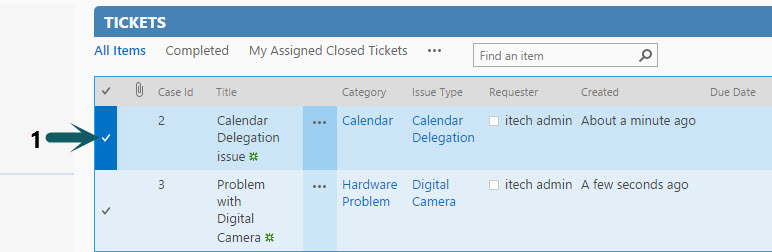
1. Send Mail directly from List views
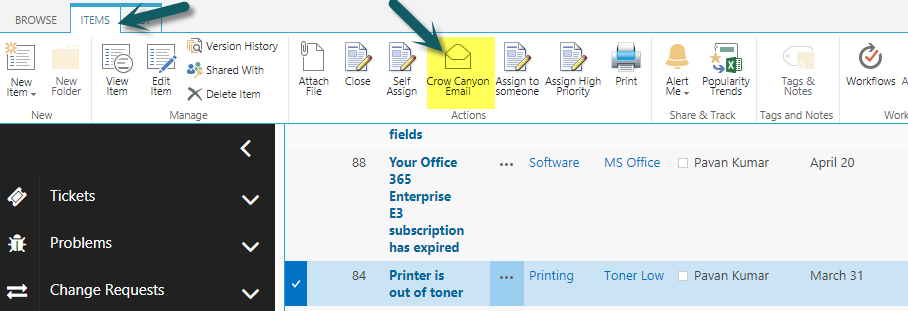
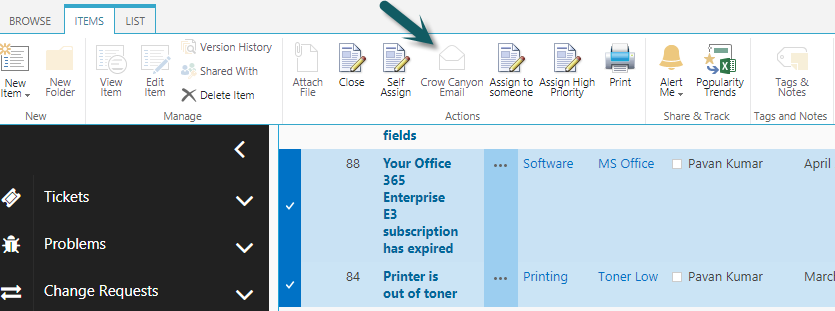
Select an item to send outgoing email and click on “CrowCanyon Email” button in the Item ribbon.
’
Note: Multiple item selection is not supported with ‘Crow Canyon Email
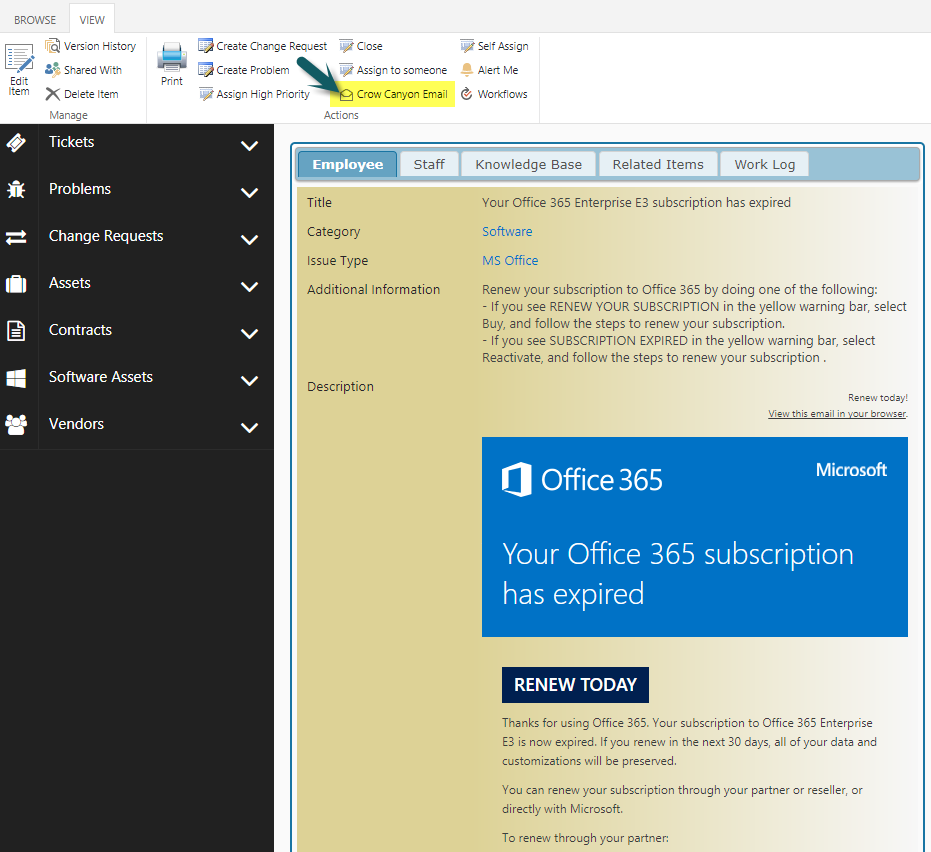
2. Send Mail from Item Display form
Open a list Item in display form and click on “CrowCanyon Email” action to send email
Send Email:
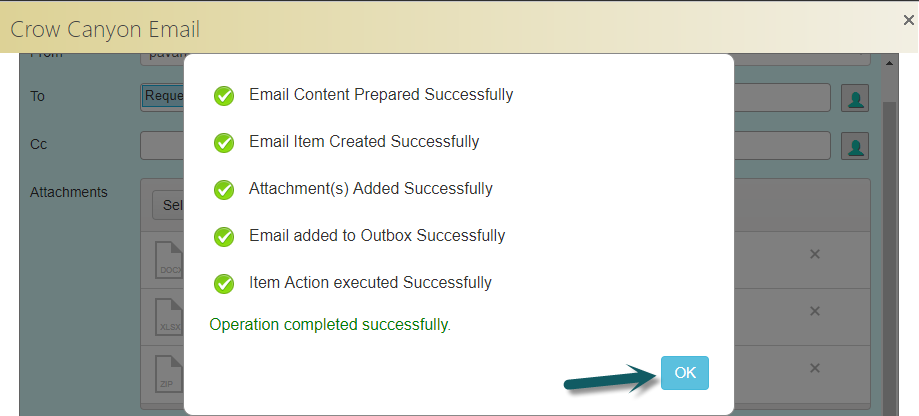
After sending an outgoing email a success log gets displayed as shown below.
On sending an Outgoing email from Tickets list, an item gets created in Email Tickets list with all the relevant details

Browser Security Settings:
1.Sometimes Advanced Email may not work as expected in Internet Explorer. So, please perform these steps to avoid issues in IE browser.
2.Open your site in Internet Explorer and open ‘Advanced Email’ app
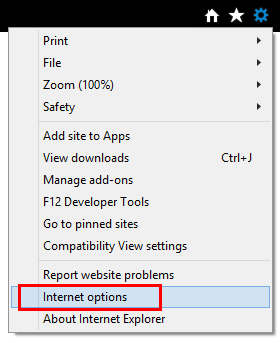
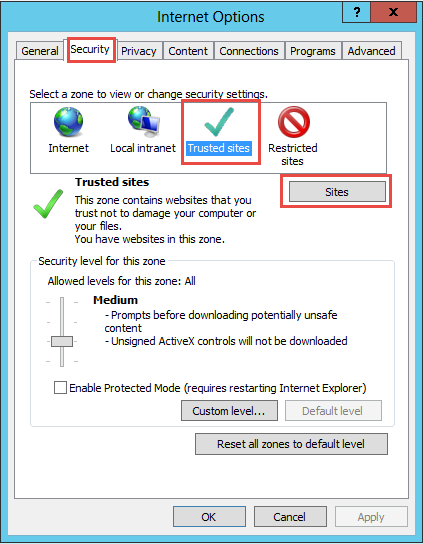
3.Click on ‘Tools’ icon from top right corner of the browser, click ‘Internet Options’, and then click the Security tab and select ‘Trusted sites’ option and click on Sites
4.On the dialog, address of the current site should be pre-filled. Please click ‘Add’ button to add it to trusted sites
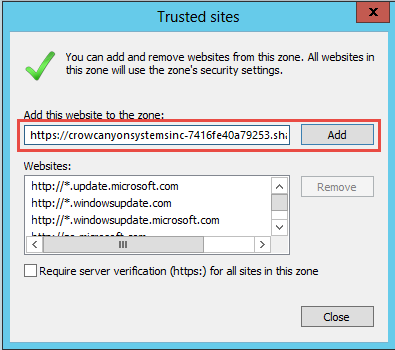
5.Also, add ‘http://login.microsoft.com’ to the trusted sites

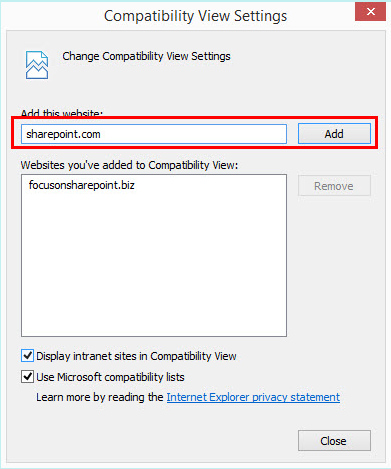
6.Next, click on Tools, click Compatibility View Settings and add site ‘*.sharepoint.com’
7.Close the browser and open it again and navigate to site.