|
<< Click to Display Table of Contents >> Tab Permissions |
  
|
|
<< Click to Display Table of Contents >> Tab Permissions |
|
SETTING UP TAB PERMISSIONS
Each tab can have a unique permission applied to it. This can be used for several reasons. First, you may want to hide a particular tab from all users in a particular role because it contains sensitive information, or information that they don't need to see. Second, you may want to hide a tab until a certain condition is met. Third, you may want to hide the tab while you're working a on new way to display the columns, and don't want to impact how users interact with the current form.
Whatever the reason, setting up permissions is quite simple.
When you have your tab highlighted (by clicking Edit), you can click the Permission tab, which is right next to Fields:
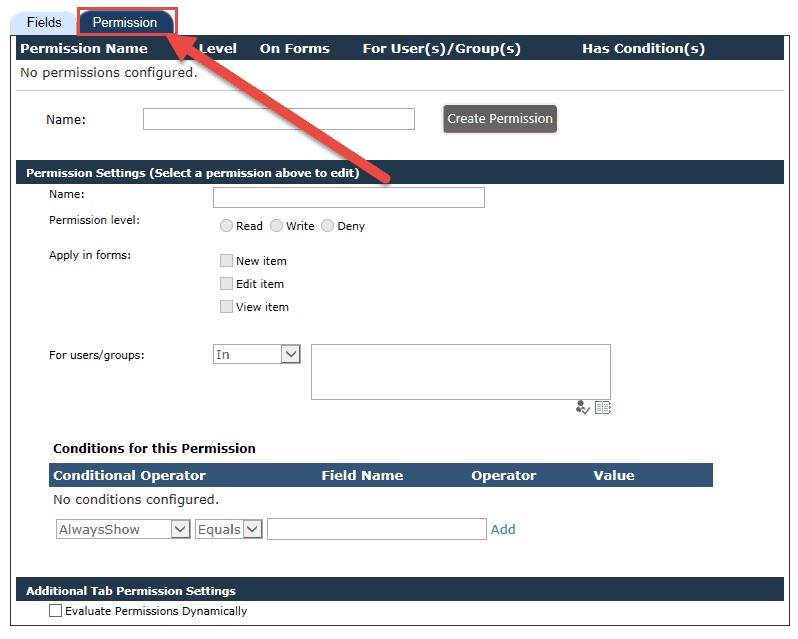
Give the permission a Name in the Name box, and then click Create Permission. In this example, the permission being created will be designed to prevent access to the tab:

In the Permission Settings section you can change the name of the Permission.
Permission level - "Read" will give read access only, even if the form is New or Edit. "Write" will give full access. "Deny" will prevent all access.
Apply in Forms - You can choose to apply this particular permission only in certain forms. For instance, you may want to Deny access to a particular tab when the item is being newly created, but then may want to provide Read or Write access when the item is in Edit mode after initial creation.
For users/groups - This defines to whom the permission applies. The options are In, Not In, Equal, Not Equal, Column, and None. In and Not In are used for SharePoint groups. Equal and Not Equal are used for individual users. Column is used to reference a Person or Group column in the given list. None is used to remove the group or user from that particular permission.

You can then set Conditions for the Permissions. These can be applied statically or dynamically. The difference is that, by checking Evaluate Permissions Dynamically, the form will continuously evaluate if the conditions have been met, and will apply the permissions immediately, before saving the form. Without this option checked, the conditions will be evaluated when the ticket is saved, and the permissions will be applied when the ticket is opened again.
SETTING CONDITIONS
You can set conditions for when to apply the permission:

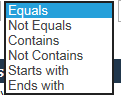
The first dropdown is a list of all of the available columns in the given list. The next dropdown is a list of available operators based on the type of column. For instance, Text, Choice, or Lookup columns will show the following operators:
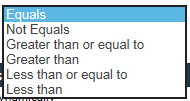
Number columns will show the following operators:
Enter the value you are evaluating the column against, and then click Add:

When you add more than one condition you can add it as an "AND" condition or an "OR" condition. This follows standard Boolean logic, where if the selection is "AND" both (or all) conditions must be met in order to evaluate the condition as "True." When it is "OR" any of the conditions must be met in order to evaluate the condition as "True."