A video tutorial on Validations is here. Note that Validations apply only to columns, not tabs or sections.
Validations are an important step in ensuring accuracy and saving time in the business environment. You might need to validate that there is an email address being entered into the form, or you might need to verify that there is information being added with certain conditions. With the right validation, all these issues can be covered.
Validations can be set on Columns that are text, numbers, or currency. However, the Validations can work like this:
A Validation could be dependent on a Condition -- a value in one column can affect what is valid in another column. For example, say you have a choice column named "Account Type" with the choice of Company or Person, along with a text column named "Tax ID". The Validation of the "Tax ID" column would use a Condition where if "Account Type equals Company", the valid format of the Tax ID is xx-xxxxxxx, but if the "Account Type equals Person", the valid format of the Tax ID would be xxx-xx-xxxx.
Another example is a Validation where "Resolution" cannot be empty if "Status equals Closed". This makes sure that some text goes in the Resolution column when a request or ticket is marked "closed" and saved. This Validation would go on the "Resolution" column with the Condition of "Status equals Closed" -- this makes it so that the Validation is only evaluated when that condition of "Status equals Closed" is met.
Validations for Multiple Columns
The NITRO Forms Designer has a feature to set validations for multiple columns at once. See Column Validations.
Setting up a Validation
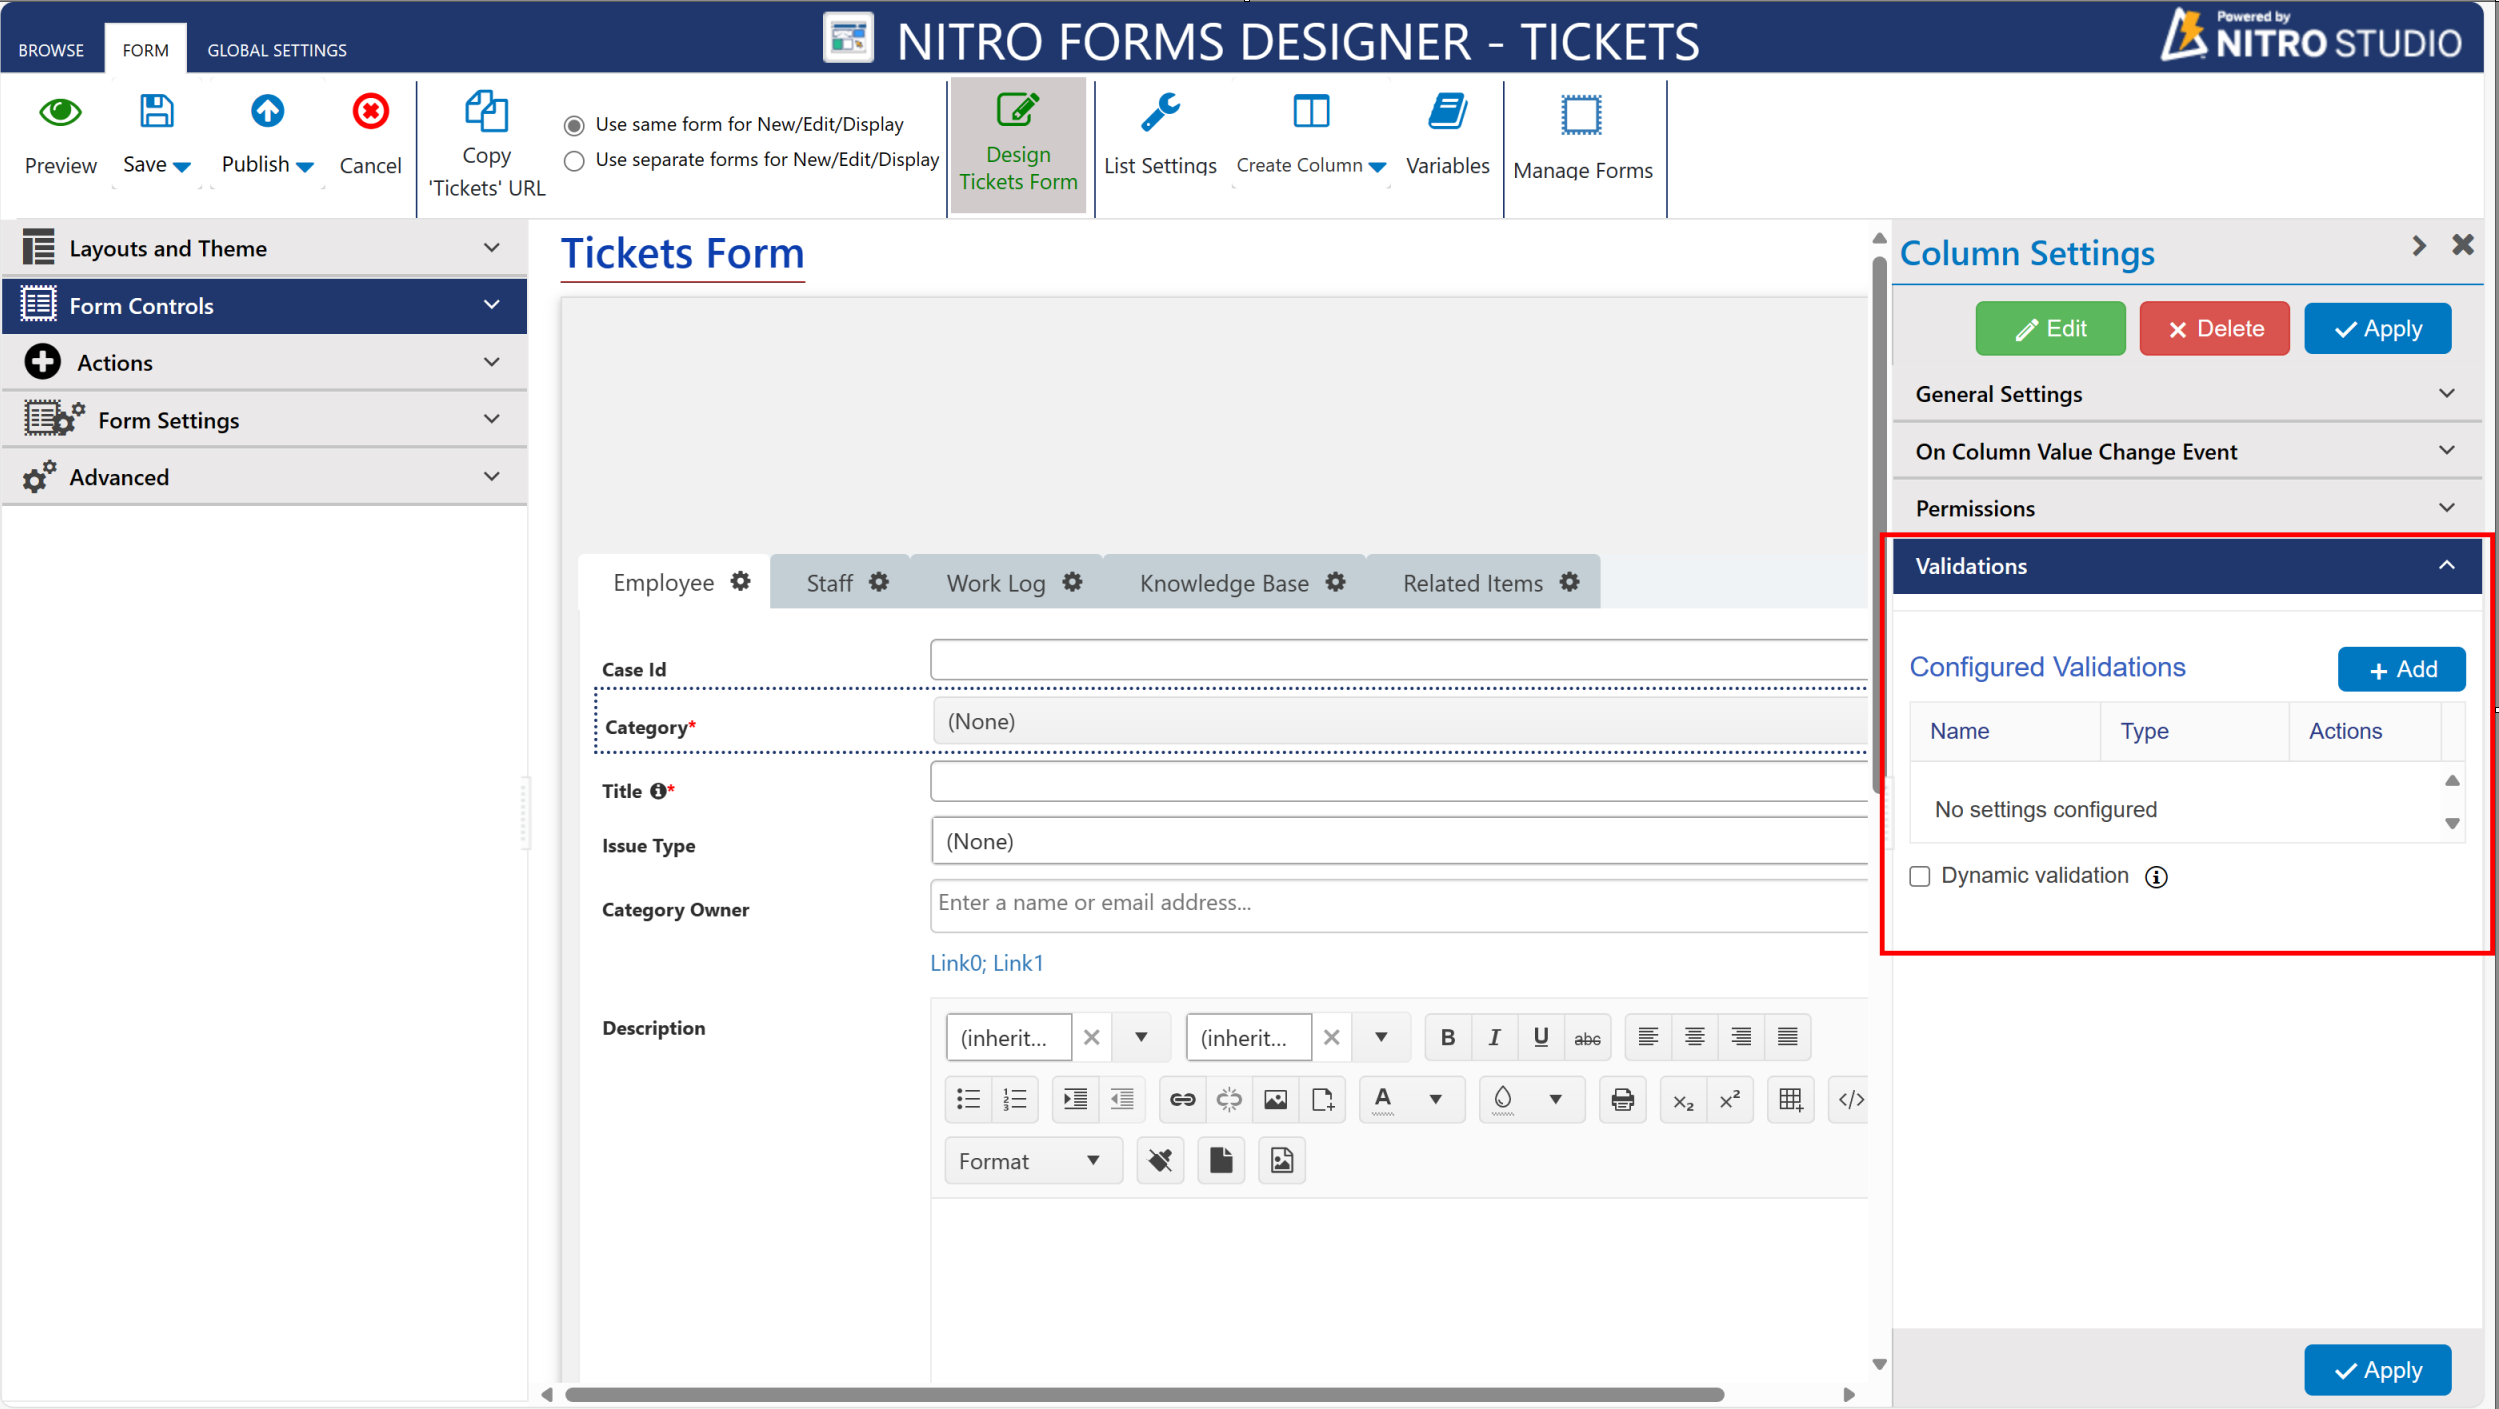
To set up a validation, first select the column that requires validation in the NITRO Forms Designer.
Selecting the column will activate the Column Settings pane on the right side of the screen. In this pane, you will see General Settings, Permissions, and Validations.
Click on Validations and a menu will drop down giving you the option to add a new validation by clicking on the "Add” button. Below this, there is a window that shows existing validations for this column.
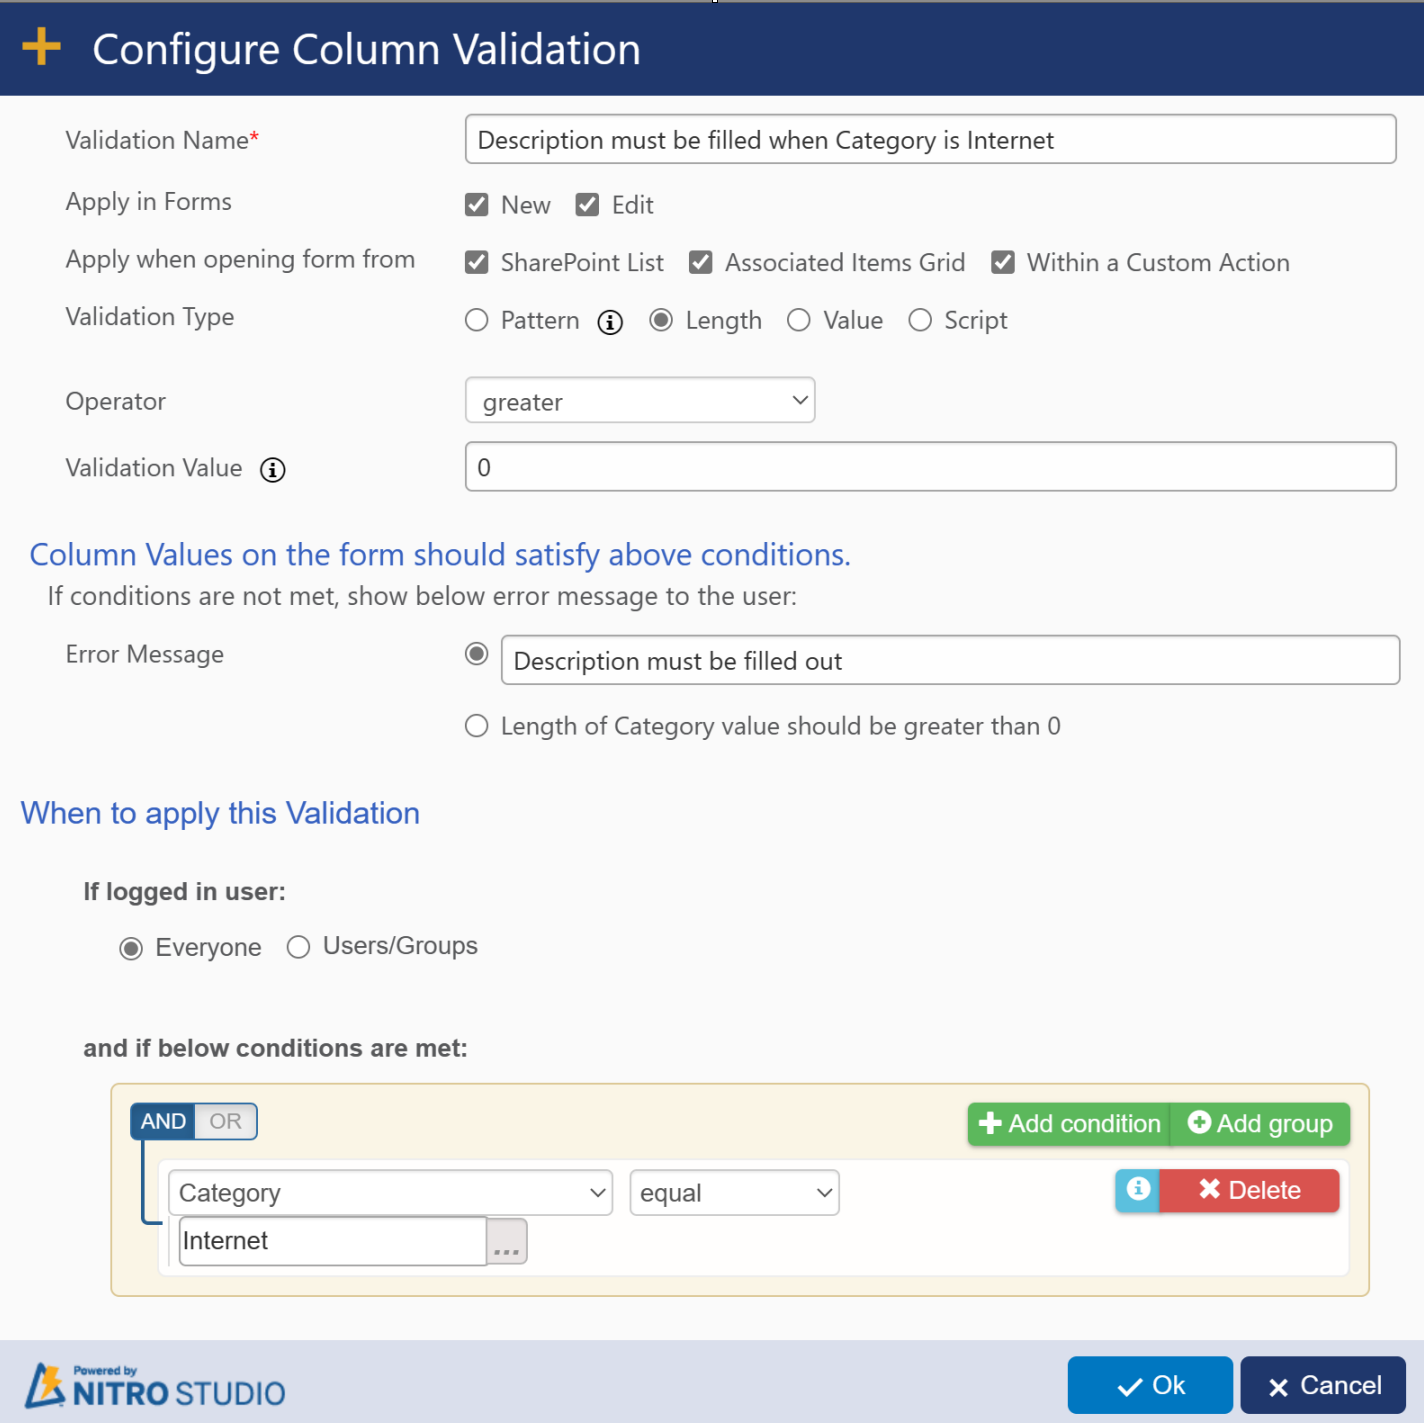
After clicking “Add”, the Configure Column Validation screen will appear. Name the new Validation, select the validation type, either “pattern”, Length,“Value” or "Script", define your pattern, select operator, validation value, and error message.
Follow the steps below:
1.Enter a name for this Validation into the “Validation Name” field
2.Apply in Forms: by default both forms (New/Edit) are selected. you can select/deselect forms in which you want to apply validation.
3.Apply when opening form from: here you can select option whether you want to apply validation when opening form from
1. SharePoint List: if form is opening from SharePoint list then you can apply validation.
2. Associated Items Grid: if from is opening from associated items grid then you can apply validation.
3. Within a custom action: if NITRO form is opening in a custom action then you can apply validation.
By default, all options are selected. You can select/deselect them as per requirement.
4.Choose Validation Type from “Pattern”, “Length”, “Value” or "Script"
5.If you chose Pattern, define the pattern using regular expressions. There are several predefined patterns for use or create your own custom pattern.
a.If you choose “custom” pattern, define the value in the “Validation Value” field.
b.To learn more about regular expressions, click here: https://www.regular-expressions.info/
If you chose Script, then click 'Edit' button besides script to configure it. Refer Add Custom Validations In NITRO Forms Using JavaScript for more details on script.
6.Enter your desired error message
7.Choose to whom you want this Validation to apply. Either Everyone or define a user or group of users.
8.Define Conditions or leave blank to have it be applied for all conditions.
9.Hit “Ok” in the Configure Column Validation window and then the Apply button in the right-side pane.
10.Publish the form.
To see this in action as well as a few examples, see our Validations tutorial video here.
Refer below articles for more details:
NITRO Forms: Set Column Values Back To The Original If Any Validation Fails During Save.
Validation On Date Column Value Relative To Today’s Date
Configure Validation For ‘Attachments’ Section In NITRO Forms