You can set Permissions on Tabs, Sections, and Columns in NITRO Forms. This is used to Show or Hide a tab, section, or column , or make it Read-Only.
Here is an example (see detailed explanations of these settings below) where you want to show a Tab only when the Account Type is Consumer.
"Show" permission for Everyone when the Condition of "Account Type equals Consumer" is met.
"Hide" permission for Everyone when the Condition of "Account Type not equals Consumer" is met.
Check the box for "Dynamic condition evaluation" so that the show/hide happens in real-time on the form
See also a tutorial video here.
Setting Permissions
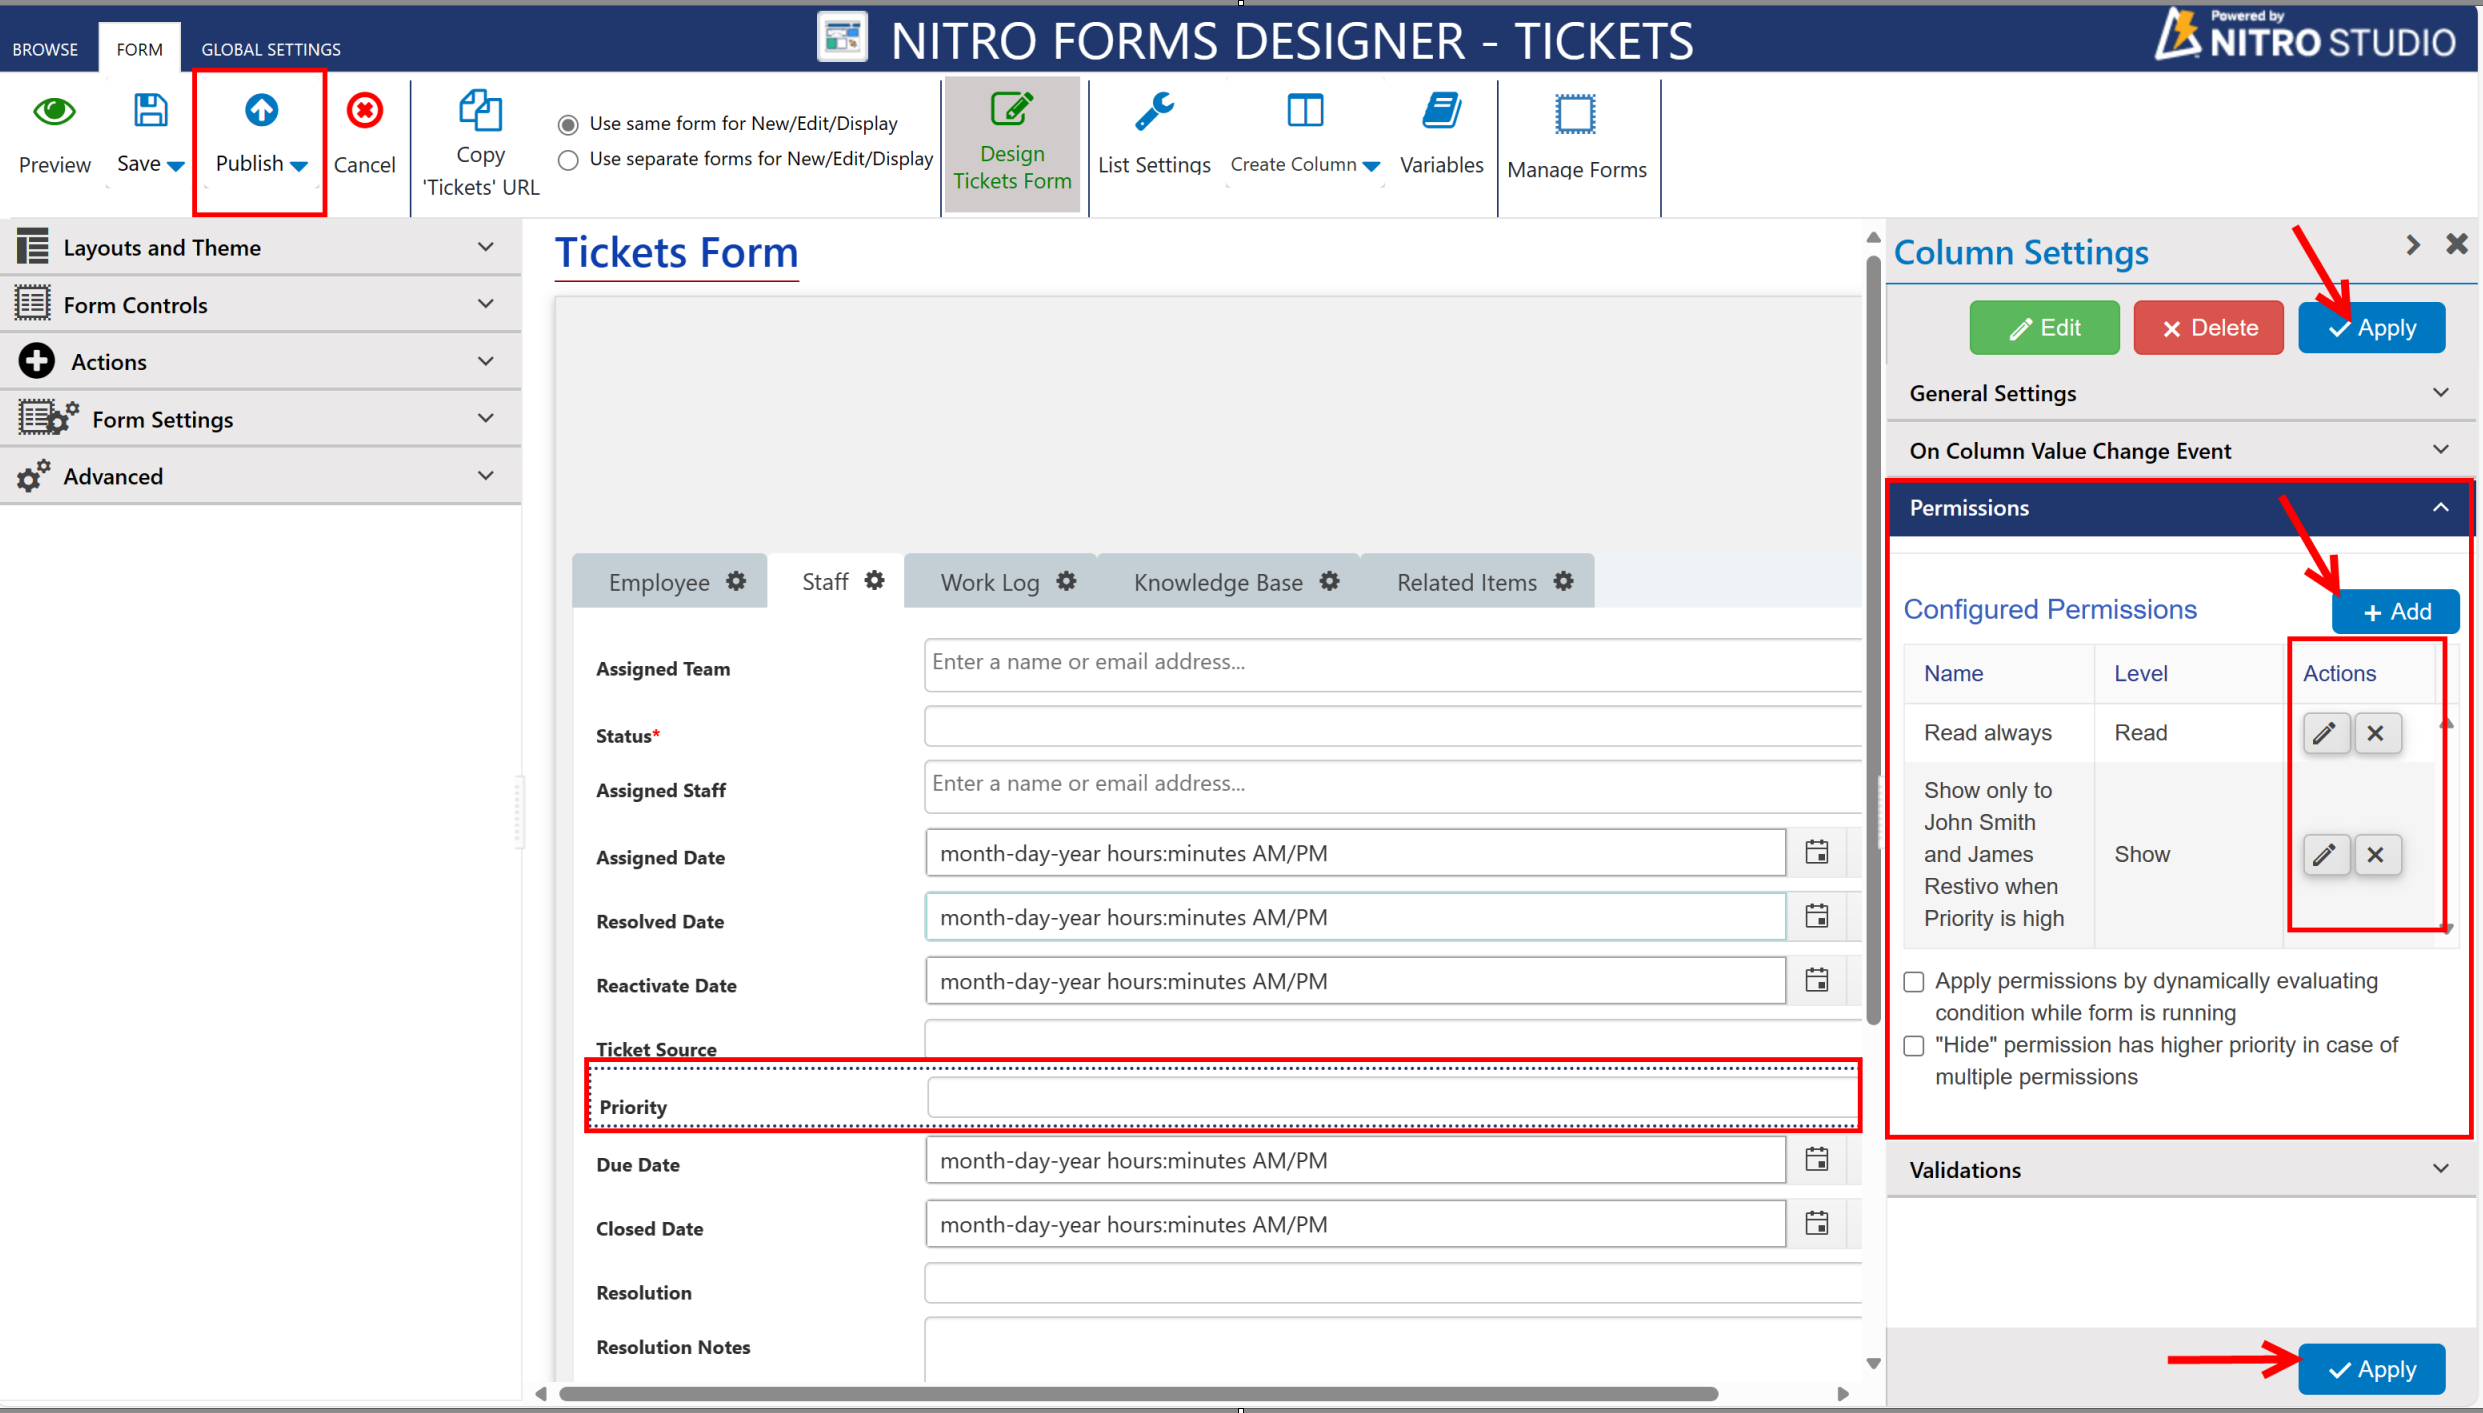
To set Permissions, select the Tab, Section, or Column. This will bring up the Settings window on the right-hand side of the screen. Below General (for tabs and sections) or General Settings (for columns) is Permissions. Once you click this, you will see the Configure Permissions window.

Permissions that have already been created (for this tab, section, or column)will be listed.
The "Add" button will bring up the Configuration Permission window, where you can set a permission.
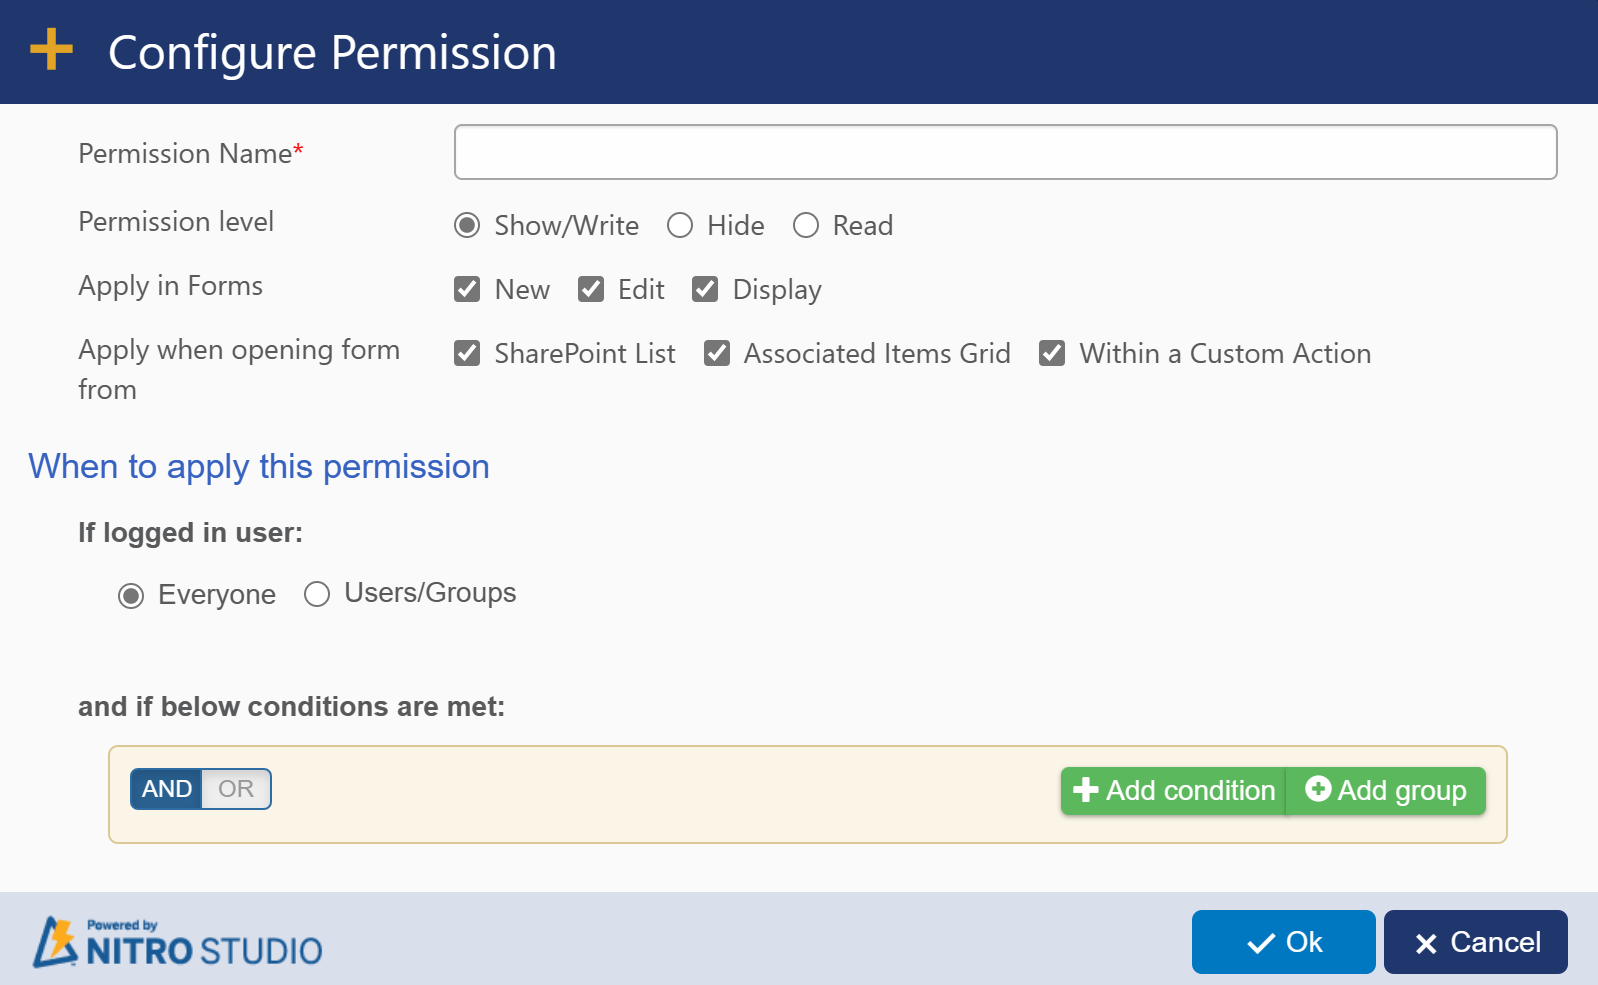
| Permission Name - give the new permission a name. This name should allow you to easily identify what the permission does. |
Permission Level - options are "Show/Write”, “Hide”,and "Read".
(Show/Write will show the tab and allow to write, Hide will hide it, and Read will show it in read-only mode.)
Apply in Forms: by default all forms (New/Edit/Display) are selected. you can select/deselect forms in which you want to apply permissions.
Apply when opening form from: here you can select option whether you want to apply permissions when opening form from
1. SharePoint List: if form is opening from SharePoint list then you can apply permissions.
2. Associated Items Grid: if from is opening from associated items grid then you can apply permissions.
3. Within a custom action: if NITRO form is opening in a custom action then you can apply permissions.
By default, all options are selected. You can select/deselect them as per requirement.
When to apply this permission - the permission will apply when the logged in user is part of the selected group.
If logged in user:
"Everyone" is all users and the permission will apply to every user.
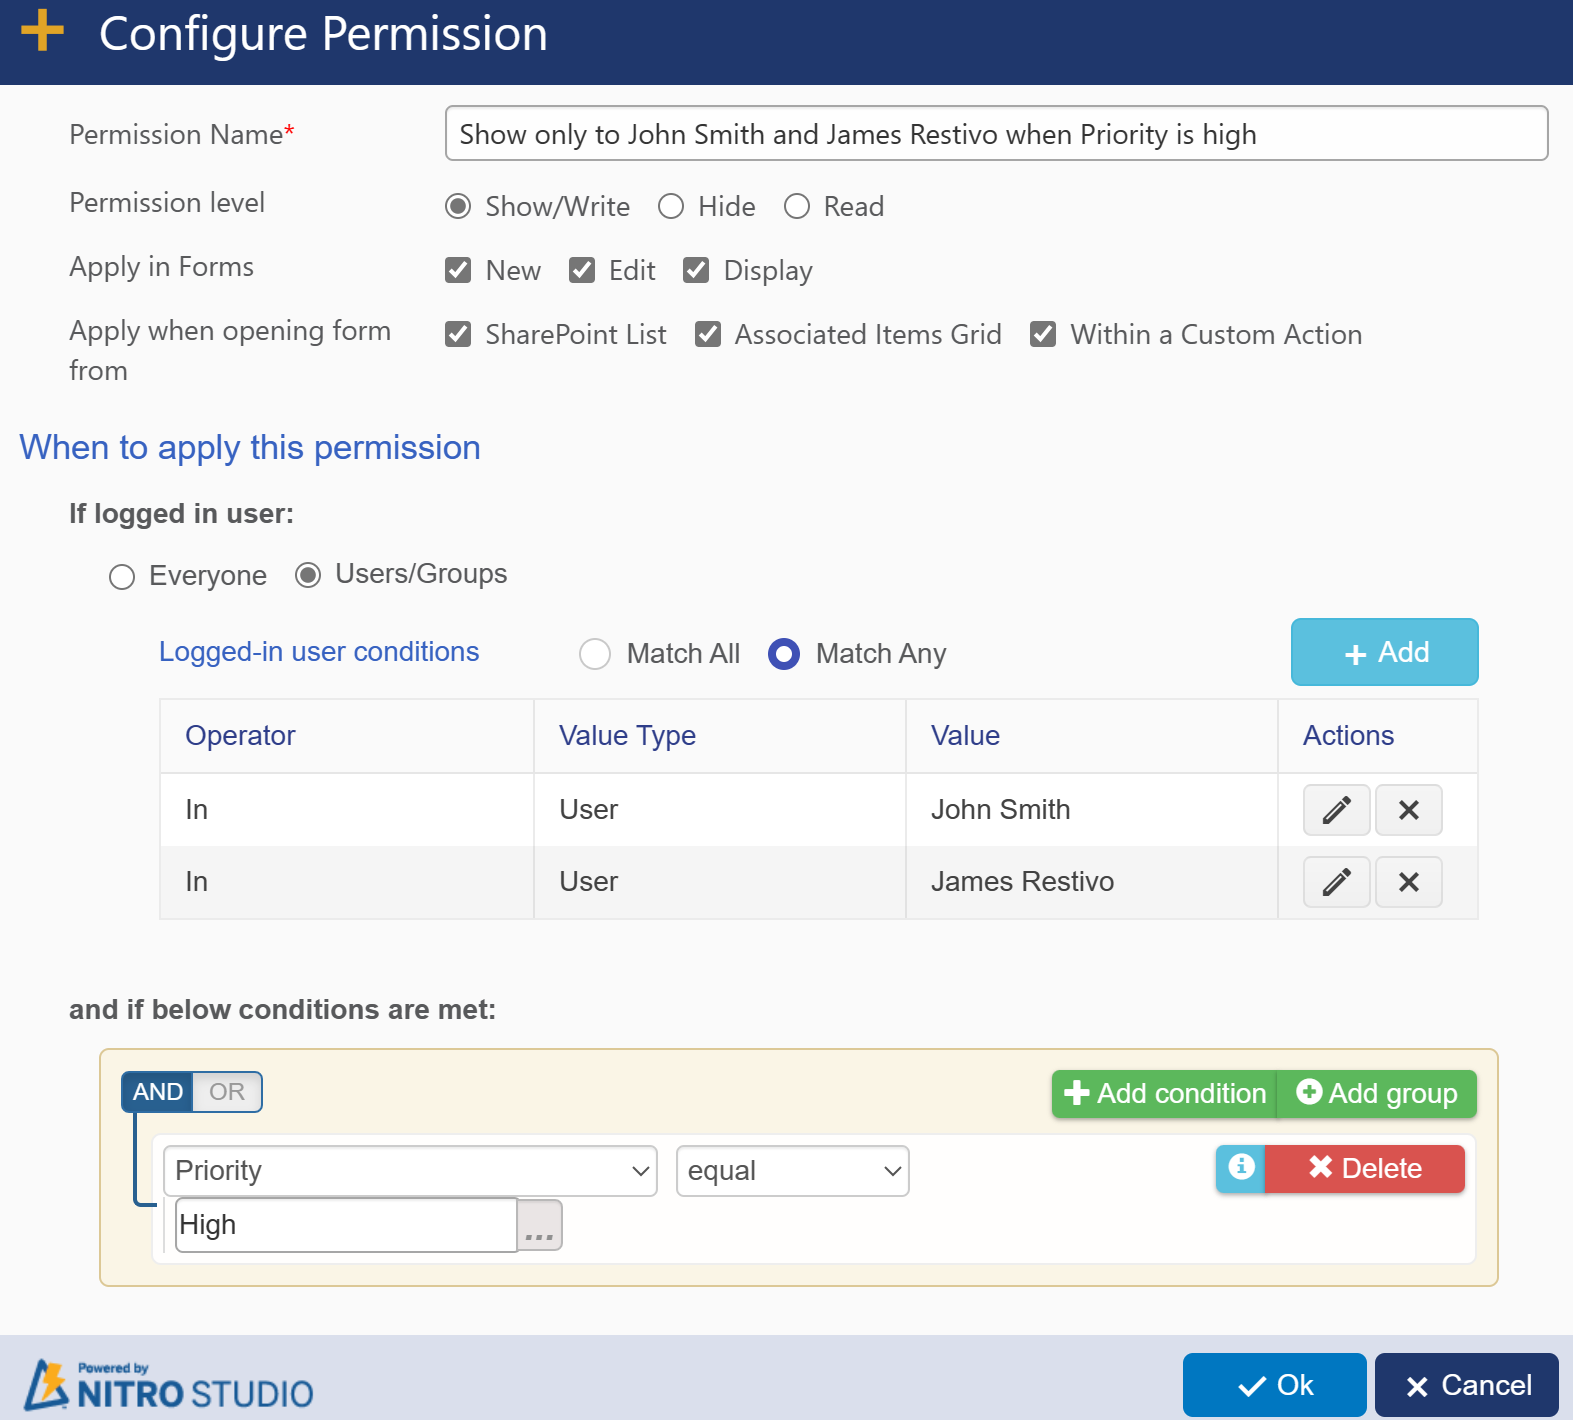
"Users/Groups" -- the permission can be restricted to certain users or groups. You can add one or more people or groups to the "Users/Groups" box.
and if the below conditions are met:
You then add one or more conditions in the “Add Condition” section (optional).
In the example below, a Column is shown only when the user is John Smith or James Restivo and the Priority is High.
When done, hit “Ok” and return to the Permissions screen, where the Configured Permissions will be listed. The Actions icons at the right can be used to Edit or Delete the permission.
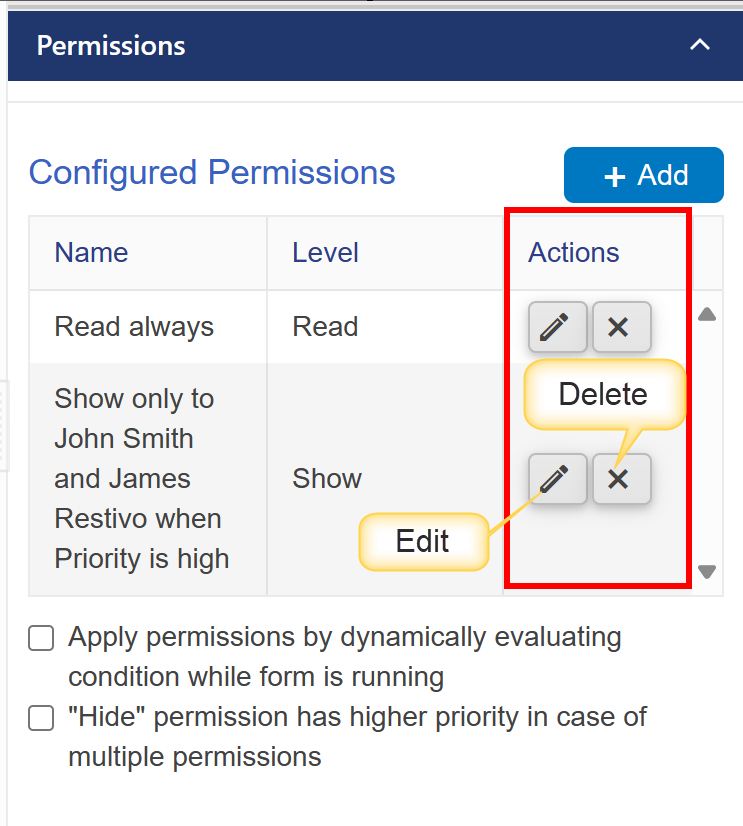
In this window, there are two options below the Configured Permissions. Check or unchecked these boxes as appropriate.
Dynamic Condition Evaluation – Applies permissions while in the context of the form. If this is not checked, the permission will be applied only after the form is saved.
Hide Permission has higher priority in case of multiple Permissions – If there are multiple permissions that would normally result in the Hide permission no longer activating, this option elevates the Hide Permission so this does not occur.
Click “Apply” (the blue button in the bottom right corner or upper right corner ). If you do not, your changes will not be saved.
Repeat these steps on any of the tabs, sections, and columns where you want to set a permission. After you have finished adding all permissions, you can Publish the form by clicking the “Publish” button on the top left side of the screen between the “Save” button and the “Cancel” button. This will add and save all changes to the form.
Also Refer How To Configure Dynamic Permissions For Columns In NITRO Forms for more details.