|
<< Click to Display Table of Contents >> Mail Templates |
  
|
|
<< Click to Display Table of Contents >> Mail Templates |
|
CREATE AND EDIT MAIL TEMPLATES
To create or edit mail templates, click the Mail Templates tab:
![]()
You'll see existing Mail Templates. Out-of-the-box, Crow Canyon provides one template called "_Default Template" (the underscore is there so that the template will always appear first in the list).
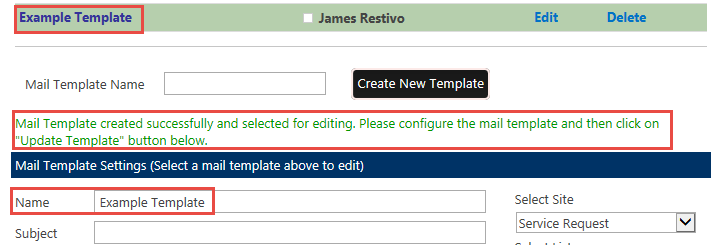
You can edit the default template, or you can create a new one by entering a name for the Alert in the Mail Template Name box, and then clicking Create New Template:

Once the template is created, you'll see that the template is added to the list, and also shows up in the Mail Template Settings section along with the text "Mail Template created successfully and selected for editing. Please configure the mail template and then click on "Update Template" button below"
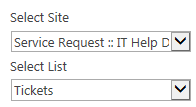
The next step is to select which Site and which List you want to use for the Mail Template. Since Advanced Alert Manager is scoped to the whole Site Collection, you can configure the template for any list within any site in your site collection:
When you select a new site and list, the columns for that list will be displayed in the columns section:
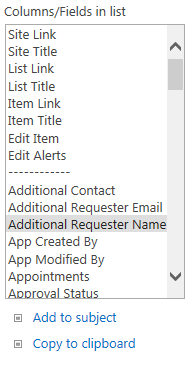
You can add any column from the list to either the Subject line or the Body of the mail template. You can also include links to the site, list, and item, and can include the titles of the same.
The template also includes Rich Text controls that you can apply to the body of the template:
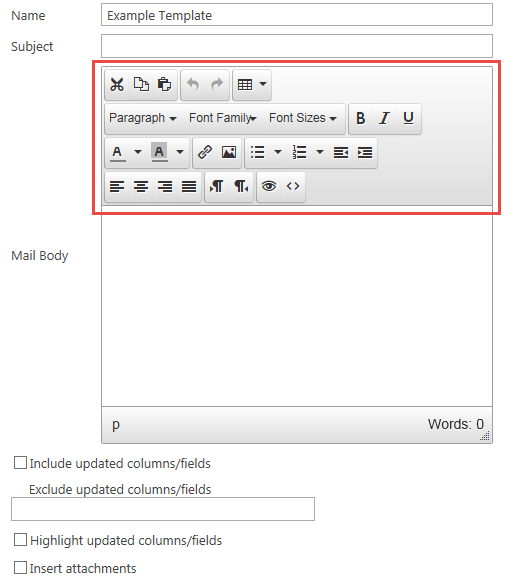
Instead of, or in addition to, specifying fields to display in the template, you can choose to show fields that have been updated by checking the "Include updated columns/fields" option.
The "Exclude updated columns/fields" is useful in case you want to keep certain fields out of the template even if they were updated. You only need to use this option if you have the "Include updated columns/fields" option checked off. The syntax for entering the information is as follows:
[[Field Internal Name || Field Display Name]]
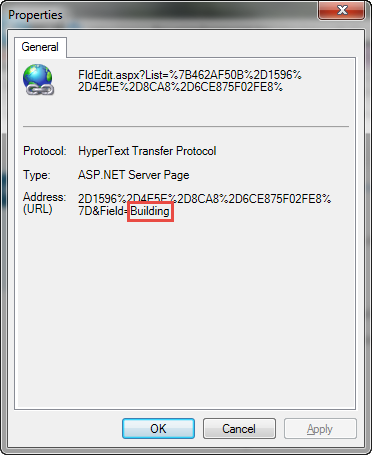
Note: In most cases the internal name and display name will be the same, but in some cases, you may have created a column, and then subsequently changed the name. The internal name remains the same, but the display name will be altered. You an find the internal name by going to List Settings and right-clicking on the name of the column, and then click Properties:
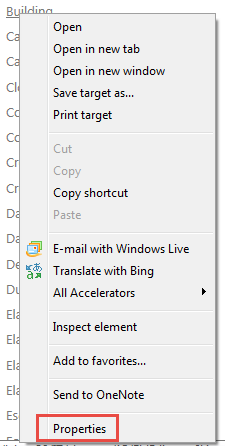
The internal name of the column will be at the end of the Address (URL) section:
If you check "Highlight updated columns/fields" your updated fields will not only appear in the template, but also will be highlighted so that they stand out in the alert.
If you check "Insert attachments", any attachments on an item will be sent with the alert.
Once you've completed your configuration of the template, click "Update Template" to save your changes, or click "Cancel" to discard your changes:
![]()