|
<< Click to Display Table of Contents >> Creating a New Alert |
  
|
|
<< Click to Display Table of Contents >> Creating a New Alert |
|
CREATING A NEW ALERT
To create a new alert, enter a name for the alert in "Alert Name," and then click "Create New Alert":

Once the alert is created, you'll see that the Alert is added to the list, and also shows up in the General Settings section along with the text "Alert created successfully and selected for editing. Please configure the alert and then click on "Update Alert" button below"
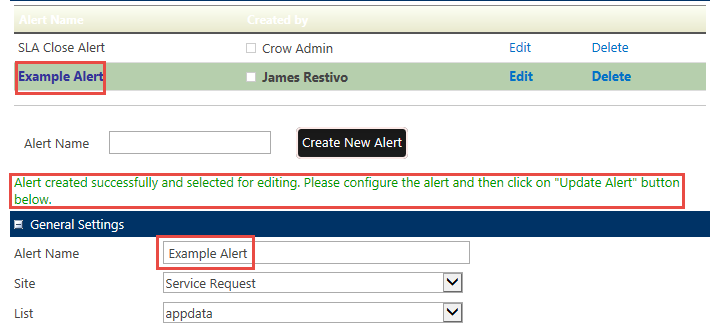
Since Advanced Alert Manager is scoped to the whole Site Collection, you can define any alert on any list within any site in the Site Collection. You can select the Site and List in the two dropdowns below Alert Name in the General Settings section.
The next step is to define when you want the alert to be sent, e.g. when a certain event happens or based on a Date/Time field in the list item:
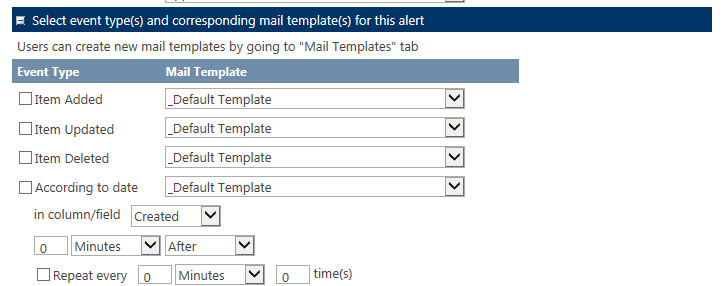
For each option, you can select a Mail Template. You can select multiple options for the alert and use the same Mail Template in all cases. For instance, if you want to know any time any event occurs in a list, you can select Item Added, Item Updated, and Item Deleted. You can then use the same Mail Template for all events, or you can select different Mail Templates for each event, in case you want to know immediately what type of event occurred on the list.
You can read more about setting up new Mail Templates here.
CONDITIONS
You can also choose to conditionally send out alerts by configuring one or more conditions:

Note the text "Select After change Equals [[Any]] for any value changed." This means that you can choose to send out an alert only when a particular column on a ticket is changed (vs. using Item Updated with no conditions, which will send out an alert when *any* column changes). You would first define the column in the first dropdown, select "After Change" in the second dropdown, select "Equals" in the third dropdown, and then enter the text "[[Any]]" (without quotation marks) in the box.
When you have more than one condition, Alert Manager will evaluate to see if all conditions are true before sending the alert.
RECIPIENTS
The next section is where you define who will receive the alert:
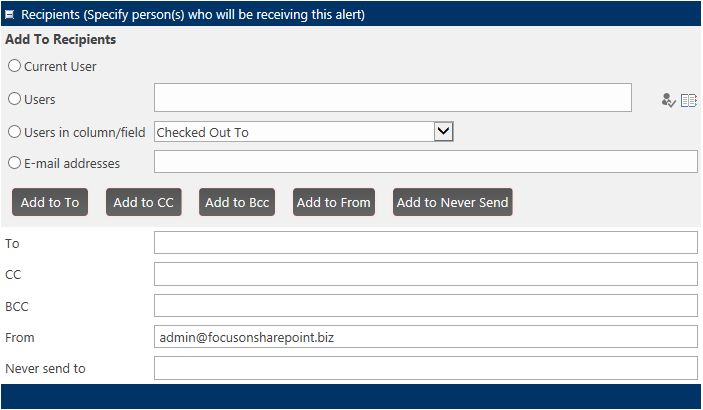
You can add one or more users at a time. The "Current User" option will add the current logged in user account. The Users field refers to your Active Directory; you can add any number of values into this field, separated by a semi-colon (;). The "Users in column/field" option allows you to choose any Person or Group field from the list so that you can dynamically alert someone (e.g. you can send the alert to whoever created the item by referencing the Created field). You can use "E-mail addresses" to send the alert to entities that are outside of your Active Directory.
Once you've entered the users and/or addresses, use one of the darker gray buttons to add that/those value(s) to the corresponding field. For example, "Add to To" will add the users or addresses to the "To" field, etc.
The "Never Send" option allows you to configure your alert so that it never goes to a certain user or address, even if that user or address would otherwise get the alert (e.g. if you want to, in general, send an alert to users who have created items, but you never want to send an alert to a particular user even though that user has created an item, you can enter that user's information and click "Add to Never Send").
SAVING A NEW ALERT
To save your new alert, click "Update Alert" at the bottom of the screen. If you want to discard your changes, click "Cancel."
![]()