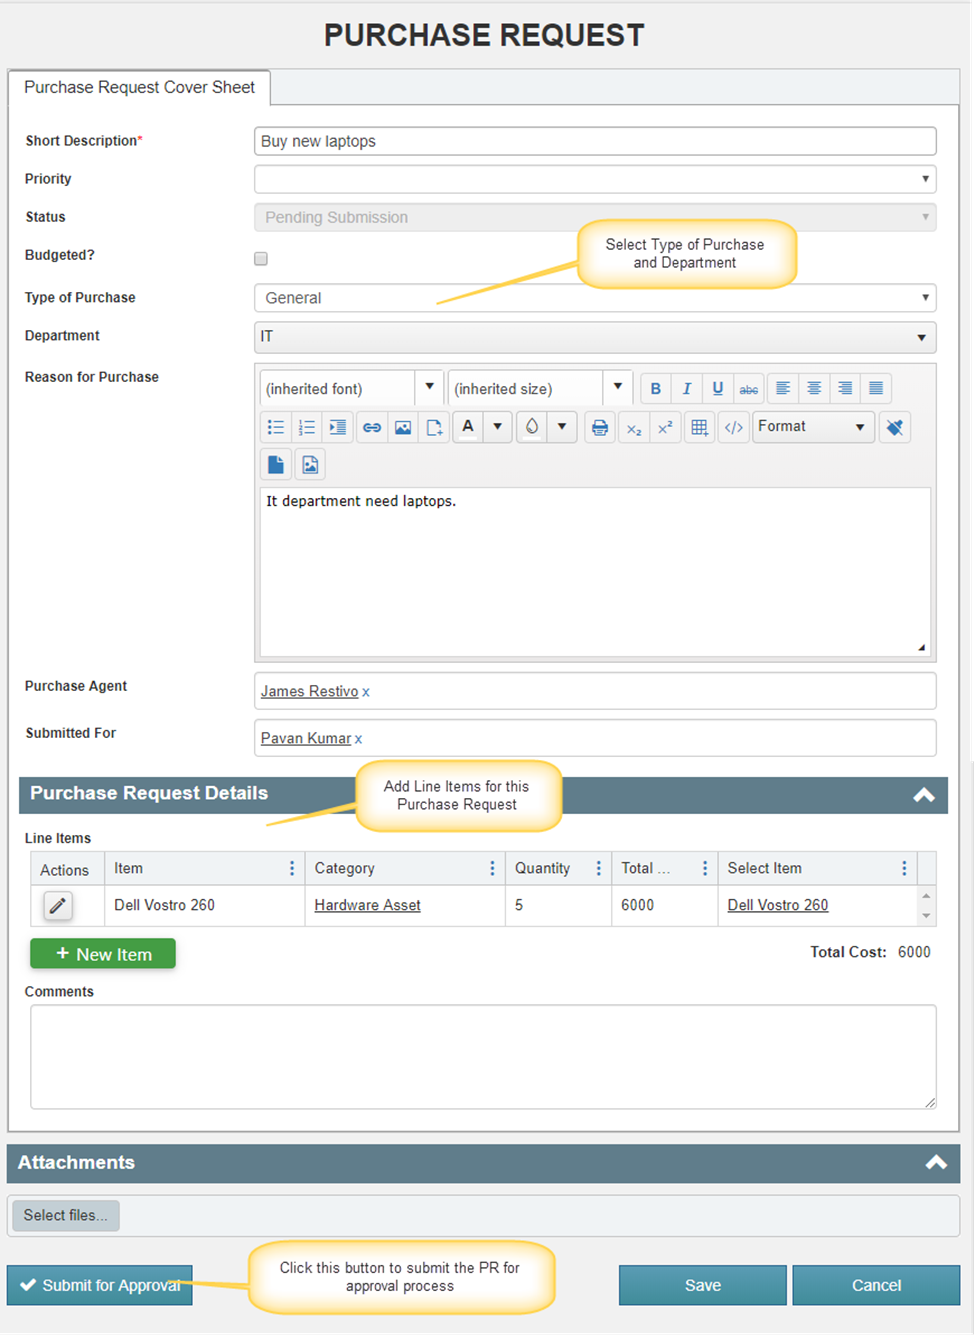
Requester initiates the approval process for the Purchase Request by clicking the “Submit for Approval” button (available in New, Edit and Display forms).
Once the Request is submitted for approval:
1. Purchase Request Id will be generated for the Purchase Request. This is a custom generated Id with below format.
Ex: PR_2019_003
Format of this Id can be modified as per your organizational needs, refer this article for more details.
2. Based on the “Type of Purchase”, “Department” and the total cost of the Purchase Request, approval tasks will be created for applicable approval levels. If none of the approval level is applicable based on the request parameters then request will be approved with status as ‘Approval Not Required’
3. When an approval task is created, approver will receive email notification with links to the Purchase Request and the approval task.
Note: Notifications are configured using Crow Canyon NITRO Workflows and these notifications are configurable. To modify the notification templates, go to Application Administration -> NITRO Workflows -> Edit “Notify Approver on task submission” workflow -> Edit “Notify Approver on task creation” and “Notify Submitted for on Approval Task Creation” send mail actions and modify the mail templates as required.
4. Approver can “Approve”, “Deny” or “Send Back” the request using action button in the approval task form
5. Based on the approval decision, Purchase Request will go for the next level in the process (Approved/Denied/Next level approval task)
Approvers can take the decision in two ways:
1. Using Custom Actions
2. Using Lazy approval process