The "Upload Document" action causes a document that you select (when the action runs) to be uploaded to either a Document Library in SharePoint or to the Current Item as an attachment.
Upload Document action in designer custom action
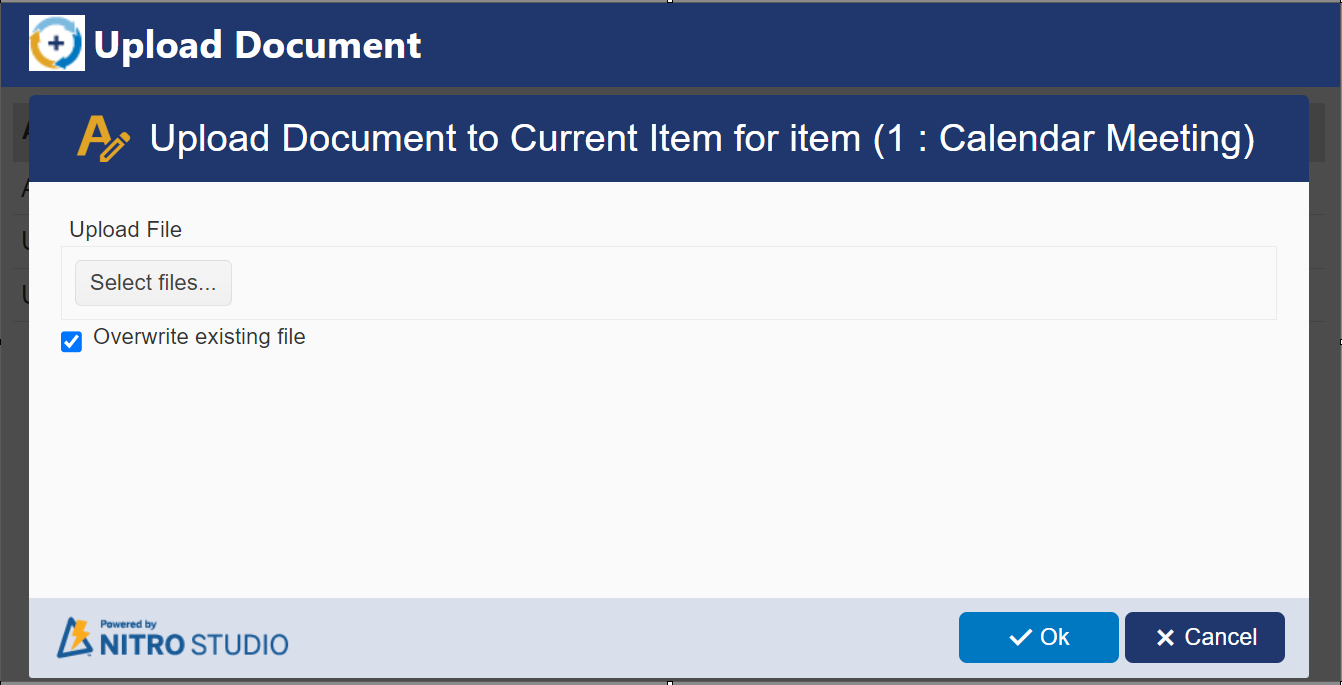
Upload to Current Item
Upload to Document Library
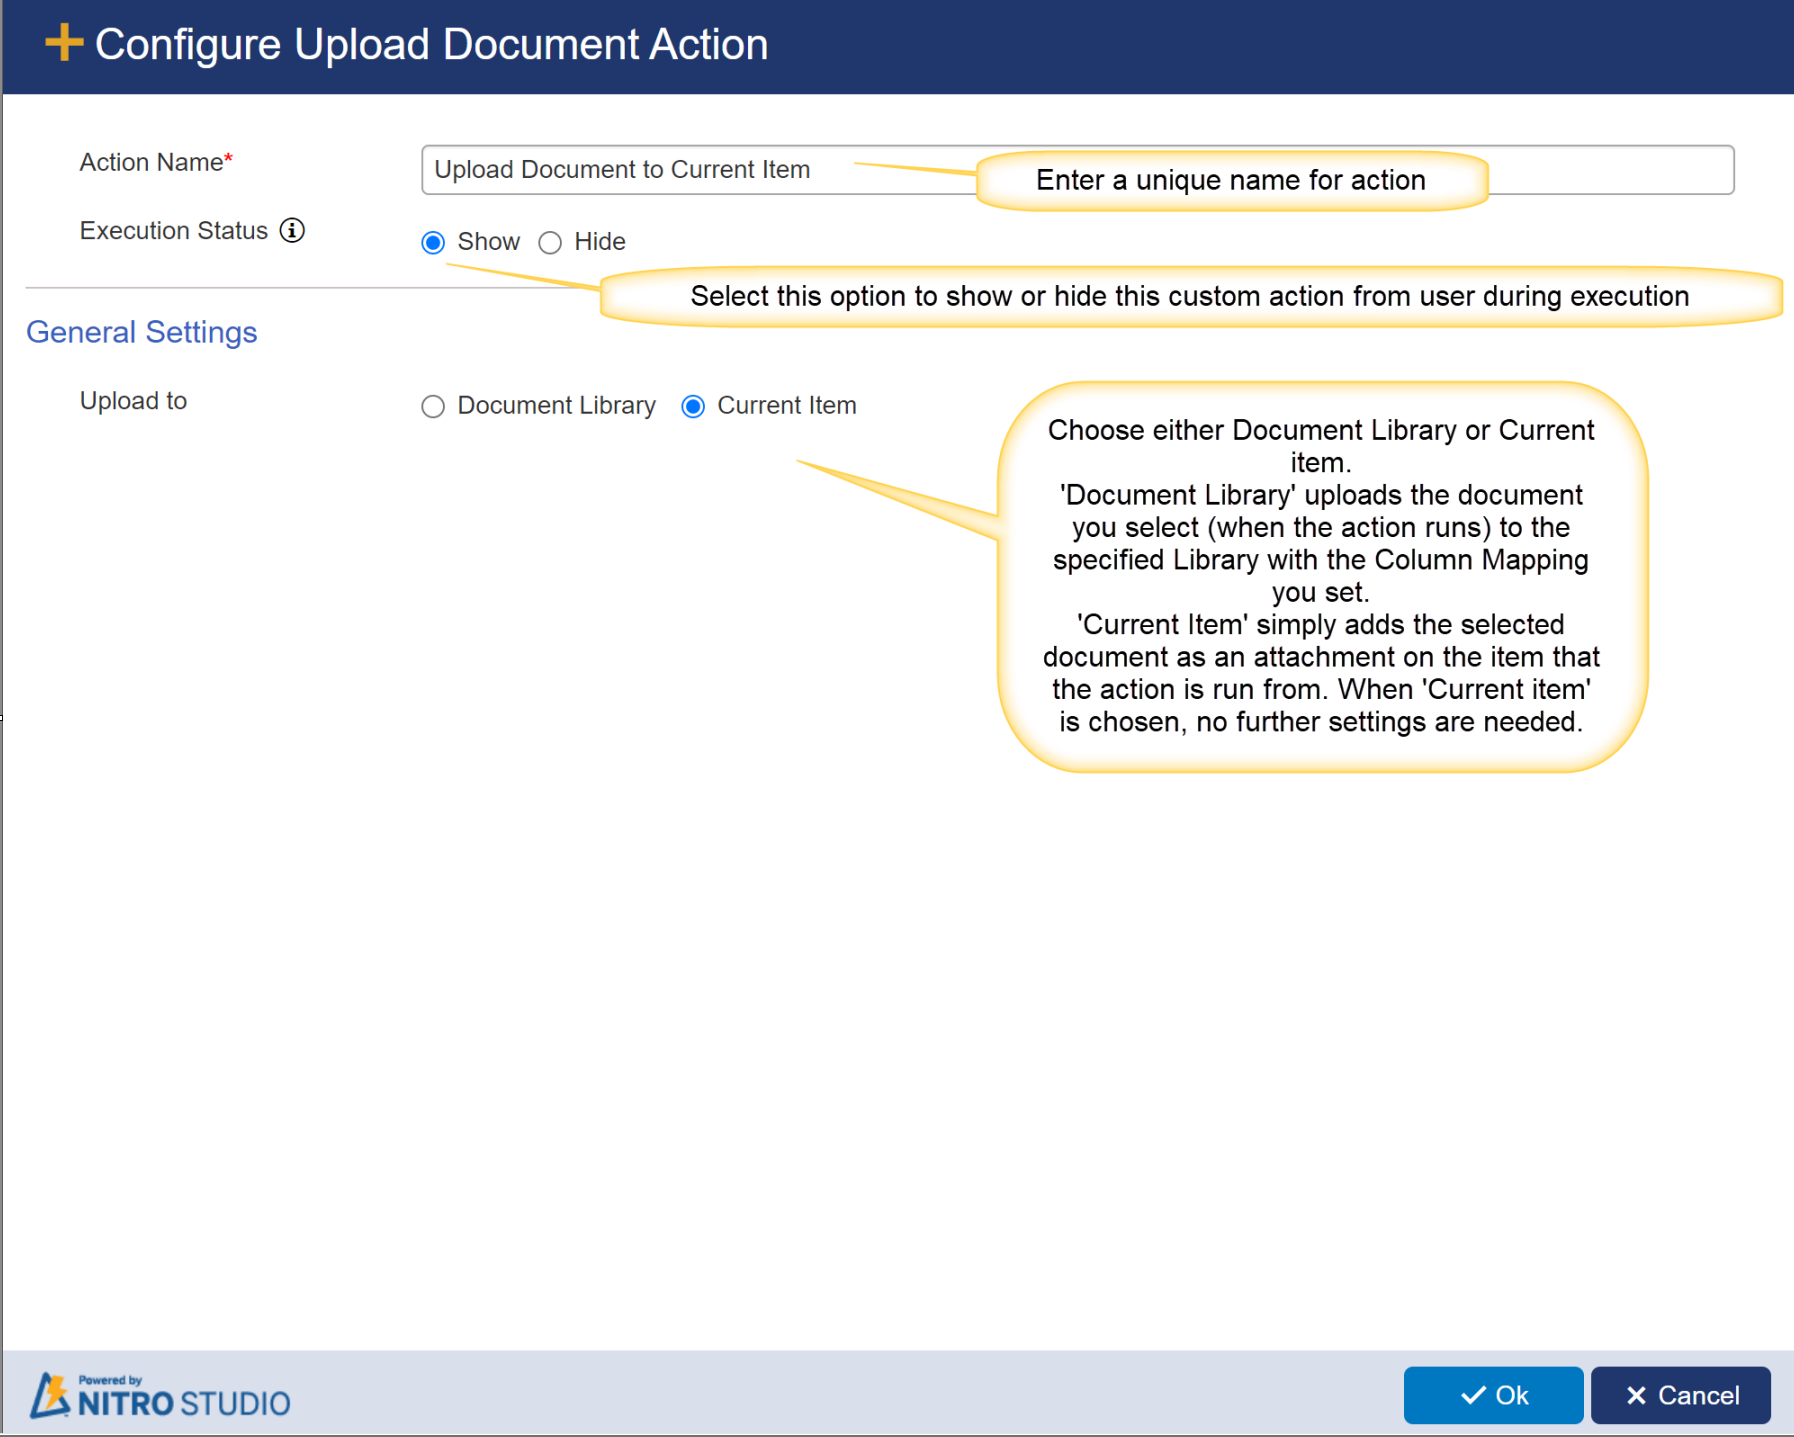
Action Name: Provide unique name for action
Execution Status: select this option to show or hide this custom action from user during execution.
| General Settings: |
| Upload to: document that you select (when the action runs) to be uploaded to either a Document Library in SharePoint or to the Current Item as an attachment. |
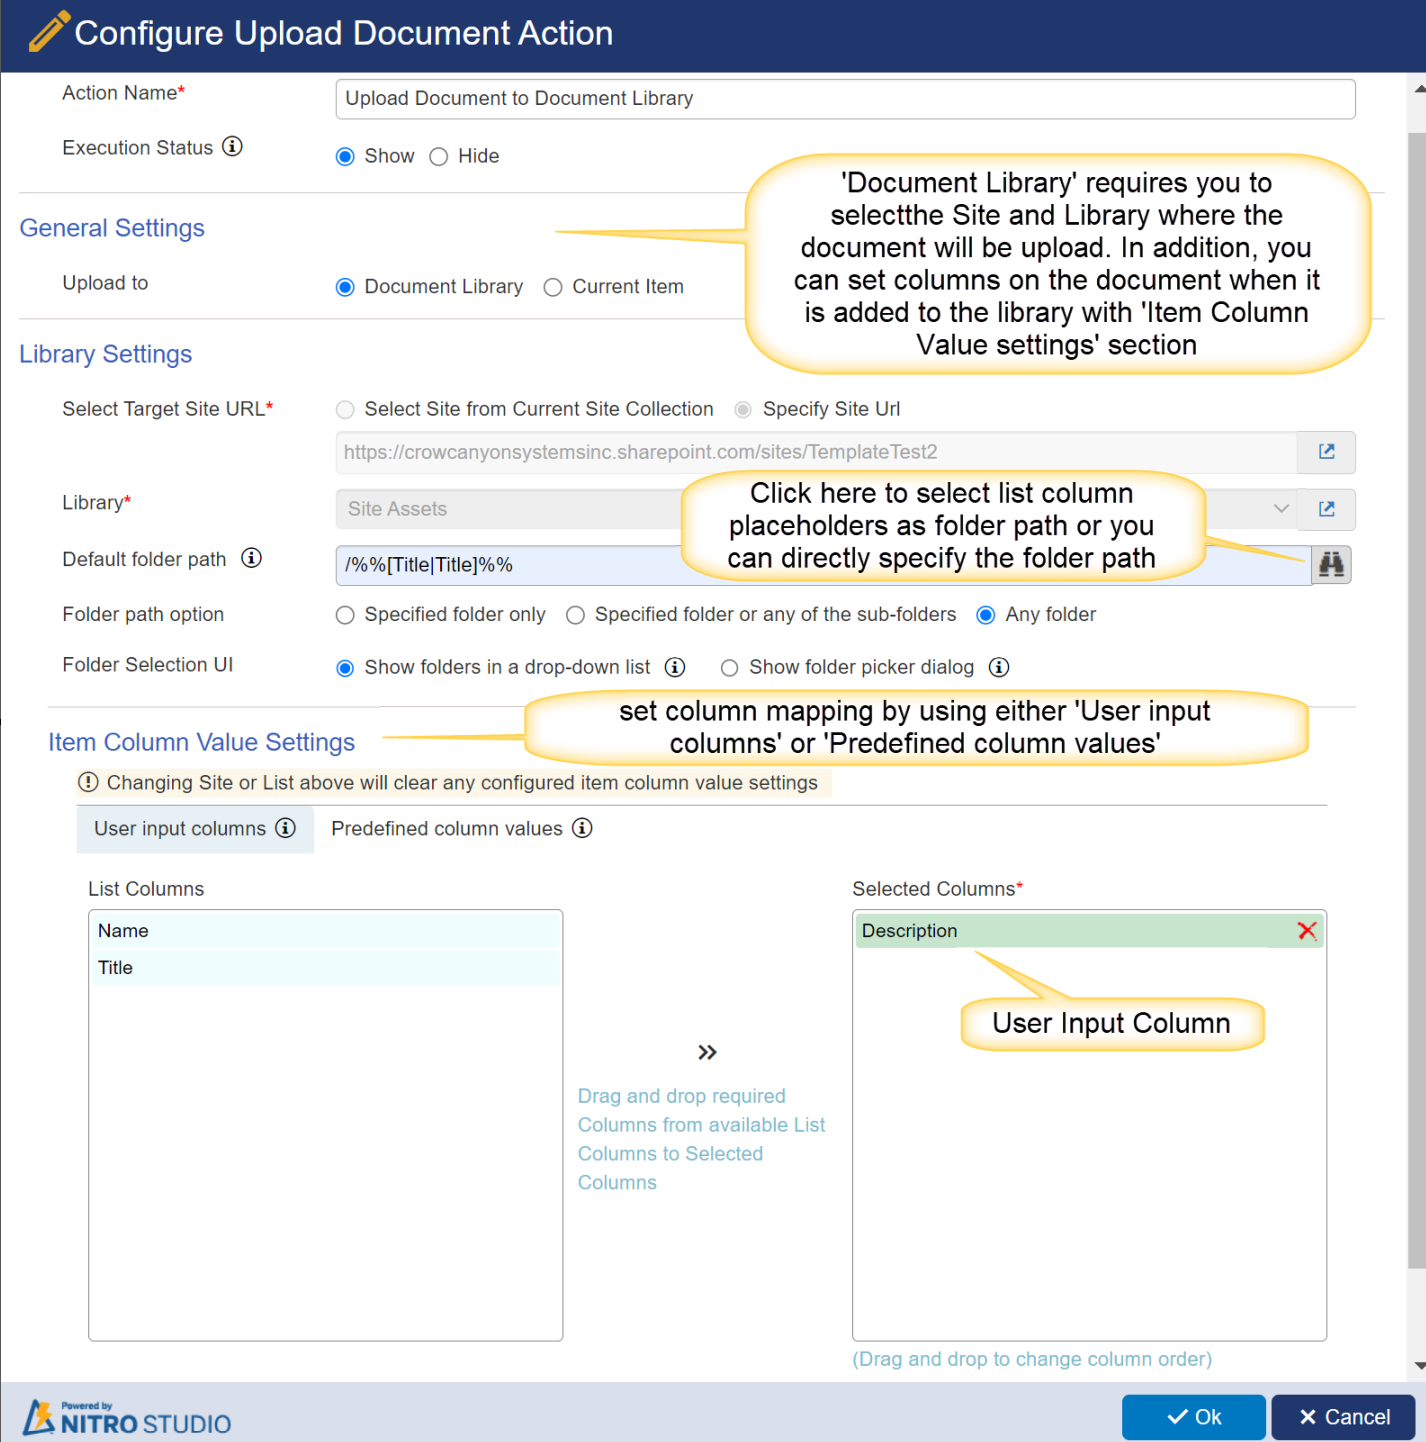
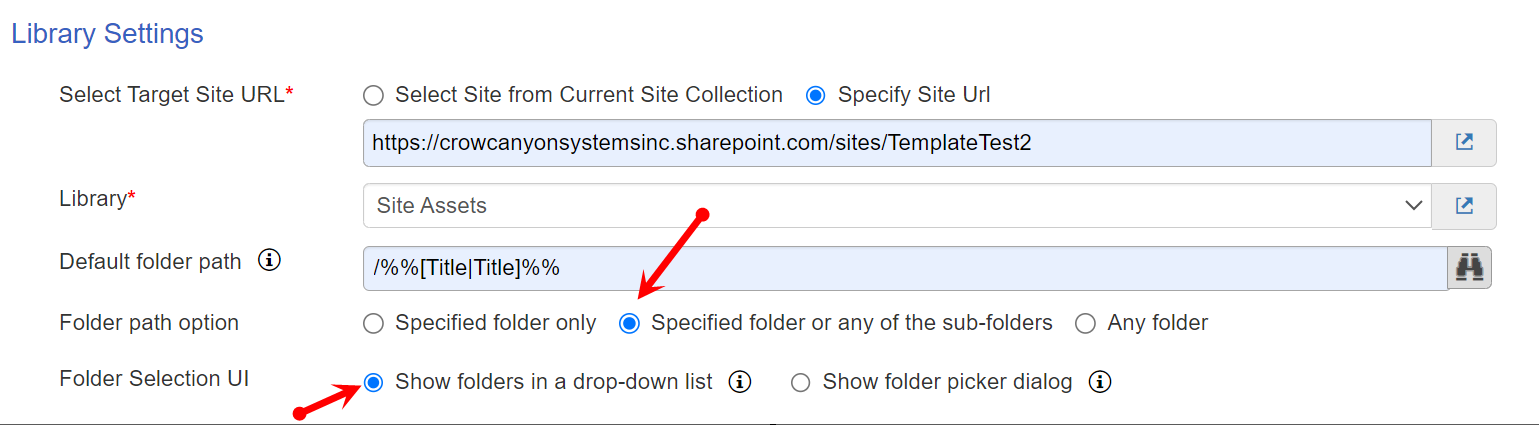
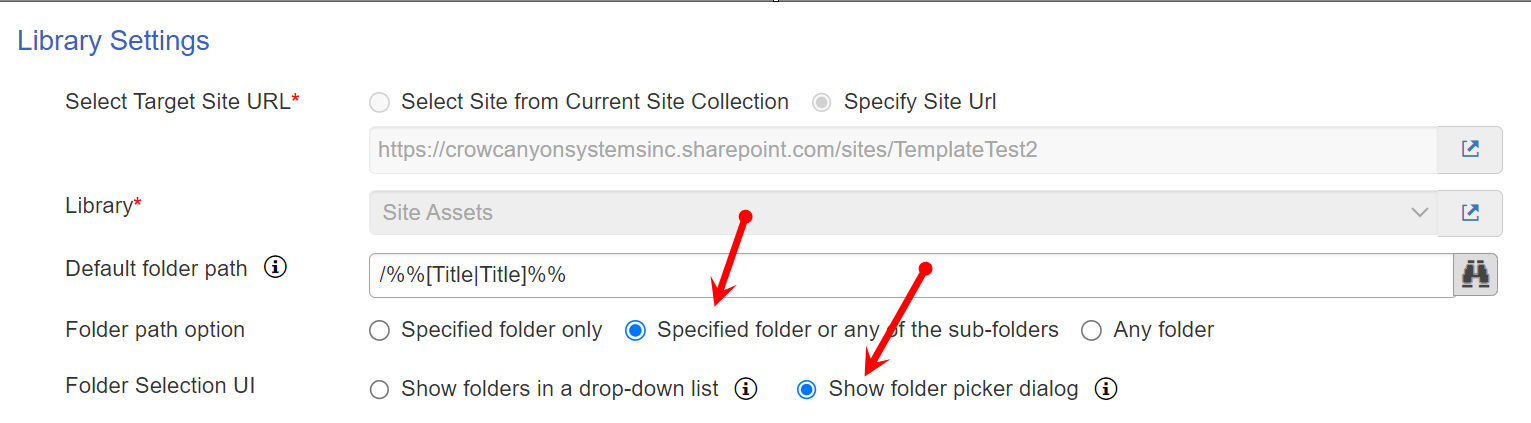
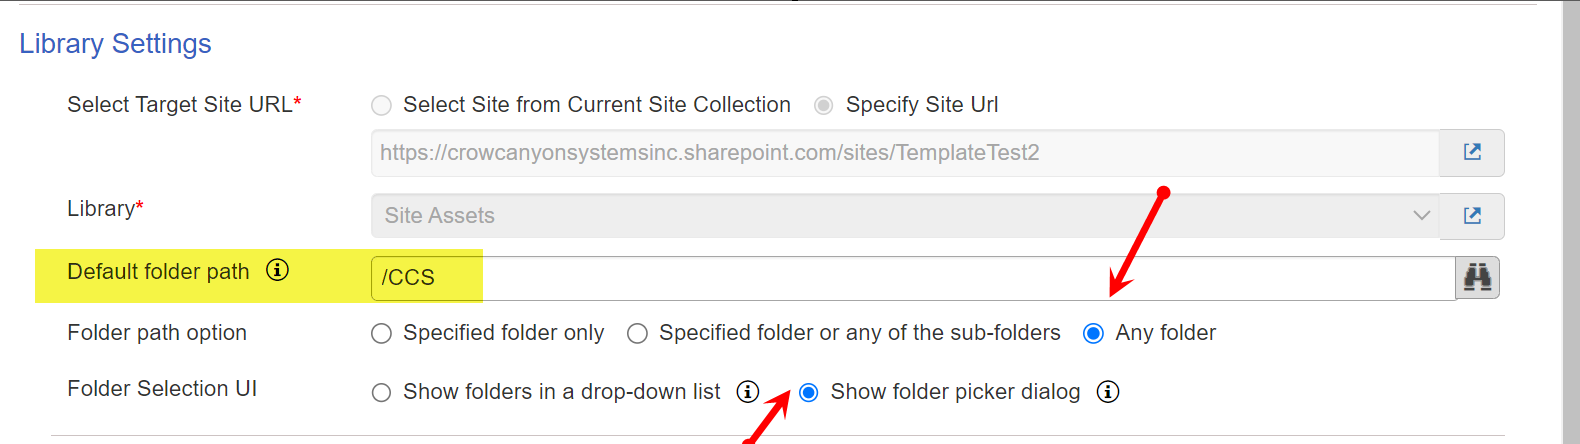
Library Settings:
Select Target Site URL: select target site URL( Either current site or specify URL) where you want to upload the document. Default value is current site URL.
Library: select target library in above selected site where you want to upload the document.
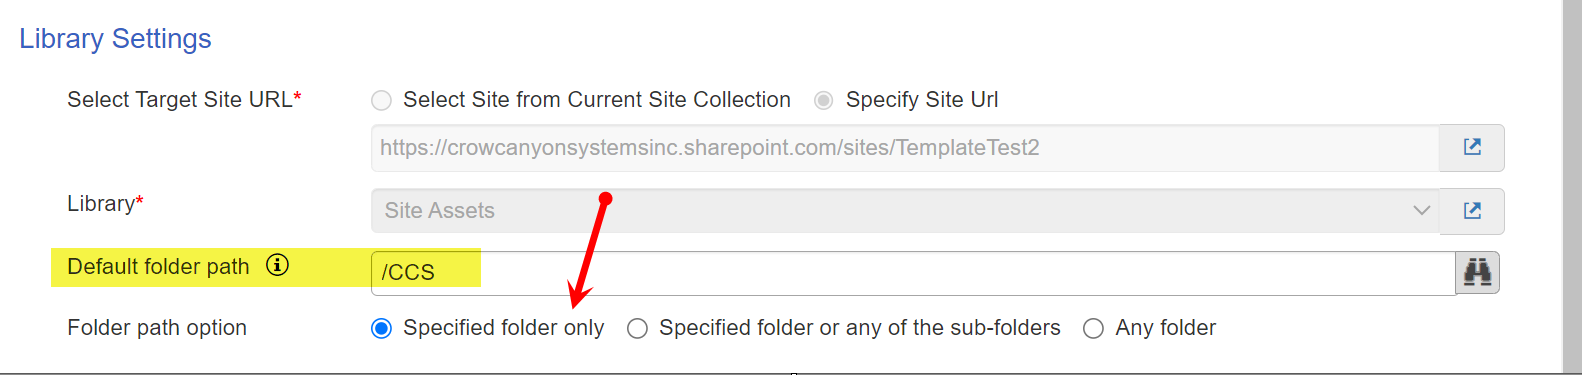
Default folder path: Specify folder path where you want to upload your document in above selected Library. You can use item column placeholder also to specify folder path. For example: /%%[Title|Title]%% ( this placeholder value will get replaced during action execution with item title value on which action is running, this '%%[Title|Title]%%' folder should be there in target library otherwise you will get error message during document upload) . here, You can also provide the folder path directly. for example: /CCS/Cache (CCS/Cache is folder in target document library)
Folder path option: It has three options
•Specified folder only: if this option is selected, it will upload the selected document to the specified folder only ( Folder specified in 'Default folder path')
•Specified folder or any of the sub-folders
It further has two options:
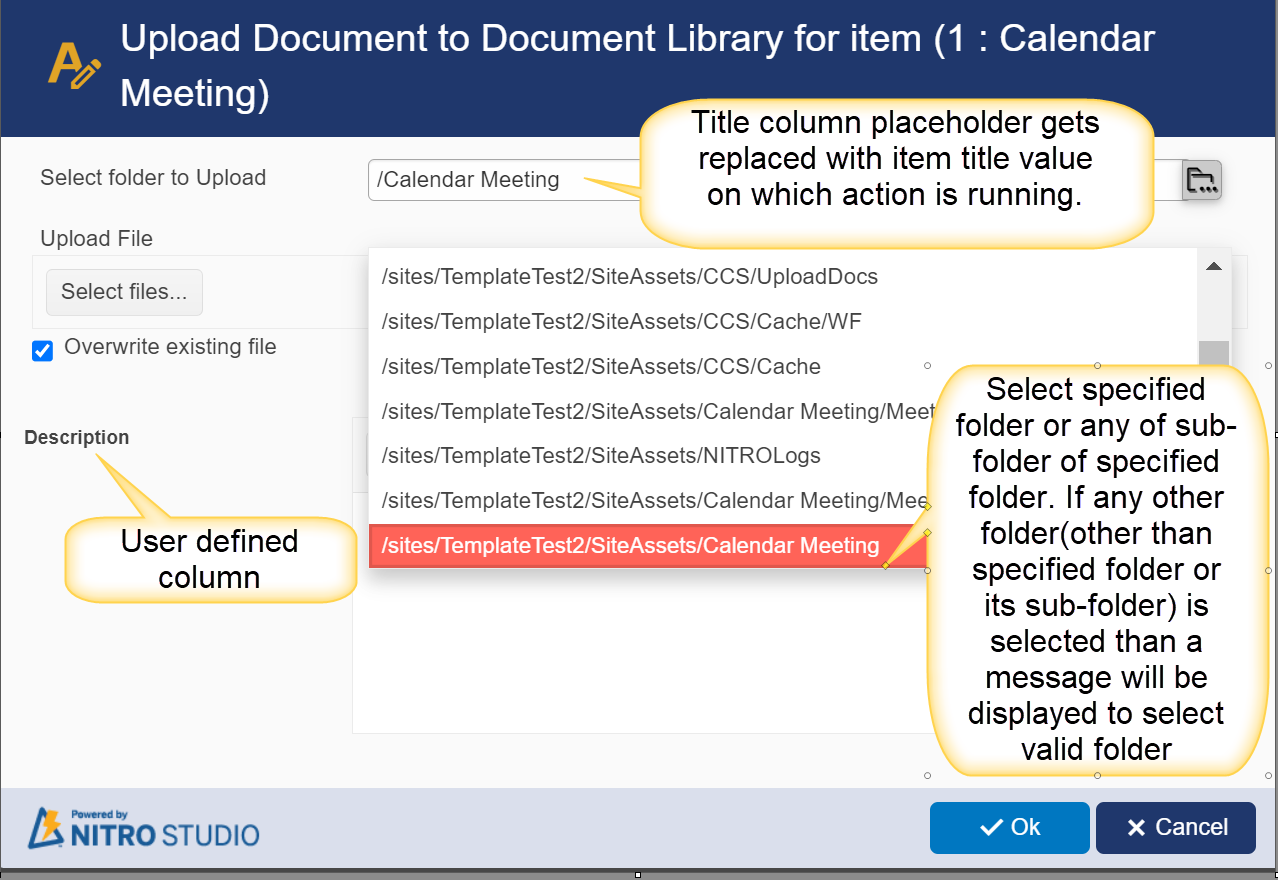
1. Show folders in a drop-don list
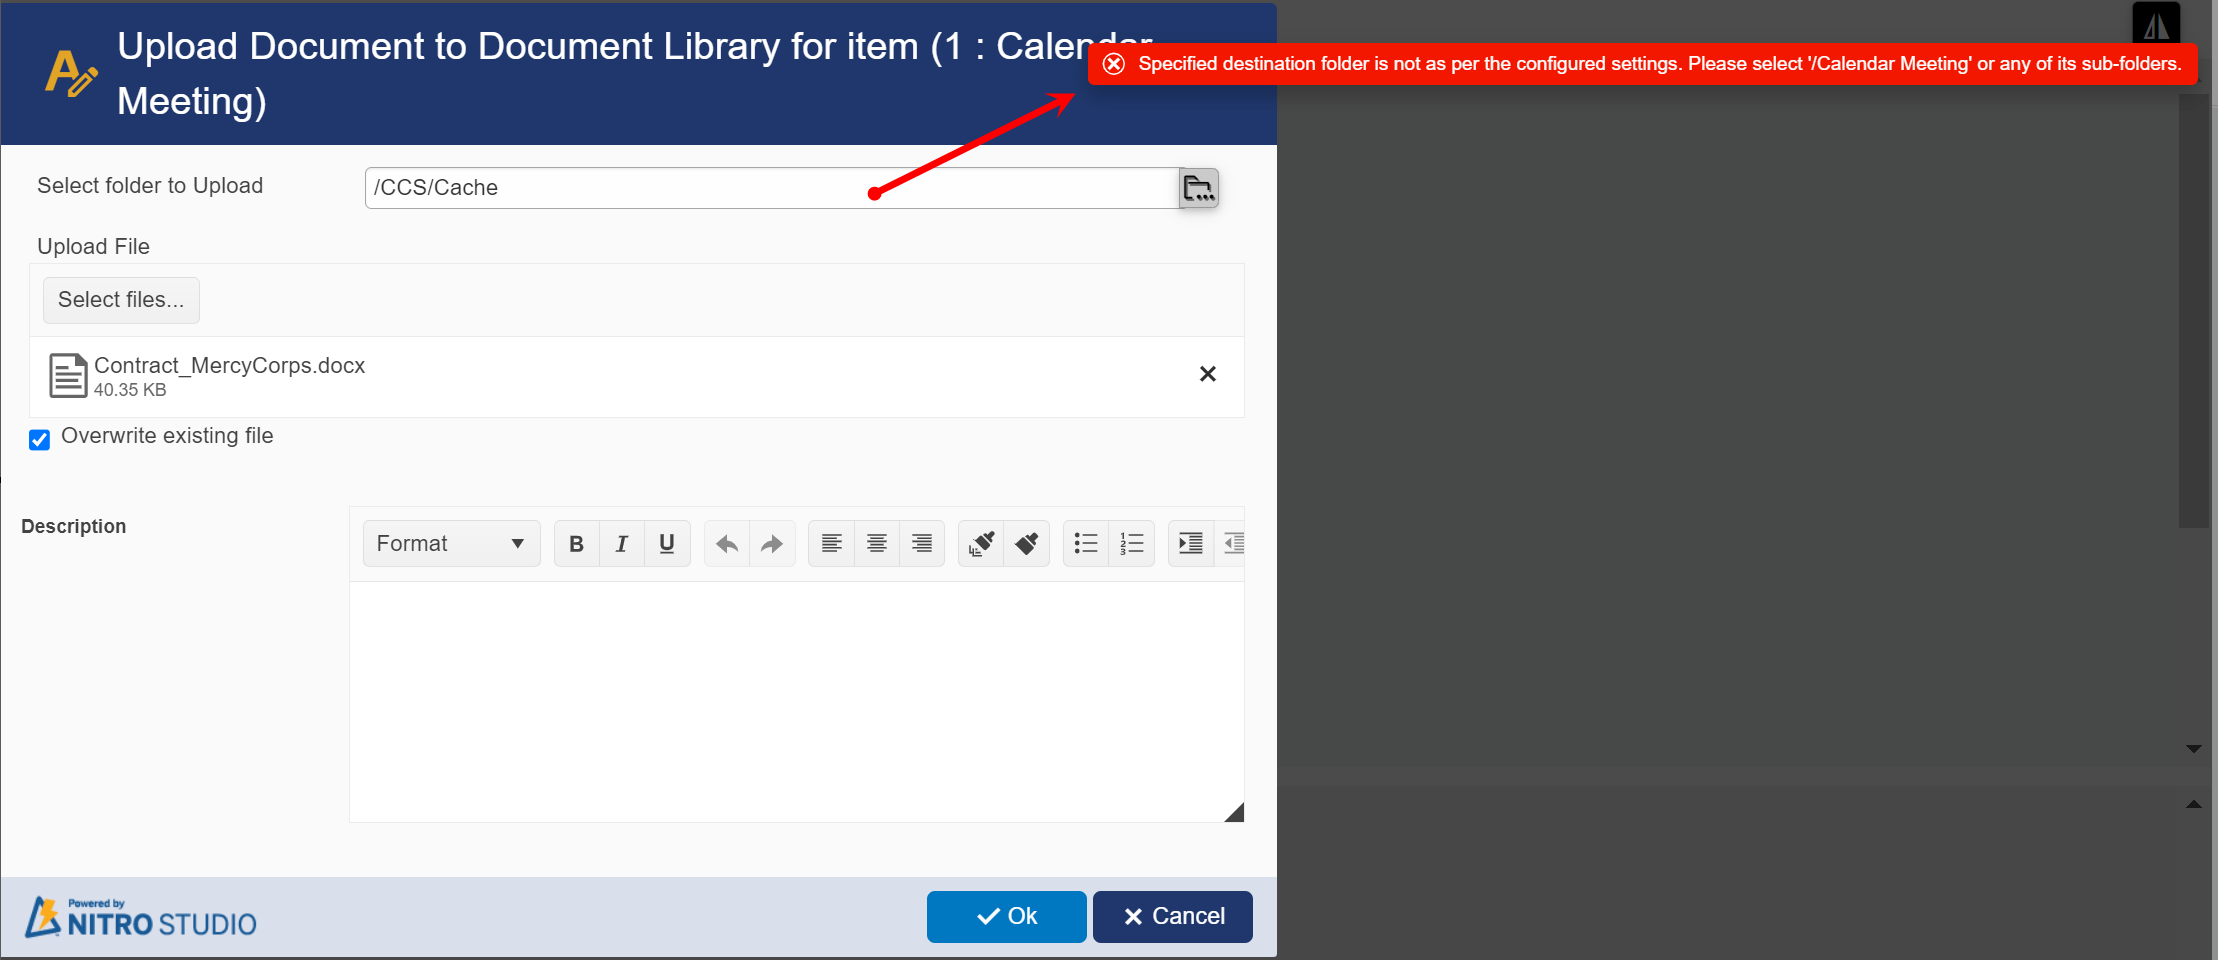
Running this action on 'Calendar Meeting' item. Here, %%[Title|Title]%% value will become 'Calendar Meeting'. If selected library has 'Calendar Meeting' folder then document will be uploaded to that folder or any of its selected sub-folder. If any other folder is selected then it shows a message
Error message:
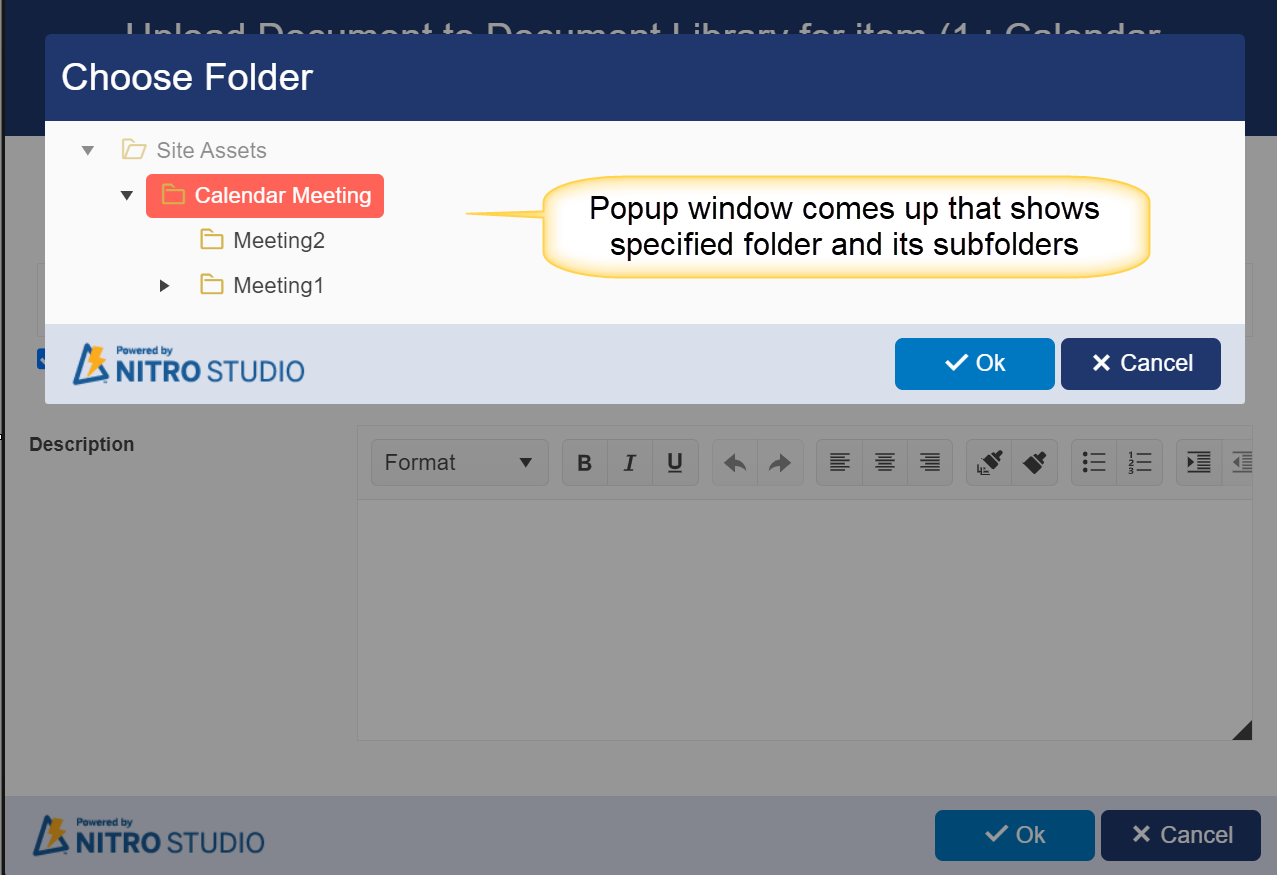
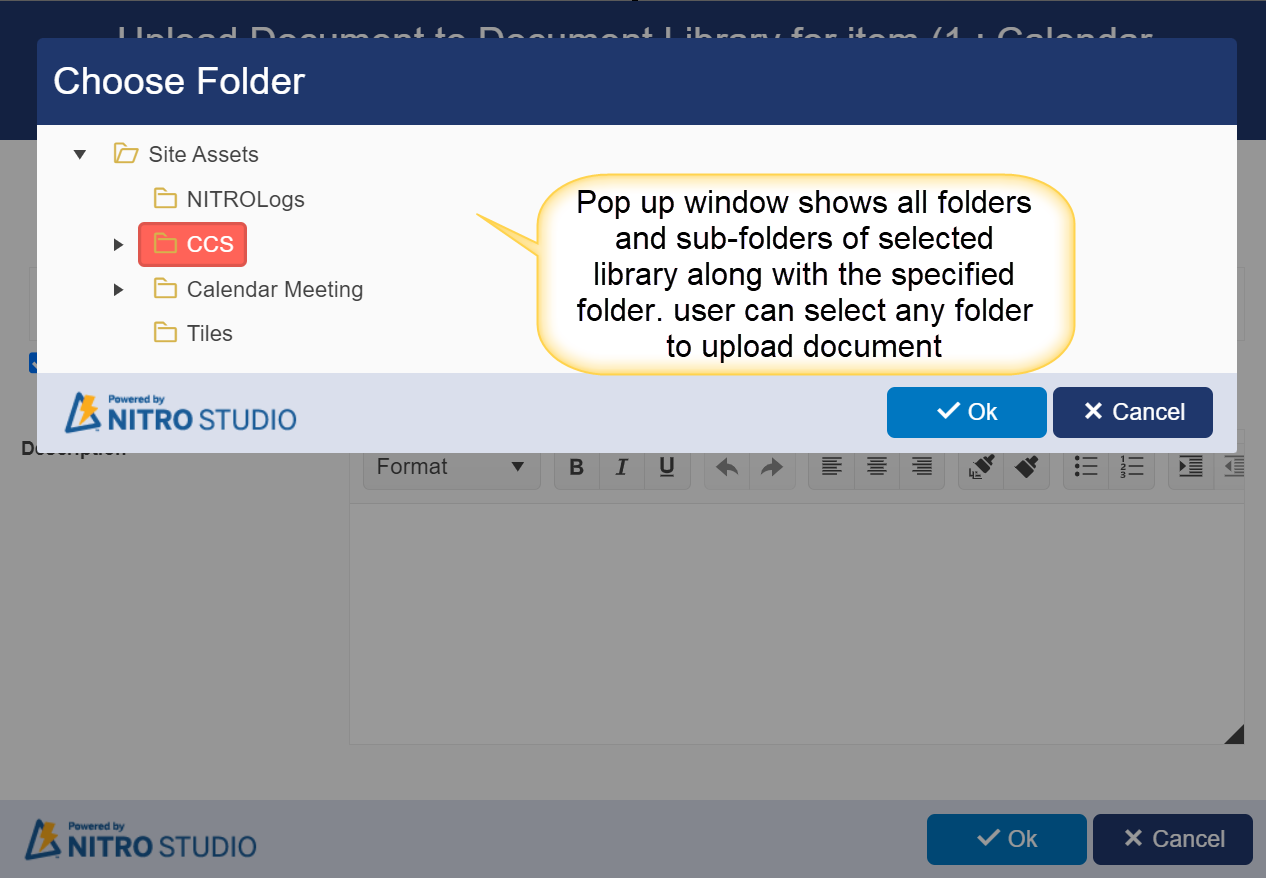
2. Show folder picker dialog: this will allow user to pick folder from a dialog window. this will show only the specified folder and its sub-folders.
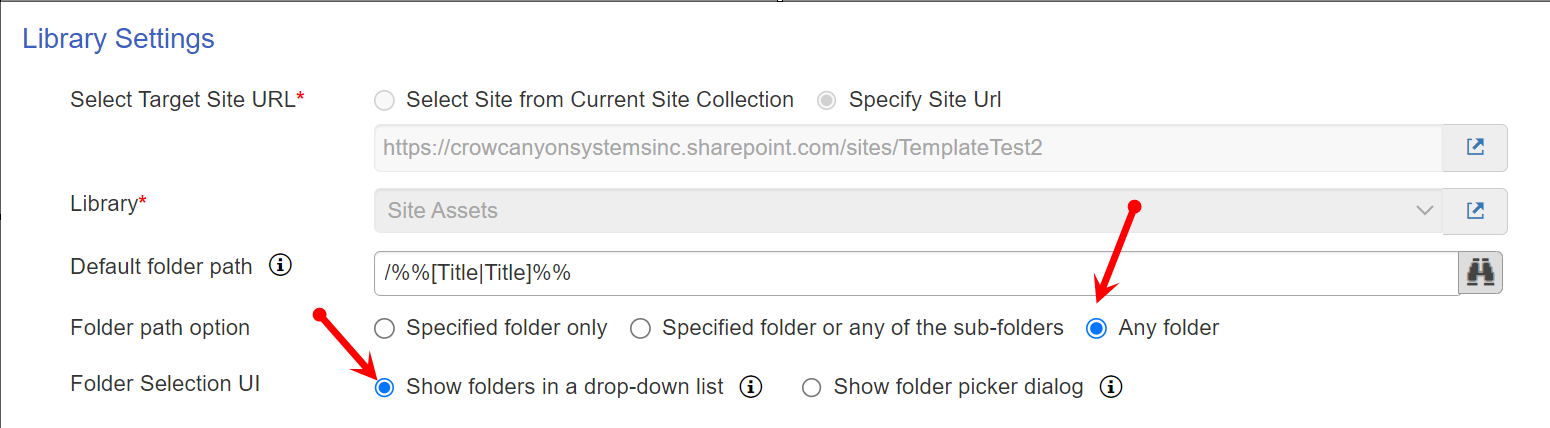
•Any folder
It further has two options:
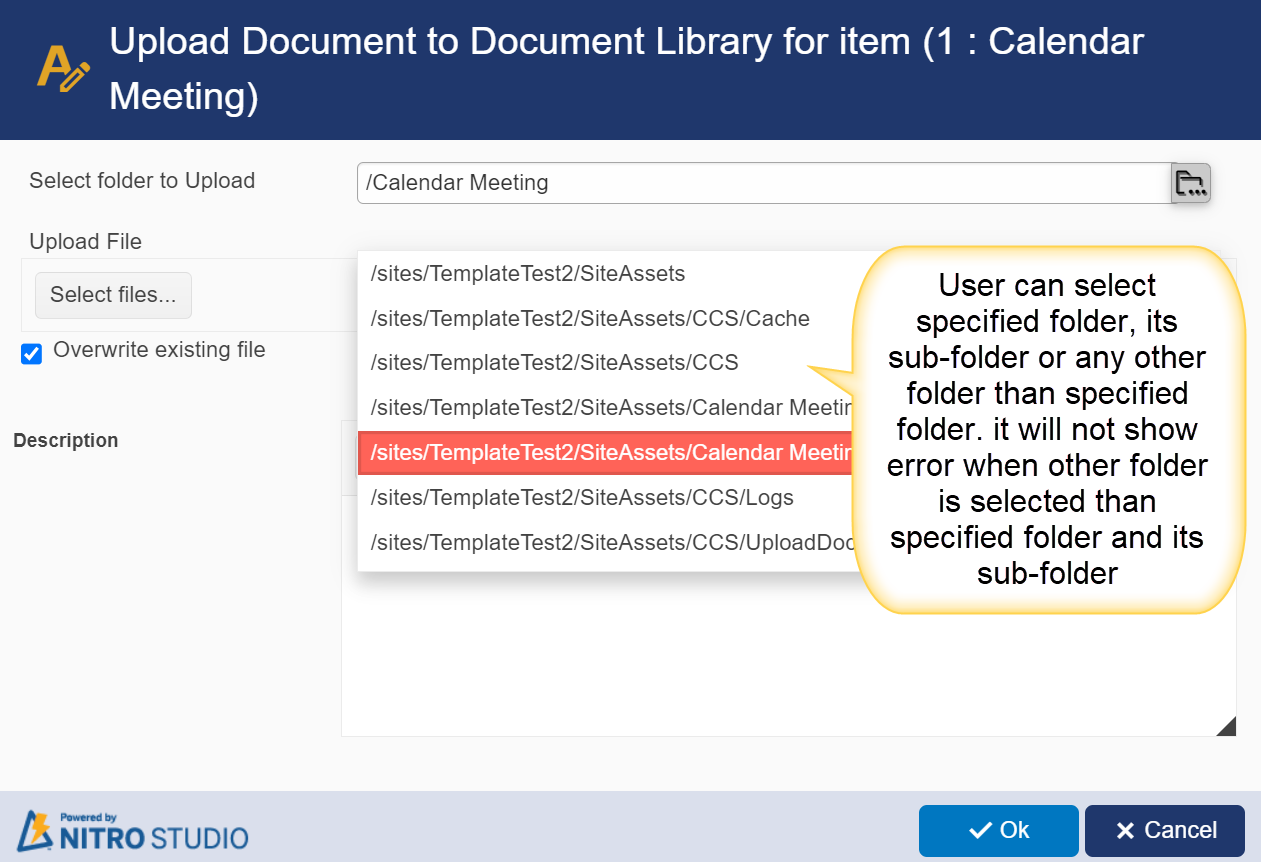
1. Show folders in a drop-down list: it will show folders and sub-folders in drop-down list. user can select specified folder, its sub-folders or any other folder, sub-folders under this option.
2. Show folder picker dialog: this will allow user to pick folder from a dialog window. this will show all folders of selected target library along with specified folder.
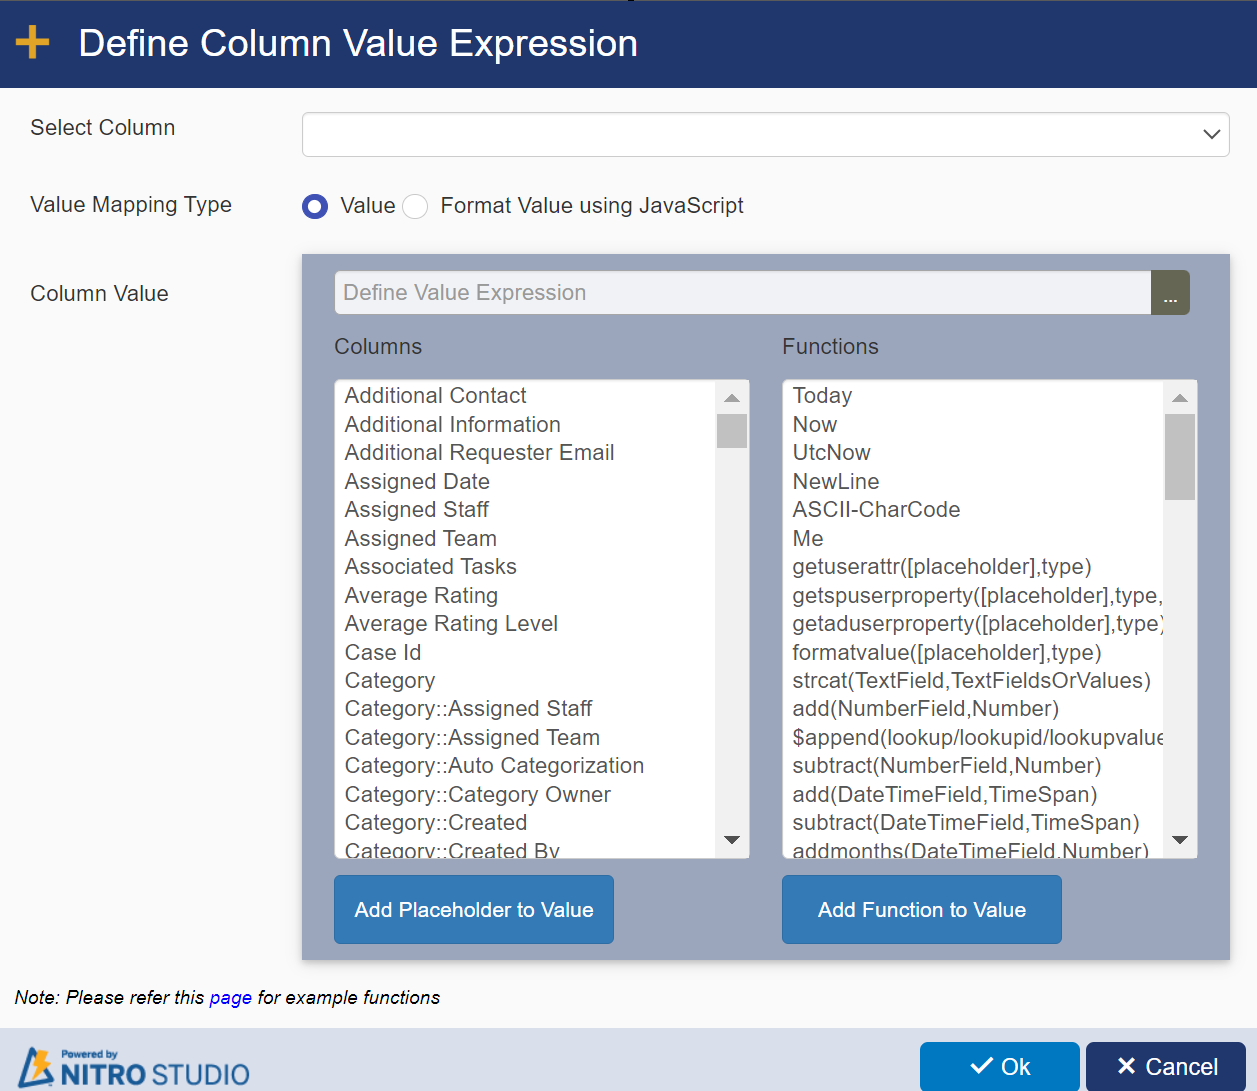
Item Column Value Settings: It has two options
1. User input columns: User can enter value for these columns while executing the action.
2. Predefined column value:
Once the Site and Library are selected, you can add column mappings (this is not required). This maps either values from the current item or values derived from functions to columns (properties) of the Document Library. In this way, you can set properties of the document when it is uploaded. These properties can help categorize or provide information about a document when it is viewed or accessed in the Document Library.
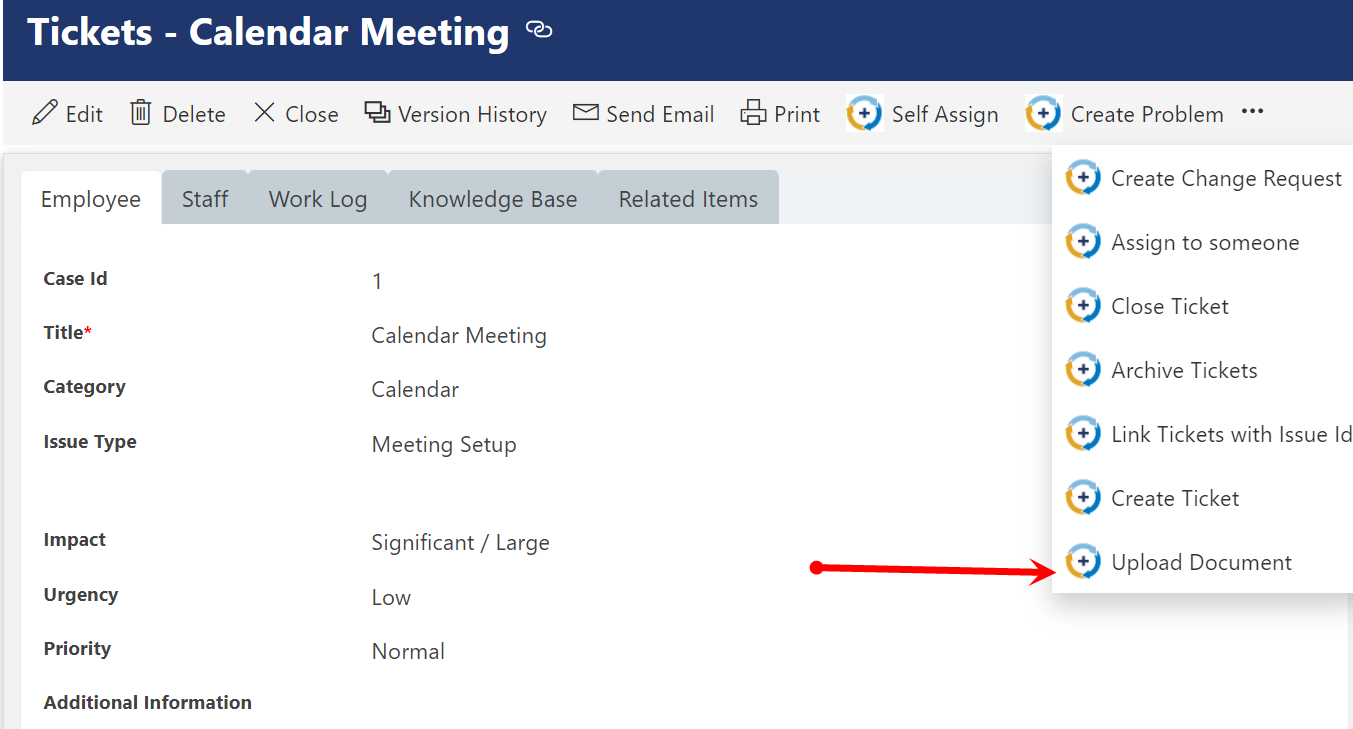
USING THE UPLOAD DOCUMENT ACTION
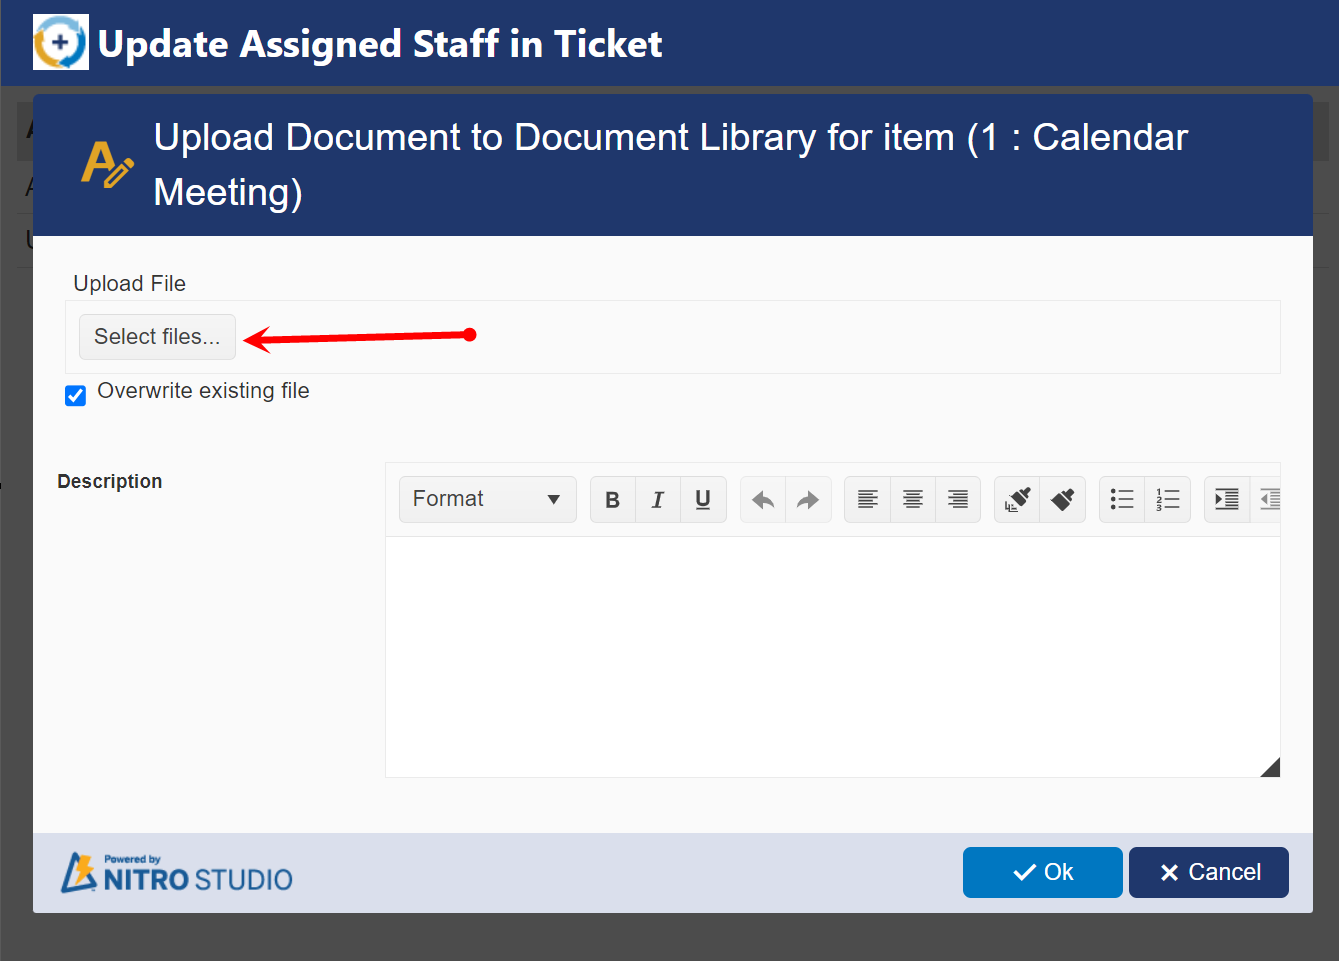
When in an item, select the Action from the item's ribbon (in this example, the action is named "Upload Document", but it can have any name you want).
When the action runs, a screen appears where you can select the document. Use "Select File" to browse for the document. The "document" can be just about any file type. Only one document can be chosen at a time. Once the document is selected, press OK to complete the action. The selected document is then either added to the designated Document Library or attached to the open item depending on how the Update Document action was set up.