Setting up Cascading Lookups
Adding Cascading Lookup to your NITRO Forms is an easy way to save your end user time and increase accuracy. Creating a Cascading Lookup has several steps, explained in detail below.
•Create parent list - a simple list with just Title.
•Create child list - a simple list with Title and a Lookup to the parent list.
•Add two Lookup columns to your main list, one to the parent list and one to the child list.
In NITRO Forms Designer for the main list:
▪Drag the two Lookup columns to wherever you want them on the NITRO Form
▪Go to Advanced, Lookup Settings, New Configuration
Creating the Parent List
Using the same example, Brands and Products, as used in our tutorial video, found here, we will walk you through the steps to make a Cascading Lookup.
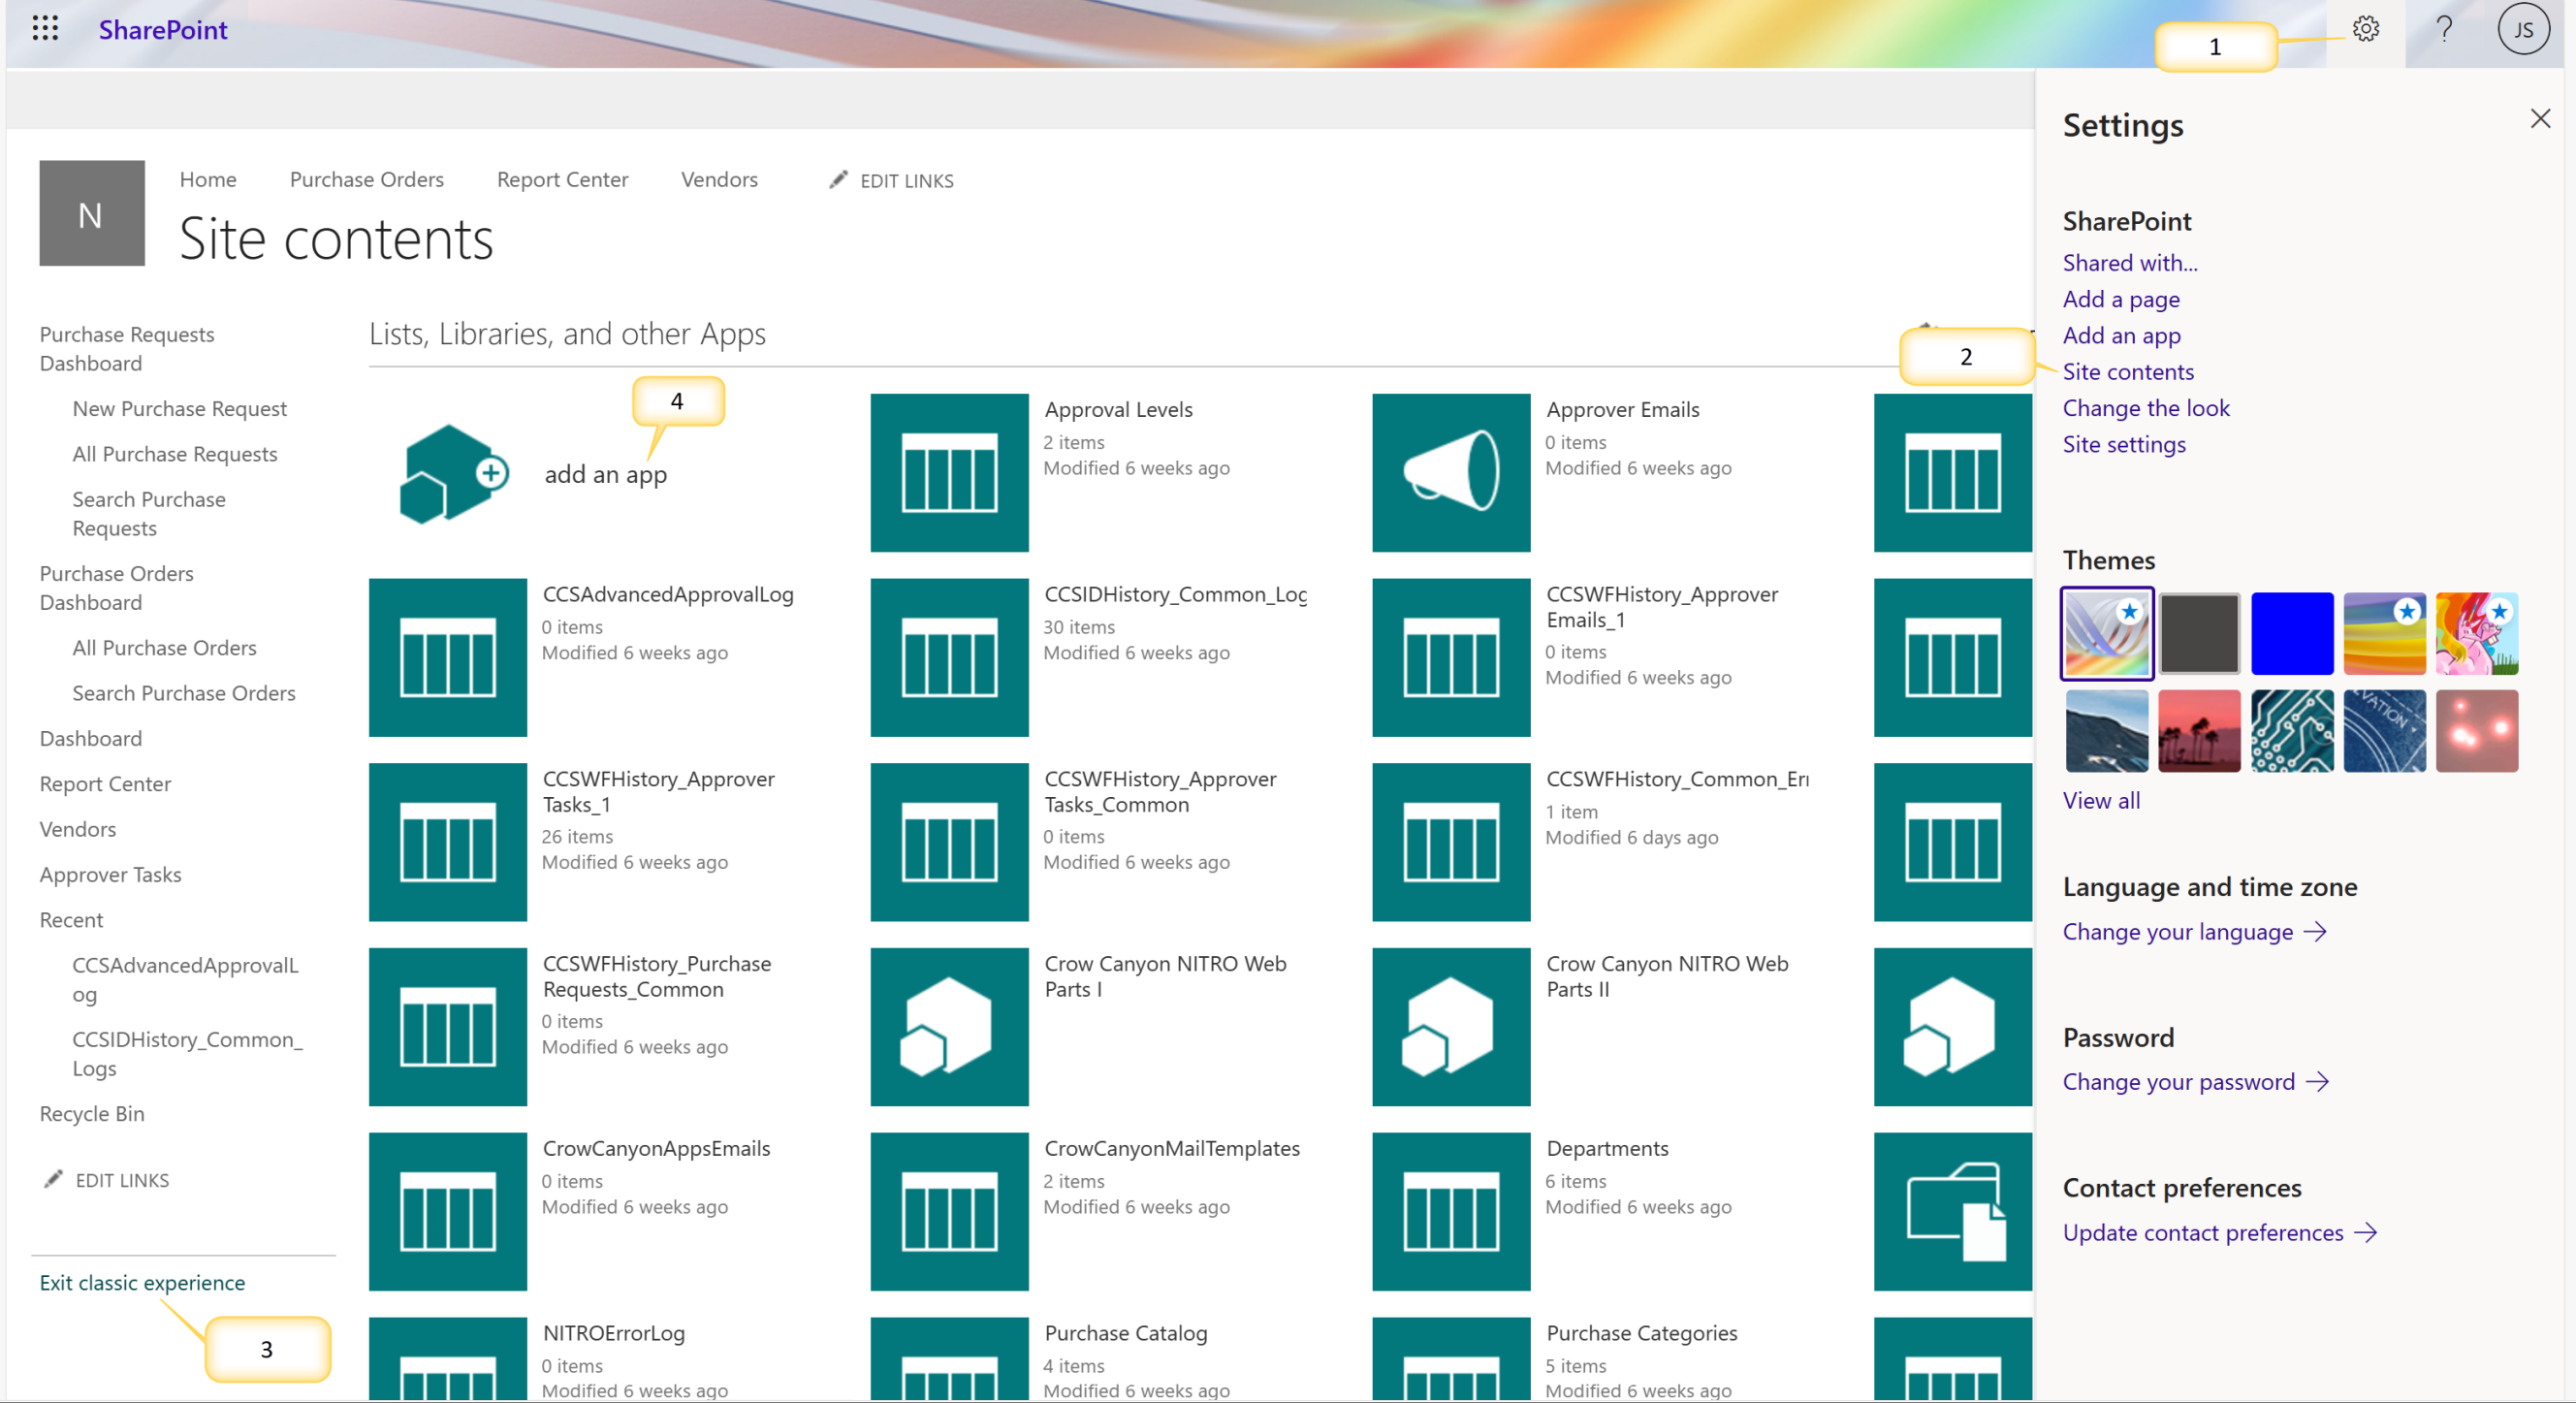
1.Go to the black SharePoint ribbon. In the top right-hand corner, to the left of the logged in user, there is a bell, gear, and question mark symbol. Click the gear symbol, then select, “Add App”.
Click gear button in SharePoint Ribbon -> Go to Site Contents -> Click 'Return to Classic SharePoint' in Quick launch -> Select 'add an app'
2.This will bring you to Site Contents > Your Apps. Here you will select “Custom List”

OR
In Modern SharePoint
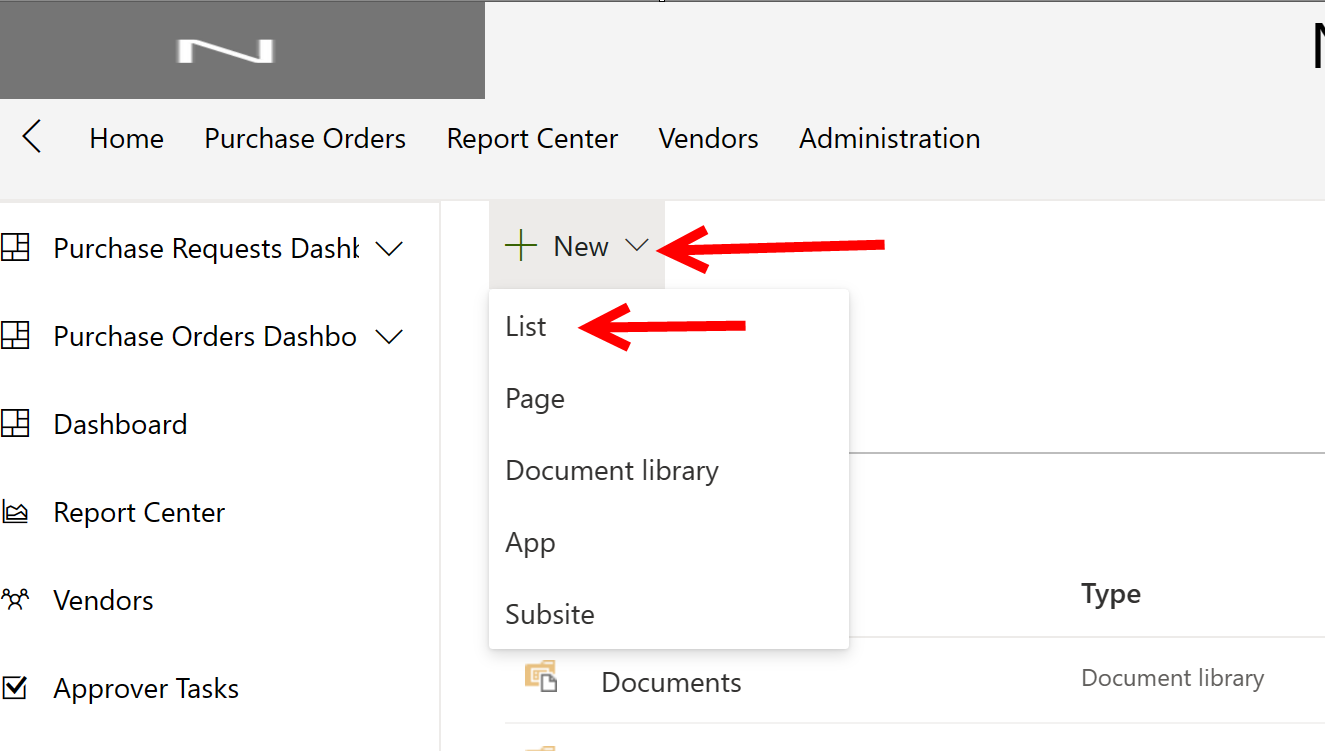
Click gear button in SharePoint Ribbon -> Go to Site Contents -> Click 'New' -> Click 'List'
3.Give your custom list a name (“Brands”, in our example) and click create.
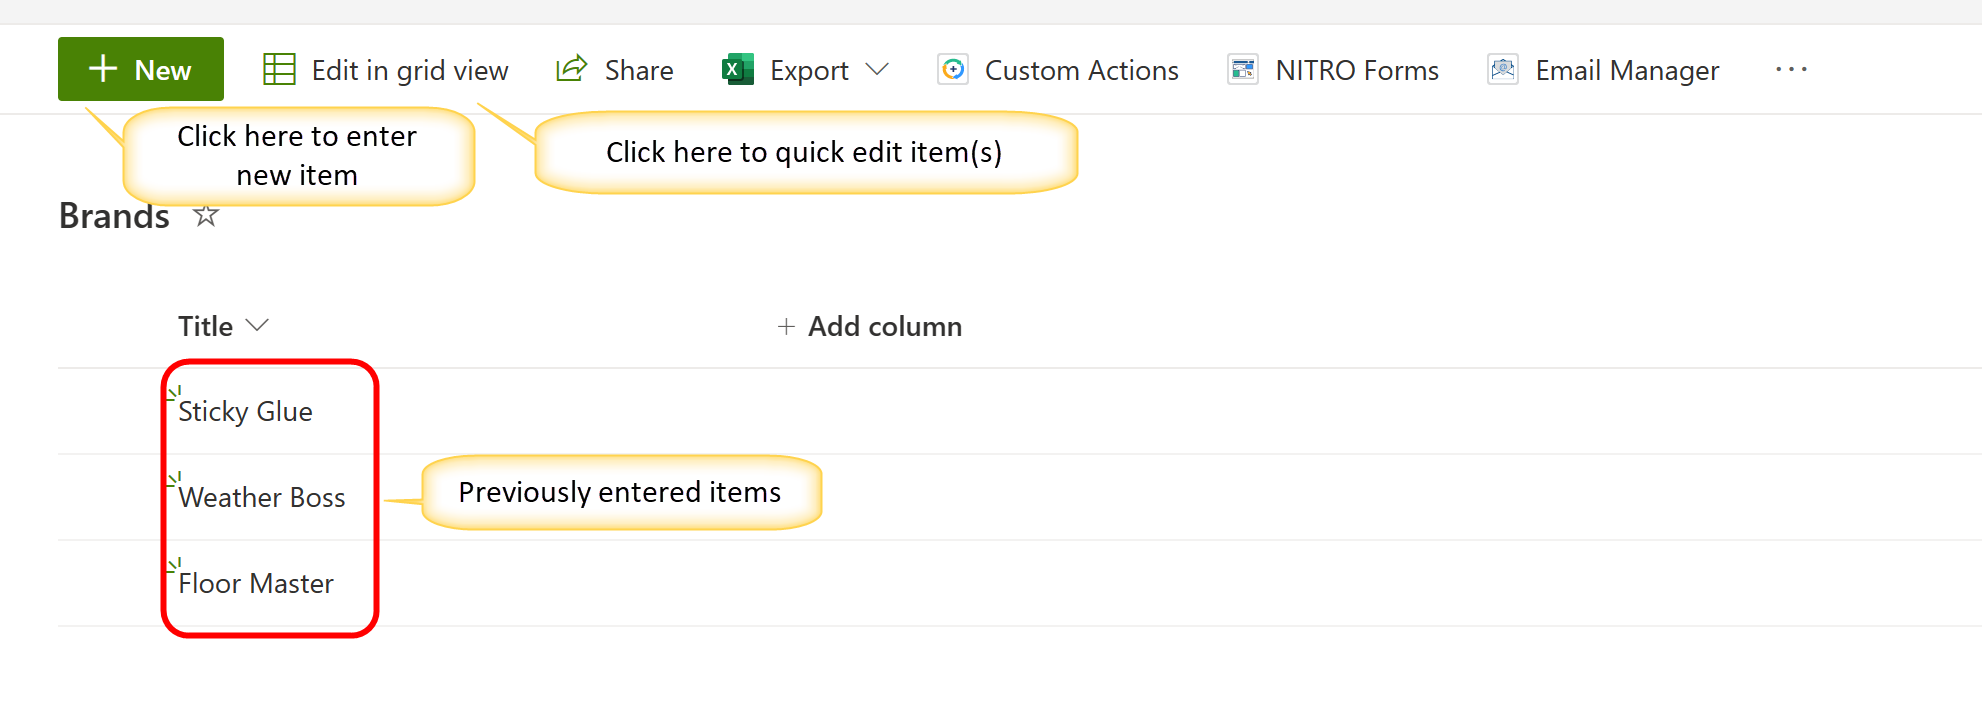
4.Creating this new list will bring you to Site Contents. Here New apps/lists will be designated with a bright green “New” label. Click on the Quick Edit button and then fill in the Title column. Each item will have a different entry in the Title and this becomes your parent list -- it could be all the Categories, or all the States, or whatever else you want for the parent list. Each item has a different Title. You can also create new items one-by-one and fill in the Titles that way, and save them.
In our example, we filled the Title columns with the name of each brand. Each item in the list has a different Brand name in the Title column.
Creating the Child List
5.Again, Click gear button in SharePoint Ribbon -> Go to Site Contents -> Click 'New' -> Click 'List'
In our example, this is "Products".
Go to List settings by clicking Gear icon in the SharePoint Ribbon.
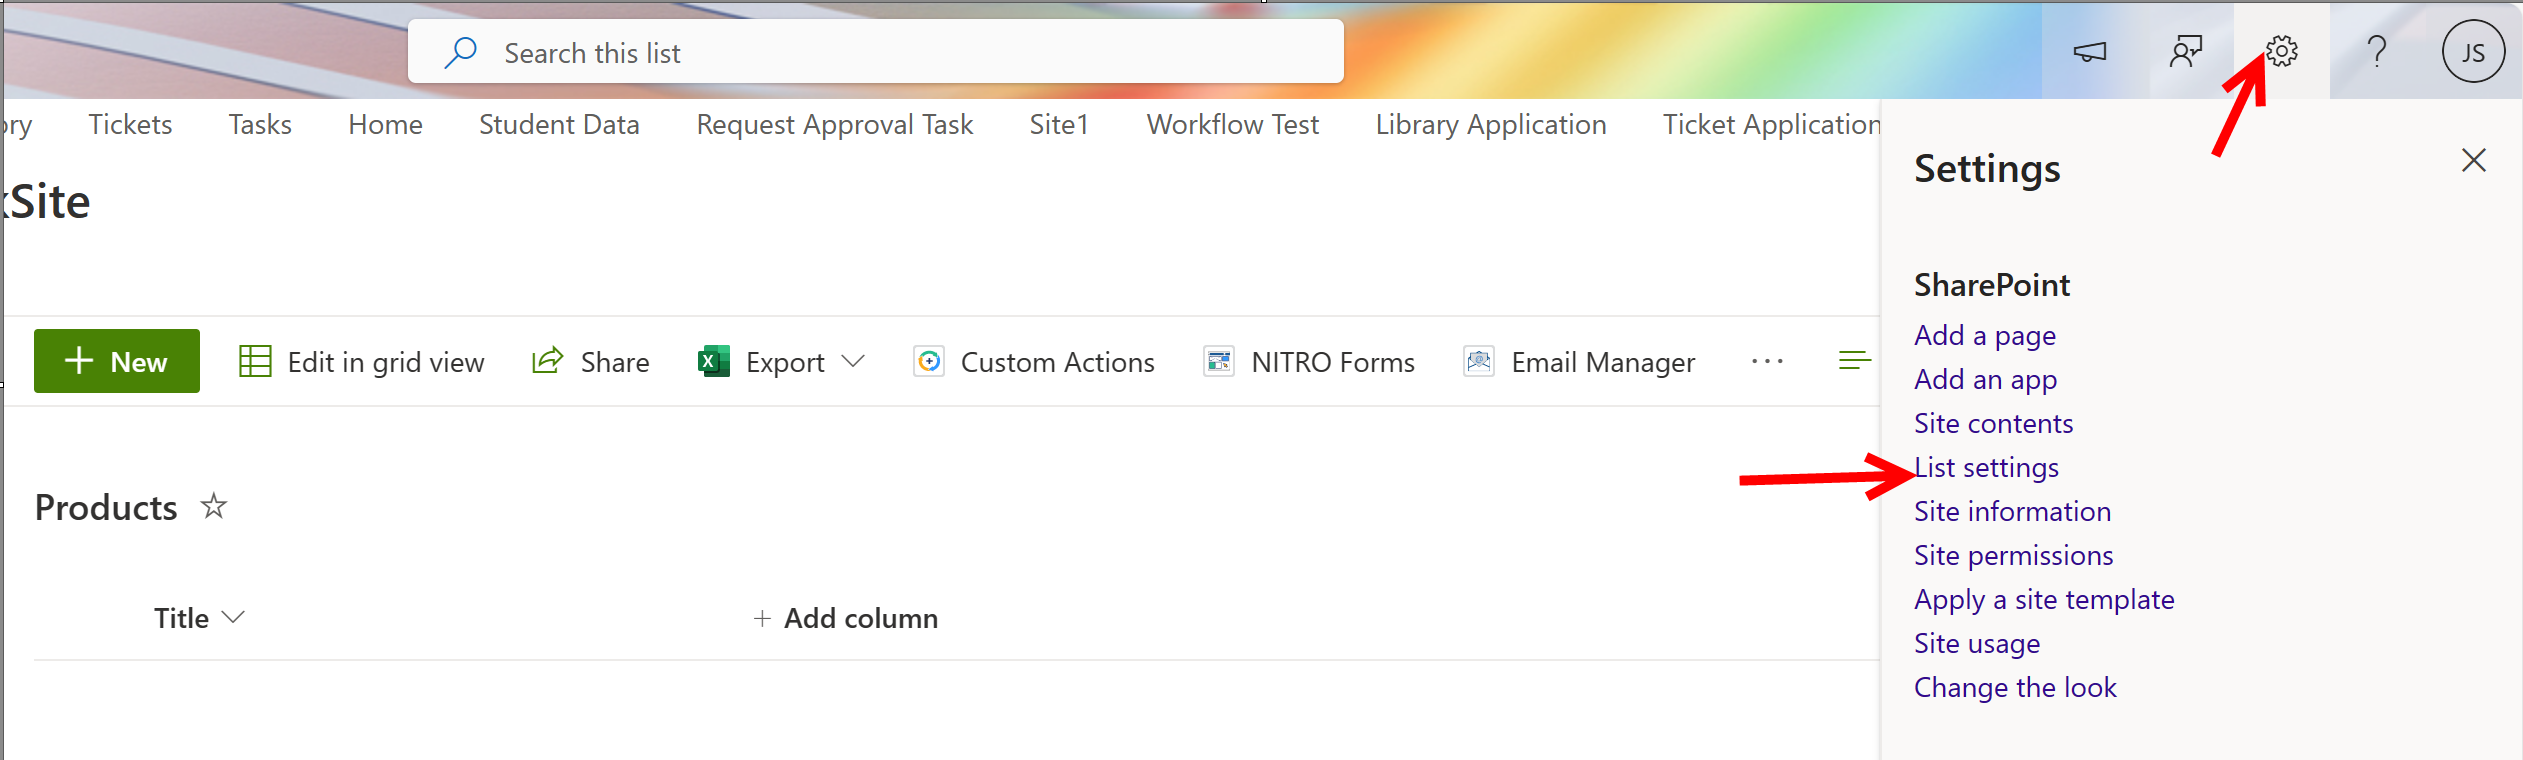
6.Scroll down until you see the “Columns” options. There you will see in blue, linked text, “Create Column”
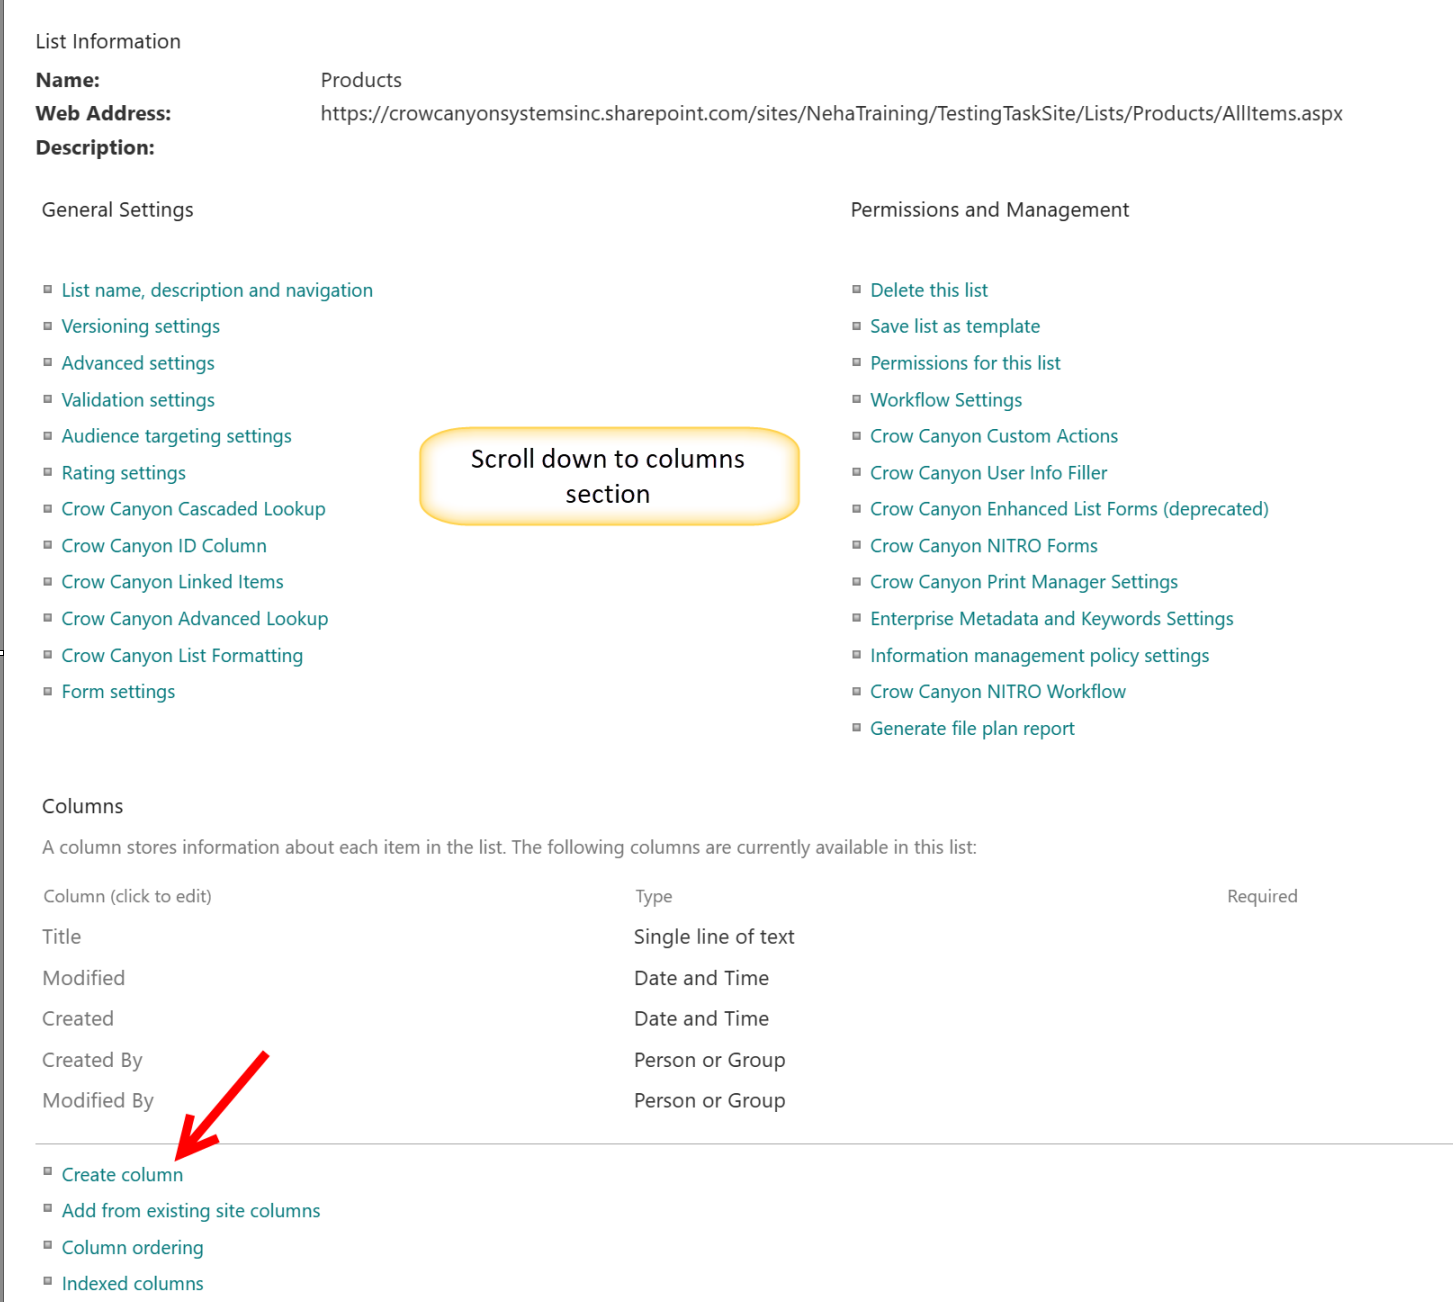
7.Create a Lookup column. Give it the name of the Parent list.
| a. In “Get information from”, select the parent list you just created. |
b.For “In this column”, select “Title”.
 |
8.Click OK and go back to this new list ("Products", in our example)
9.Add each child item -- put the name of the child in the Title and select the right Parent from the Lookup column. In our example, this is putting in the Product name in the Title for each item, and then selecting with Brand it is associated with.
Add two Lookup columns to the main list
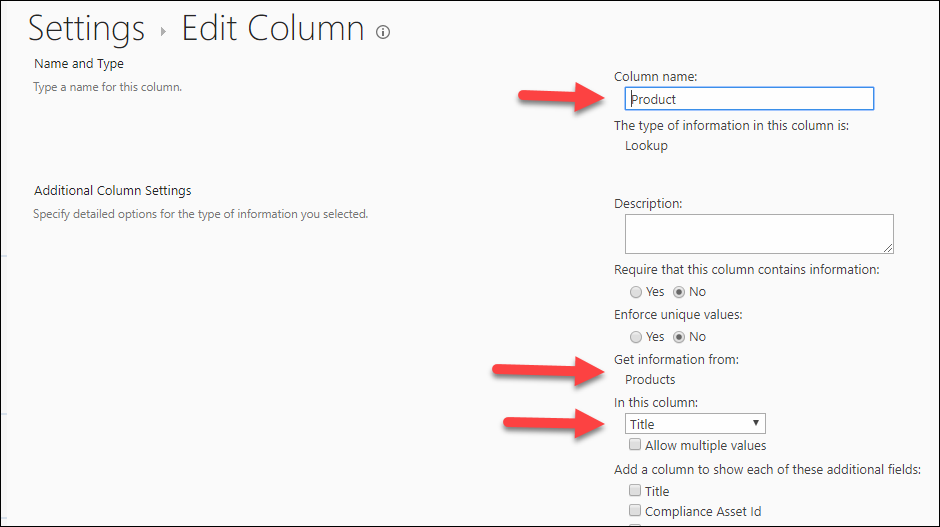
1. In List Settings for the main list ("Tickets" in our example), create two Lookup columns
a. For one, give it the name of the Parent list and for "Get information from", select the Parent list
b. For the other, give it the name of the Child list and for "Get information from", select the Child list
In both cases, for "In this column", select "Title".
Go to NITRO Forms Designer
1. Add the two Lookup columns you just created on the main list to the Form. You can put them wherever you want (drag-and-drop from the Forms Control on the left side). These will be the Cascading Lookups that are visible to users, so usually they go right next to or right over each other
2. Edit the child lookup column (in this case "Product") by clicking on the column on the form, and clicking on the Edit button on the right panel.

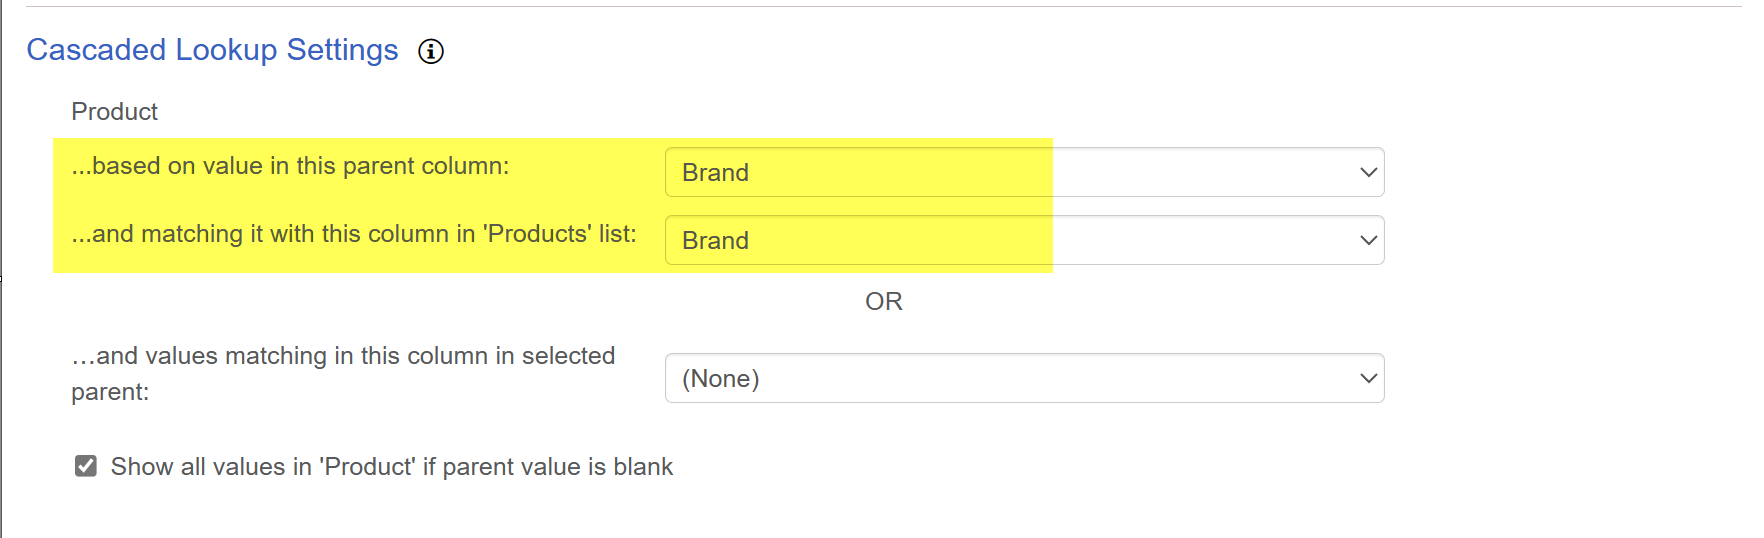
In Cascaded Lookup Settings:
Choose the Lookup to the Parent list ("Brand" in our example) .
Choose the Lookup column in the Child List, which should be the same name as the Parent list (again, "Brand" in our example) .
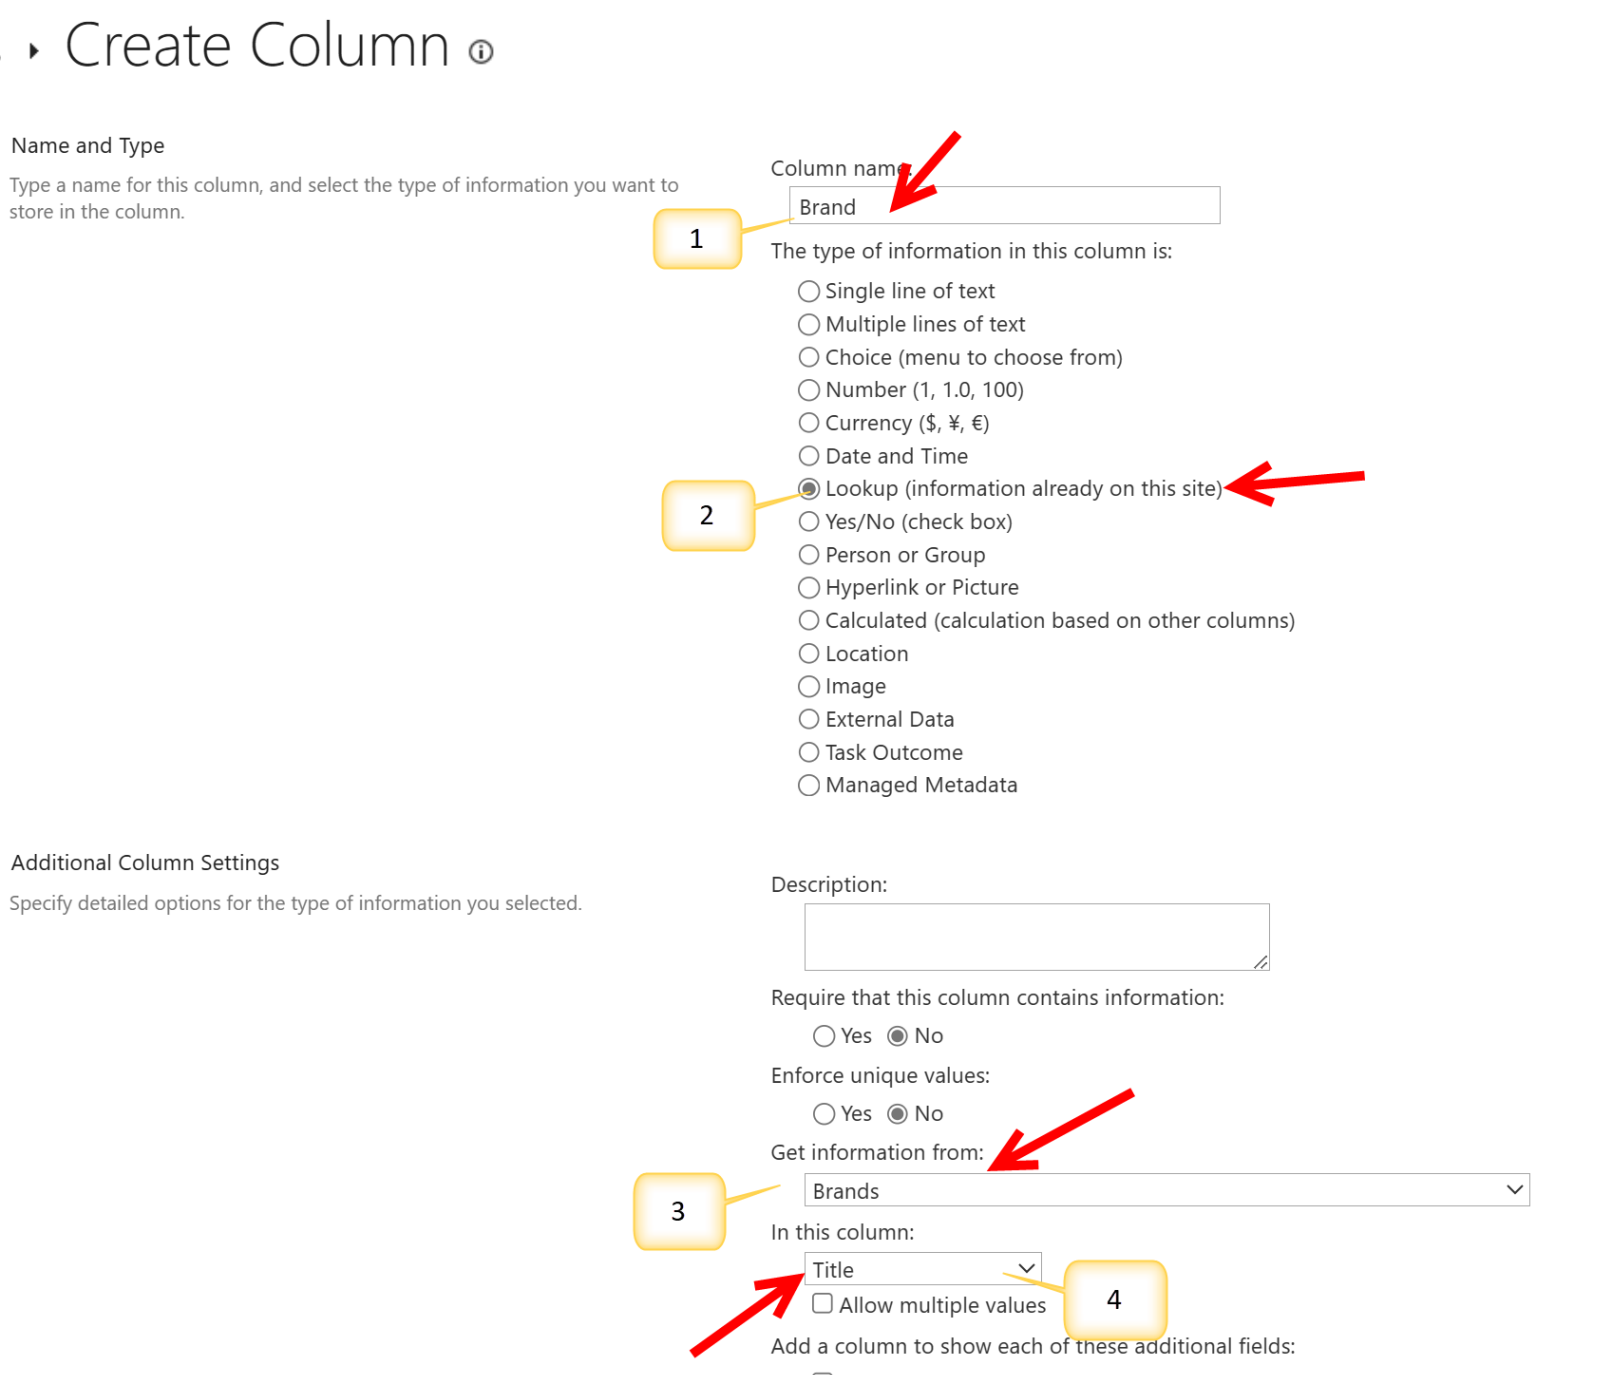
Sample Output:
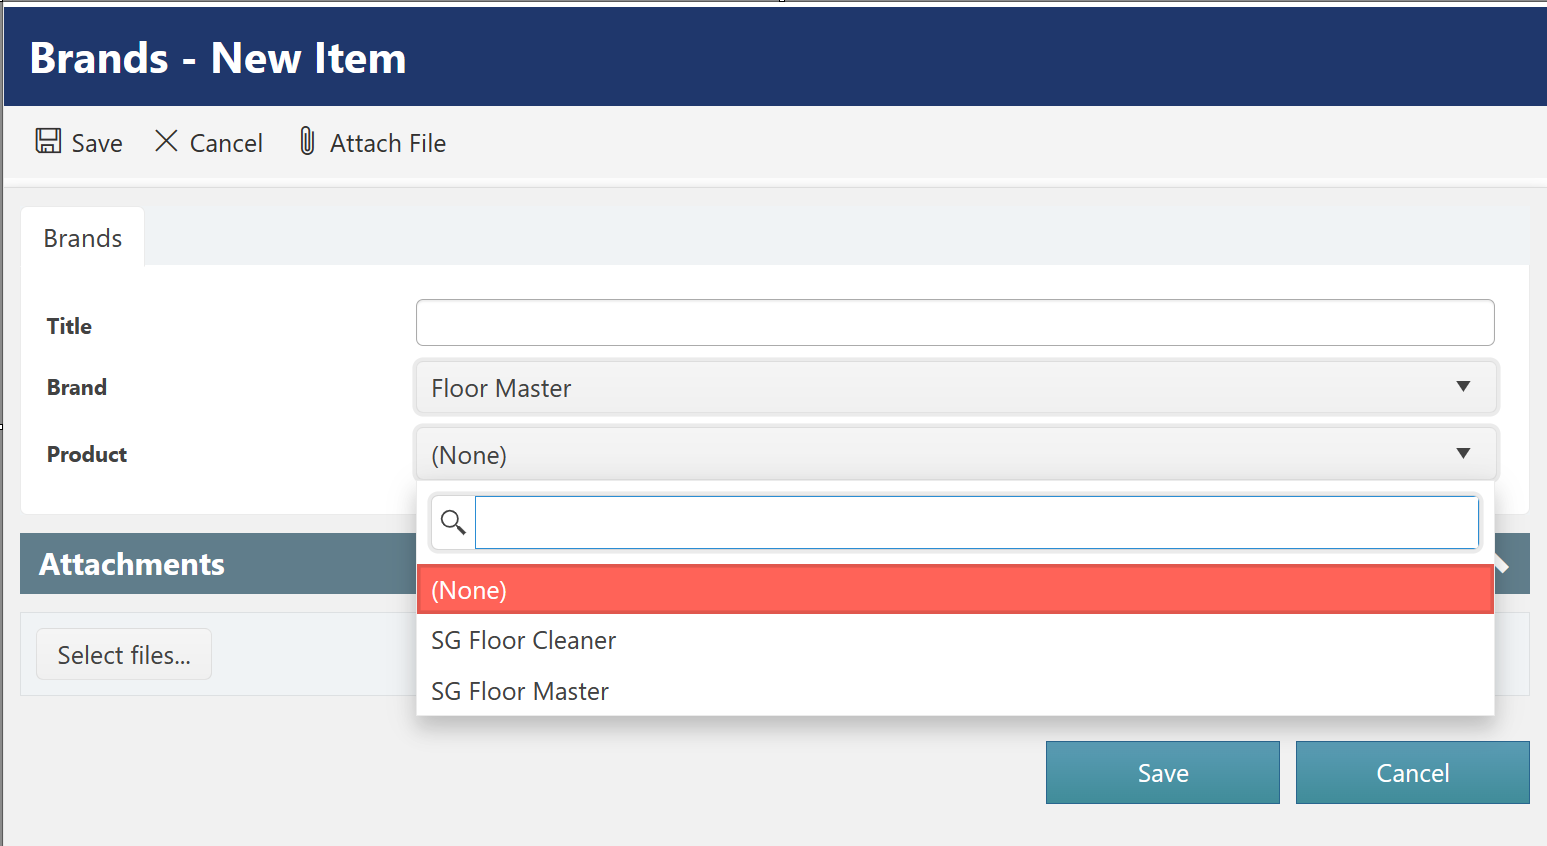

In above output, 'Product' column values got filtered based on selected 'Brand' value
Refer this article for more details: Add ‘Main Category’ To Filter Category Values In NITRO Forms