Introduction
Form Event Actions enable advanced custom functionality on NITRO forms. These actions can be invoked on form load or when a column value is changed by a user or by another form event action. In response to these events, different actions can be configured to fetch data, update other controls, and write custom JavaScript to access and update the SharePoint data and NITRO forms.
Adding Form Event Actions to the Form
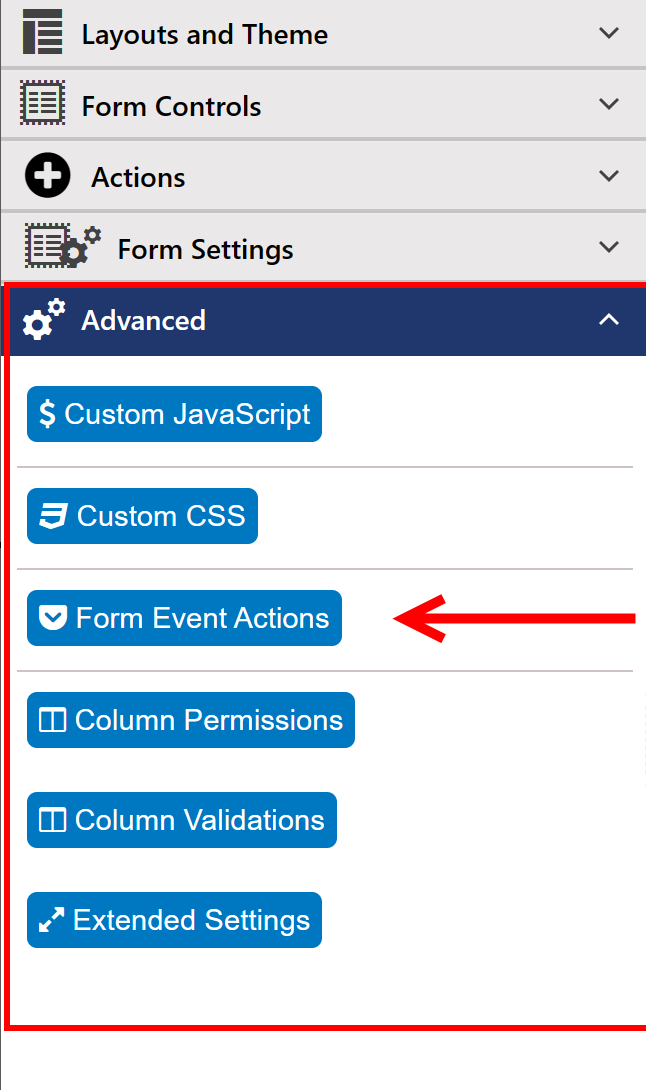
In left-side pane of the NITRO Forms Designer, under Advanced, you will see “Form Event Actions”. Click this.
Configuration
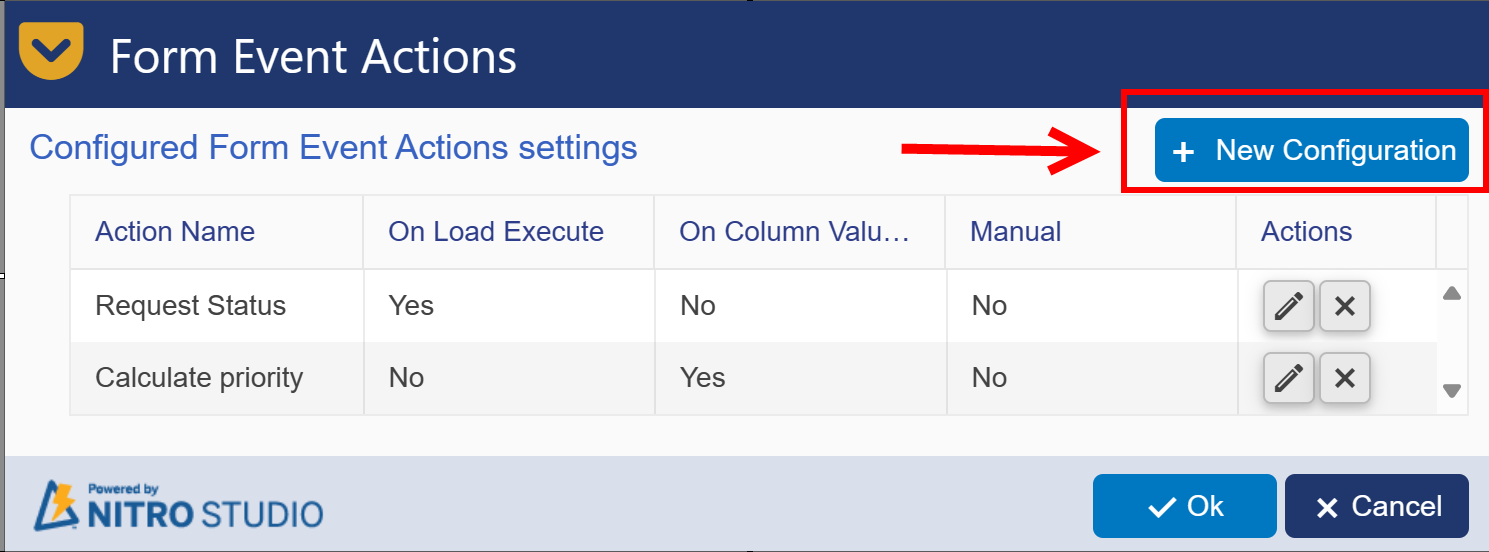
Click “New Configuration” in below dialog to start defining Form Event Actions:
Below window will pop up when you click 'New Configuration'

Title: Provide name for form event action
Apply in Forms: by default all forms (New/Edit/Display) are selected. you can select/deselect forms in which you want to trigger form event action.
Apply when opening form from: here you can select option whether you want to trigger form event action when opening from from
1. SharePoint List: if form is opening from SharePoint list then you can trigger form event action
2. Associated Items Grid: if from is opening from associated items grid then you can trigger form event action
3. Within a custom action: if NITRO form is opening in a custom action then you can trigger form event action.
By default, all options are selected. You can select/deselect them as per requirement.
Trigger
User can define separate settings for different triggers:
"Execute on Form Load"
You can create more than one configuration for Form load with different set of actions
"Execute on column value change"
Same event can handle one or more column value changes or a separate event can be defined for each column
| "Execute Manually" |
| select this option if you want to trigger form event action manually. Refer Use Of “Execute Manually” Form Event Actions In NITRO Forms for more details. |
 |
Actions
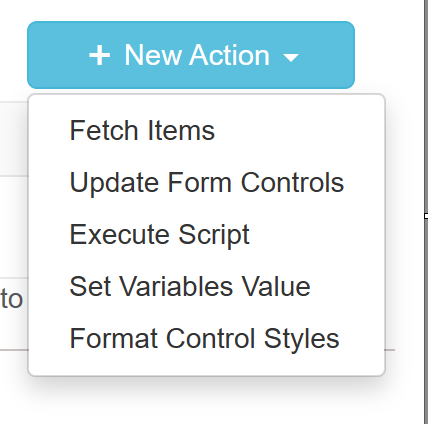
Form Events support three types of actions. Each type can be executed conditionally; the form and item data can be used to specify the conditions.
1.Fetch Items
2.Update Form Control
3.Execute Script
4.Set Variable Value
5.Format Control Styles
 |
Fetch items
With this action, we can read data with the specified criteria from any list in the current site collection and store the data in a “Action Variable”. This data is then available on the Form and can be used in subsequent actions as well as in “Custom JavaScript” option available in NITRO Forms.
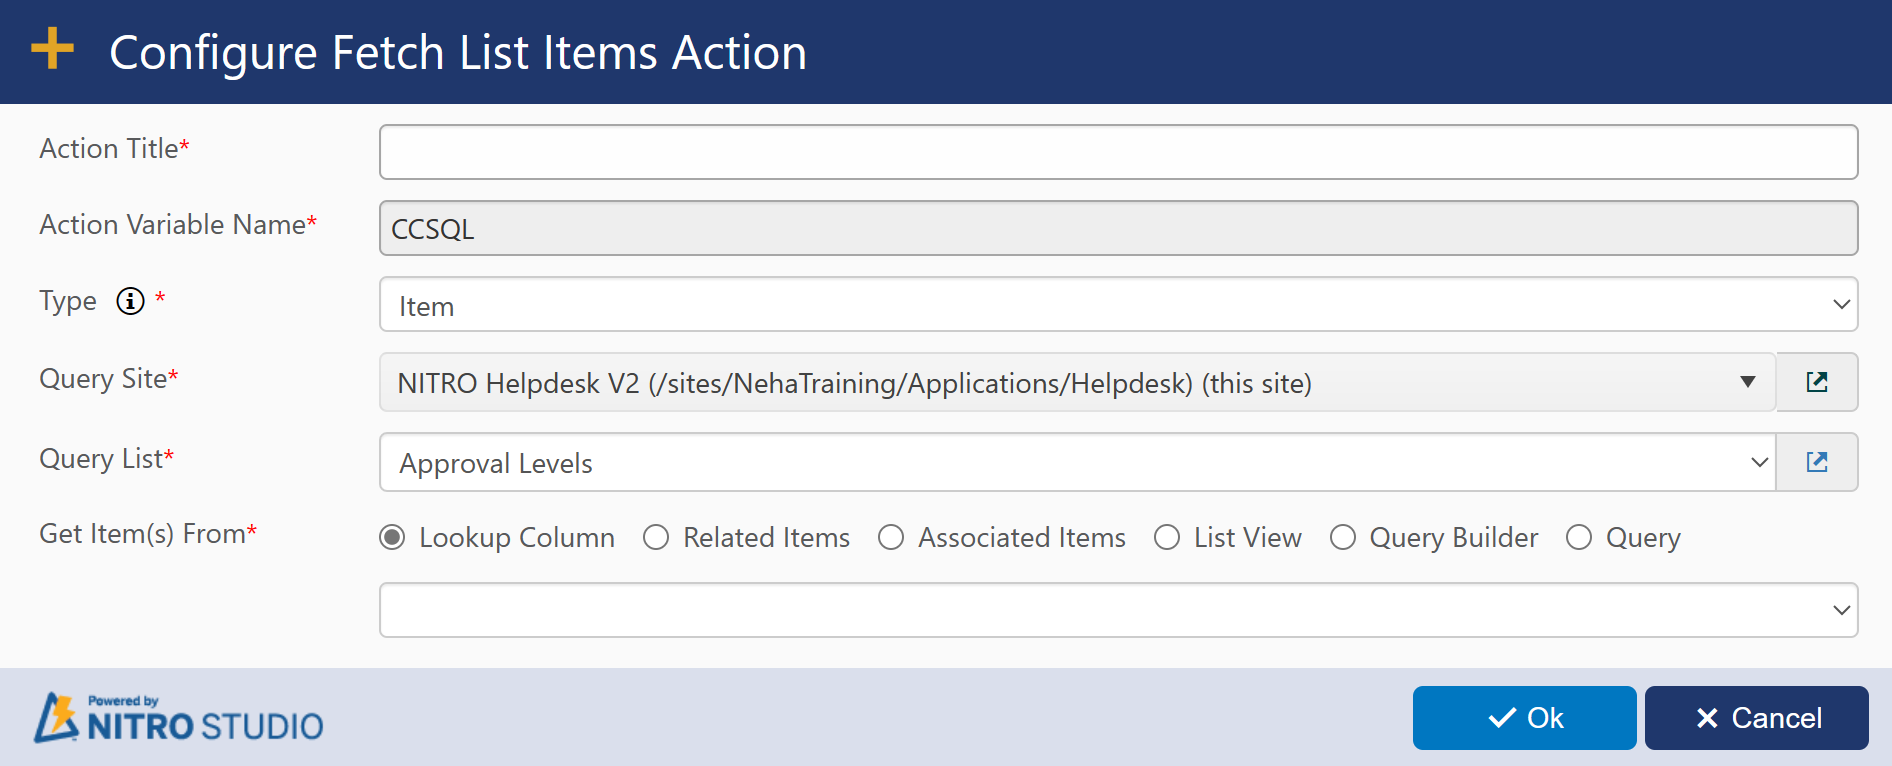
Action Title: Provide action title name.
Action Variable Name: this field is read only.
Type: It provide options to fetch single or multiple list items.
Query Site: select query site from dropdown.
Query List: select query list from dropdown. This dropdown will show all lists that are available in above selected query site.
Get Item(s) From: it provide options to fetch items based on the option selected in this field.For more details on these actions see Get Item(s) From section in Query List action
Associated Items: it will fetch items based on associated item column selected here.
Example
Use Case: The person filling out the form puts the name of an Employee into a box on the form. We want to get other data about that Employee. The Employee data is stored in a separate list, and we need to query that list to get that data. Once we have that data, we can use the results to fill in certain columns of the Form. The data can also be used for other purposes
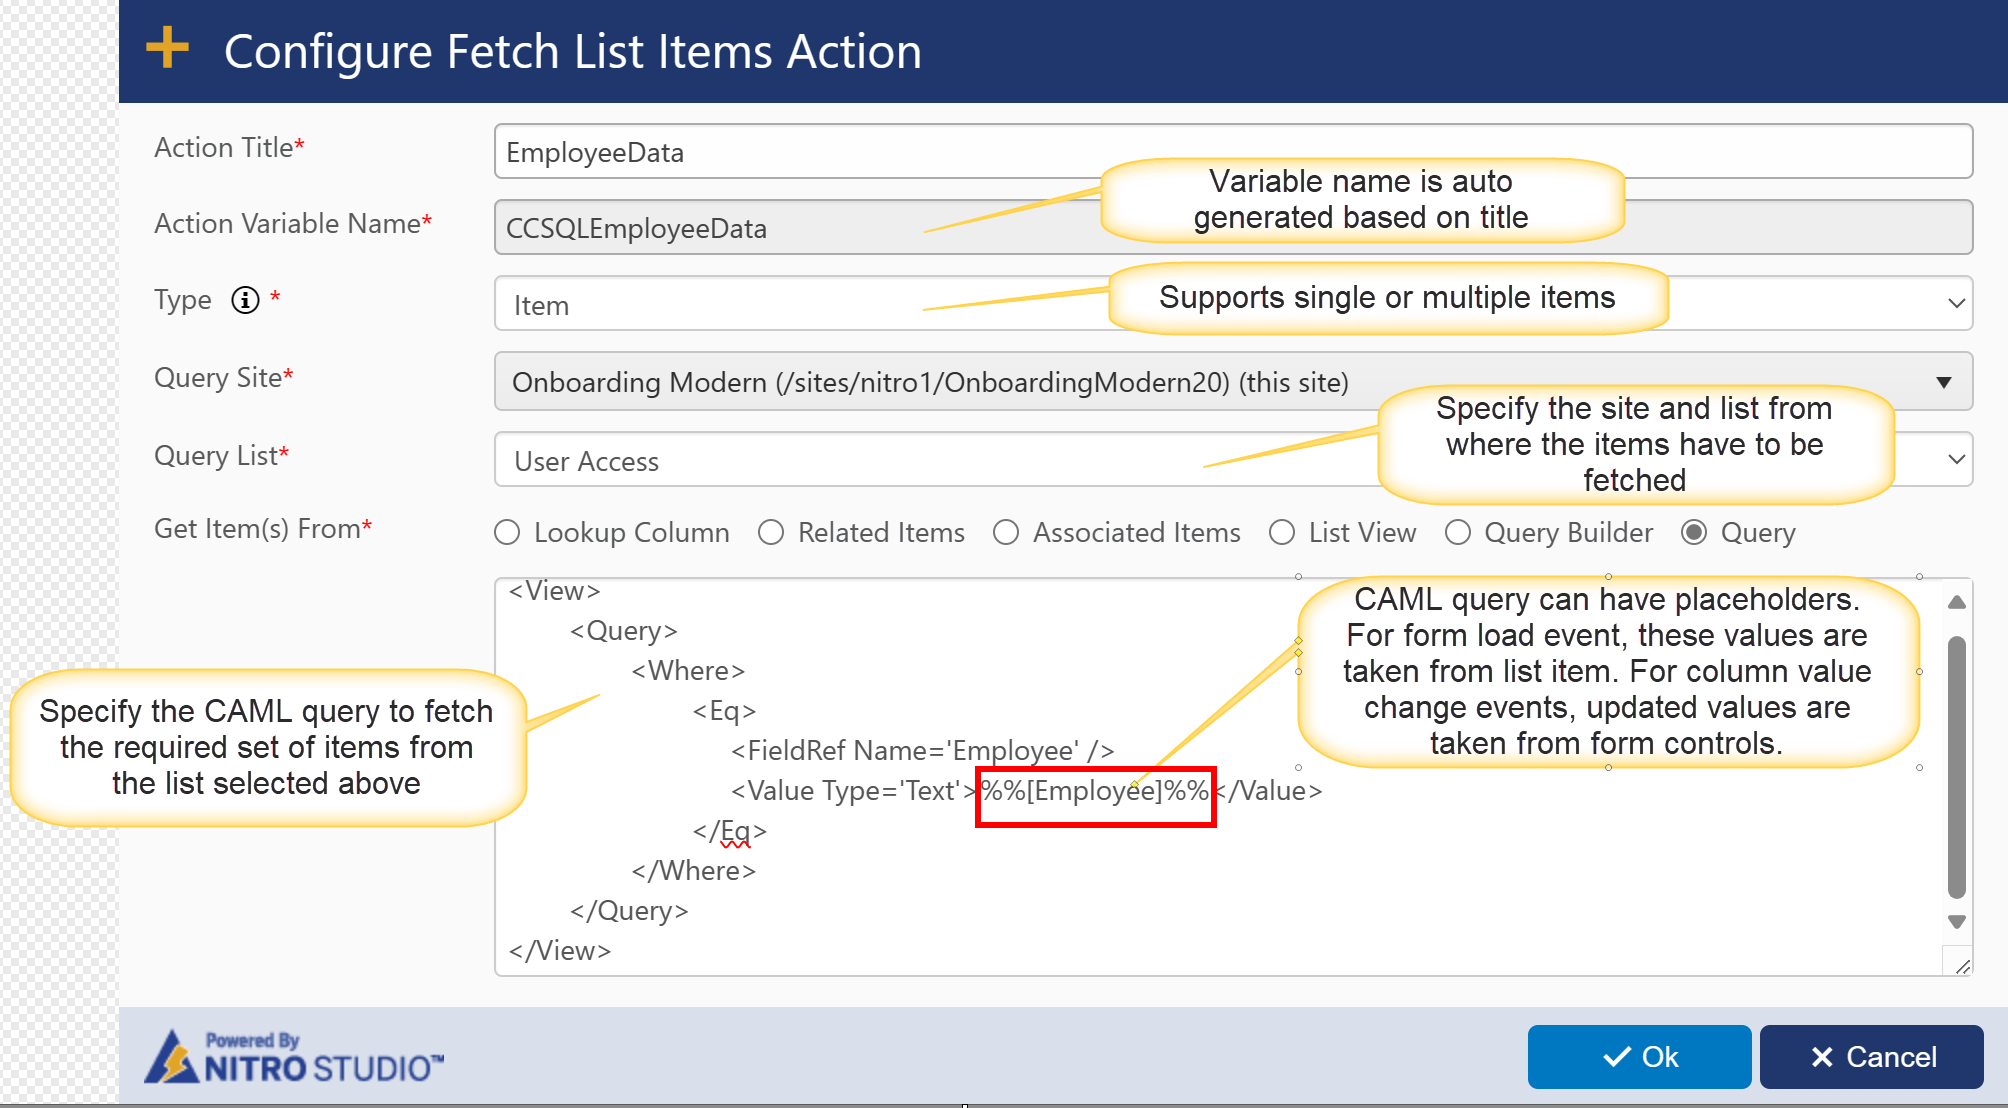
Action Title is “EmployeeData”
The Action Variable Name (in this case, “CCSQLEmployeeData”) is auto-generated. When this Form Event Action is run, the Employee data stored in this variable can be used to fill out columns on the form or can be used in custom JavaScript.
CAML Query:
<View>
<Query>
<Where>
<Eq>
<FieldRef Name='Employee' />
<Value Type='Text'>%%[Employee]%%</Value>
</Eq>
</Where>
</Query>
</View>
Please note the placeholder value in query ‘%%[Employee]%%’
Usage of data fetched:
In ‘Update Form Control Values’ action, for setting the Id of employee record, it can be given as following in the column mapping:
CCSQLEmployeeData##ID
If employee has a ‘Role’ attribute, then it can be accessed in custom JavaScript later as:
window["CCSQLEmployeeData_Fields"]["Role"]
You can also fetch multiple item, sample configuration shown below to fetch all items from the ‘Configurations’ list:
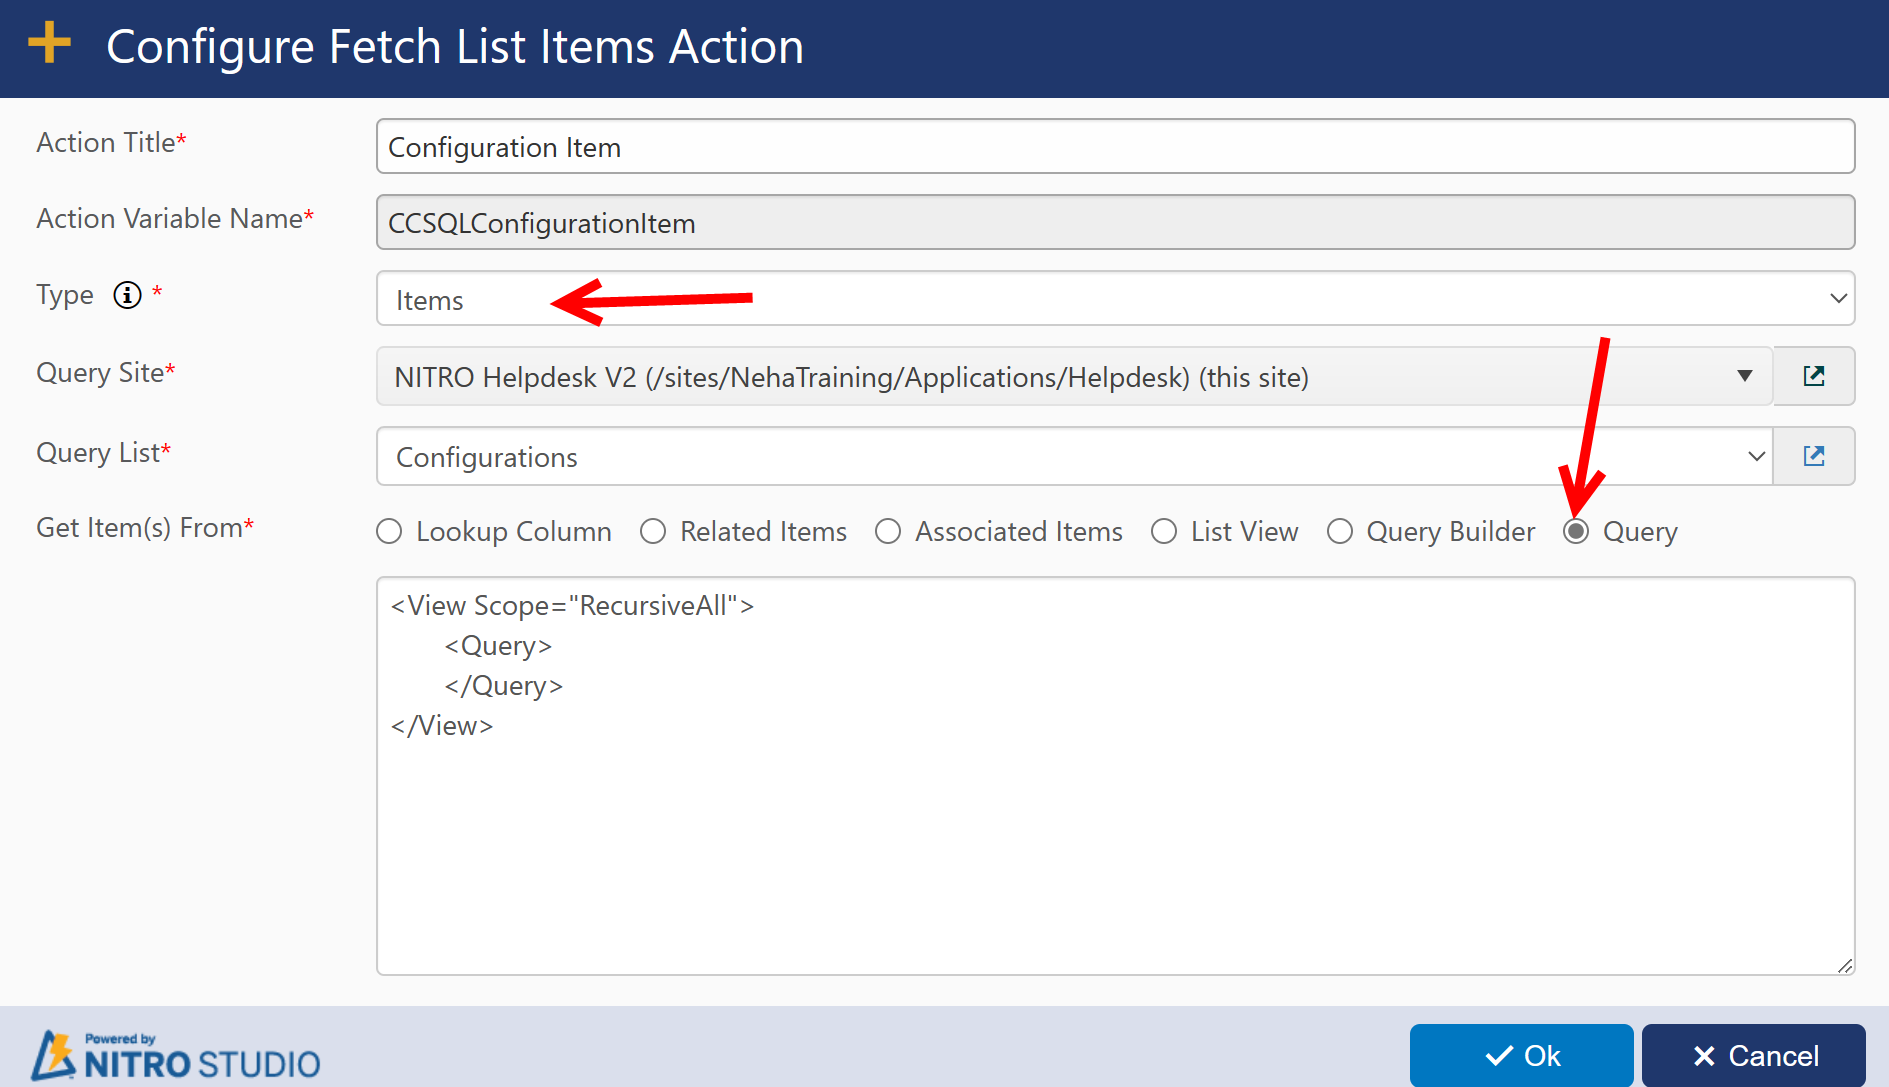
Items fetched then can be used in “Custom JavaScript” as shown below:
var objItems = window ["CCSQLEmployeeData"];
for (var itemId in objItems){
var item = objItems [itemId];
var itemValue = item.get_item("fieldName");
}
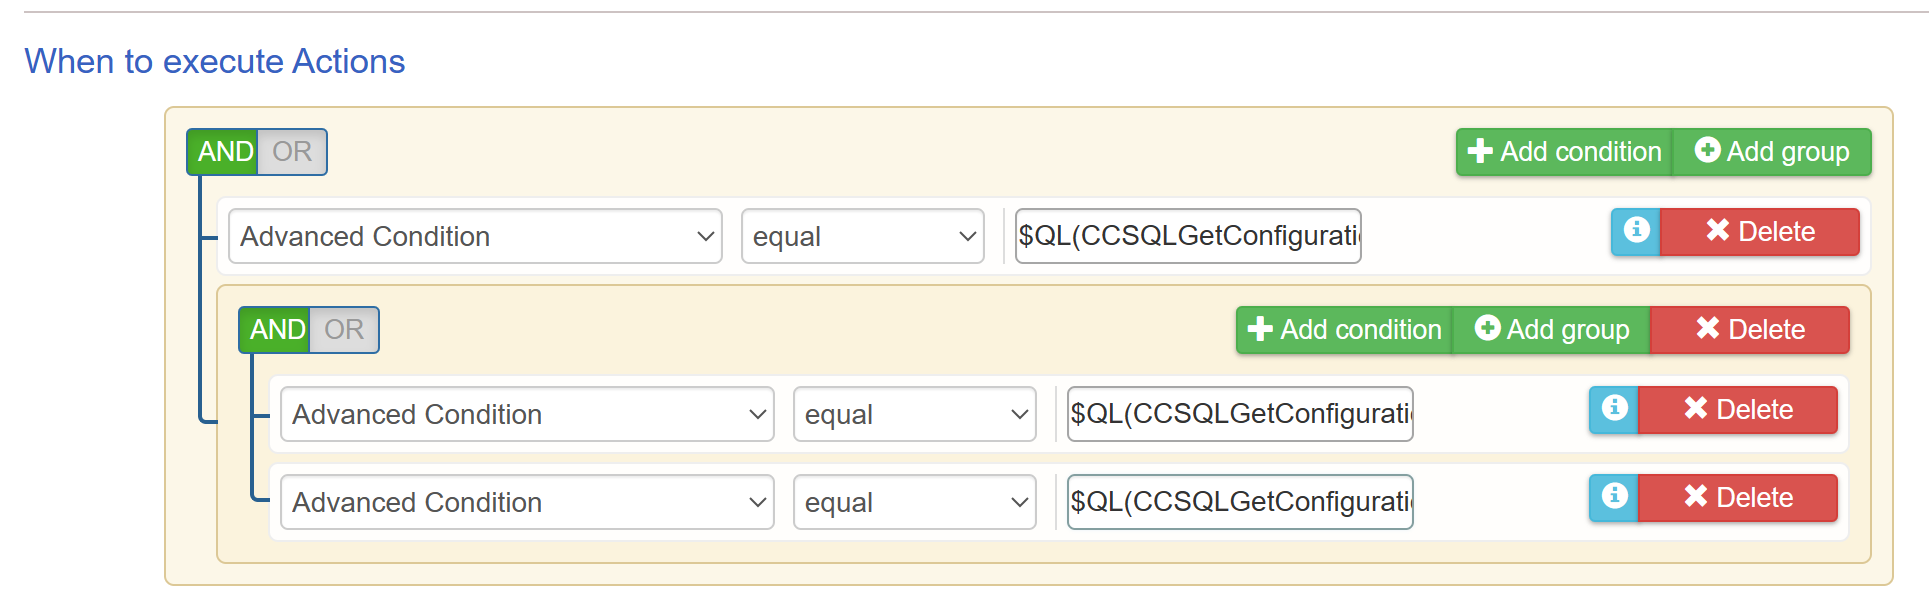
Usage in advanced conditions
Fetch Items data can be used in the conditions of subsequent actions by selecting “Advanced Column” option in condition control and specifying the value in format:
$QL(CCSQLGetItems##<<Field Internal Name>>, <<fixed value>>)
1.$QL is reserved and should be specified as is
2.CCSQLGetItems is the name of fetch item variable
3.## is reserved and should be used as is
4.<<Field Internal Name>> should be replaced with the internal name of the list column of the list specified in fetch item action
5.<<fixed value>> should be replaced with the value to be checked against
Note: Advanced conditions are supported for only single item fetch action and not item collection (multiple items).
Example: $QL(CCSQLGetConfiguration##AllowAdhocAccess,true)
Check if item fetched from configuration list has value as true for column AllowAdhocAccess
Execute Script
In this action we can use the data fetched earlier using fetch items action. Based on the data we can call REST API to fetch/update data from SharePoint/External System.
Refer Custom Script Examples In NITRO Forms for more details
Refer How To Calculate Date Value Dynamically Based On Other Column Value Changes In The NITRO Form?
Update Form Controls
With this action we can update the values in column value controls on the Form. There are various options to set the values:
1.Set a fixed value by directly specifying the value text
2.Copy one form control value to other. For this we can specify the placeholder with field internal name of the source control: [Field Internal name]
3.Set the value based on item data fetched in fetch Items action: CCSQLGetItems##Field Internal Name
a.Here, “CCSQLGetItems” is the variable name in the Fetch Items action
b.“Field Internal Name” is the SharePoint internal name of the list column (source value column)
c.Please note that this should be used for single ‘Item’ type of fetch action and not for the case where multiple items are returned by fetch items action
4.Use JavaScript to specify custom value. Here we can use data fetch earlier and use conditions as per business process to specify the required value.
Refer Using Form Event Actions On Auto-Populated Lookup Column for more details.
Refer Syntax For Expressions In NITRO Forms
Refer Clear A List Column Value In NITRO Forms And Workflows
Refer Format The Phone Number Specified In A Column Using Form Event Actions In NITRO Forms
Refer Use ‘Form Event Actions’ Feature Of NITRO Forms To Add Custom Functionality
Refer Use ‘Form Event Actions’ Feature Of NITRO Forms To Add Custom Functionality – II
Set Variable Value:
For this refer Set Variable In NITRO Forms
Format Control Styles:
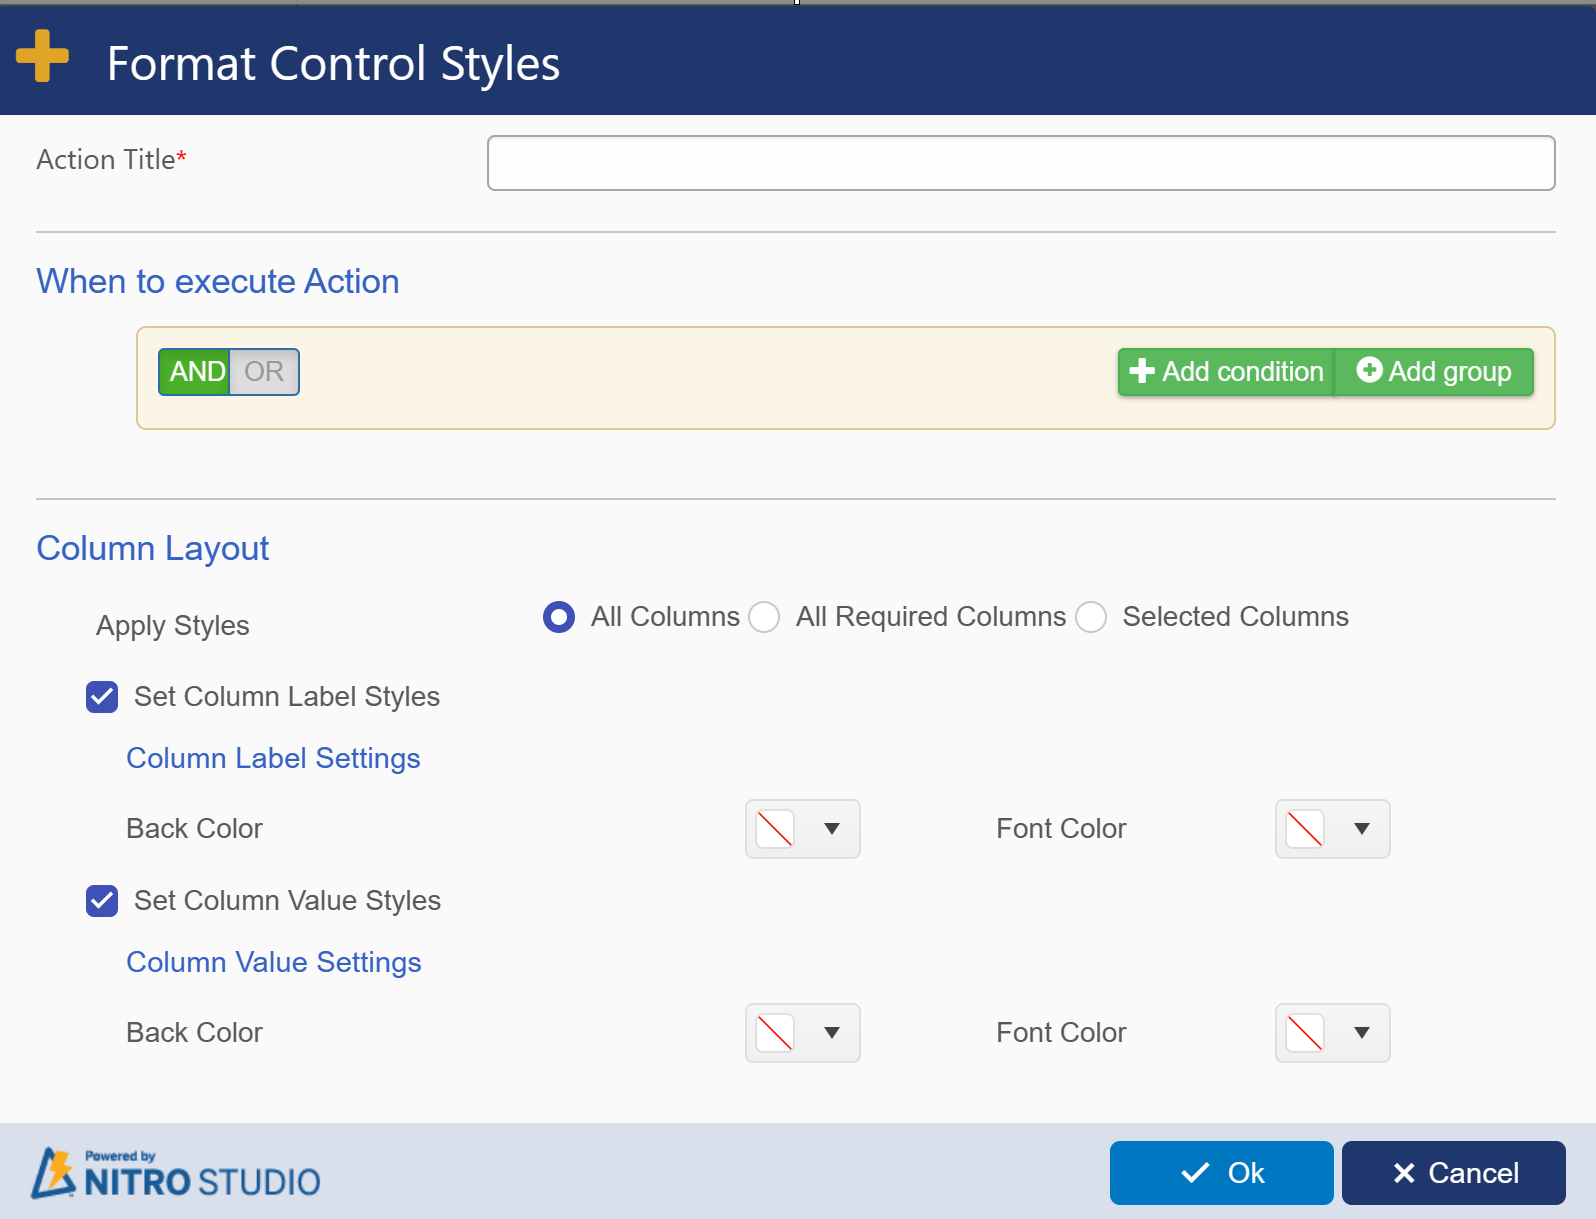
Action Title: Provide action title name
When to execute Action: specify the condition based on which you want to execute the action.
Column Layout:
Apply Styles: select option where you want to apply column label style and Column value style.
- To 'All Columns' or
- To 'All Required Columns' or
- To 'Selected Columns'.
Set Column Styles: here, select column label background color and font color
Set Column Value Styles: here, select column value background color and font color.